
A while back I converted my Jet 12 X 36 metal lathe to DC variable speed drive. Since then I’ve wanted to add some type of tachometer so I could see the actual speed the main spindle was rotating. I tried using a bicycle speedometer with a magnetic pickup with reasonable results. But calibrating it for my particular lathe was difficult and it didn’t return the accuracy I wanted.
One various Home Machine Shop forums on the internet, they talk about the “MachTach” Machine Tacometer with good praise. This is a kit that is available online from a fellow names Henry Arnold. http://www.machtach.com
For $56.00 (as of this writing 1-21-15) you get a bag full of parts, a sender of your choice and an address to download an owners manual and an assembly guide.
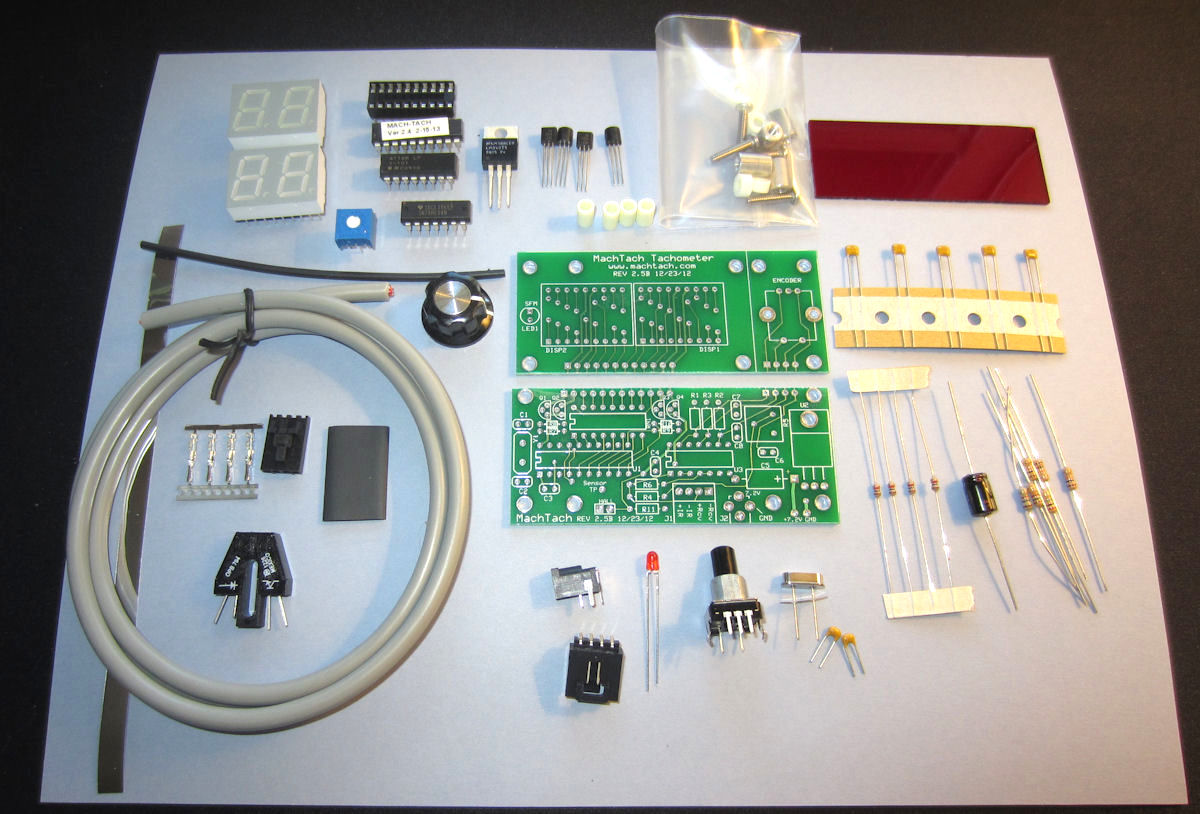
You have a choice of a “Half Sized” kit or a “Full Sized” kit. The only difference is the Half Sized kit uses two circuit boards, one above the other, while the full size is laid out on one circuit board. This is all explained on their web page along with lots of pictures and a couple great videos.
I opted for the half size kit as I didn’t want to give up too much room in my electronics cabinet.
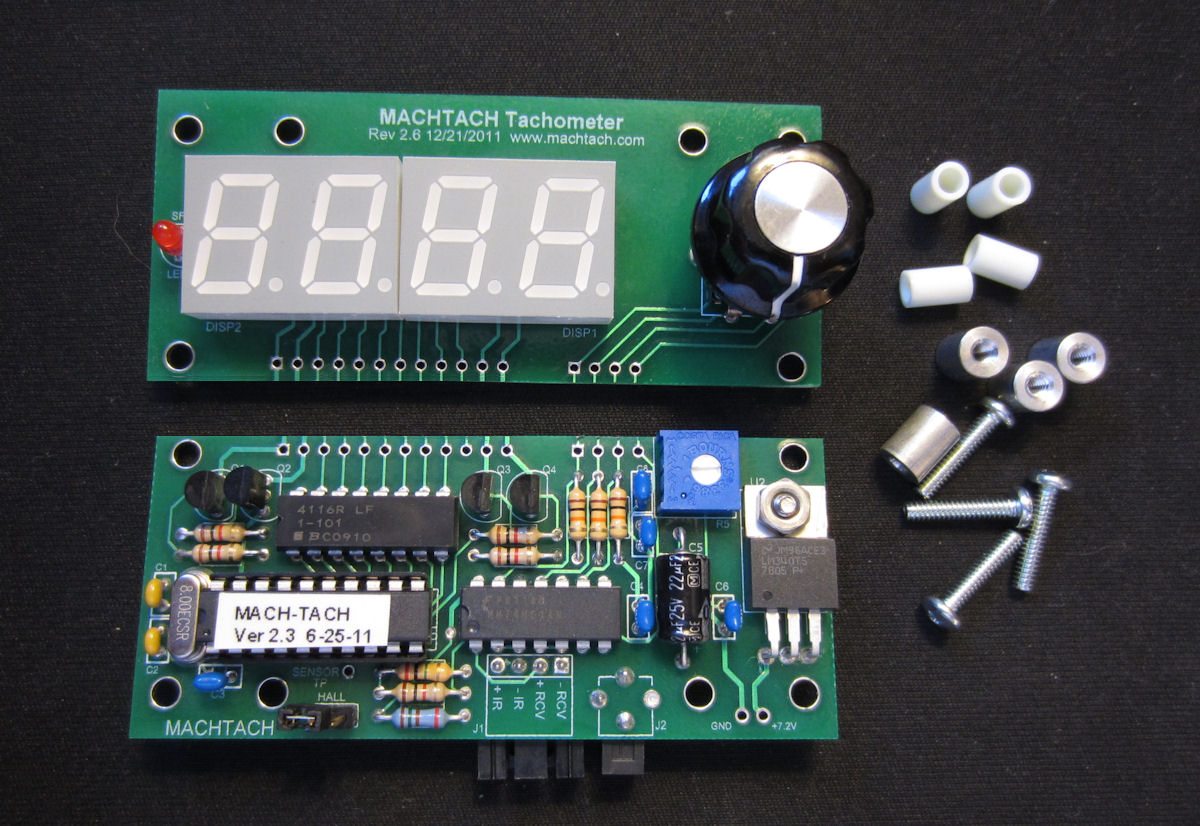
This is the halfsized kit with all components installed, just needing to be “stacked” and 16 connections made between the two boards:
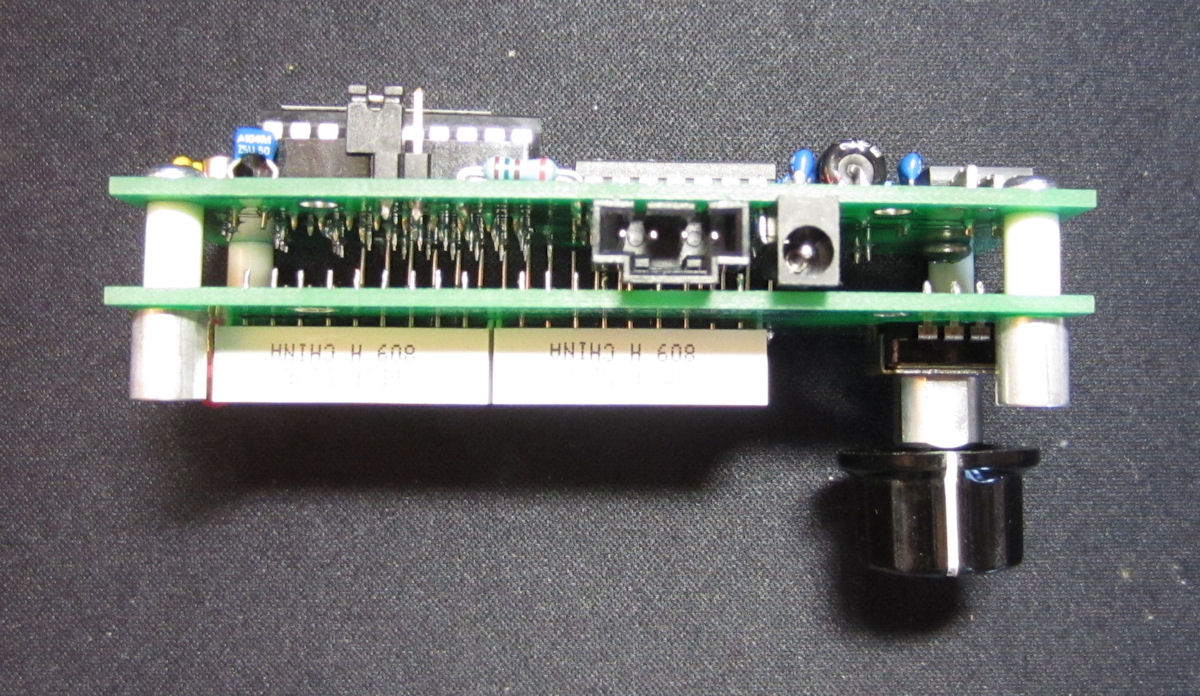
And here it is with the two boards stacked and connected together:
OK, let’s talk about assembly…..
The down load for the Assembly and Owners manual is pretty straight forward. As a users Guide it is actually quite good. As an assembly manual it is rather poor for a novice kit builder. There is no step by step assembly instructions. There are pictures and a few hints, but basically you are on your own to use the parts list, the manual’s photographs and the printing on the circuit board to work with. (UPDATE!!! Â See the comment below from the owner of Mach Tach…..Wow! Someone actually reads this stuff I write!….THANKS Henry!)
I do not recommend this kit for a first time builder. If you have no experience soldering on a very crowded circuit board, this one will challenge you.
The solder lands are extremely small and a low wattage soldering iron (20-30 watts) and very fine  electronic solder is needed. It took me about 45 minutes to assemble the entire unit and it worked perfect on the first try. But I’ve built hundreds of Heath-Kits, Dynaco Stereo Kits and other electronic devices.
The manual jumps around a bit. You need to flip pages back and forth to look at pictures, parts lists and assembly  hints but all in all it is workable and hey, whadayawant for $56!
Here is where you order your kit:
Once my kit was assembled I tested it with a 9V battery and it worked perfectly. Now it was time to mount the IR sender to my lathe and fabricate an enclosure for the device.
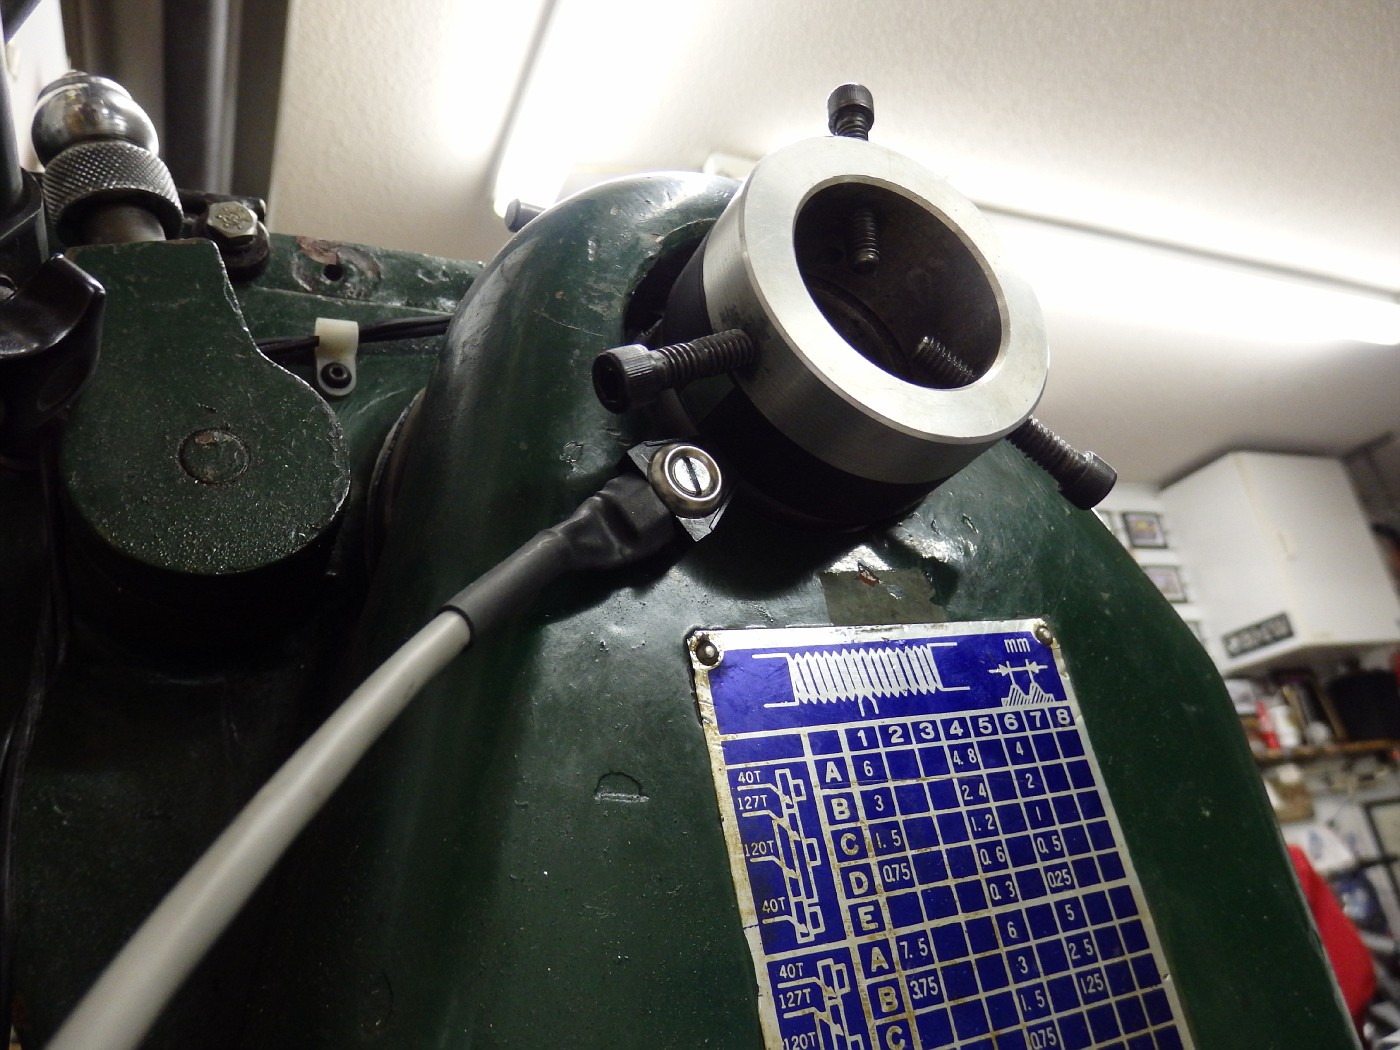
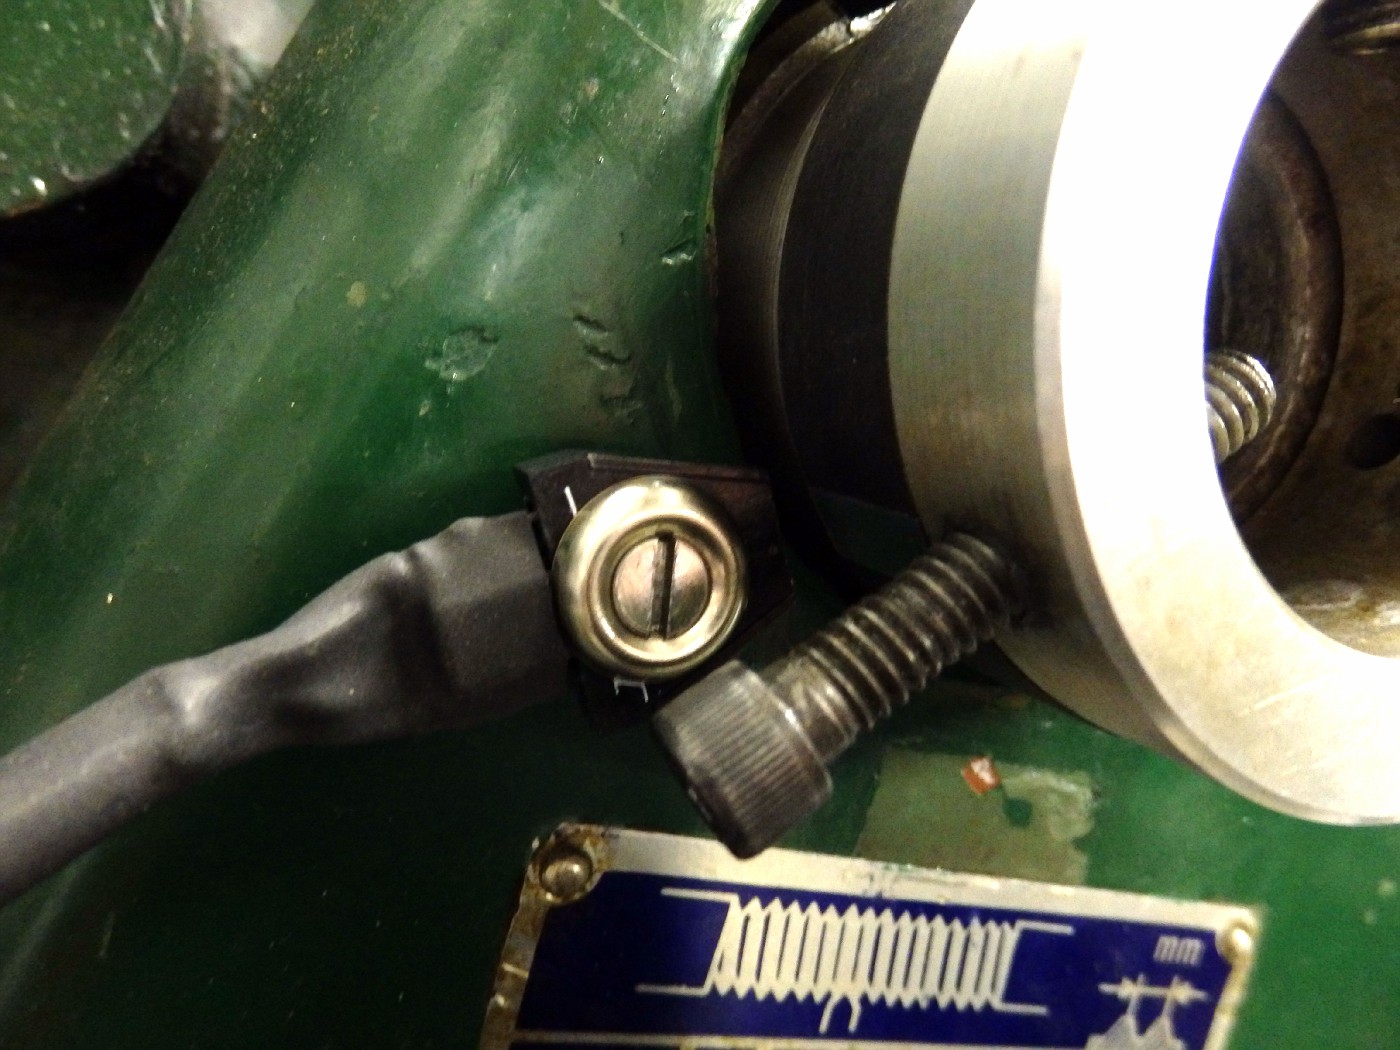
I decided to read the RPMs right off the outboard end of my spindle. This kept the IR sender unit out of the grease and oil of the gear box.
A simple hole was drilled and tapped and the sensor mounted:
I wrapped the outboard “spider” on my lathe with black electrical tape and applied three pieces of reflective tape that are included with the kit:
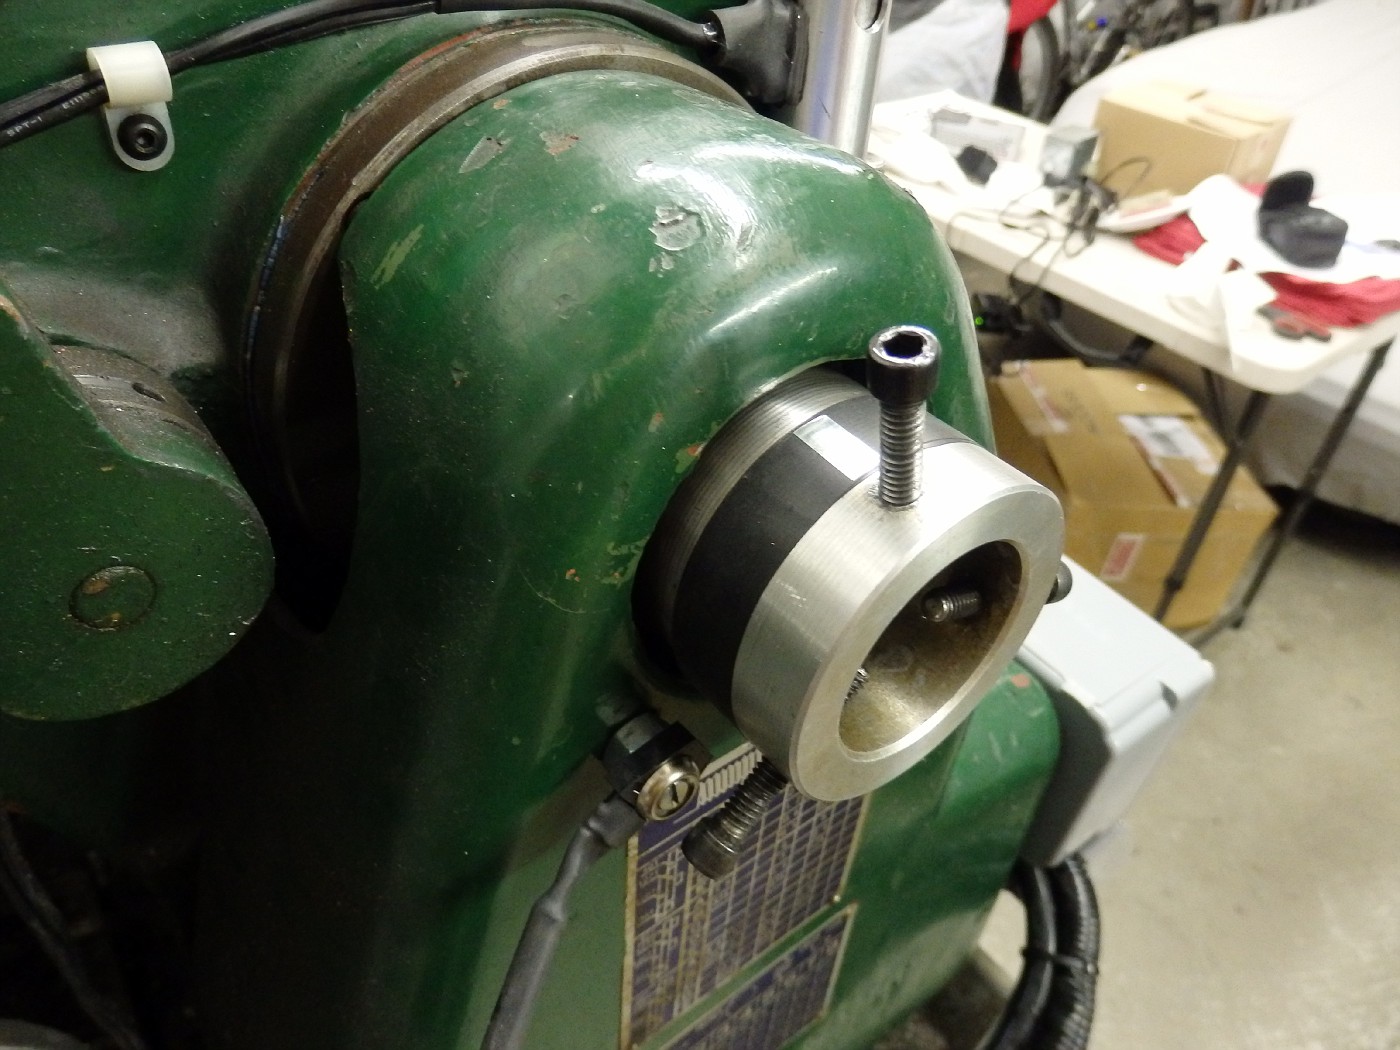
With three pieces of reflective tape the MachTach will read down to 10 RPM. The more pieces of reflective tape you use, the lower it will read the RPMs. It does not increase the accuracy, only the threashold of lowest RPMs. All clearly explained in the owners manual.
Next I needed to mount the device itself.
At Lowes Home Store I found a very nice 4″ Â 4″ plastic outside electrical work box. I bought two. One for the tach and one for the main controls of my lathe.
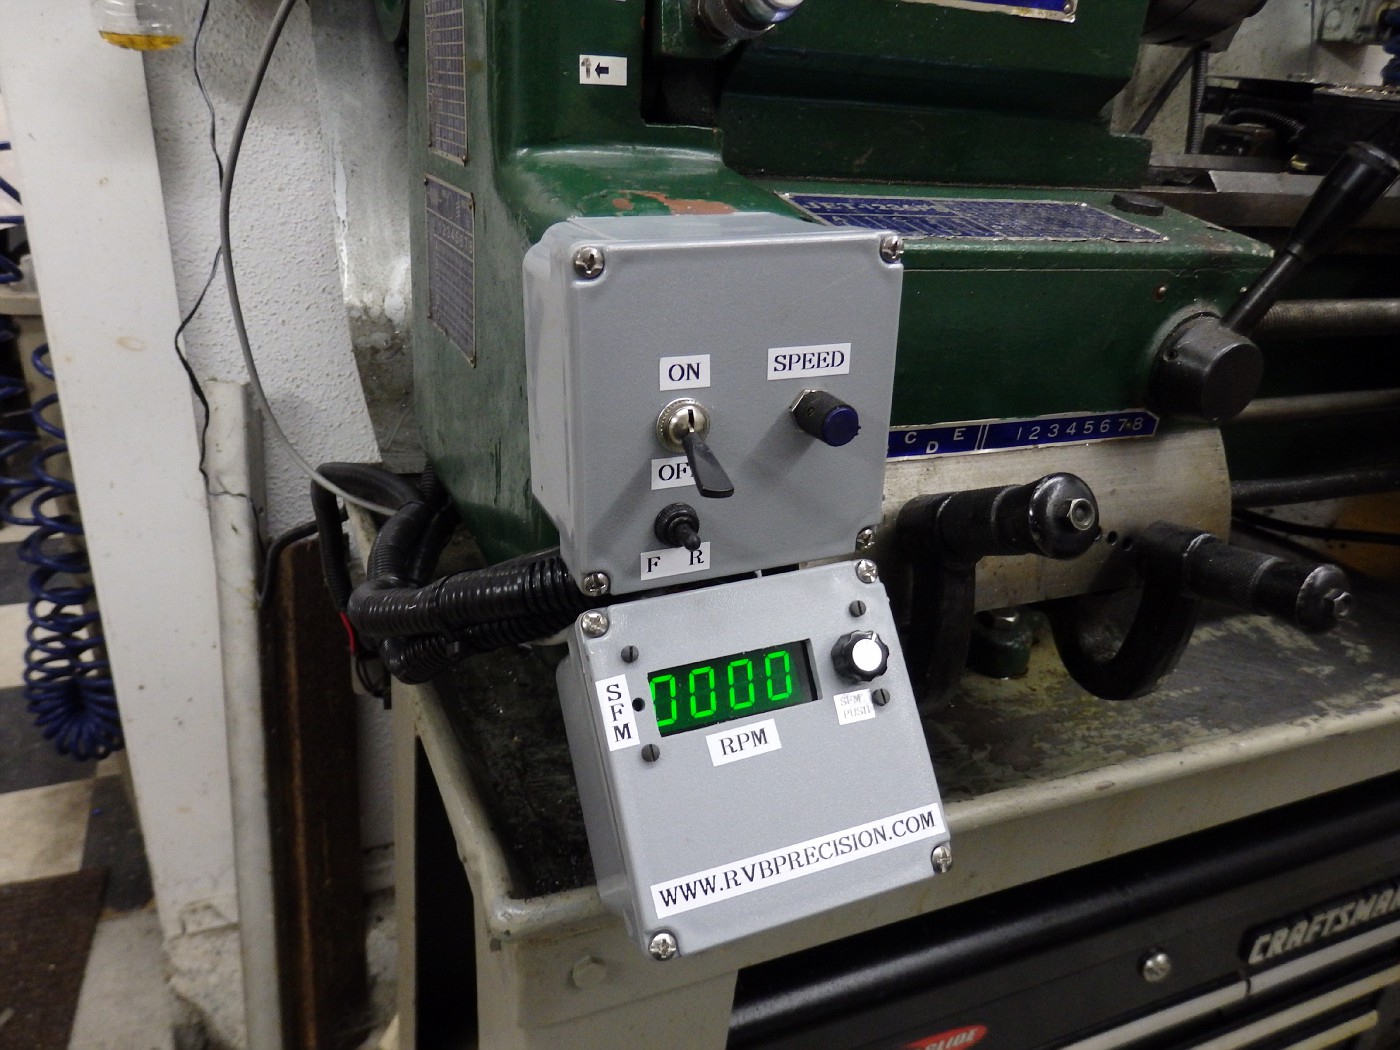
I then bent a bracket to tilt the Tach upwards so it could be read easily:

I had an old “Wall Wart” 9V power supply in my parts drawer. But when I hooked it up to the Tach, the read-out would flicker and tend to “scroll”. I checked the voltage and it was outputting 10.5V. Not sure if this was the issue or not, but I had another power supply rated at 6V that actually output 7.5V and this worked perfectly:
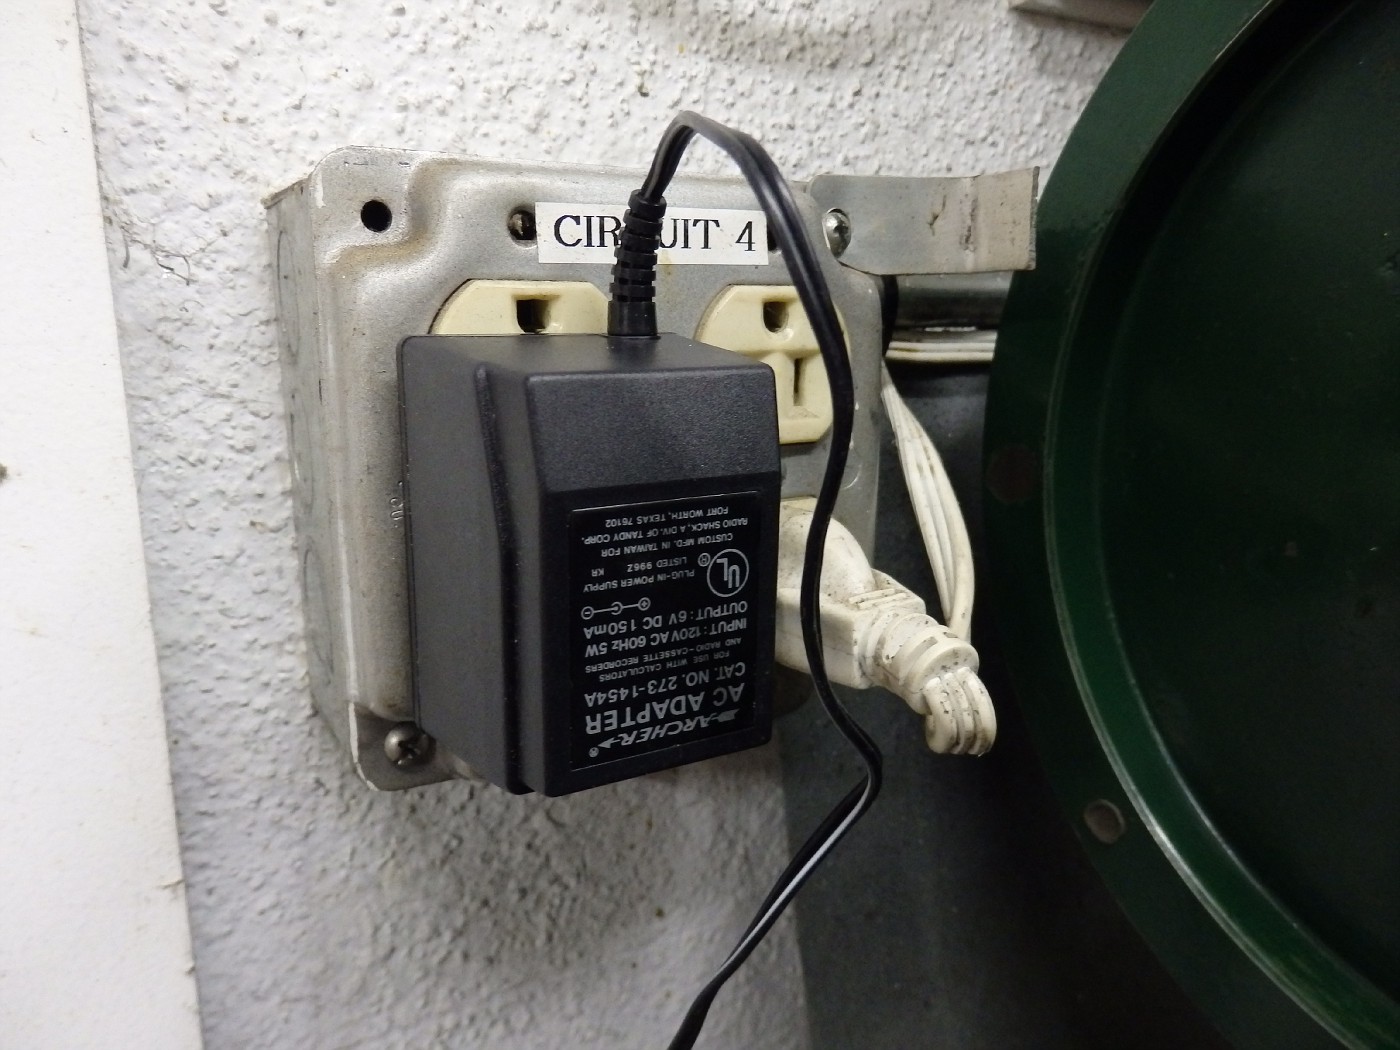
I imagine you could run it on a 9V battery, but I have no idea how long the battery would last. You can buy a power supply from MachTach if that is more convenient.
(BTW…The whole story on the DC motor conversion and the Powered Carrige Feed can be found elsewhere on this web site www.rvbprecision.com)
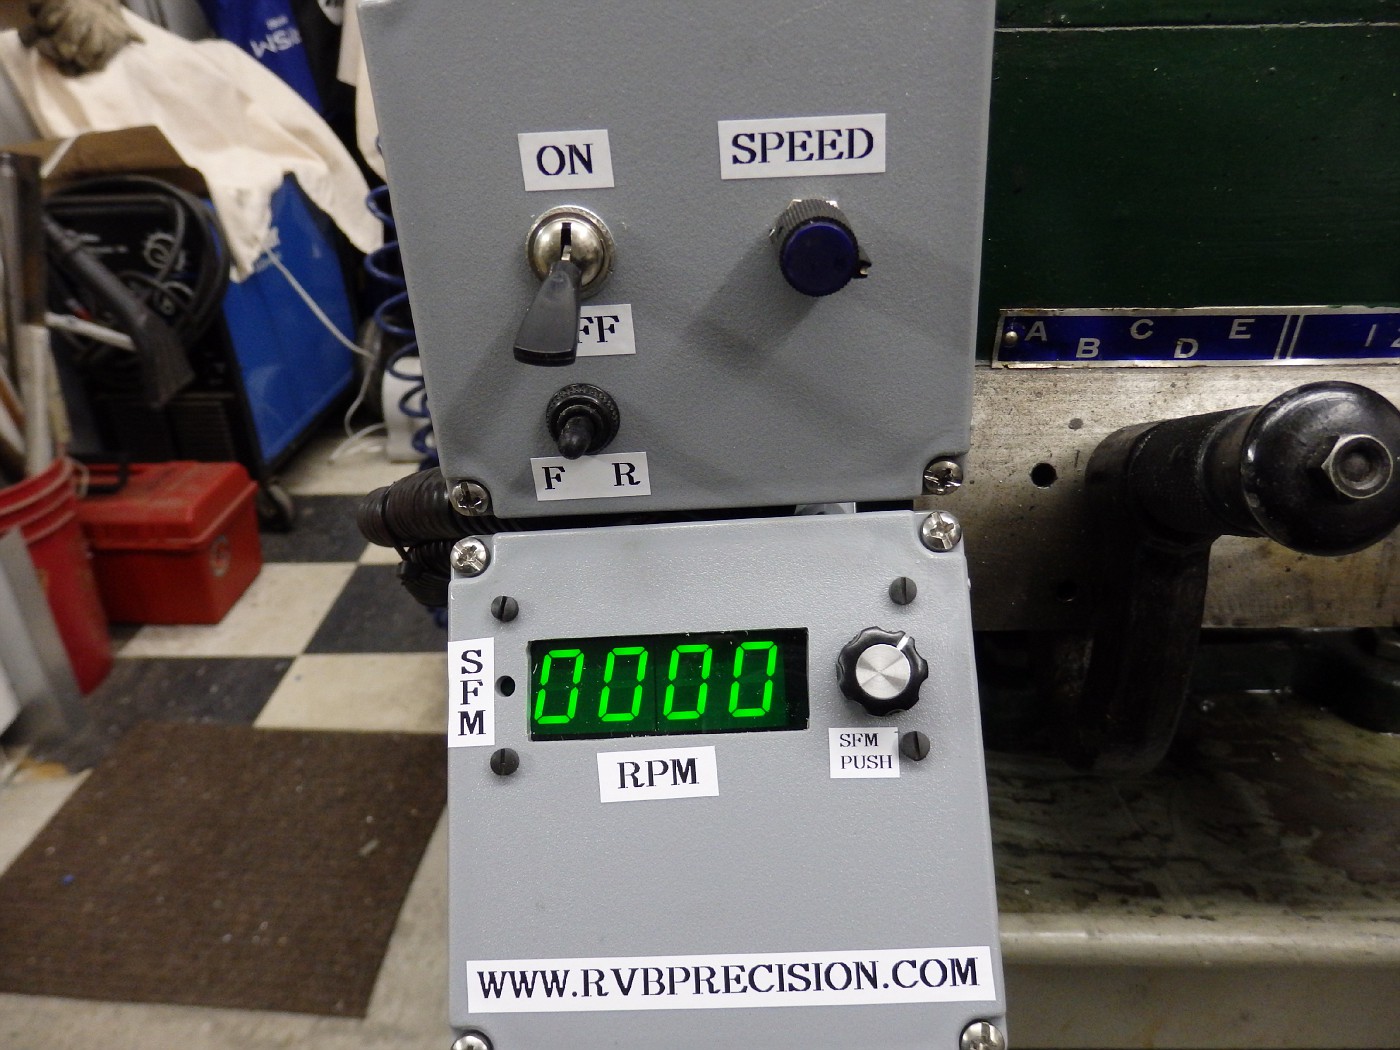
This device will not only give you actual RPMs of your lathe it will also give you SFM (Surface Feet per Minute). A simple push of the knob and you can input the diameter of your work from 0.01″ to 99.99″. This is extremely helpful if you know the material you are turning. The manual lists common materials and the speed at which you should be turning them. When you push the knob, a green LED illuminates to let you know you are in SFM mode.
So there you have it! A real nice digital tachometer for your lathe for well under $100!
Here is a video of the Tachometer in play:
http://public.fotki.com/Rbertalotto/machine_tool/metal-lathe-tachome/p1240024.html
or if this link doesn’t work, it is available on YouTube:
More pictures and other nonsense here:
http://public.fotki.com/Rbertalotto/machine_tool/
Hope you enjoyed this article…….!
UPDATE From Henry Arnold, MachTach Owner…
> Hello Roy,
> I did enjoy your article. I am the owner of MachTach. I took to heart
> your comments about the manual skipping around and not addressing
> beginners. I have revised the MachTach manual and posted here
> http://www.machtach.com/Docs.html. Let me know if I addressed your
> concerns. If I didn’t, your specific suggestions are welcome. Thanks
> for buying a MachTach and taking the time to review it on your
> website.
> Henry Arnold
AND MORE FROM HENRY:
Roy,
I would be glad to answer any emails regarding MachTach. I also hang out at the Yahoo Group for MachTach and help out when needed.
I didn’t want to ask you to change your comments but I do appreciate you offering to update your review.I just received new panel overlays for the MachTach Enclosure. Unlike the laminated ones I was making these can be drilled and cut to different sizes.
Thanks so much,
Henry Arnold
henryarnold@earthlink.net
6 comments on “MachTach Metal Lathe Tachometer Build”