
Ball joints. Those little things on the bottom of the front control arms that hold just about everything together up there! When they go, or are worn out the front end of the car gets very sloppy and in some states, you won’t pass inspection. The Porsche 911 uses one ball joint on each control arm. The top of the control arm is located with the strut tower. This makes the job relatively easy as you are only replacing two ball joints total.
You can test for ball joint play by jacking the car up, using a pipe or a crow-bar under the front tire, lever it up and down. There should be no movement. No “clacking” noise. Nice and solid. Of course, movement could also spell bad wheel bearings, but many times you’ll hear bad wheel bearings and bad ball joints won’t make a noise.
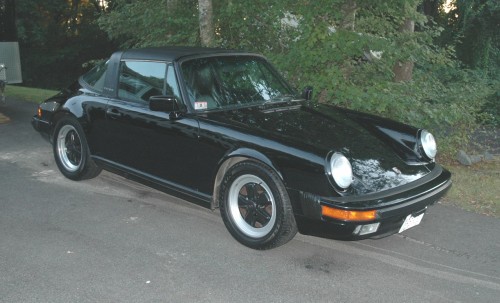
Removing and replacing the ball joints on a Porsche is a #8 difficulty on a scale of 1-10. You do need a couple of unique tools and you need to know your way around a torque wrench. You are dealing with major steering components. If you have no idea what you are doing you could kill yourself or worse, someone else. You will need a service manual of some type as I will not spell out torque setting as they may be different on a different year 911. This article deals with the procedure for a 1987 911 Carrera
As in everything in life, there is more than one way to skin a cat. This is my way. It took me two hours to do one side and 45 minutes to do the other. I had never done ball joints on a Porsche, but I had done them on other vehicles. The 911 is actually the easiest I’ve ever done, once you do one.
Jack the car up and put in on some sturdy supports. You will be yanking and pushing on the car and you don’t want it to fall down a go boom!
Note, I did this whole procedure without removing the brake caliper, rotor or hub. The various manuals tell you to remove all these parts. I found it totally unnecessary. Your mileage may vary……..
Remove the wheel and tire;

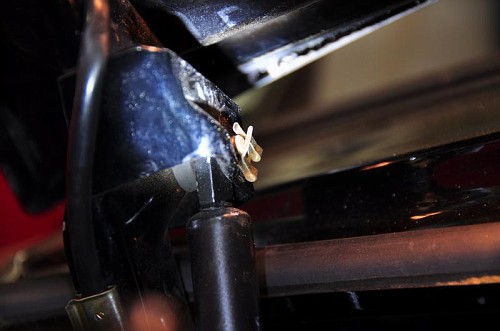
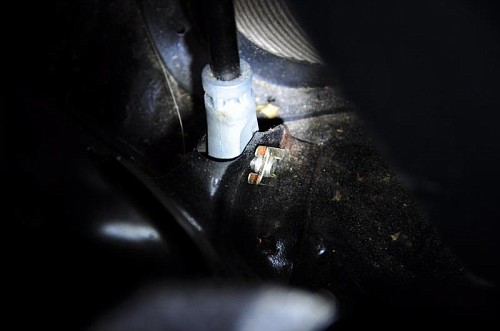
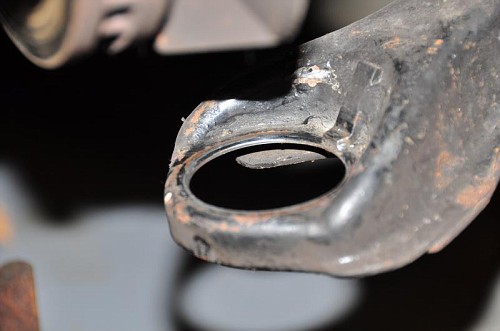
loosen the nut that holds the “ball joint pin” in place. But do not remove the nut totally, just back it off a bit. This picture is the bottom of the strut tower, behind the wheel hub.
This is the infamous “ball joint pin” you’ve heard so much about!
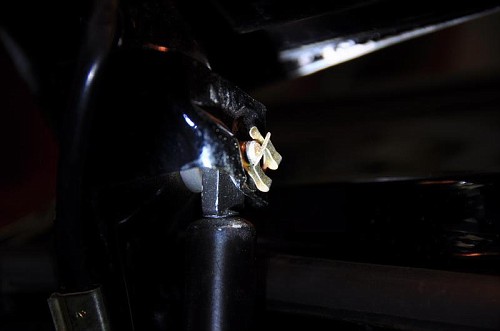
Use a hammer and pound the nut to push the ball joint pin out. Once the
pin starts to move, remove the nut and use a drift punch to remove the
pin completely. Some folks really struggle with this pin. Mine popped
right out with ease, even on a car that is 23 years old! the shop
manual says to replace these pins and not reuse them. Good advice.
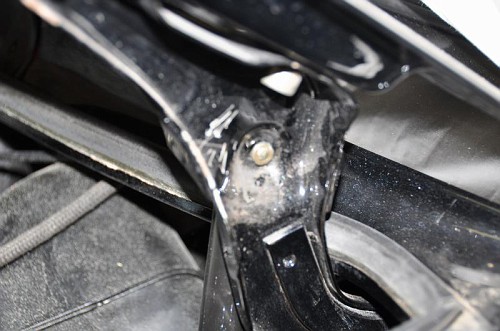
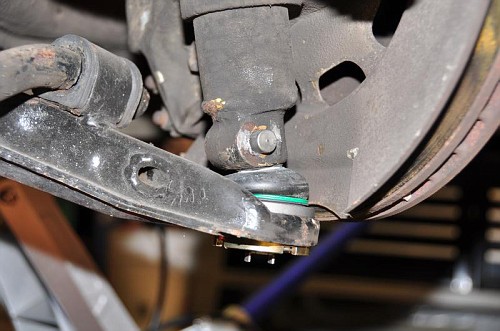
Now before we remove the ball joint from the strut tower, we need to remove the large castle nut on the bottom of the ball joint. This is much easier to do if you leave the ball joint attached to the strut for the time being.
First remove the cotter pin, then remove the weird star washer. This washer stops the castle nut from spinning and loosening up later. It simply pops right off once the cotter pin is removed.
This castle nut is a real bear to remove. I really believe the Germans do stuff like this just to piss us off! Why not use a simple nut? I tried using a pipe wrench and a hammer and drift to turn this bas—d. I tried heating it up. No way! I finally resorted to cutting it with a cutoff wheel in the Dremel tool. Took all of two minutes and it was removed easily.
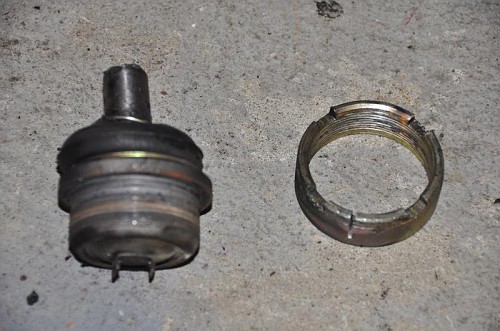
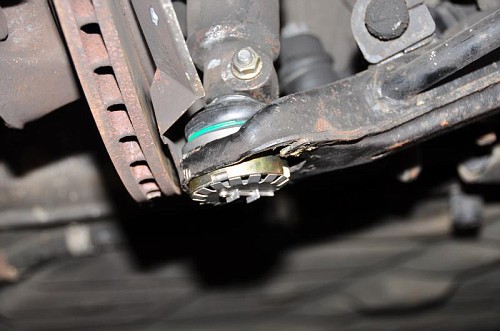
Since you are replacing the ball joint, you can cut into it with the Dremel. There is a little space where the cut-off wheel will fit. You don’t need to cut it right to the top, this was enough.
This picture shows how little I actually cut into the castle nut. Obviously this nut will need to be replaced. DO NOT CUT INTO THE CONTROL ARM for obvious reasons!
But do not remove the castle nut just yet. Loosen it up so it can be removed easily after you remove the ball joint pin.You want it to hold things together a bit while you go to the next step.
Now, more fun! Separating the ball joint from the lower part of the strut. Some folks beat on the lower control arm with a BFH. I’m not one for pounding on suspension components. There is a nice tool available from Porsche (Pelican Parts) that accomplishes this task nicely. But I didn’t want to spend the $$ so I improvised. Two ‘pickle forks’ were employed. Pickle forks are used to separate ball joints on most other types of automobiles. You can rent them at auto parts stores or you can buy them. I paid $8.99 each for these at Autozone.
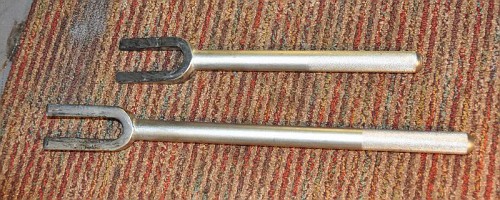
You will need two as the gap between the ball joint and the strut is too great for a single fork.
I simple hammered one in and then the other on top. I used a bit of propane torch heat on the area around the pin to help it along. Heat always allows less brute force. Heat is your friend when disassembling anything. But be aware, you will set the rubber parts of the old ball joint aflame so have a spray bottle of water available. Note: Be sure you removed the ball joint pin (see above) before you start beating on anything. Some folks have had brain farts and pounded the living daylights out of their control arm before remembering they forgot to remove the pin! Duh!

Once the pin is out of the strut, you ca go ahead and remove the castle nut and the ball joint. You will need to compress the strut a bit to make room to remove the ball joint (see neat method I used below)
You will now be able to clean up the ball joint socket and notice the little welded pin that will index the ball joint and stop it from spinning when you go to tighten the new castle nut.
You can now insert the new ball joint into the bottom of the strut. Be sure to line up the detent on the pin properly with the coresponding area in the strut pin hole. Sounds complicated, but when you have the parts in hand it will make sense. Smear “never seeze” all over everything. The next owner will love you for it! Push the ball joint up into the hole in the strut as far as it will go. Look through the hole for the pin, it should be unobstructed. If not, there might be crud in the strut hole and need to be cleaned out more. Once it looks like it is in the proper place, insert the funky ball joint pin. It should go in easily with about 3/8″ extending out the far side. Do not try to use the nut to pull it all the way in. It will strip the threads. Don’t ask me how I know this.
Once the pin is in about this far, use a hammer and a drift to bang it in all the way. It should be flush. If it won’t go flush, I’d bet there is crud in the pin hole and the ball joint isn’t going up far enough. You’ll need to pop the ball joint back out and clean out the hole real good.
Once the pin is all the way home, you can install the nut and the washer and torque to spec.
Now, more fun! That castle nut again. Install the ball joint into the control arm, turn it with a big set of pliers to have the little welded tab intercept the slot on the ball joint. This is important as you will not be able to tighten up the ball joint castle nut unless this happens. Be careful to not damage the integral rubber boot on the ball joint. If you damage this boot, order a new ball joint. You can not repair it and it will fail quickly if water and grit gets in there.
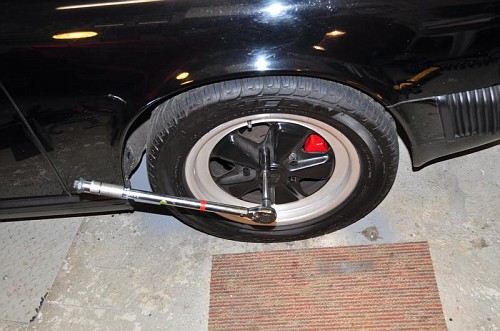
Install the new castle nut. Here’s where it gets fun. This castle nut needs huge amounts of torque to meet spec. There is no way that those four little nubs on the special socket can apply the torque needed without some help.
This is what I did.
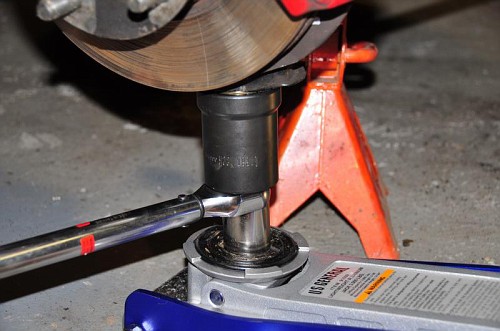
I used a large socket under my torque wrench, pushed up against the special castle nut socket to keep steady pressure. It worked, but it’s a foolish place for that ridiculous type of nut. If someone simply machined a standard hex nut for this purpose, they would make a million!
Anyways, install the new “star” washer and a new cotter pin, and you’re done.
Well, after you reinstall the wheel and tire and torque the lug nuts to spec.
A few notes:
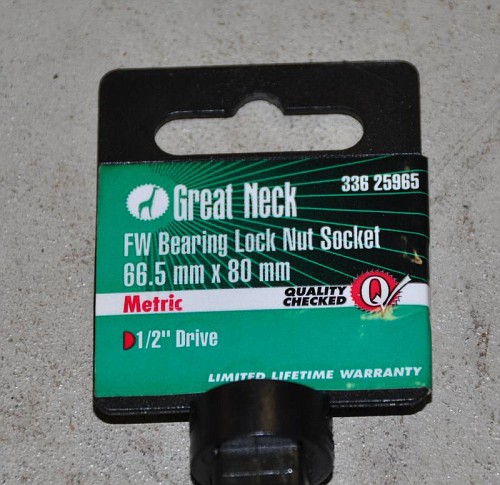
You could purchase the special castle nut socket from Pelican Parts (highly recommended) or you can buy a reasonably, almost fits right, substitute at Auto Zone ($17)
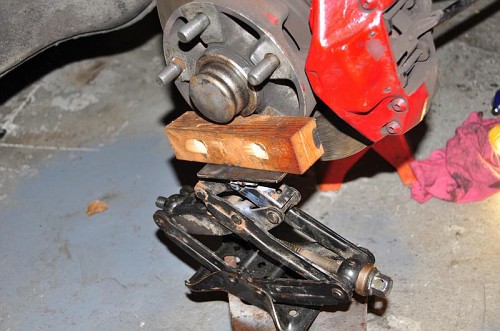
You will need to jack the wheel assembly up and down a few times to get the ball joint into it’s hole in the control arm. I took a piece of wood and drilled two holes into it to attach to the hub. A simple jack was used to move the hub and therefore the strut up and down as needed. Made the whole job extremely easy.
PARTS LIST:
I buy all my parts from Pelicanparts.com and you should too! Great service, extremely fast shipping and a bunch of folks that really know Porsche and can be called anytime to ask questions.
(2) Ball Joints
(2) Threaded Ball Joint Lock Pins
(2) Lock Pin Nuts
(2) Lock Pin Washers
(2) Ball Joint Castle Nuts
(2) Ball Joint Star washers
(2) Cotter Pins
I did not include part numbers as these might change and might be different for your year Porsche. Remember a simple phone call to the head Pelican and your parts will be on the way!
ADVERTISEMENT:
This website is part of my income stream. If this was helpful you could throw a few nickles my way via paypal  rvb100@comcast.net
Not necessary, but appreciated none the less!
If you have any questions, I can always be reached at rvb100@comcast.net
Thanks
Roy B
7 comments on “Porsche 911 Ball Joint Replacement”