
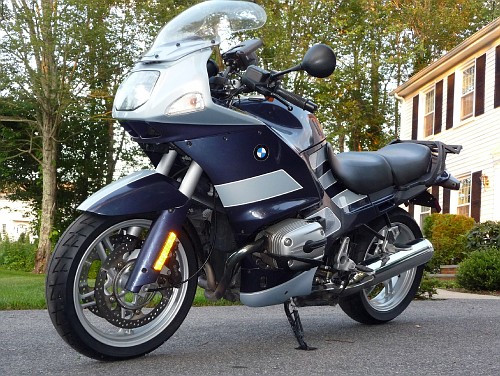
I bought a 2004 BMW R1150RSL with 18K miles on the odometer.
Upon inspection at the time of sale, I noticed a certain amount of play in the rear wheel. This could be worn or mis-torqued Pivot Bearings or the dreaded Final Dive Bearing Failure. The test is the following. Put the bike on the center stand, wiggle the rear wheel at 9-3 o’clock and at 12-6 o’clock. If there is movement you need to determine whether it is Pivot Bearings (PB) or Final Drive Bearing (FDB). Have someone hold down the rear brake, do the wiggle test again. If there is still movement, it is the PB. If the movement stops, then it is the FDB. PB is a relatively easy fix. The FDB is a bit more involved. Fortunatly for me, my new bike had PB issues.
Before I whipped out the credit card and started ordering parts, I attempted to reset the existing bearings. I was told on various internet site that this was a 50/50 proposition. Usually when the bearings show signs of movement, they are gone. But I had nothing to lose but a bit of time so out came the heat gun and I reset the torque to specs. No go. Now the pivot made a clicking sound when I did the wiggle test.
Internet research led me to Rubber Chicken Racing. http://rubberchickenracinggarage.com/bushings.html These folks make a set of bushings that I, and many others, believe are a huge improvement over the tiny roller bearing that BMW uses. Roller bearings are ment to “roll”. The pivot point of the BMW motorcycle simply “rocks” only a few degrees back and forth. This is the job for a good race and bushing. And Rubber Chicken Racing supplies the JL Paralever Bushing Kit.
Here’s what you need to get the job done.
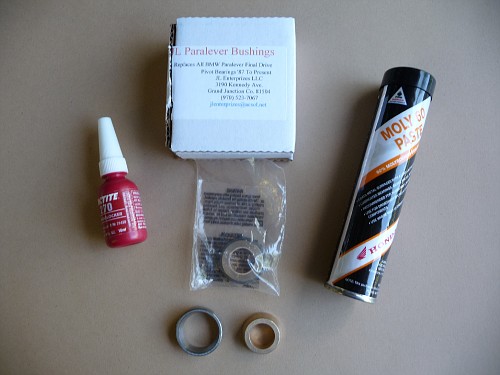
The JL Paralever Bushing Kit $119.00, Honda Moly Lube $9.95 and Locktite 270 $17.50, All available from Rubber Chicken. Total cost with shipping, $164.05
Besides the usual set of sockets, allen keys and wrenches, you will need the following tools:
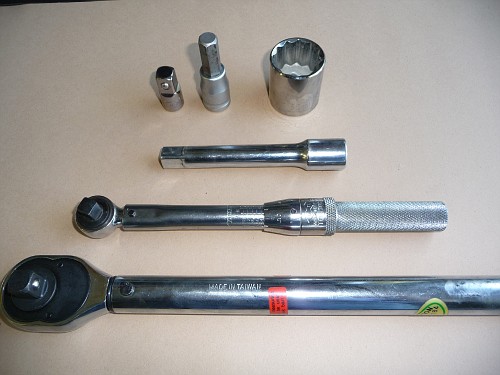
1/2″ to 3/8″ adapter so you can use the allen socket in the inch pound torque wrench. A 12mm Hex socket, a 30mm socket, an ” Inch Pound” torque wrench and a “Foot Pound” torque wrench. A 3″ or 4″ 1/2″ extension will come in handy. You also need a Heat Gun or a propane torch. All these tools are available at Sears or Harbor Freight Tools.
Just for fun, I wanted to see how long it would take a fellow like me to do this job. I have reasonable mechanical skills. On a scale of 1-10 I’d say I’m a 7. I change my own oil, brake pads, tires and can bleed brakes and clutch circuits. I know how to adjust valves and do a throttle sync. I own a small machine shop so I know my way around tools and technics. But I believe if you are reasonably handy, you can do this proceedure.
I started at exactly 5PM…..
(Nice watch..Huh?)
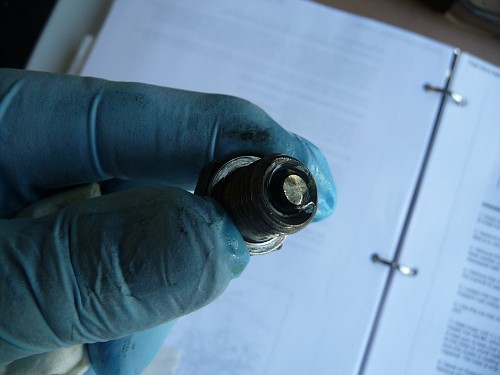
First thing you want to do is drain the FD oil. Here is a shot of my magnetic drain plug. No fuzz or any metal parts. Hopefully this shows my FDB is in good shape. That’s a GOOD thing!
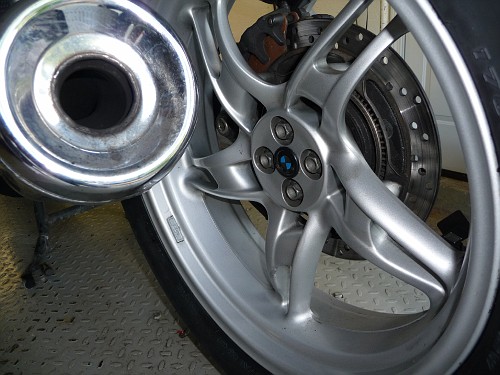
Remove the rear wheel.
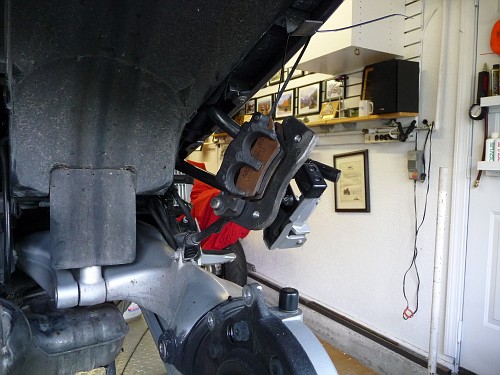
Remove the ABS sensor and the rear brake caliper. The ABS sensor might be tight. Twist it a bit and pull on it and it will come loose. Hang them out of the way.
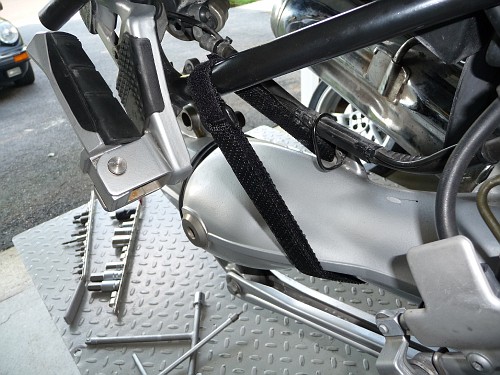
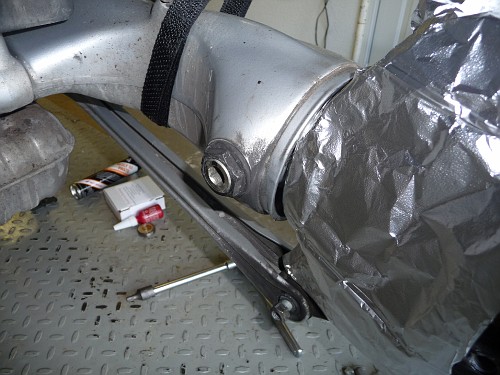
Use a strap to support the swing arm.
Cut the wire-tie that seals the front of the FD boot. Fold it back and out of the way.

Put a bit of tinfoil over the FD rubber boot so you don’t melt it when you apply heat the Pivot Bearing bolts.
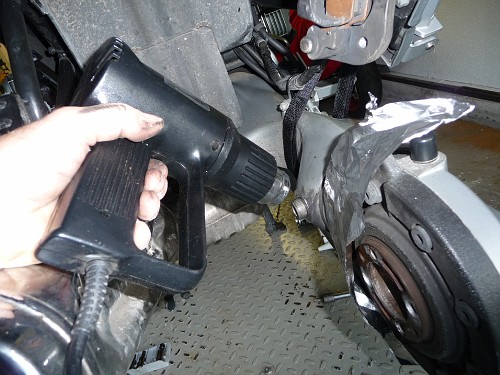
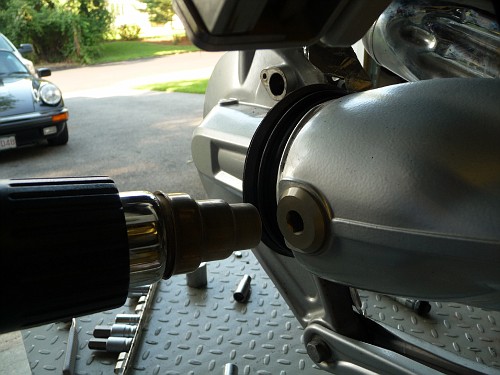
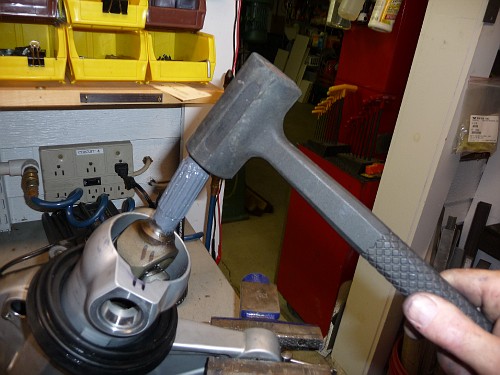
Use a heat gun or a propane torch (carefully! Don’t melt the paint!) to heat up the left side pivot retaining nut. If you use a propane torch, just direct the flame into the hex hole in the bolt so you don’t damage the paint. Once it’s good and hot , about 140 degrees, use the 30MM socket to remove it. This bugger is on there tight. Don’t knock your bike over trying to remove it!
Now use your heatgun/torch to heat up the left side pivot bolt. The heat is to break down the existing loctite. If you try to remove it without heat, you will rip the threads out of the soft aluminum. This would be a bad thing! Use the 12mm Hex Socket to loosen this bolt. Do not remove it at this time. Turn it out 5-6 revolutions to break the loctite bond.
I used a Laser Thermometer to be sure I’m at 140 degrees. Not necessary, but you can buy these laser thermometers at Harbor Freight Tools for under $50 and there are lots of uses around the home and shop. (Like taking grandkids temperature while they sleep 🙂
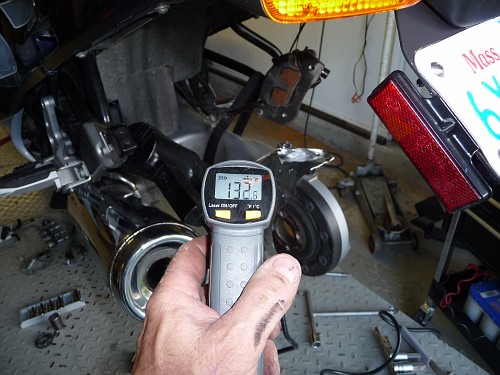
Now heat up the right side pivot bolt and losen it.
remove the bolt from the lower paralever.
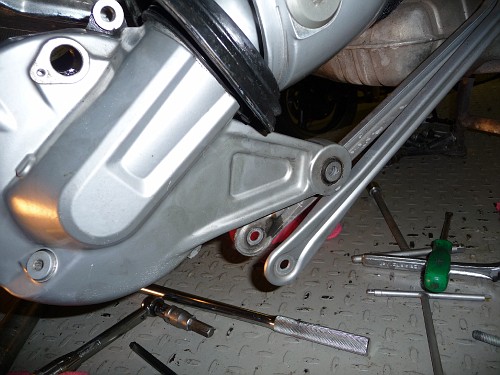
Remove the pivot bolts and the final drive will drop right out. It’s a bit heavy, be careful not to drop it. Once you have the FD out, you can bring it to a work bench to perform the folowing:
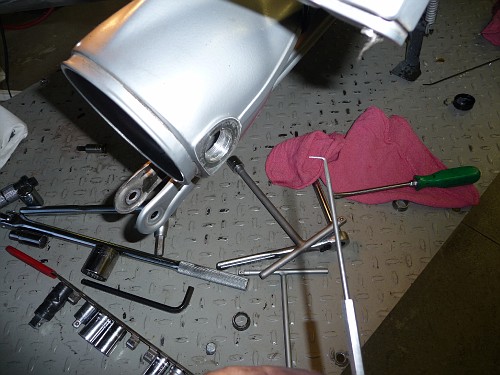
Use a big screw driver and something to pad the edge of the FD housing and ‘pop’ the universal joint out of the FD.
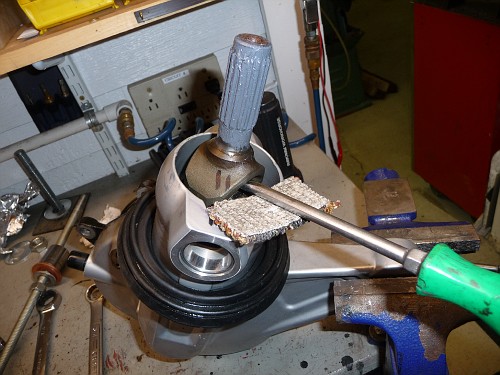
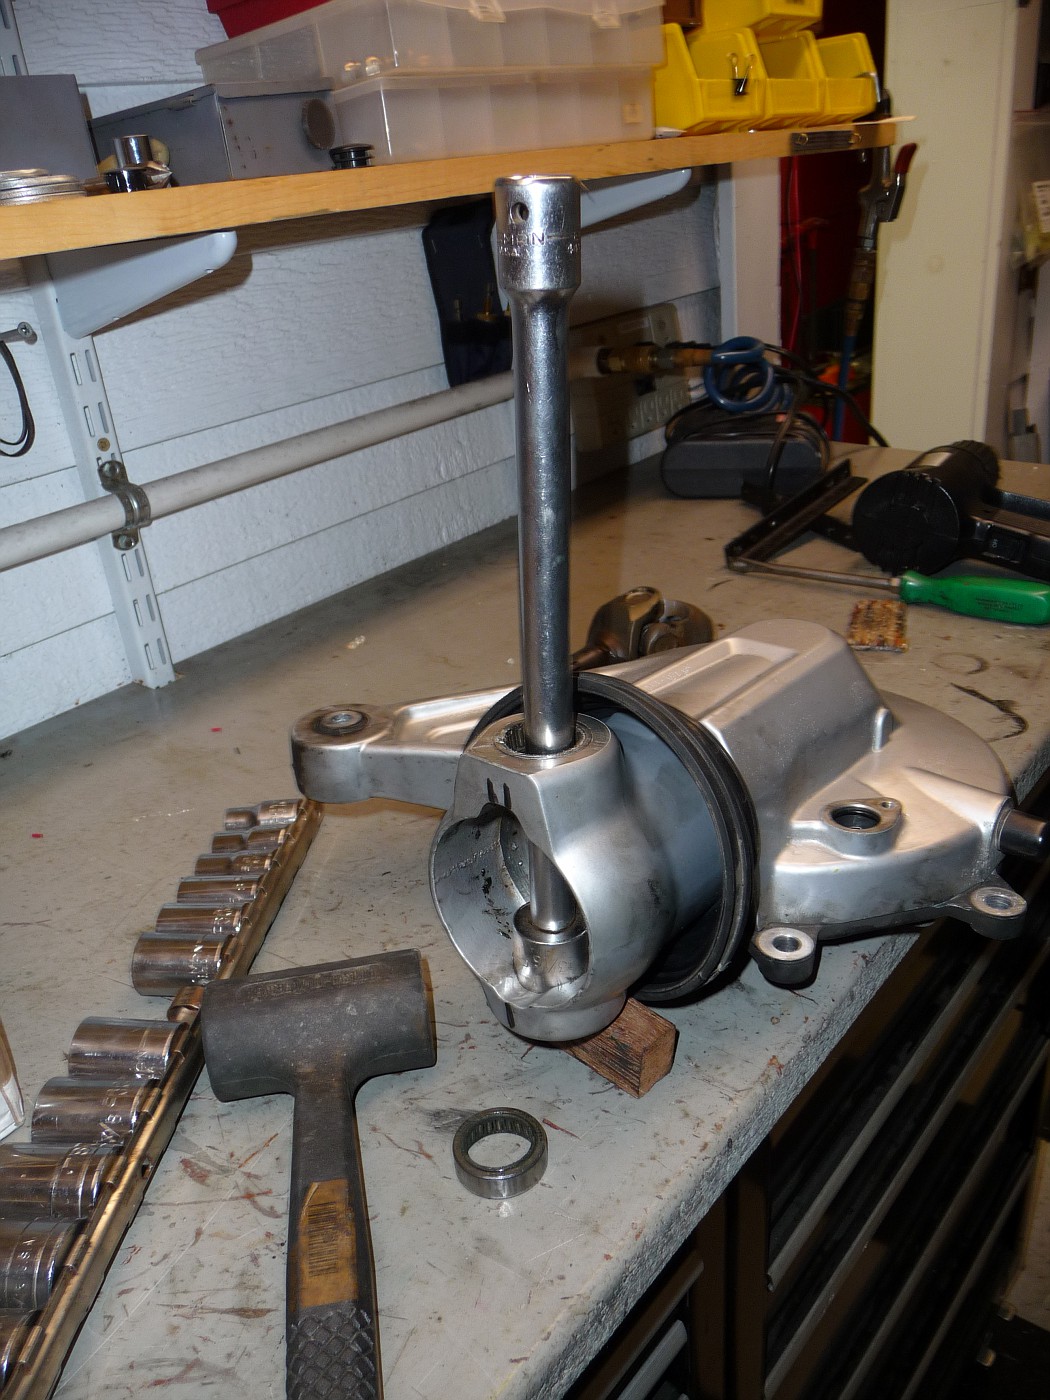
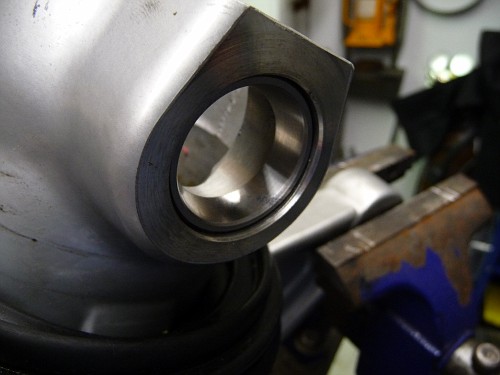
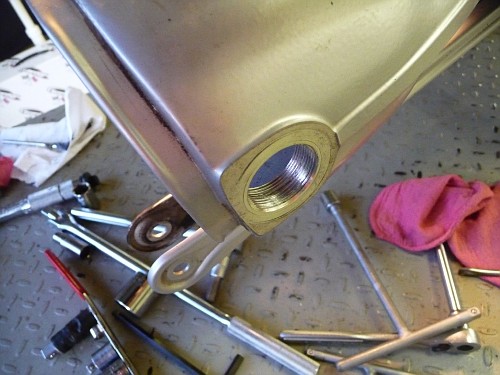
Once the universal joint is out, you can remove the bearing races. I did this by finding a socket that fit into the internal bearing recess perfectly. In my case it was a 13/16 Sears Craftsman 1/2″ drive socket. A block of wood, a 6′ socket extension and a rubber mallet were used to hammer the bearing race out. I also applied a bit of heat to the FD housing around the bearing. This expands that aluminum and allows easier removal of the bearing race.
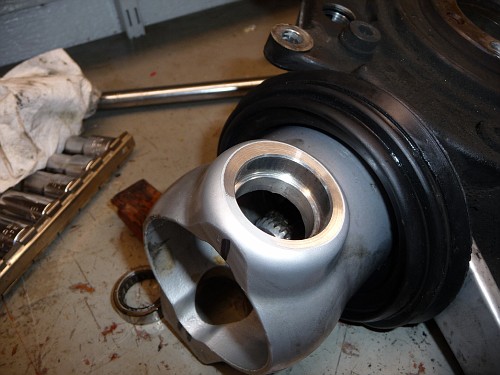
Once the races are out, inspect and clean the bearing recess. Make sure they are really clean. One side of mine had a ridge where the factory must have misaligned the original bearing when they pressed it in. I used a Dremel Mototool to clean it up just a bit so the new race wouldn’t hang up.
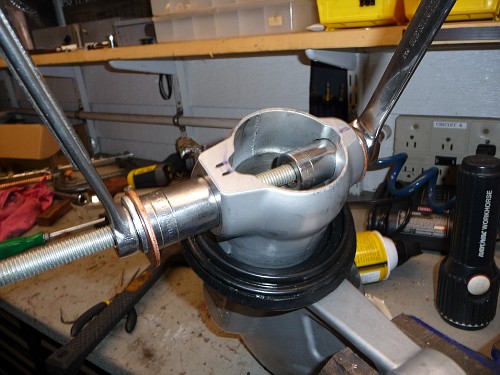
Installing the JL races was the hardest part of the whole evening. I finally decided to use 1/2′ threaded rod, a few washers and various sockets that fit the internal hole and the bearing race Outside Diameter. Two wrenches had the races seated in short order.
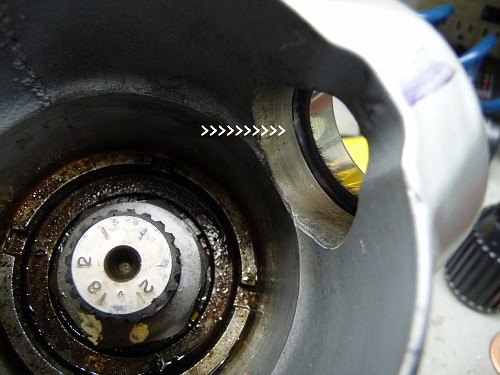
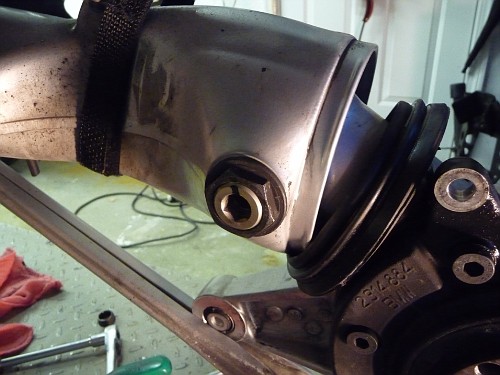
The races need to be completely bottomed in this area (arrows). This requires a socket of the correct size to bear on the edge of the race from the outside.
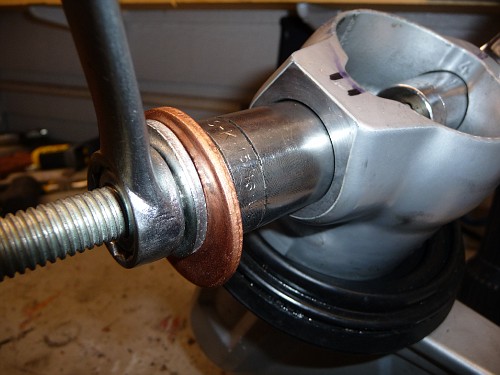
This is a 15/16th S-K socket that is a perfect fit.
The bearing race ultimately needs to look like this. Recessed a bit and firmly bottomed in the recess.
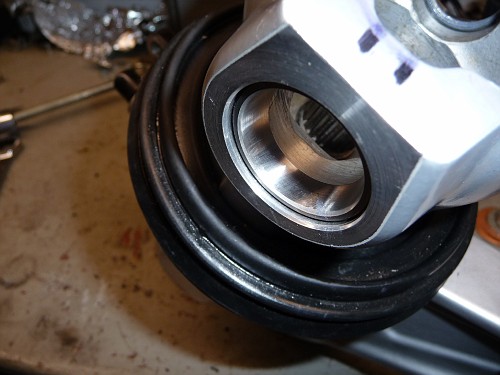
They need to completely bottom out.
OK, the races are installed…….Have a beer! (or two)
You can pop the universal joint back together. You will need to rap it with your rubber mallet to get it to seat. You’ll hear it snap back together.
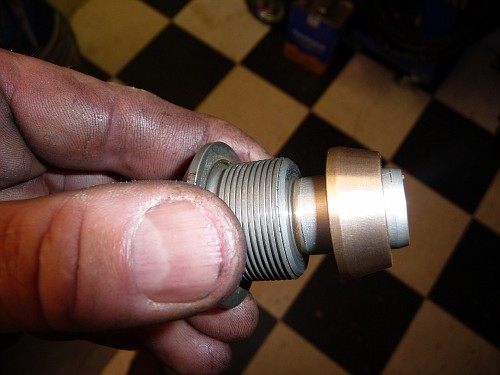
Now it’s time to work on the pivot bolts. The bushings should fit with a nice, no slop fit. They can’t be forced on or they could split the bronze bushing. Use a piece of 400 grit wet/dry sandpaper and sand the pivot bolt until the bushing just goes on with very little force.
You don’t want them to end up like this.
they need to seat all they way down. Like this
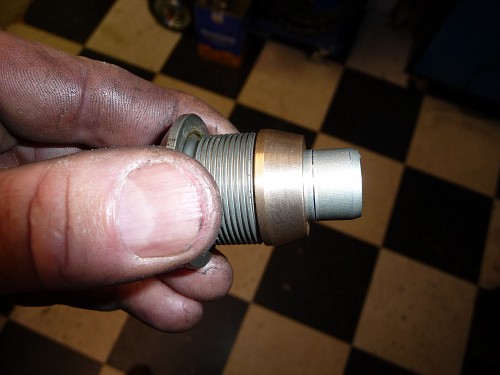
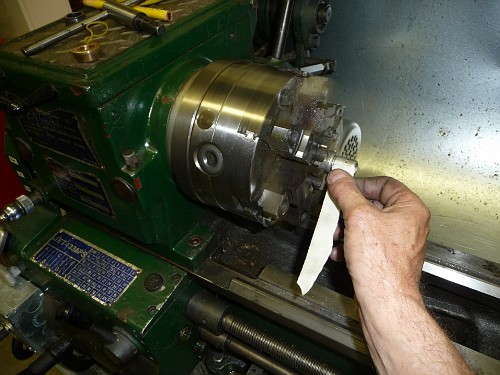
I cheated and used my lathe to spin the pivot bolt and held 400 grit paper against it until I had a perfect fit. But you can do it by hand, it will just take longer. I believe this is one of the most important steps to a good install. Take your time. You want a nice slip fit.
You must clean out all the old loctite from bolt the pivot bolts and the threaded holes in the swing arm. I used acetone and a pick to get it all out.Be careful with the acetone near your paint! I poured acetone into a glass jar and put the two pivot bolts and the 30mm lock washer in and let it sit a few minutes. And then with a pick, I scraped out all the old loctite. I didn’t want acetone anywhere near the bike so I used the heat gun and the pic to get all the old loctite out of the threaded holes.
It needs to be really clean or the torque reading will be off.
OK, almost done! Put some Honda 60 moly grease on the bushings and insert them into the races on either side of the FD. The grease will hold them in for the next step. I used a small brush to coat the race and the bushing.
Now you can slide the spline back together. Put a nice coat of moly grease on it, but not too much. just a nice coat like thick paint. I used a small paint brush to do mine. Use a long screw driver in the pivot bearing hole to help you guide the splines back together. It takes a bit of wiggling, but it does go together. Keep the bike in gear so the drive shaft doesn’t rotate. Be sure you have the driveshaft universal joints phased. Do a search on the BMW MOA web site for an explanation of this.
Once you have the FD back together, insert the right side pivot bolt. Don’t tighten it down, just enough to support the FD. Next install the left side. Again, just enough to support the FD. BNe careful to not cross thread these bolts. The drive shaft housing is fairly soft aluminum.
Now remove the right side pivot bolt and apply some loctite 270 to the pin itself and a couple drops to the threads. Insert until just bottomed against the swing arm. If you did a nice job with your 400 grit paper, it should go together like beer and August!
Do the same thing for the left side. The loctite is used to hold the bronze bushing from rotating on the pin. All the rotation wants to take place between the bronze bushing and the bearing race.
Tighten the left side pin until just bottomed out, and then back it off one turn.
Now using your Foot Pounds torque wrench, tighten the right side pivot bolt to 110 foot pounds.
Now tighten the left side pivot bolt with your Inch Pound torque wrench to 40 inch pounds. Try to wiggle the entire final drive. If there is any movement, you can torque it up to 48 inch pounds. But don’t exceed this amount. The rating for these bushings is 36-48 inch pounds.
Everything should be nice and tight, but there should be nice smooth movement of the FD up and down, no wiggle side to side.
You can wait about 20 minutes for the loctite on the threads to set up before you install the lock-nut. Have a beer!
I hope you used that 20 minutes to clean up your tools and reorganize your work bench.
Now you can install the locknut on the left side. Torque to 75 foot pounds. I put a mark on the pivot pin so I could see if it moved when I tightened the lock nut. The loctite that was allowed to set up for twenty minutes held fast and the pivot bolt did not move.
Install the rear wheel, brake, ABS sensor and reattach the paralever. The book calls for the rear bolt on the Paralever to be torqued to 32 Ft pounds. But I’ve been informed that this rubber mounted bushing in the final drive is captive and does not rotate, therefore you should have someone that weighs about 185 pounds sit on the bike, with the rear wheel on the ground, while this bolt is torqued down. This sets the rubber bushing in the middle of its movement and takes strain off the FD.
You’re done!
Total time, four hours and 12 minutes. I can easily do the next one in two hours. I spent a lot of time messing around with the bushings before I used the threaded rod. I had tried the heat / cold method, where you put the race in the freezer and heat the FD. The race when in half way and was crooked. I had to pop it back out and try again. threaded rod and various sockets and washers is the way to go.
I hope this was helpful and your pivot bearings continue to pivot for hundreds of thousands of miles!
Ride safe!
ADVERTISEMENT:
This web site is part of my income stream. If this article was helpful
to you, you might want to throw a few bucks at me via paypal
rvb100@comcast.net
Not necessary, but certainly appreciated!
If you have any questions, I can always be reached at rvb100@comcast.net
Thanks
RoyB
13 comments on “Bmw Pivot Bearing Replacement”