
THIS SYSTEM WAS INSTALLED IN 2015
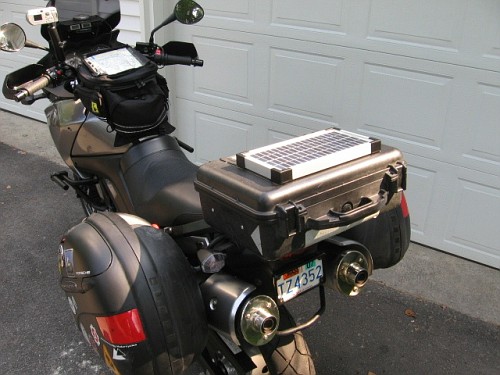
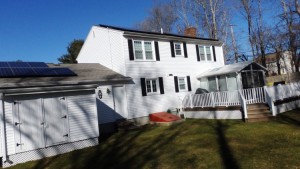
If you have followed along on this web page, you realize I’m a solar power junkie! I have a 10.5Kw system on my house, my previous truck camper had solar and I even have a small solar panel on my motorcycle to keep my lap-top charged! I’m infatuated about “free” , non moving, energy from the sun.
Since most of the events I attend with this new toy hauler (Forest River Comanche Grey Wolf 19RR) will be “Off The Grid” with no power hookups, solar becomes very important. The truck camper was small and I could only fit one panels, which served me fine if I was very conservative with my electrical use during a long weekend. This new TH is 20′ long and has lots of roof space so two, 140 watt panels were decided.

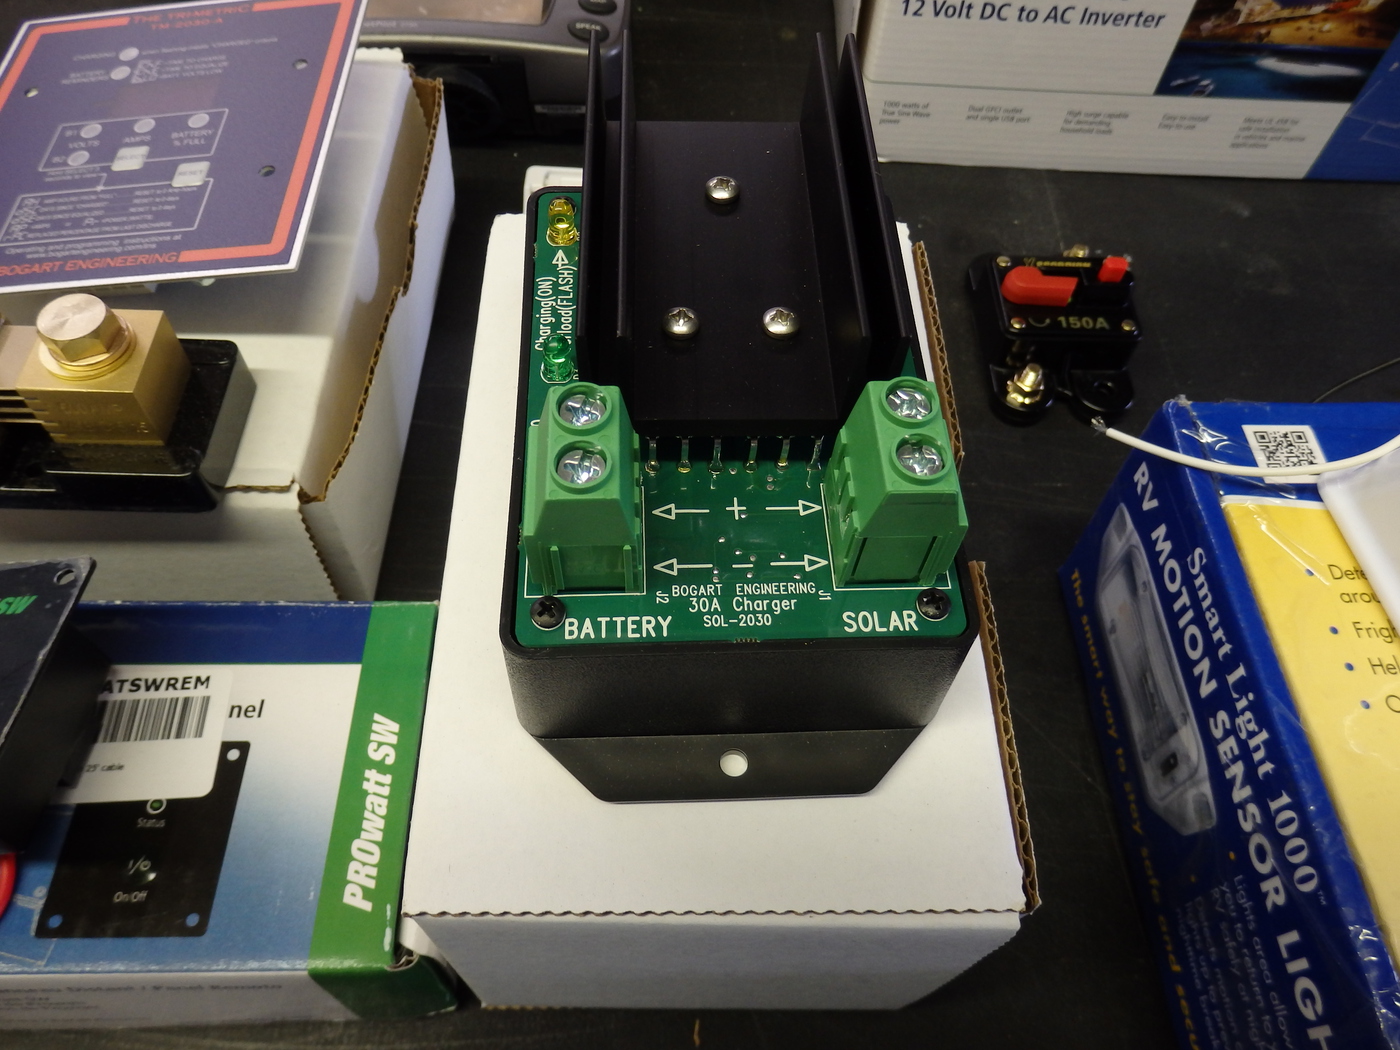
For solar control, the device that regulates how much current is being fed to your batteries I decided on some new technology from Bogart Engineering. This device along with its partner to monitor what is going into and out of your batteries should serve me well.
Bogart SC-2030
You can read all about it here. Â Â http://www.bogartengineering.com/content/solar-charger
To monitor the system I’ll be using the Bogart companion, Trimetriv TM-2030. I had this device in the truck camper and loved seeing exactly what was happening with my batteries and my total solar / charging system. Great device!
Read all about it here    http://www.bogartengineering.com/content/trimetrics
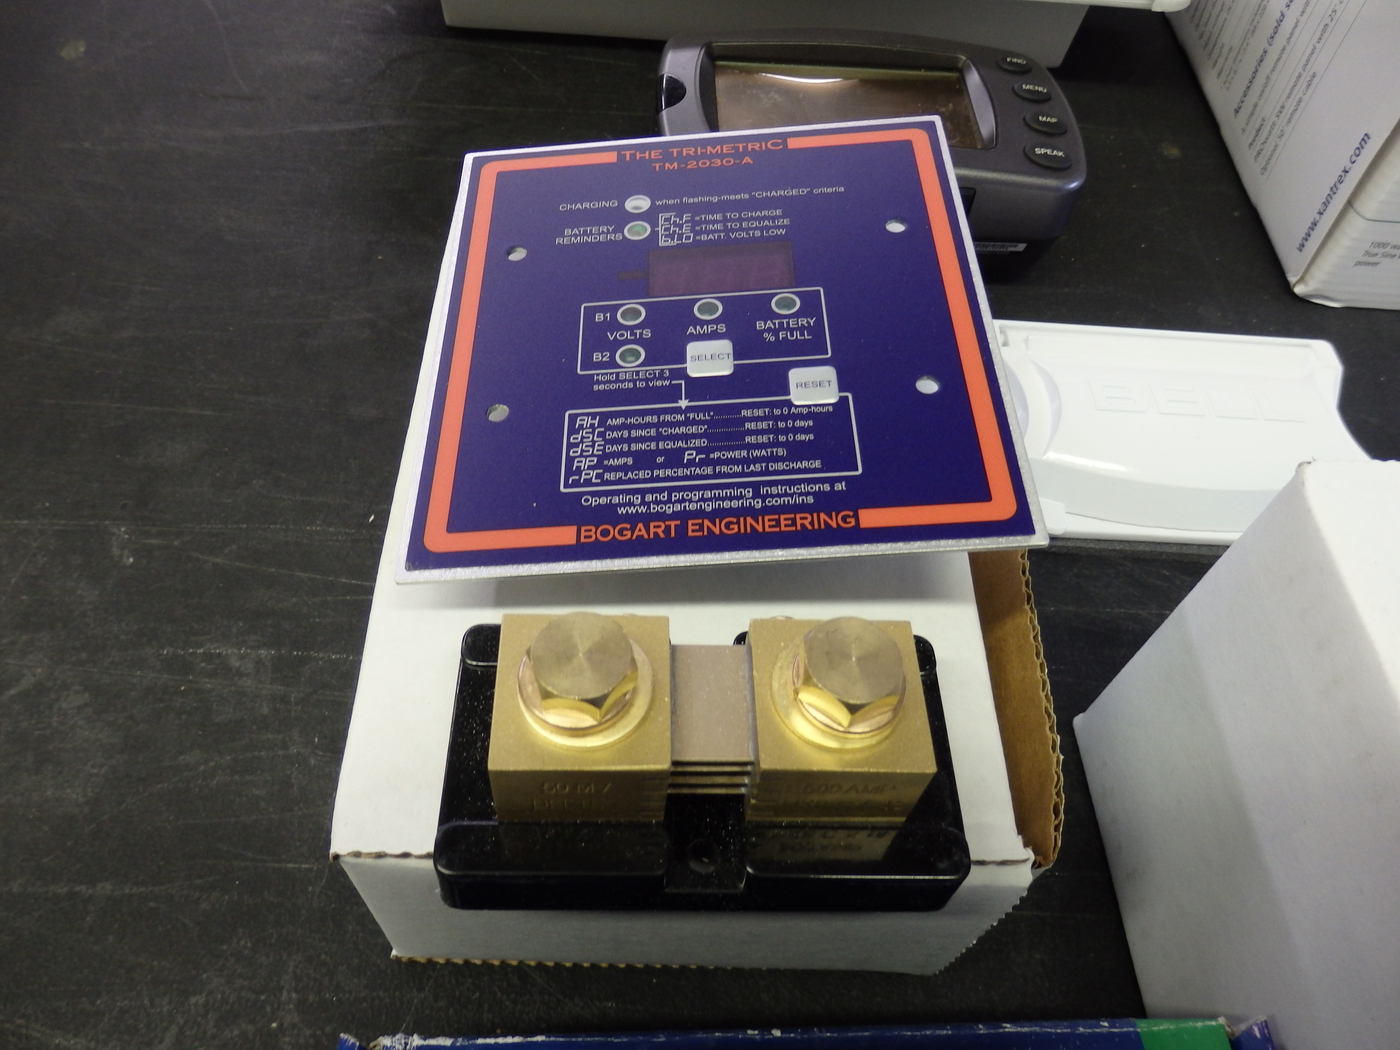
The large brass thingy is a “Shunt” that lets the batteries “talk” to the monitor panel…
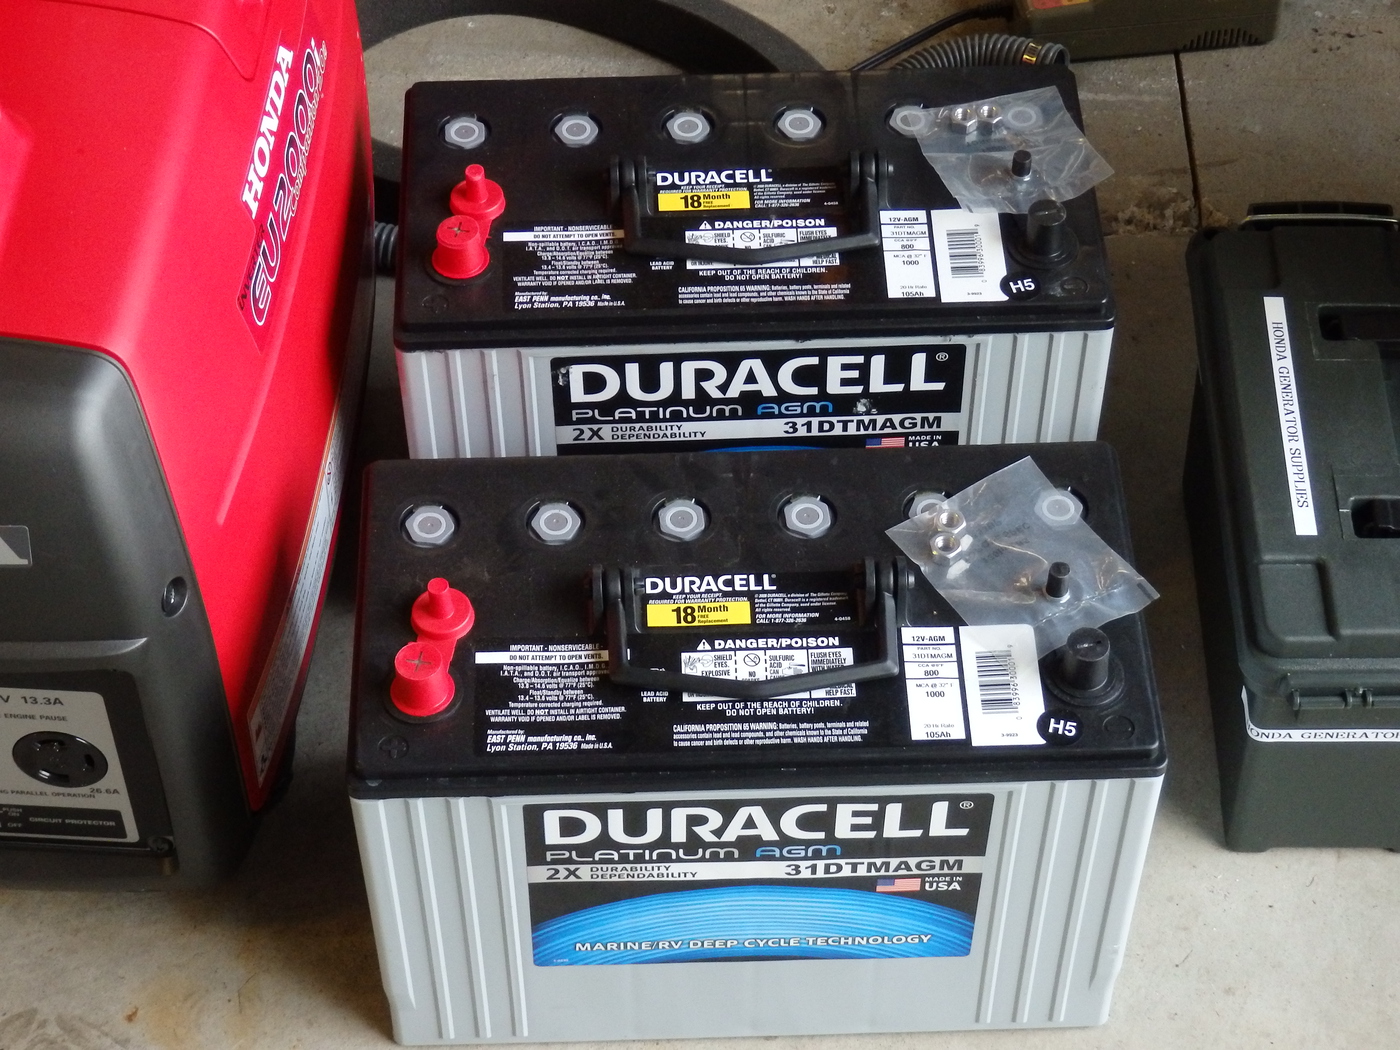
For batteries I decided on AGM for zero maintenance. Two Group 31 Duracell platinum batteries should serve me well.
To connect everything together I decided (after MUCH internet debate) to use 4g wire. The whole discussion about wire size is extremely confusing and complicated. Some “experts” recommended 10g wire while other said anything less than #2 would have too much lose! (BTW, the smaller the number, the larger the diameter of the wire). I decided on 4G as the majority of the “experts” suggested that cost, ease of installation and availability points toward 4g.
Standard 4g wire is extremely difficult to work with. Very, very stiff and hard to terminate, go around corners, etc. 4g “Welding Cable” is very flexible and has a very thick rubber jacket. It is meat to take abuse on a work site. But it can be expensive. I stopped by my local welding supply house and luck was with me. On a clearance table was a 80′ piece of #4ga welding wire for a reduced price! I paid $1.40 a foot. Could have bought it cheaper on Ebay, but I simply didn’t want to wait. Picked up some #4, copper crimp connectors while I was there.

So lets get going. It’s a beautiful day and lots to do.
First order of business is to mount the panels on the roof. A piece of 1.5″ X 1.5″ aluminum angle was cut up into eight 7″ pieces and holes drilled to mount to panels and the roof of the TH (toy hauler)
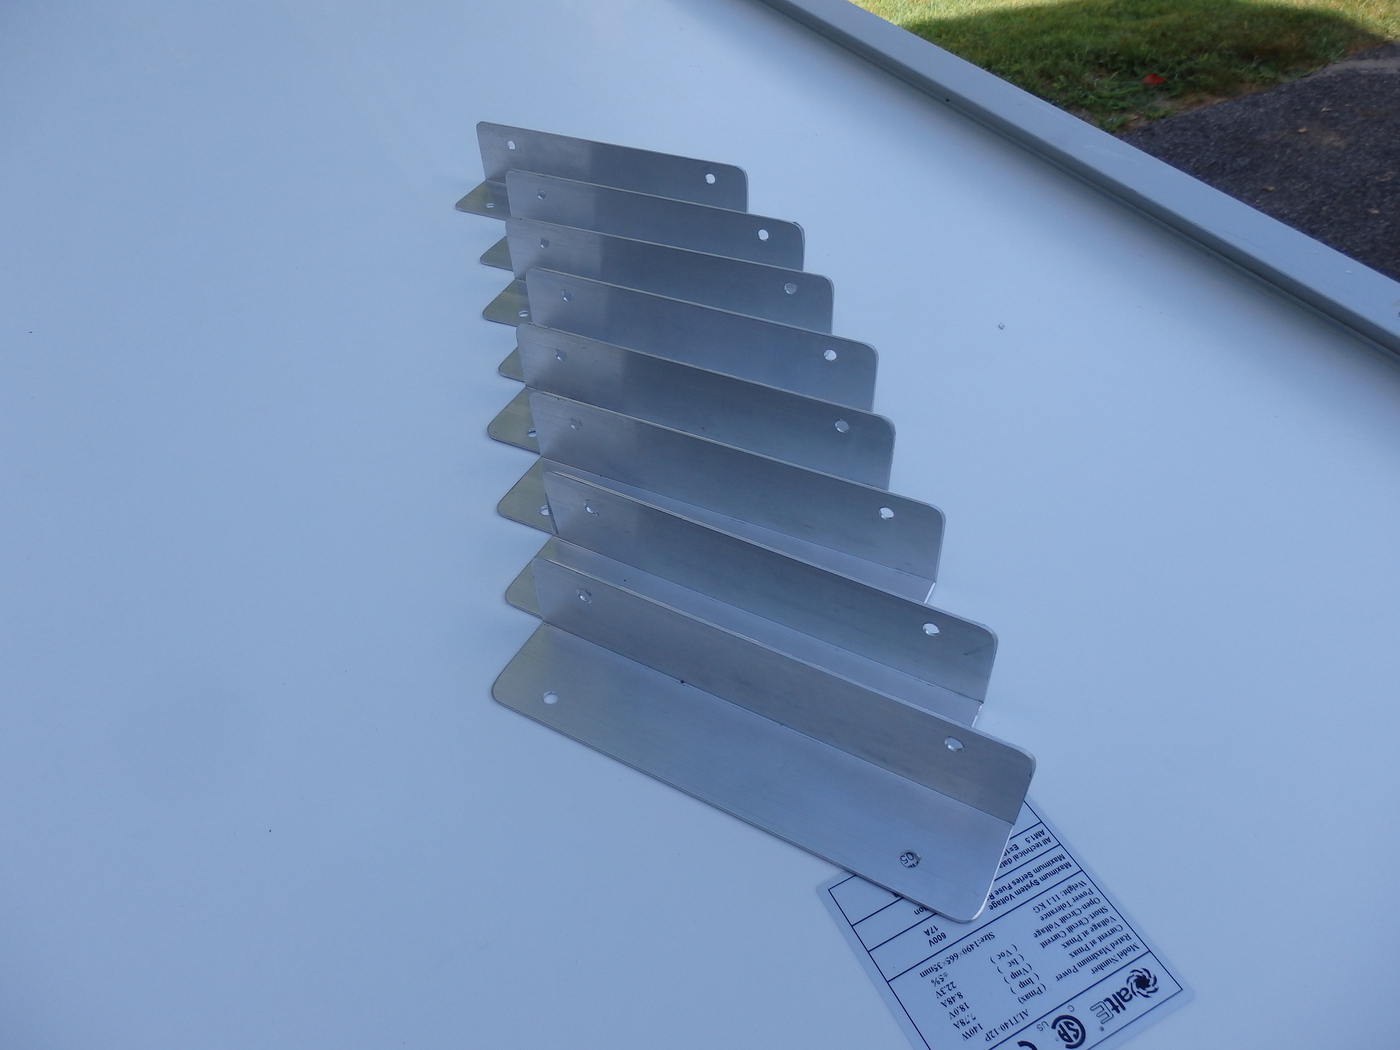
Brackets were “pop-riveted” to the panels
Panels were wired with 10g for the short run to the roof mounted junction box. I wanted to run the whole system with 4g wire but I simply couldn’t fit it into the weather guard and the terminals on the solar panels. 10g wire for less than a 2′ run will be fine with negligible loss.
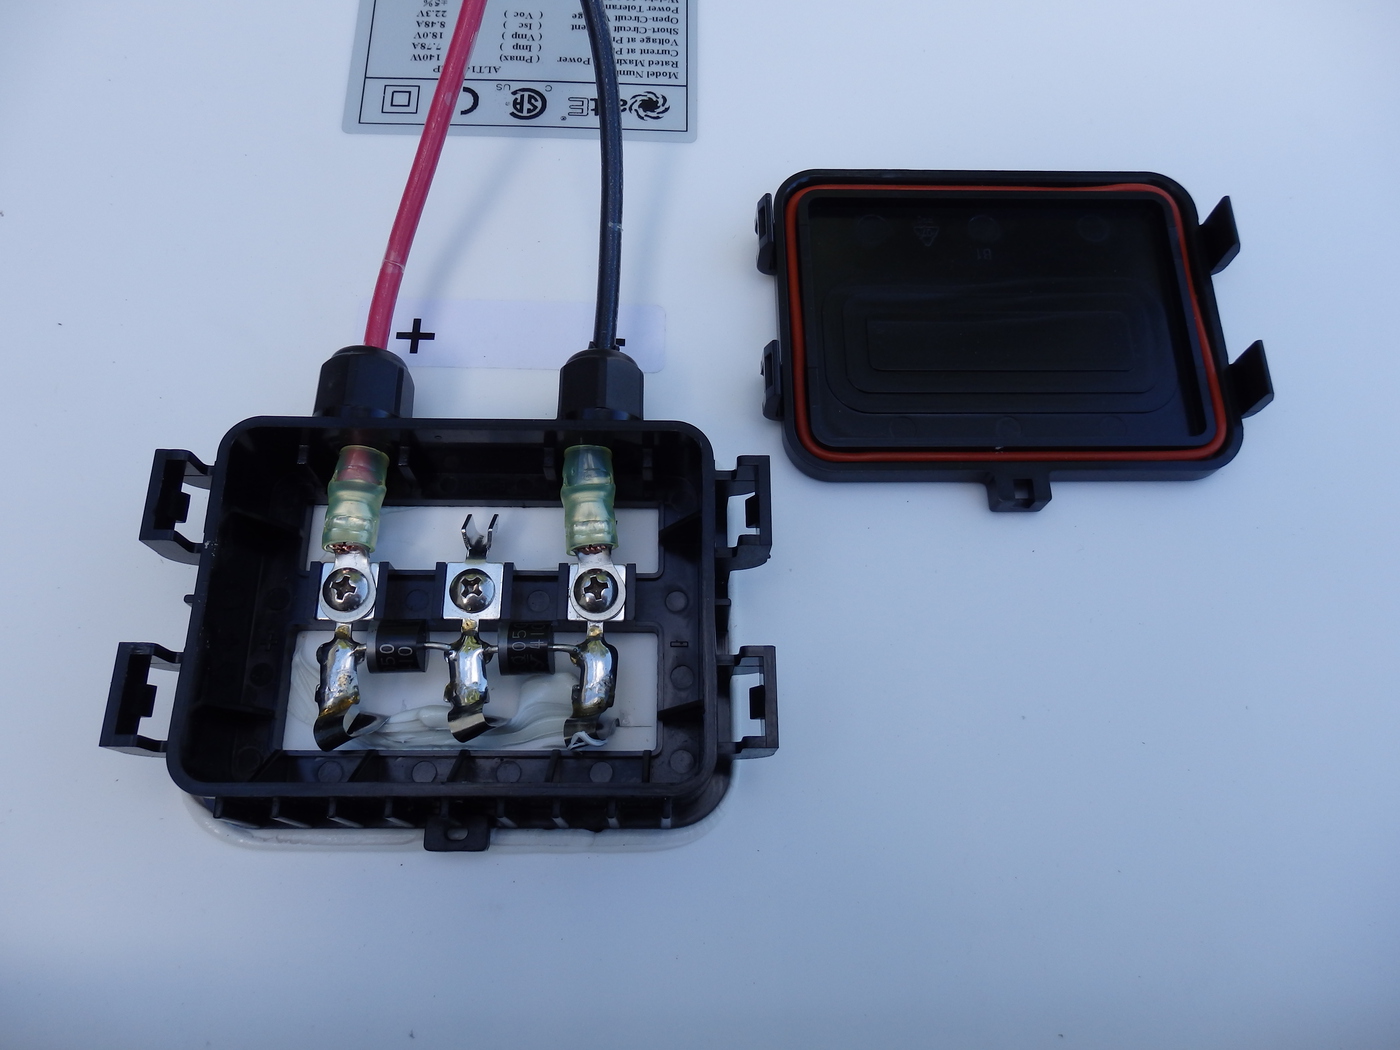
The panels I bought from AltE had a real nice. weatherproof junction box mounted on the back of eack. Nice rubber “o-Ring” to seal out the weather
To mount the panels to the roof I used stainless steel screws and the worlds best caulk /adhesive…3M 5200. Amazing stuff! once cured you’ll rip the roof off before you break the bond. At $25 a tube it better be freak’n miraculous!
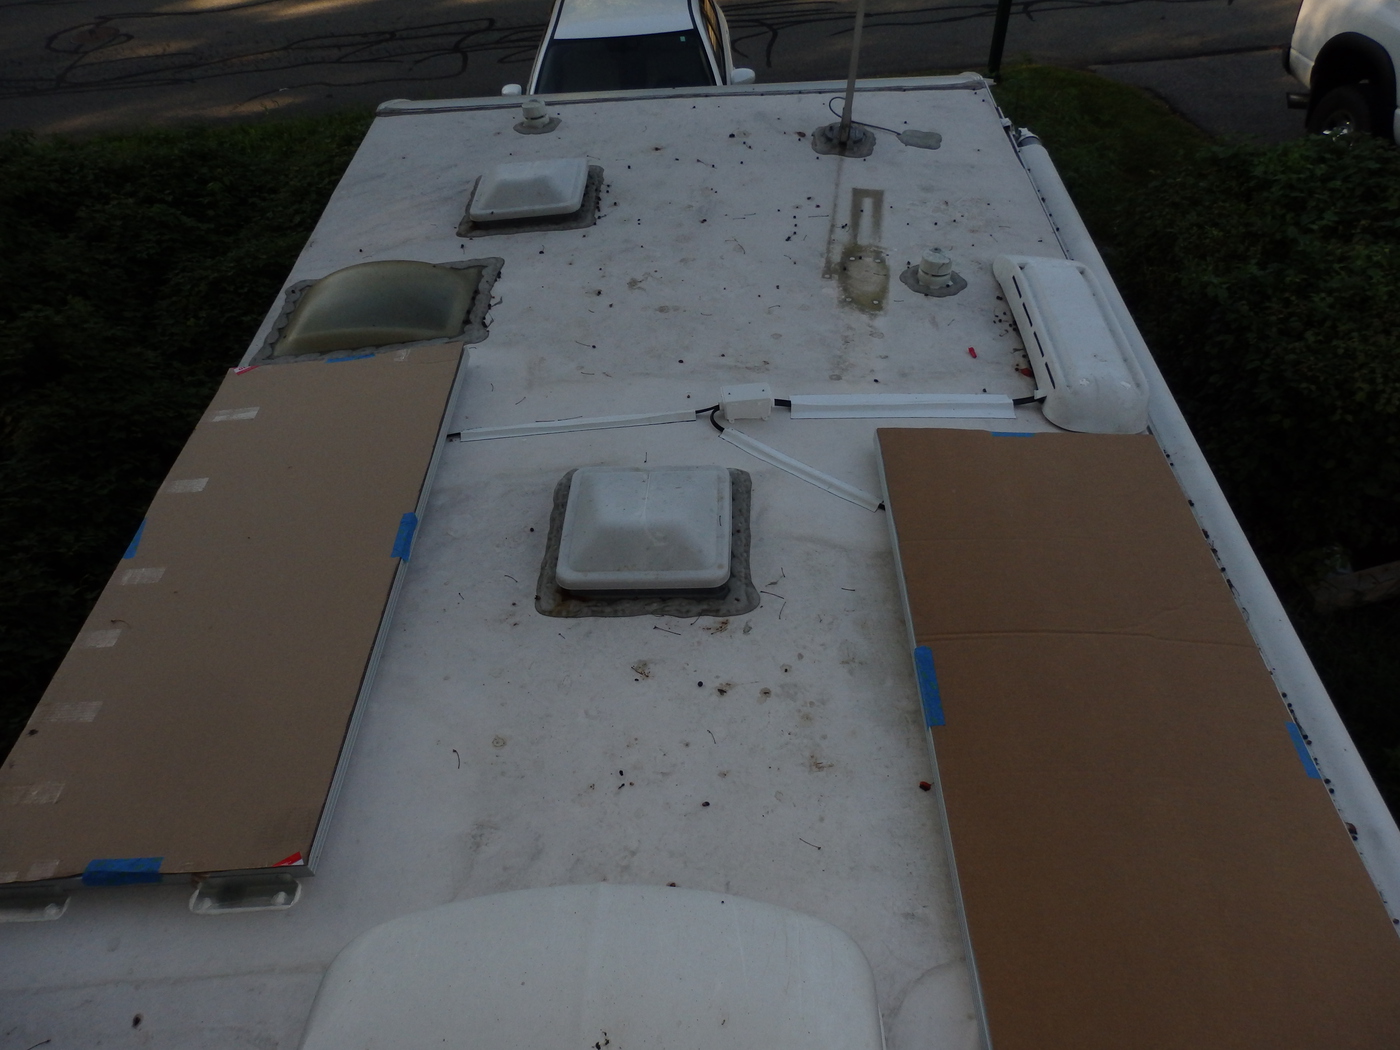
Panels were covered with thick cardboard to protect them and to stop them from generating electricity during the install……(Interesting to note, that even with the cardboard covers, the panels were still outputting 5.6v!)
The area they would be mounted was thoroughly cleaned, marked with a pencil, panel supported with a jack and glue/sealant applied
Â
Panels were lower down, Screwed down and sealed over the screw heads
Wires from the two panels were run to a junction box and bolted together with stainless steel bolts. A small plastic partition was installed so these connections never touch. Not shown in this photo is the connections were covered with “Liquid Filled” heat shrink tubing to keep corrosion at bay. Connections will be secured in place with more 3M 5200.

I ran a bead of 5200 around the edge of the cover, but let it set up and dry before installing it. Once the 5200 dried it made a beautiful rubber gasket. This cover needs to be removable in case of service or adding another panel in the future.

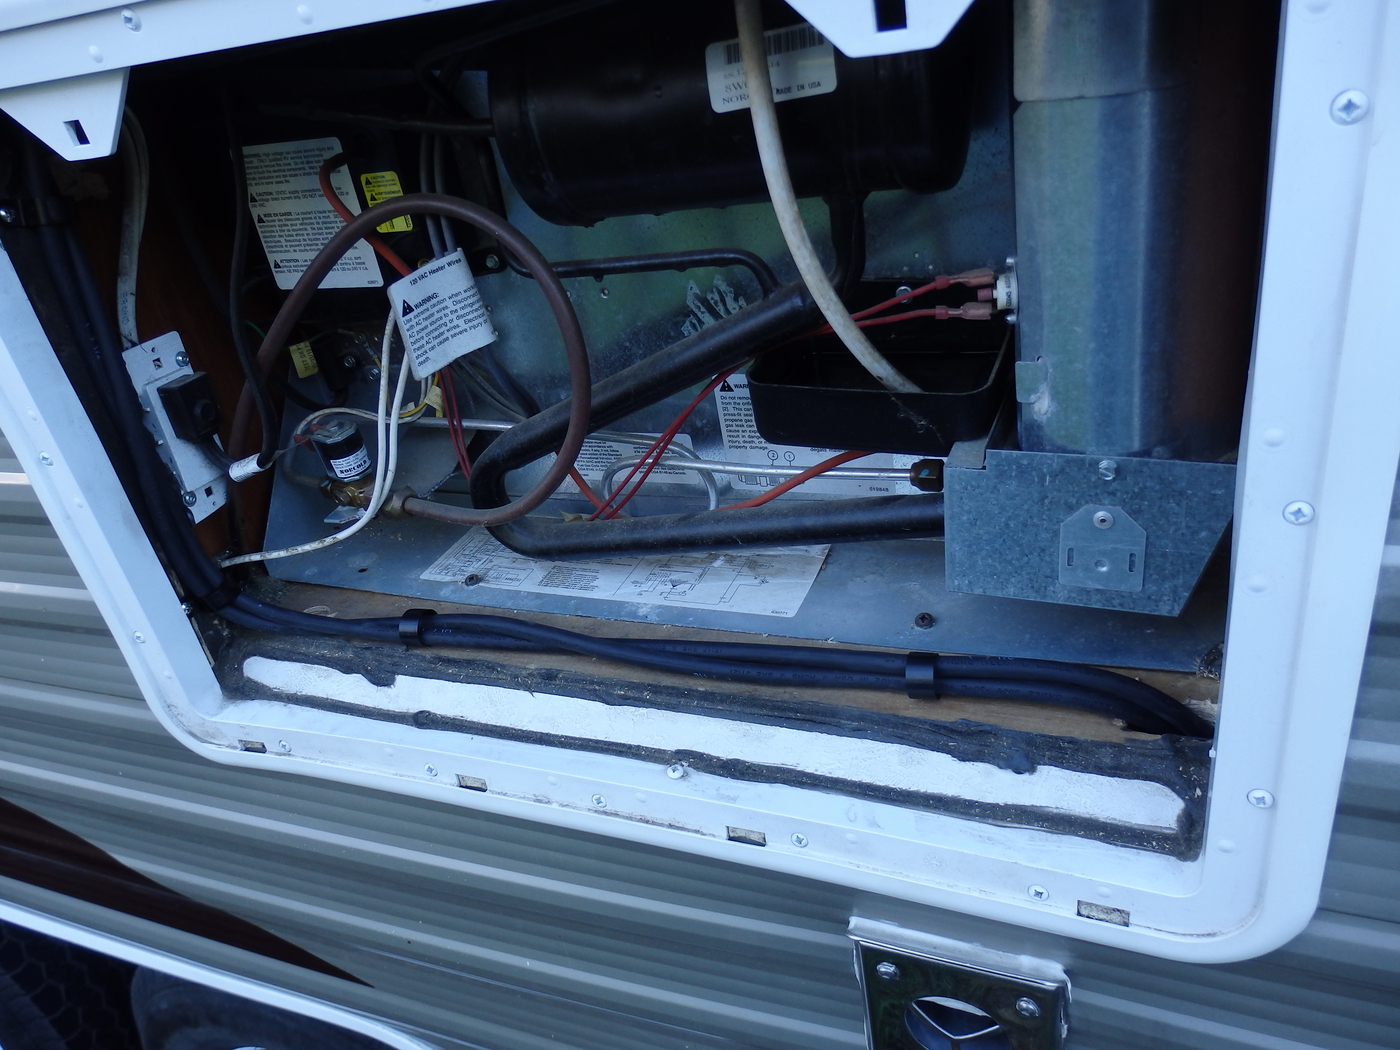
heavy 4g welding wire (much more flexible than other 4g wire) was run over to refrigerator vent and down to bottom of TH.
(While I was there I attached a piece of window screen with much smaller holes than the factory screen to keep ants, bees, etc out of the camper. This window screen was simply attachedwith a few dabs of 3M 5200)
All wiring on the roof was secured with Eternabond. This stuff is amazing. usually used to fix leaks but works great to secure wires to the roof. Once down, it ain’t NEVER comming up!
http://www.eternabond.com/?Click=2058&gclid=CNLZzJCX4scCFdMWHwod0fwGPg
So the roof part is done, now down to running the wires.
The monitor panel for the solar system is located just inside the main entrance door, in the kitchen. A run of about 25′ from the battery bank and where the Solar Controller is located. The 4g solar wires only need to run about 18′ as they do not need to go to the monitor panel.
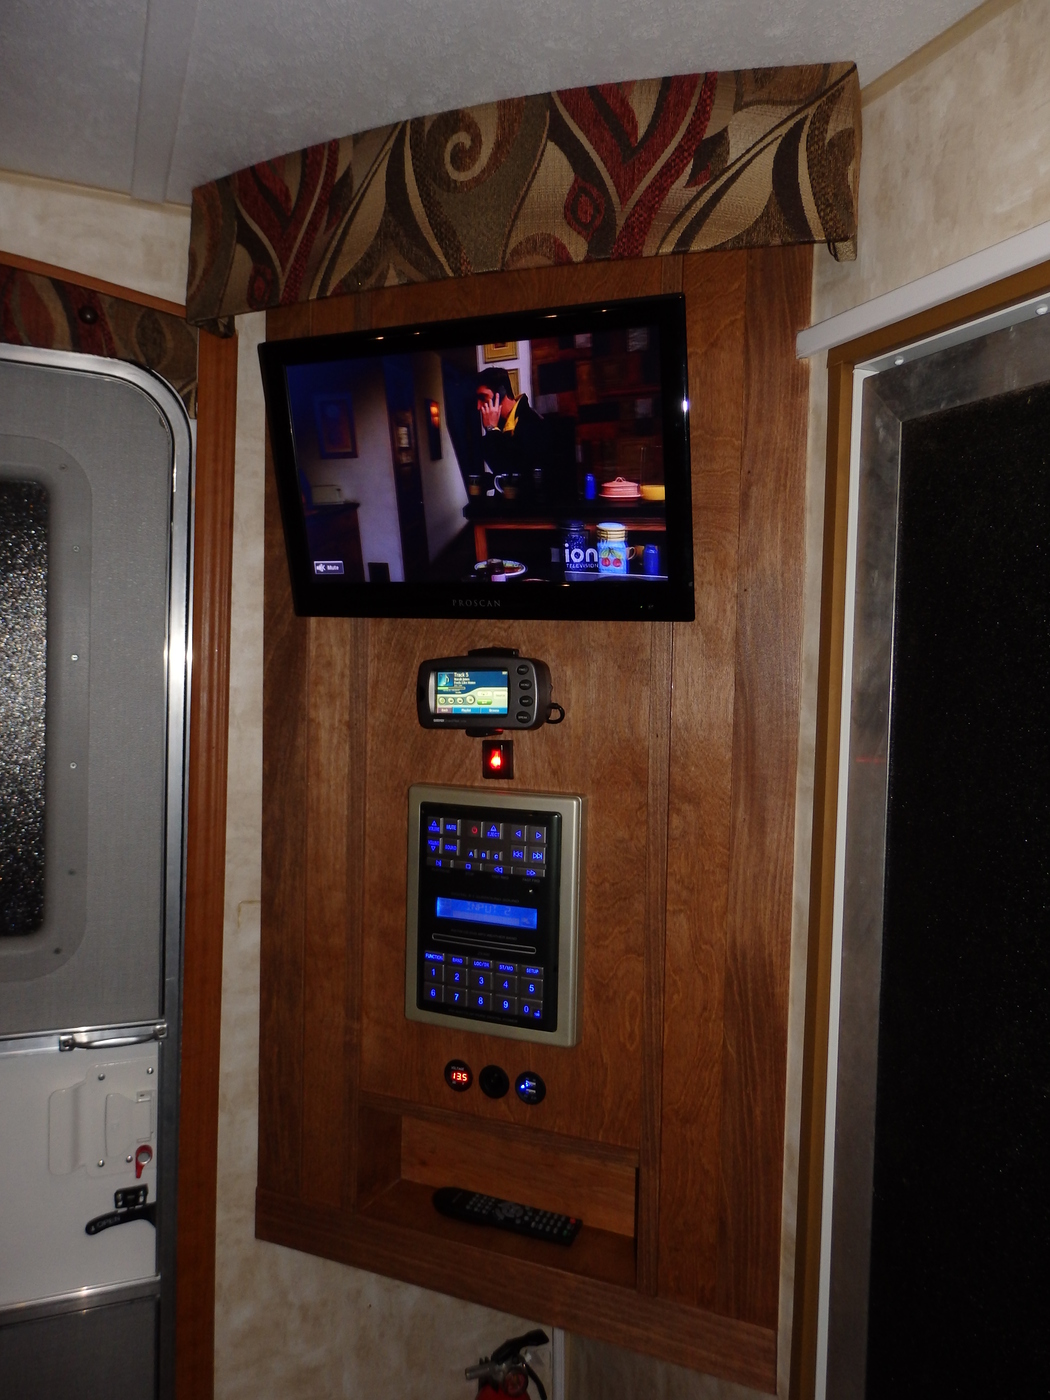
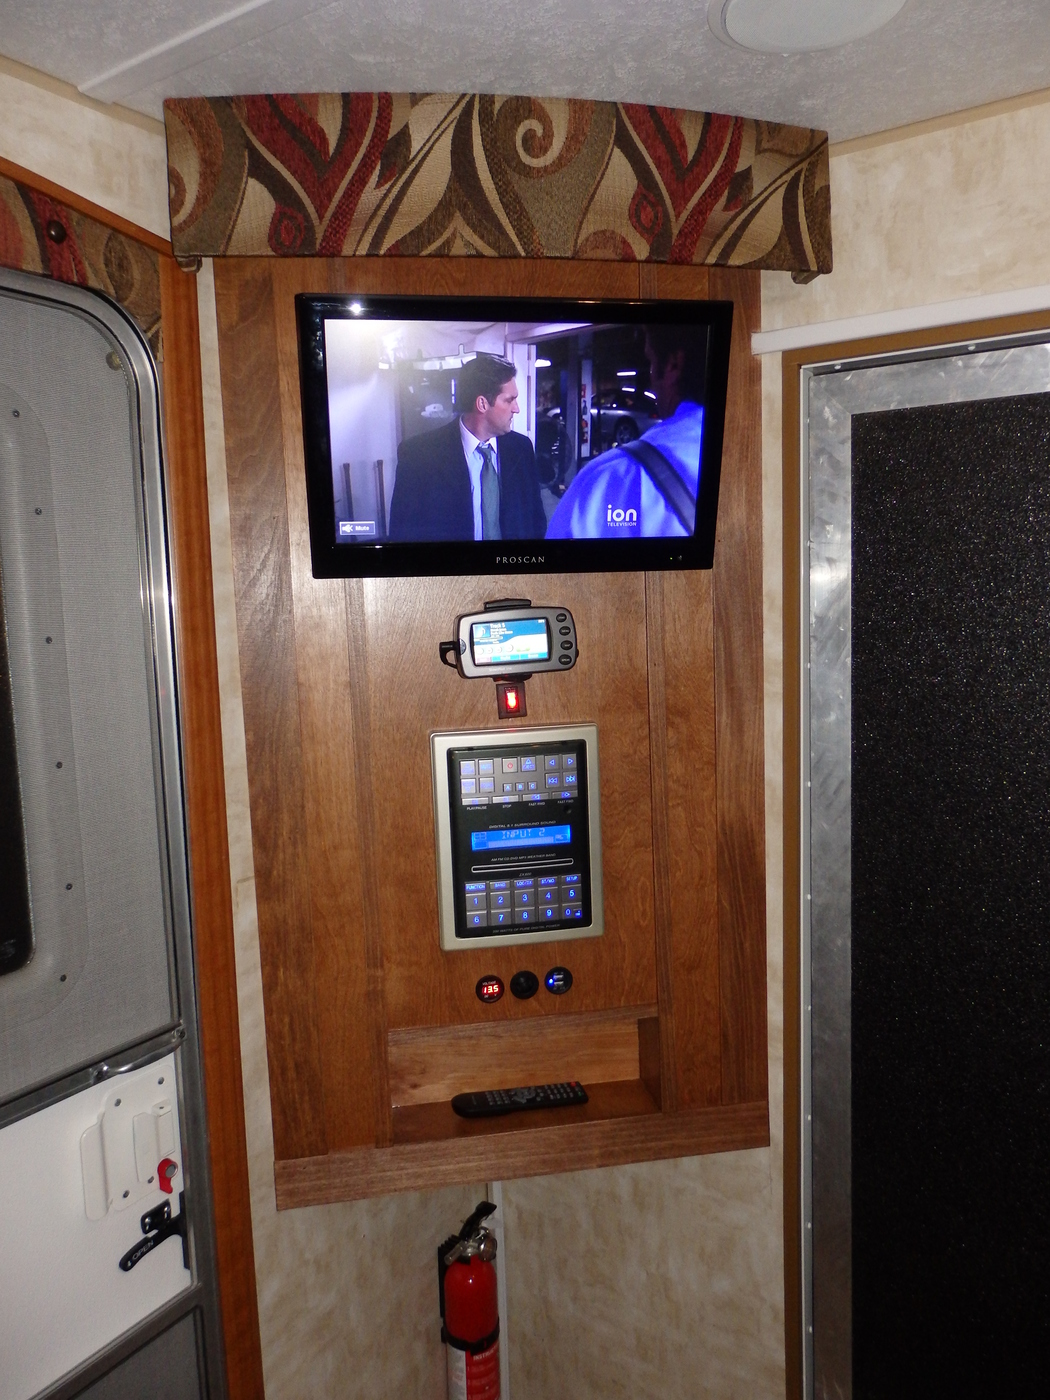
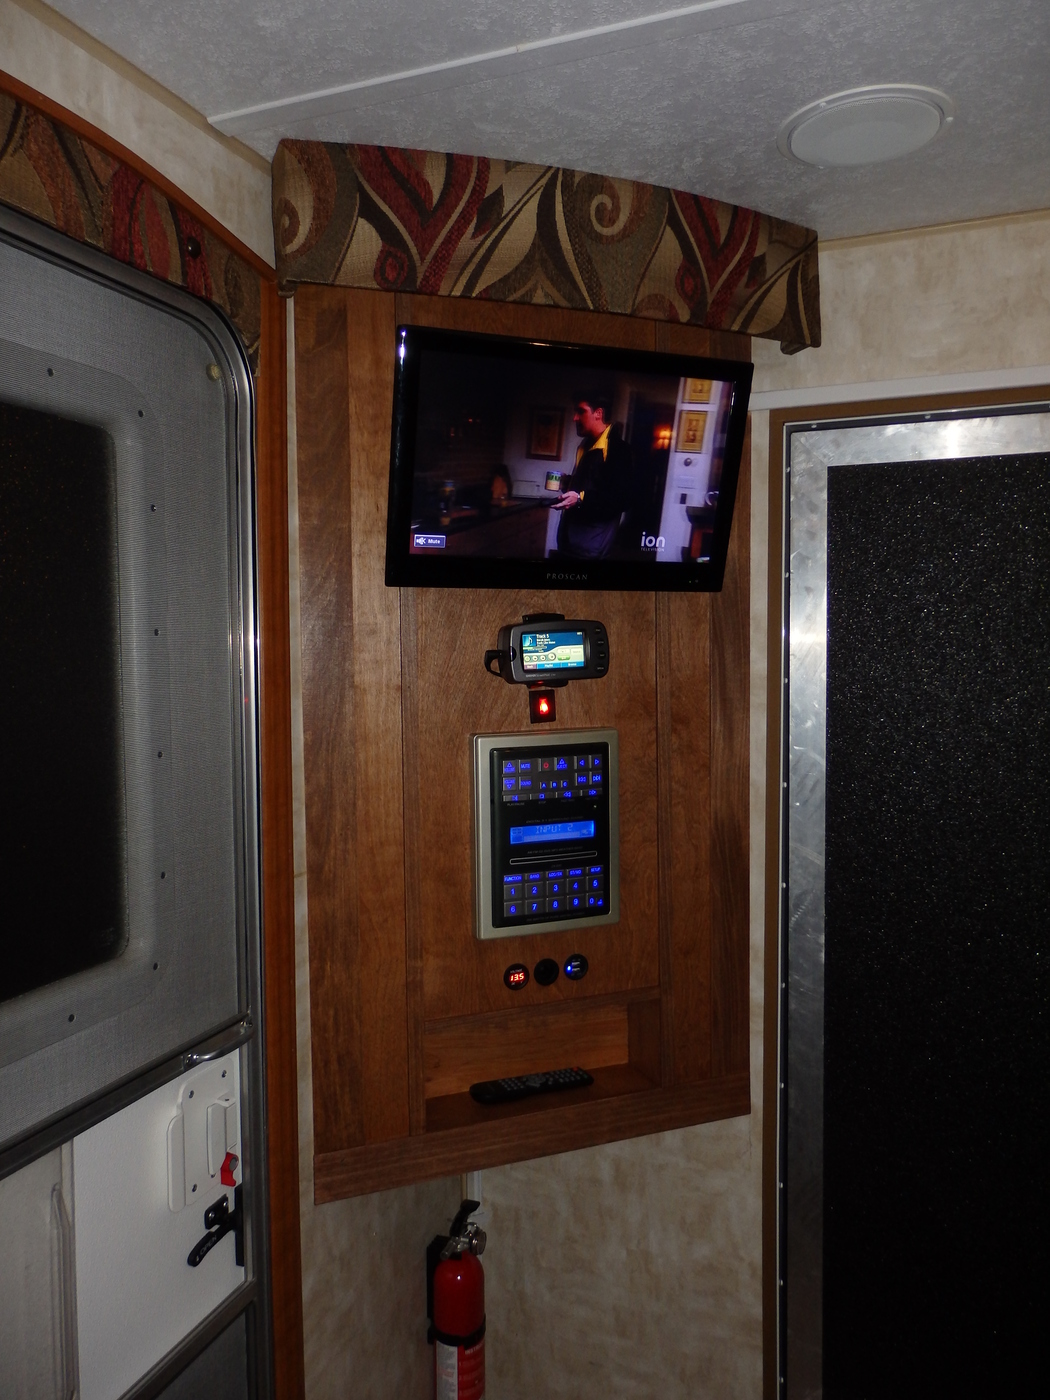
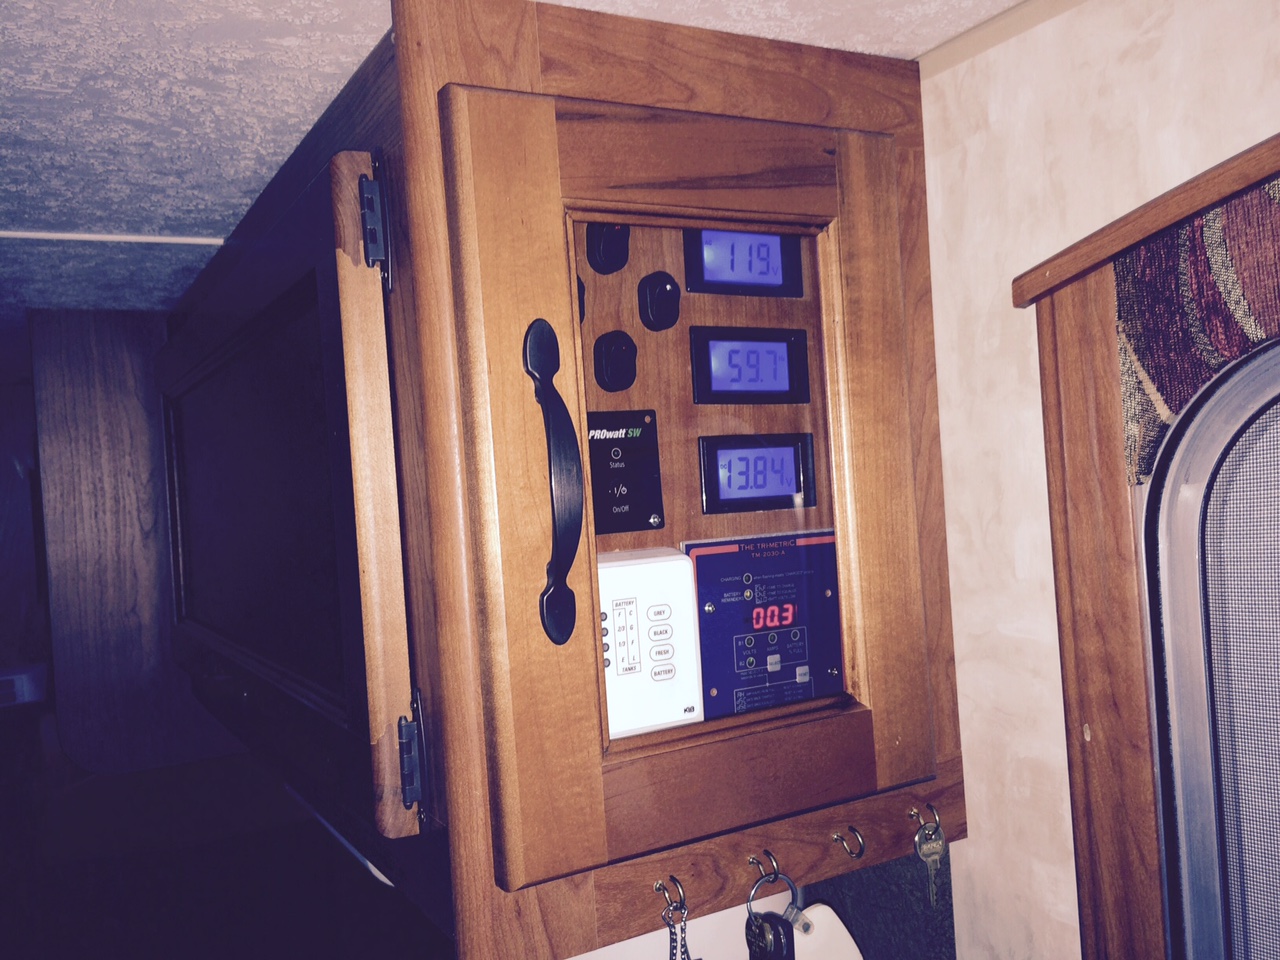
Here is the monitor “station” for all things electrical
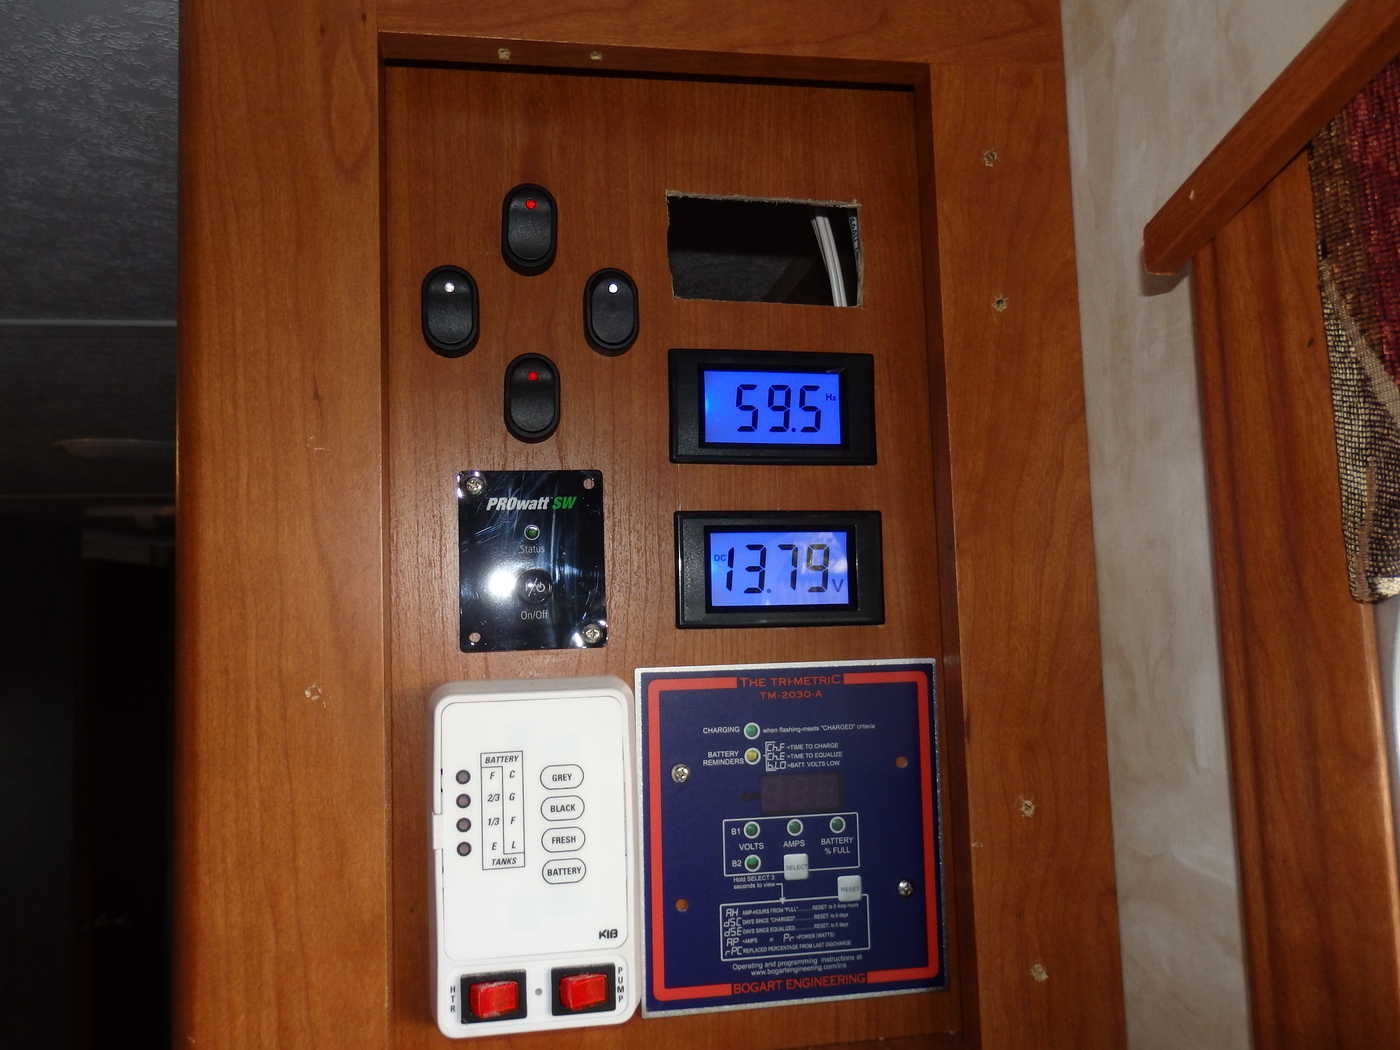
Four taggle switches are for outside LED flood lights…Left – Right -Front- Back
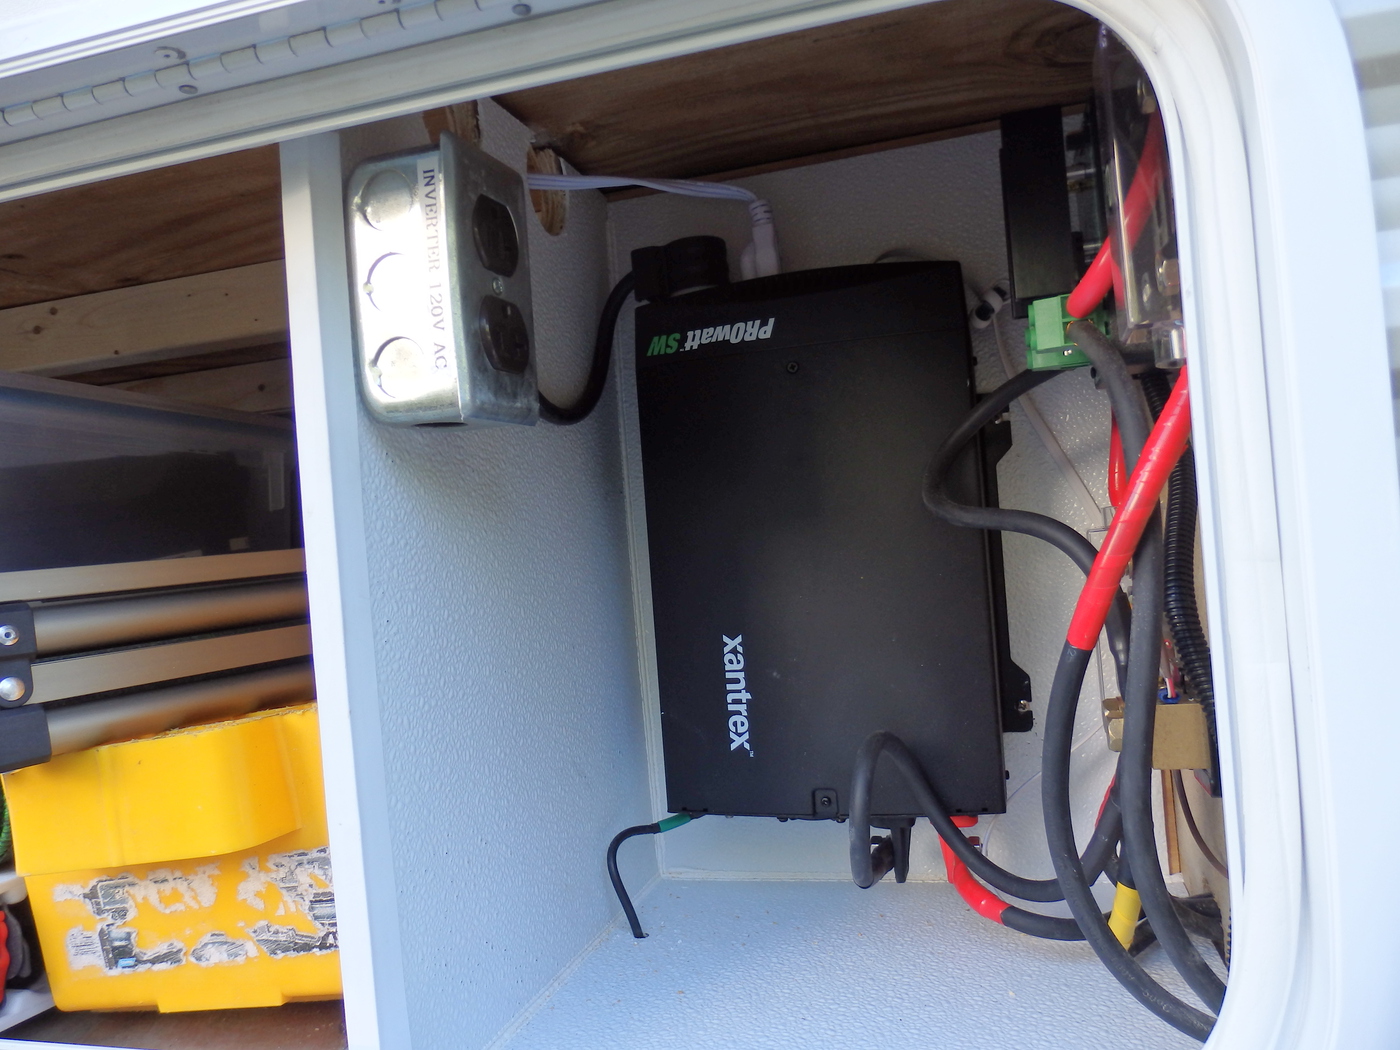
“ProWatt SW Remote control for Xantrex inverter (More on this later in an update)
The three gauges (one I’m still waiting on) will be AC voltage, AC Hz-Frequency, DC voltage
Factory supplied fluid level gauge, hot water electric heater switch and water pump switch
Bogart Trimetric 2030 DC system monitor
For the 2030 monitor panel to communicate with the solar charge controller I needed to run a 4 conductor telephone cable and four conductor 18g bell wire from this panel to the front of the trailer where the batteries and charge controller are located. Lots of work crawling around under the trailer, but finally DONE!
The 4g solar panel wires ran down the refrigerator vent and through the space below the refrigerator to under the trailer
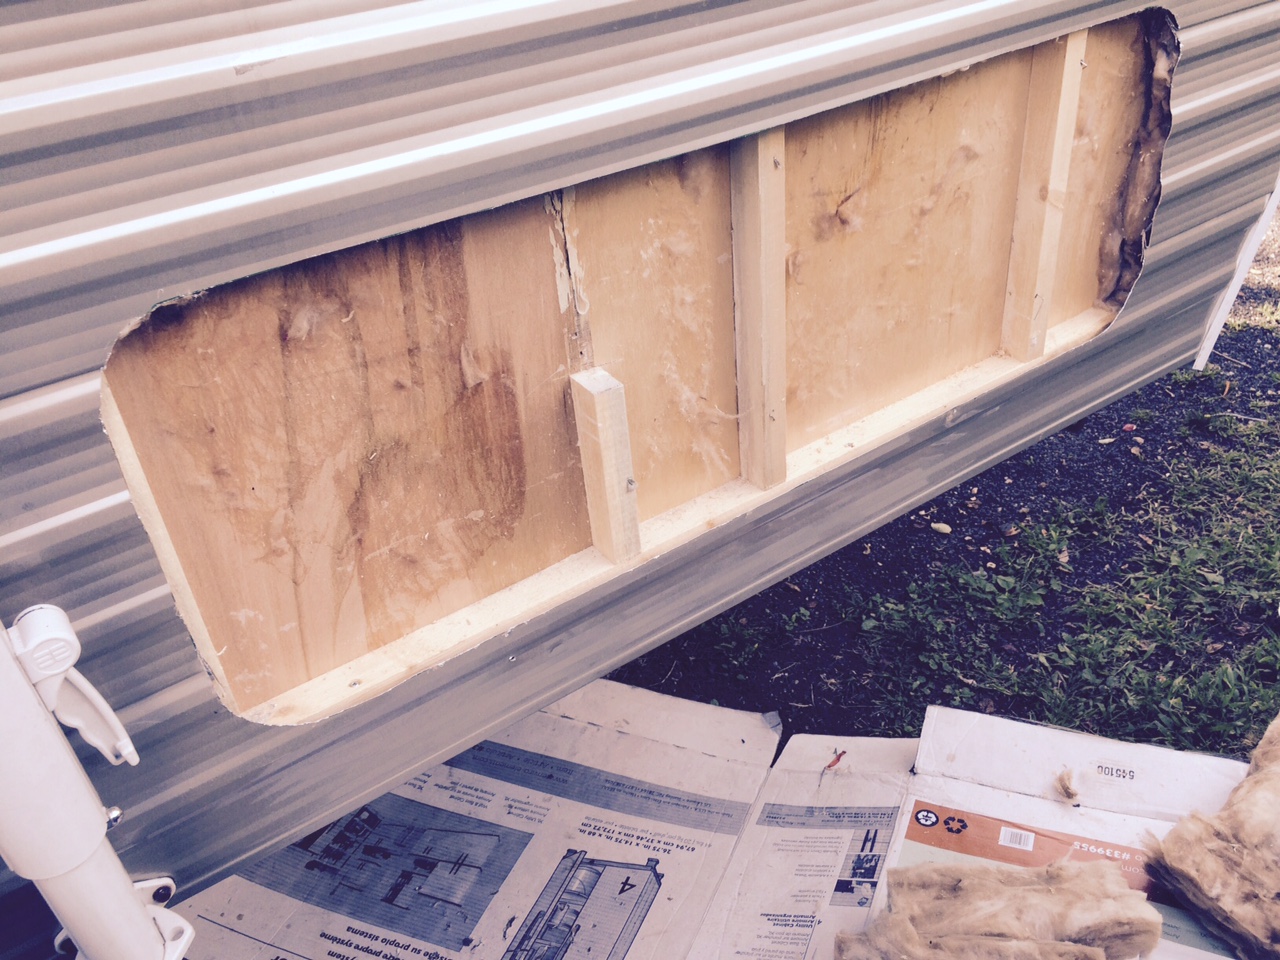
And they ended up here. Currently this panel resides inside the trailer. I ordered another cargo door which when it arrives I’ll cut a hole into the side of the trailer to access this area from the outside. But it was much easier to do the wiring from inside with the Air Conditioning on and not have to do this through a small cargo door.
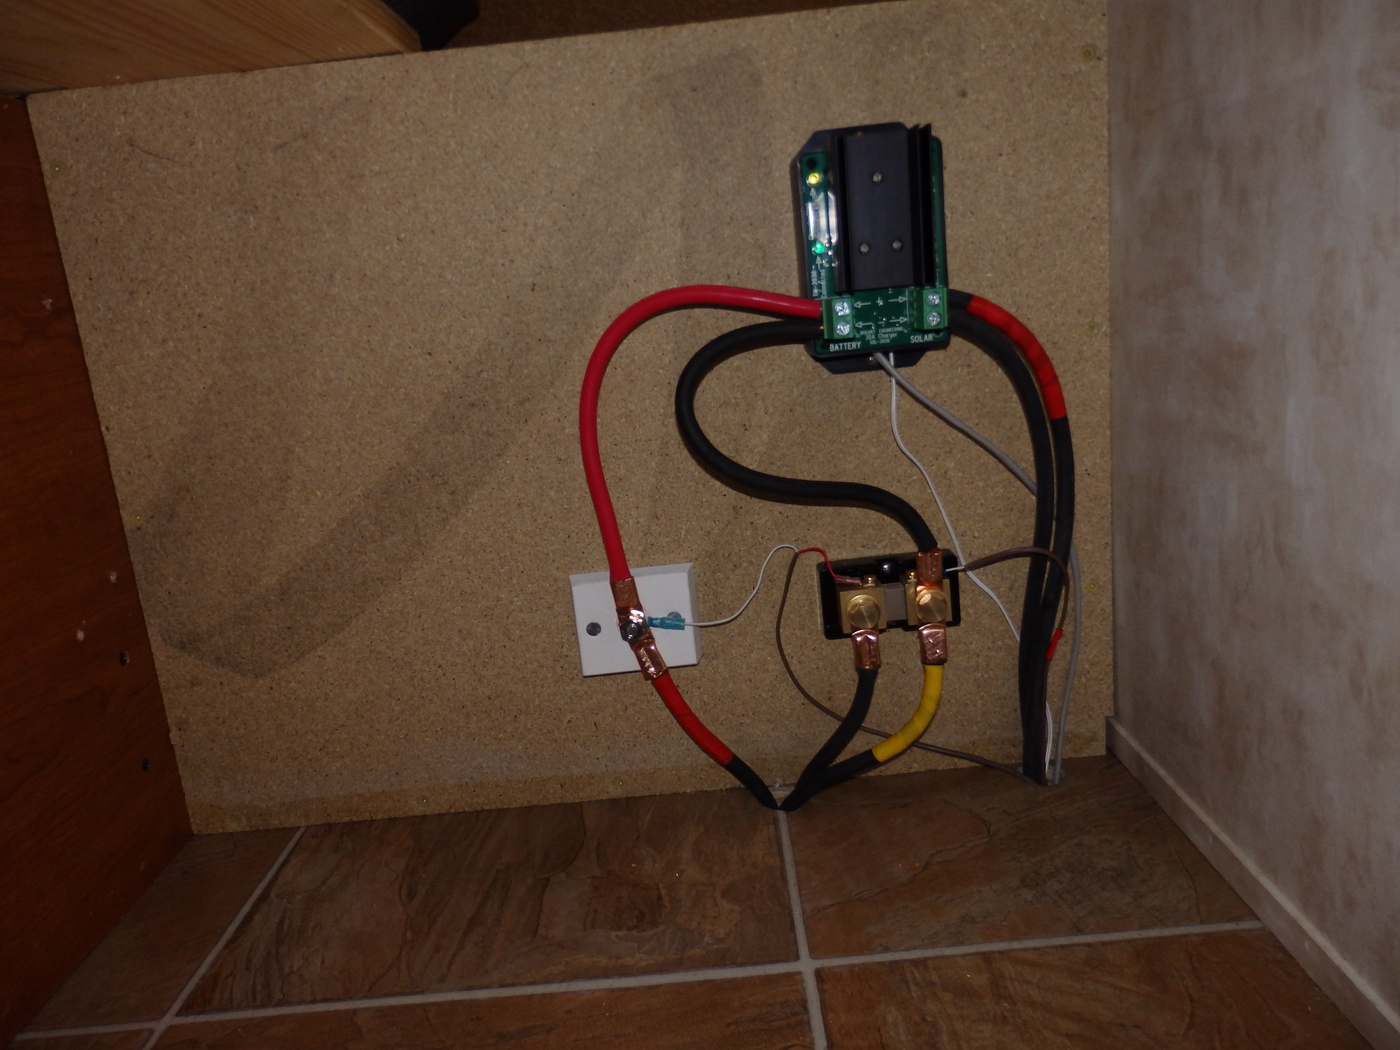
Two wires to the right of the solar controller are from the panels
The red and black wires on the left of the solar controller feed the battery and the “house” system.
Every “ground” wire needs to be connected to the shunt for the Trimetrics to monitor properly. The black wire on the shunt will go to the batteries negative side. The Yellow wire will connect to the house ground wire which runs back to the trailers main AC/DC electrical panel.
The thin 18g wires connected to the shunt are for the Trimertic monitor system and run all the way back to the “monitor station”.
On this trailer, batteries are outside on the tongue.
The white terminal block is a piece of Delrin plastic with a stainless steel bolt where all 12V feeds will terminate. The wire with RED tape will connect to the battery +
So that’s what I have done so far. I’ll be hooking up the batteries today and giving it a test run….Stay tuned!
UPDATE 9-1-15
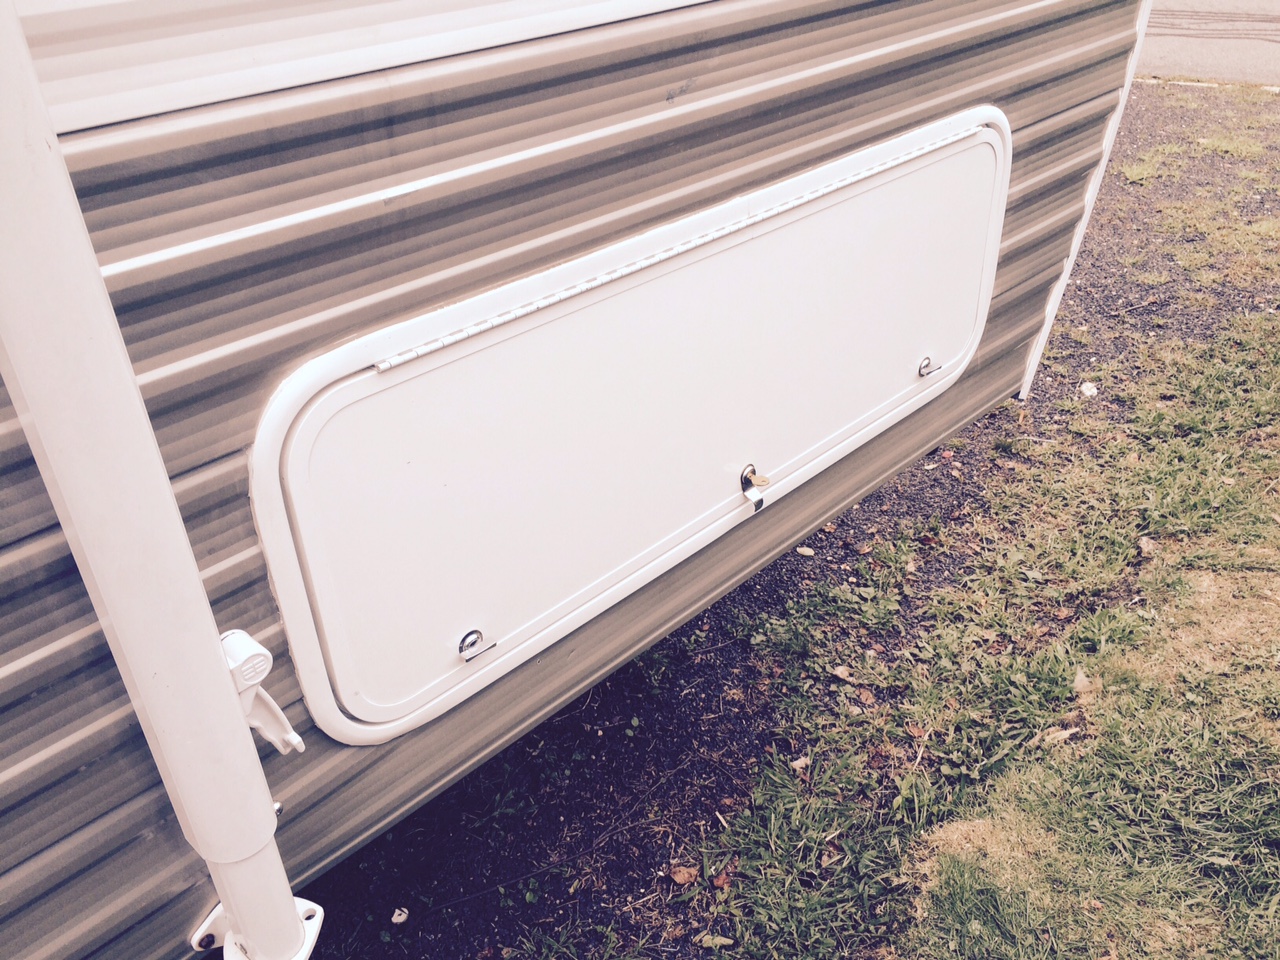
I received the new cargo door and installed it
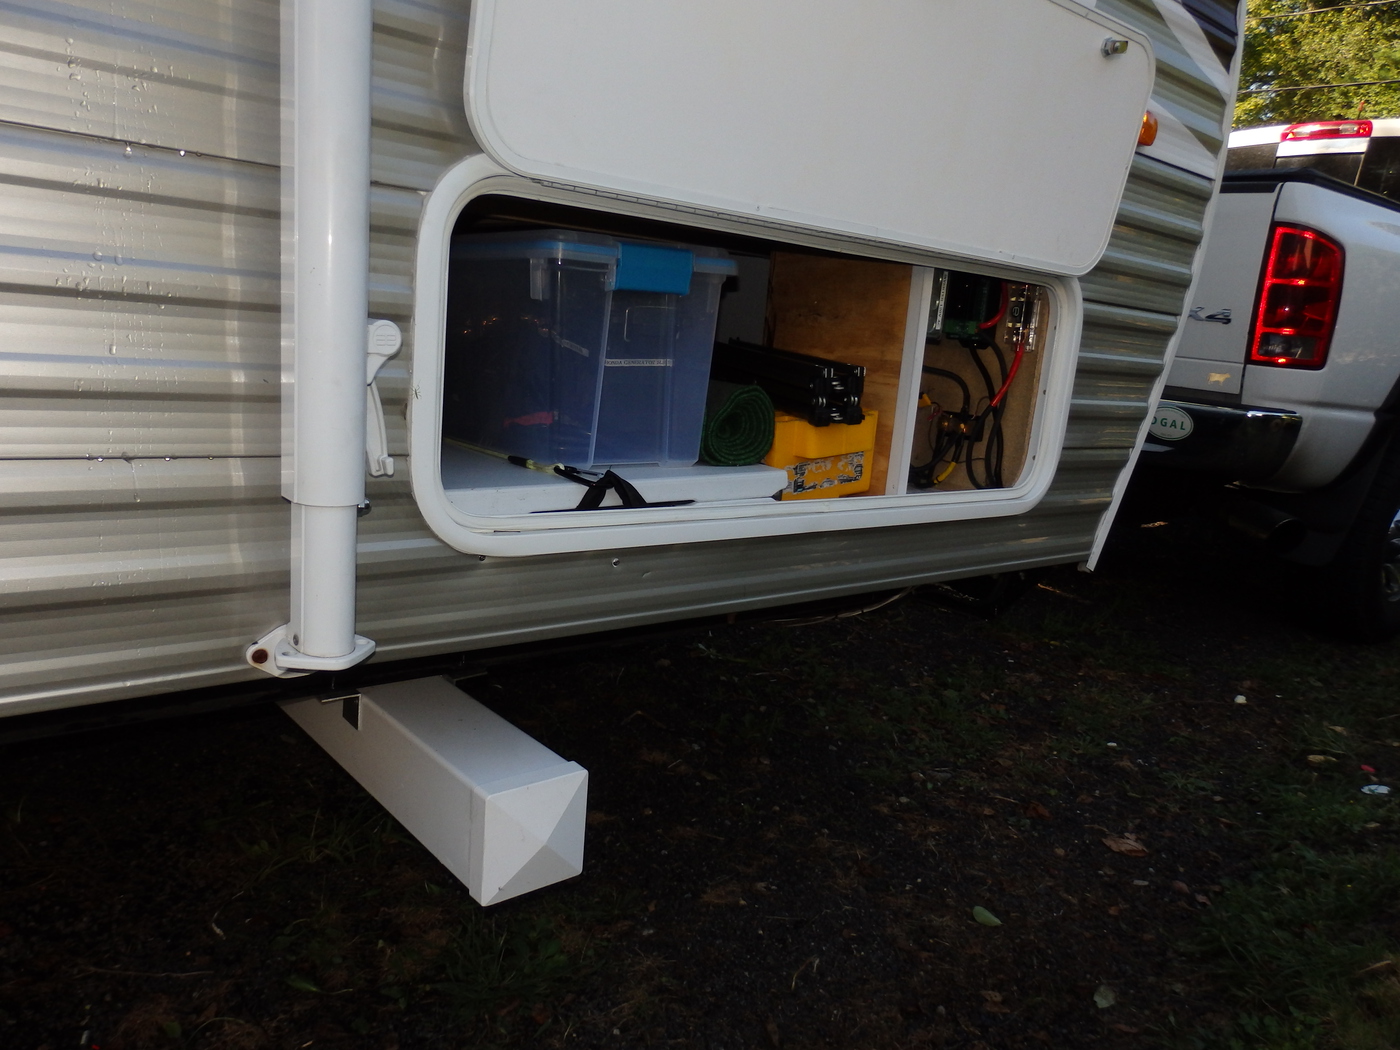
Now I have much easier access to the solar components and the inverter
UPDATE 9-7-15
Completed the solar install and tested….
First I had to build a battery box for the two group 31 AMG batteries. For now I built it out of birch plywood and sprayed it with two coats of truck bed liner. At some point I’ll get the TIG welder out and make one out of diamond plate aluminum. But time and money dictated this direction. (24″ X 48″ sheet of polished aluminum diamond plate is $77!…And I’ll need two!)
Simple “box” construction. Exterior glue and nails. Corners all rounded over with router.
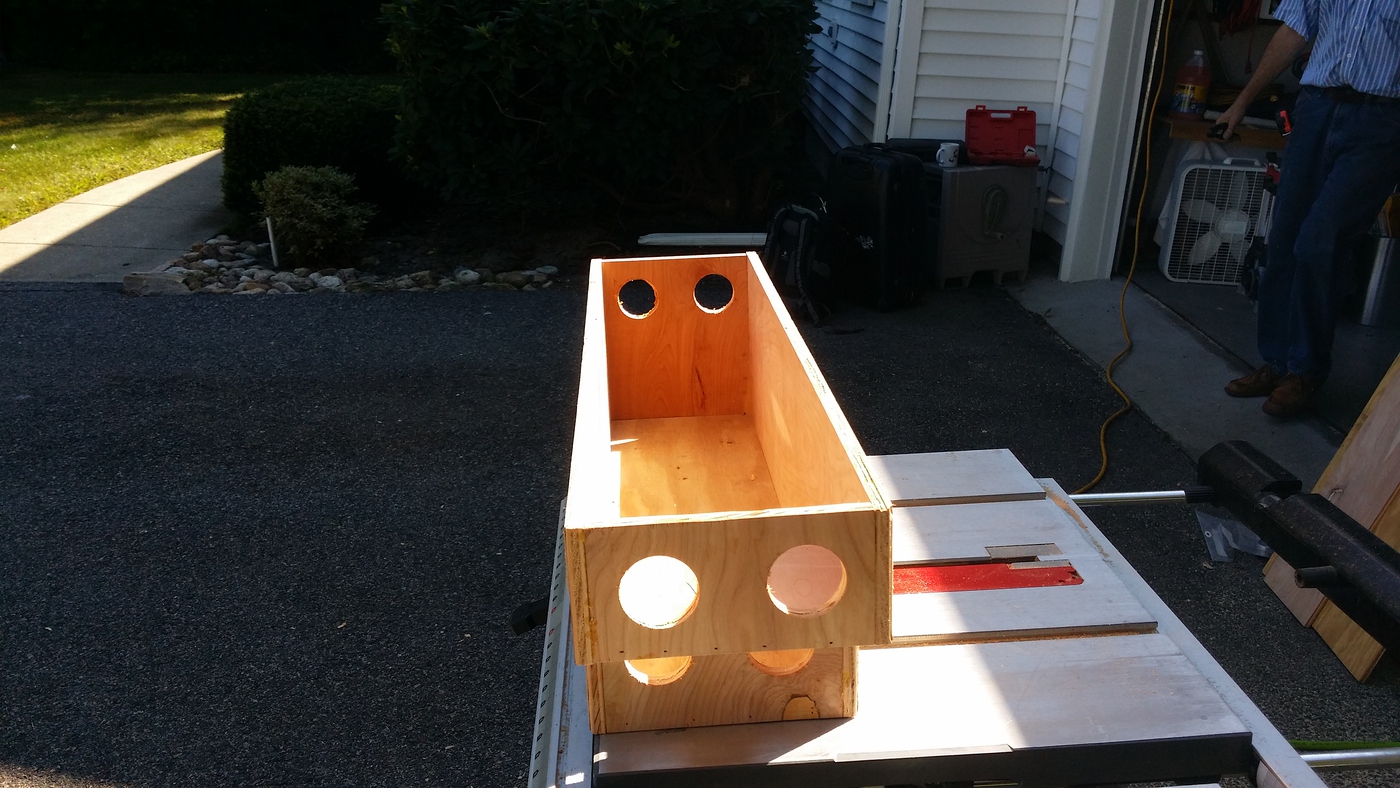
The width of two Group 31 batteries used up all the space between the hitch rails so I needed to fabricate a “side car” for the disconnect switch and the 50A circuit braker (not shown in these photos…Still waiting for delivery from Amazon)
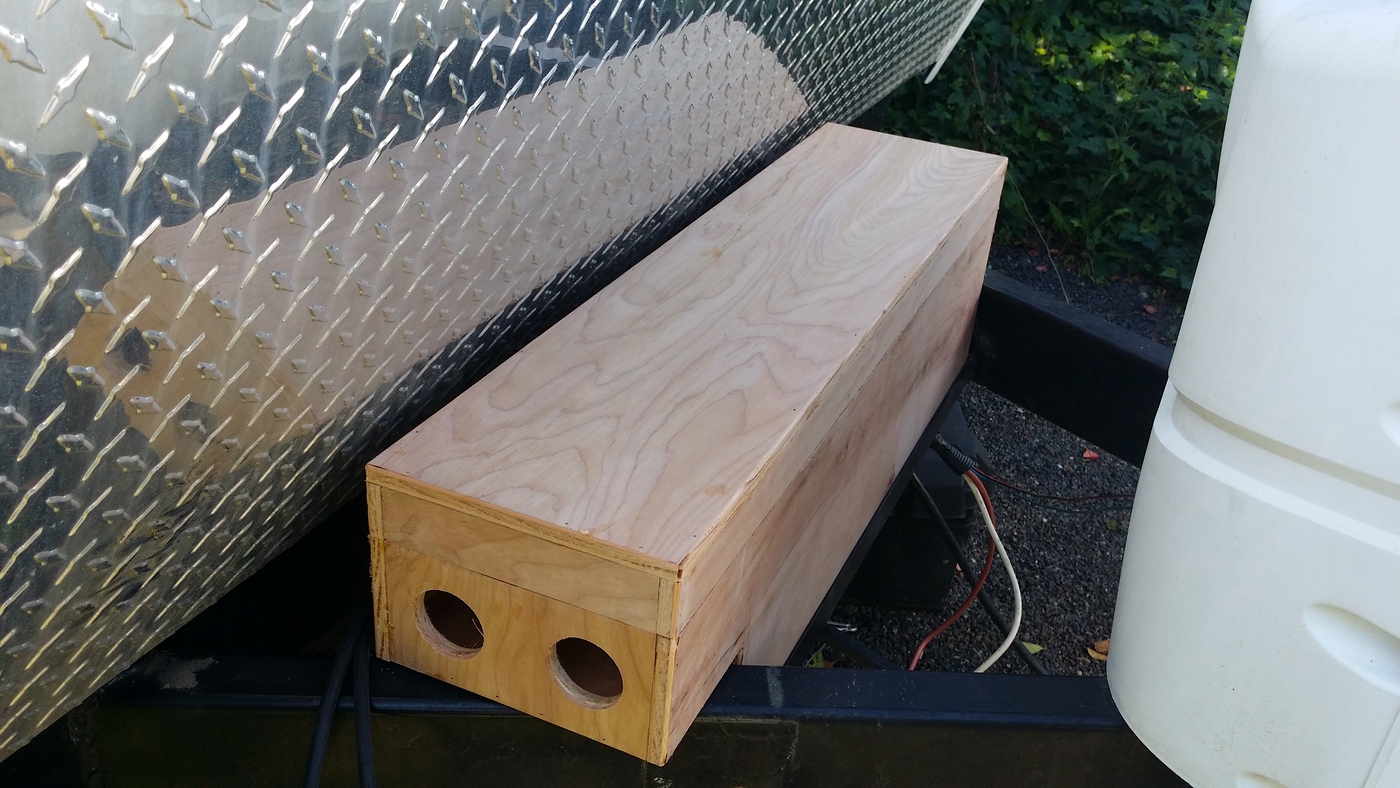
The top is simply removable to facilitate easy battery access.
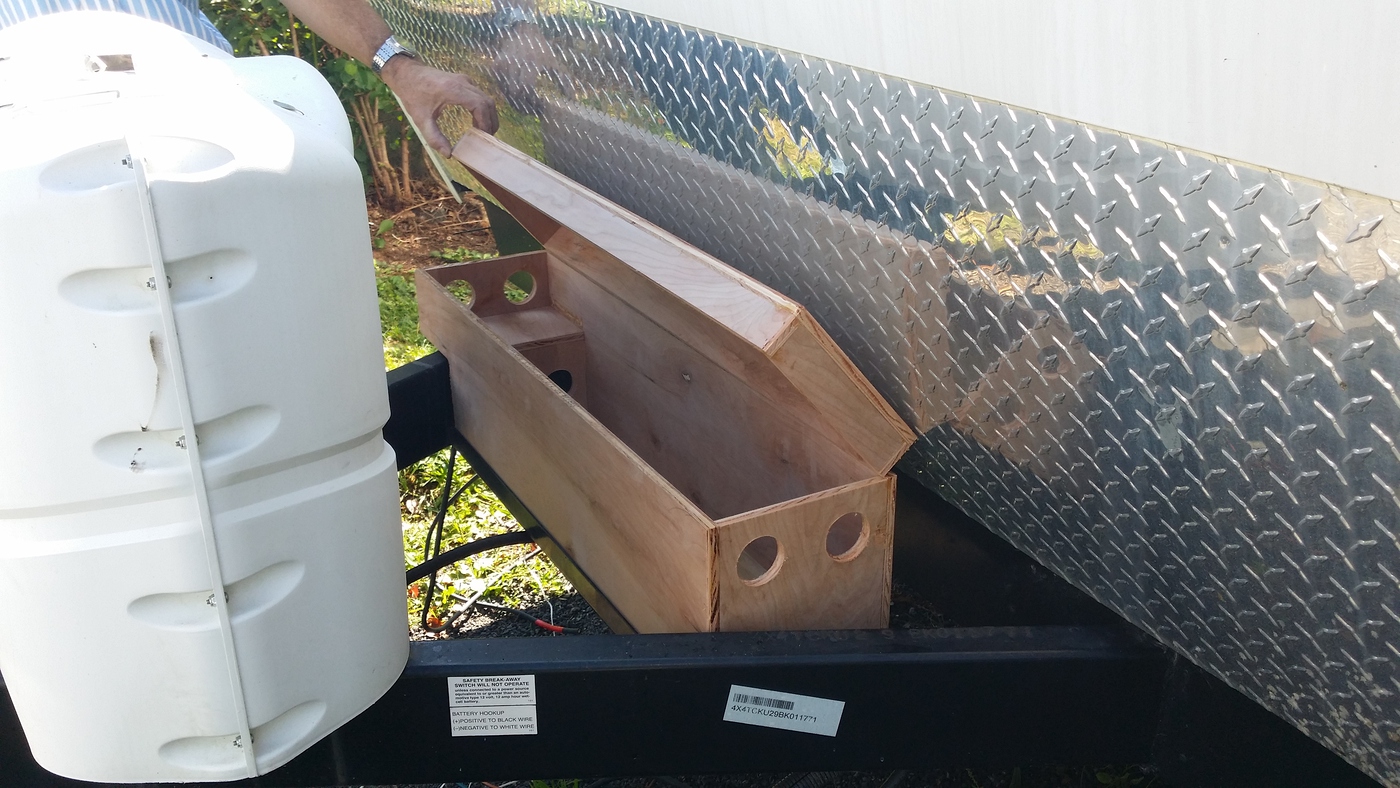
Holes are for vents…

Lots of cutting…crimping…heat shrinking….But it is done!
Two circuit breakers installed…50amp for the house system and 150amp for the 1000w inverter

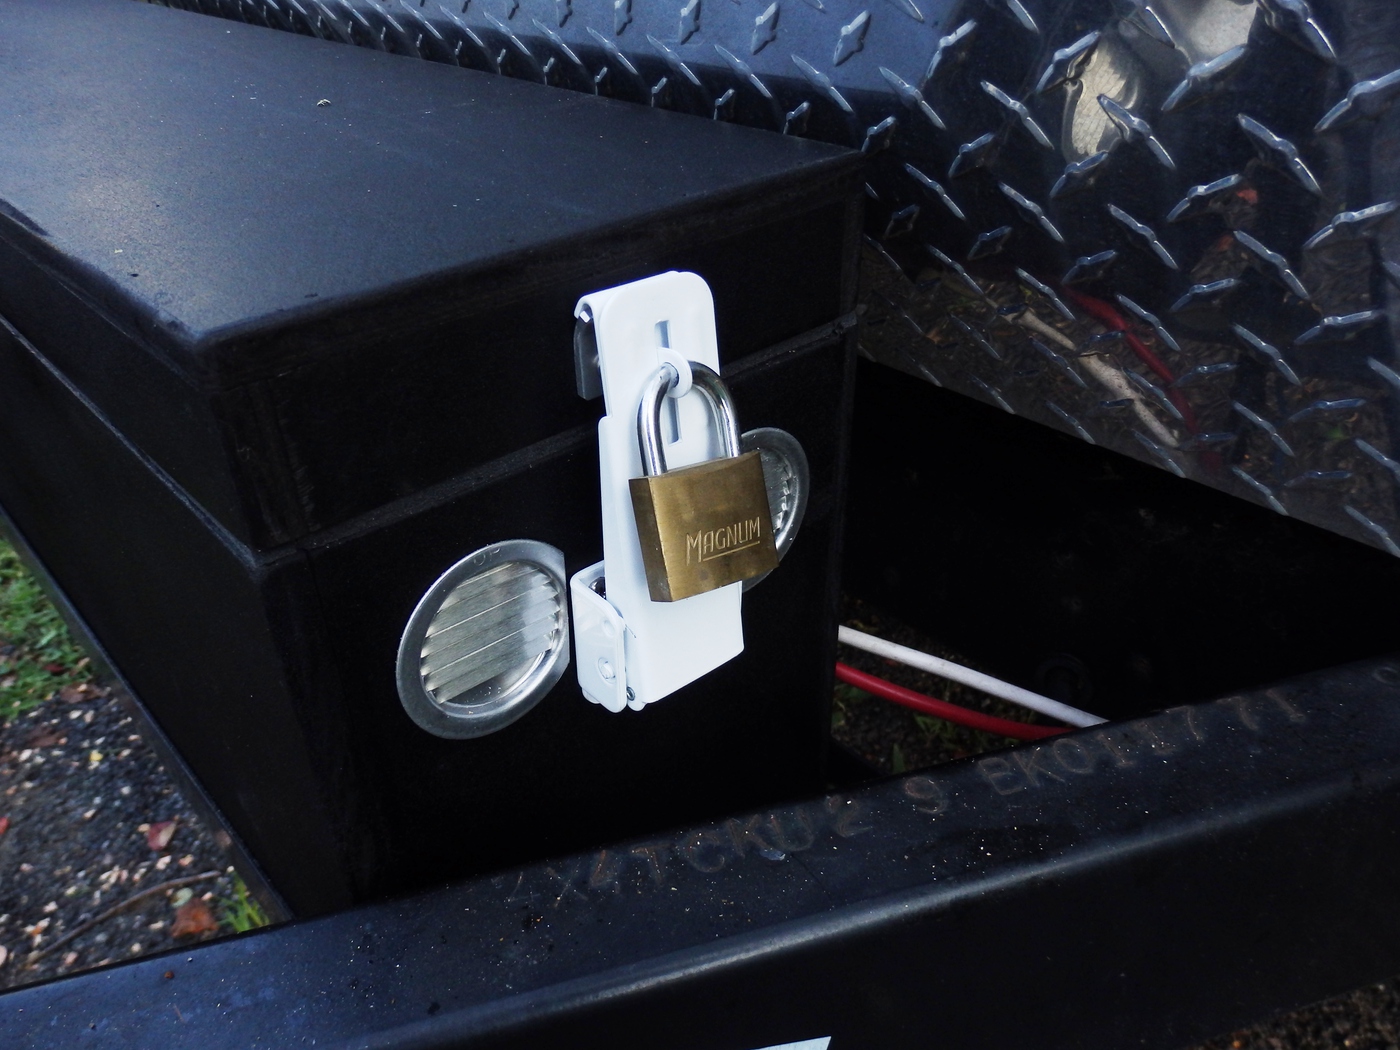
I added “locators to the lid to make it easy to replace…and rubber gasket between lid and box.

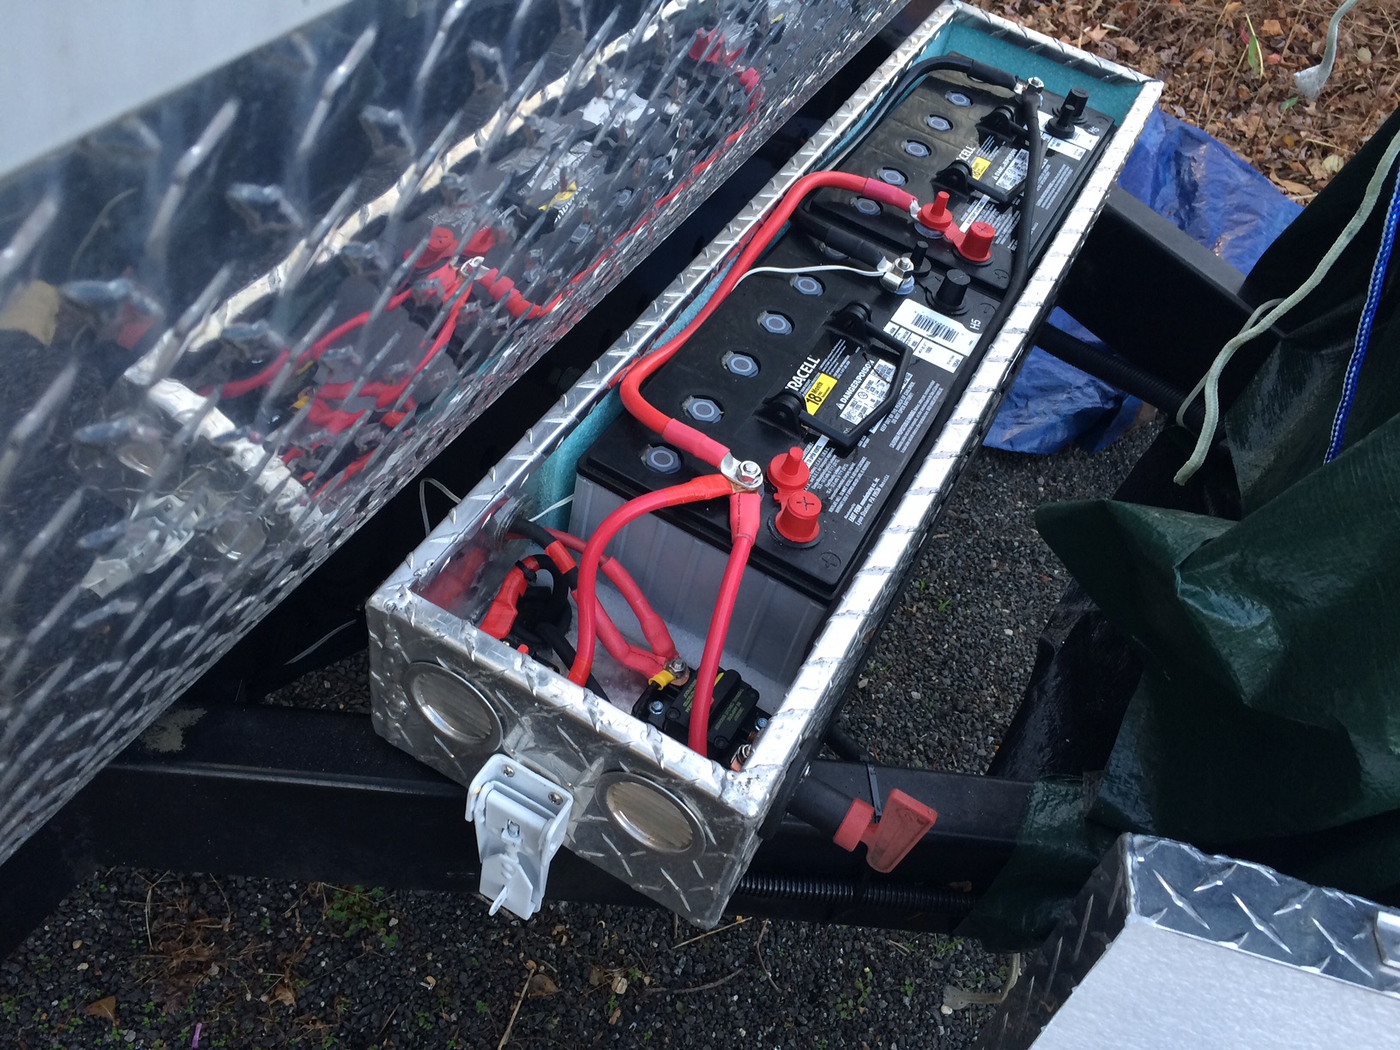
Battery disconnect removed the entire battery bank from the system in an emergency or for any needed DC maintenance….
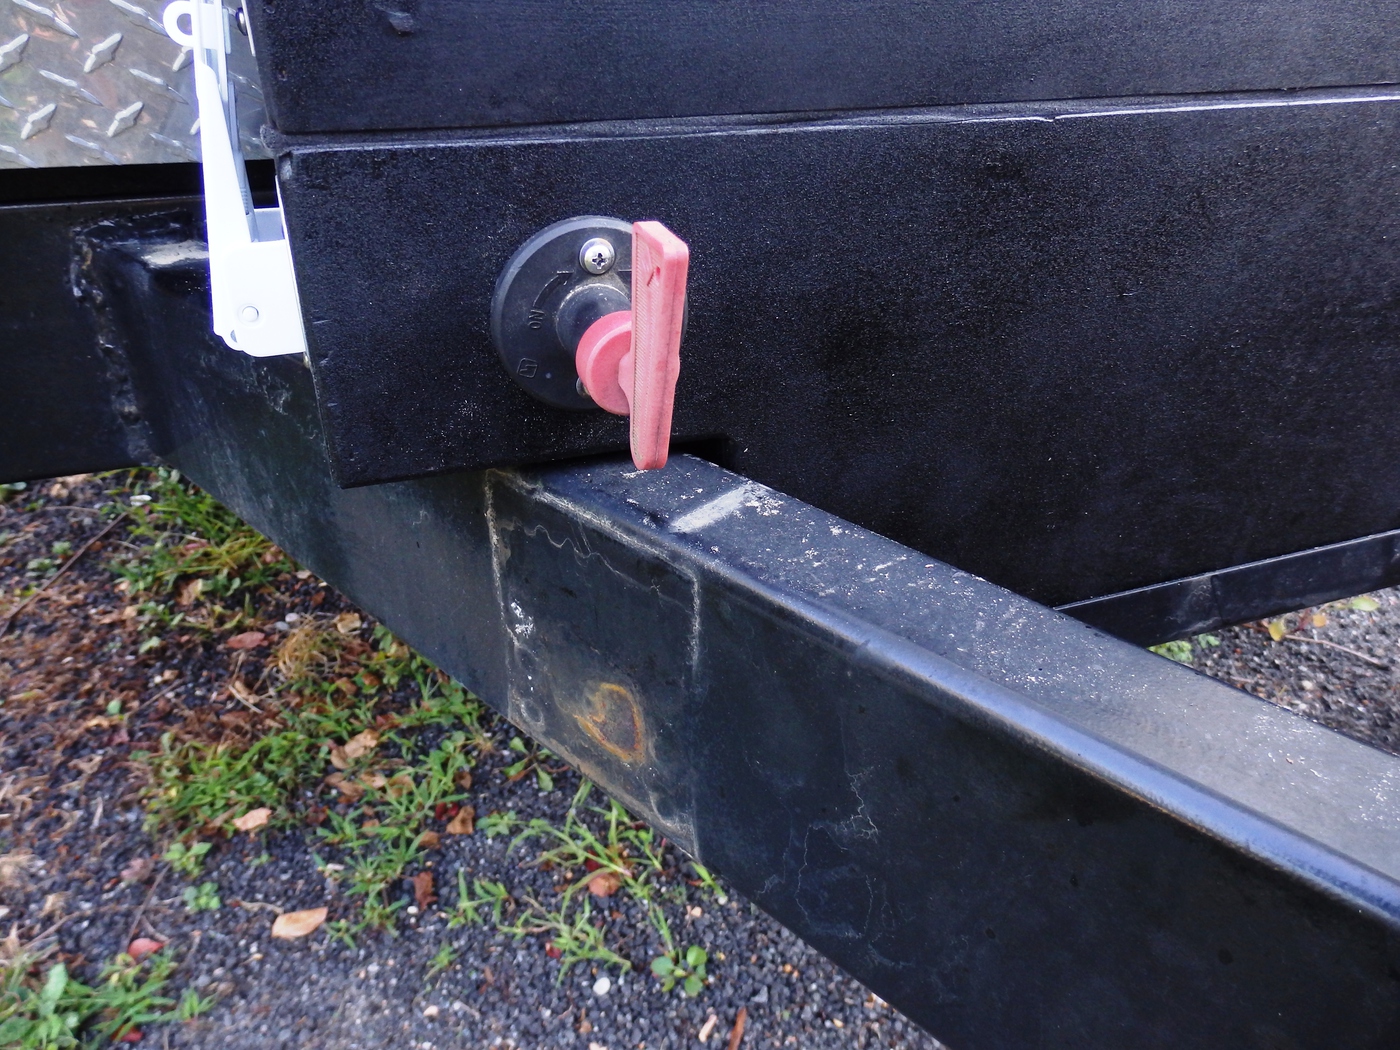
A couple of locks and we are good to go!
I finished the install at 3:30pm…..threw the battery disconnect switch and even late in the day, and under a few trees, the Trimetric was showing the batteries receiving a small charge! Can’t wait to try it out next weekend!
By the way. I bought 80′ of 4g welding wire and when it was all done. this is how much wire I had remaining….

In the next day or two I’m going to itemize the total cost for this solar installation. Folks have been asking for this so I’ll get it posted here ASAP.
Added glass to the door that covers the monitor panels and the light switches:
UPDATE 9-12-15
I added a couple of heavy duty fuse holders to the 12V DC electrical panels. Mostly as a quick way to disconnect the panels and the positive lead to the battery from the controller .
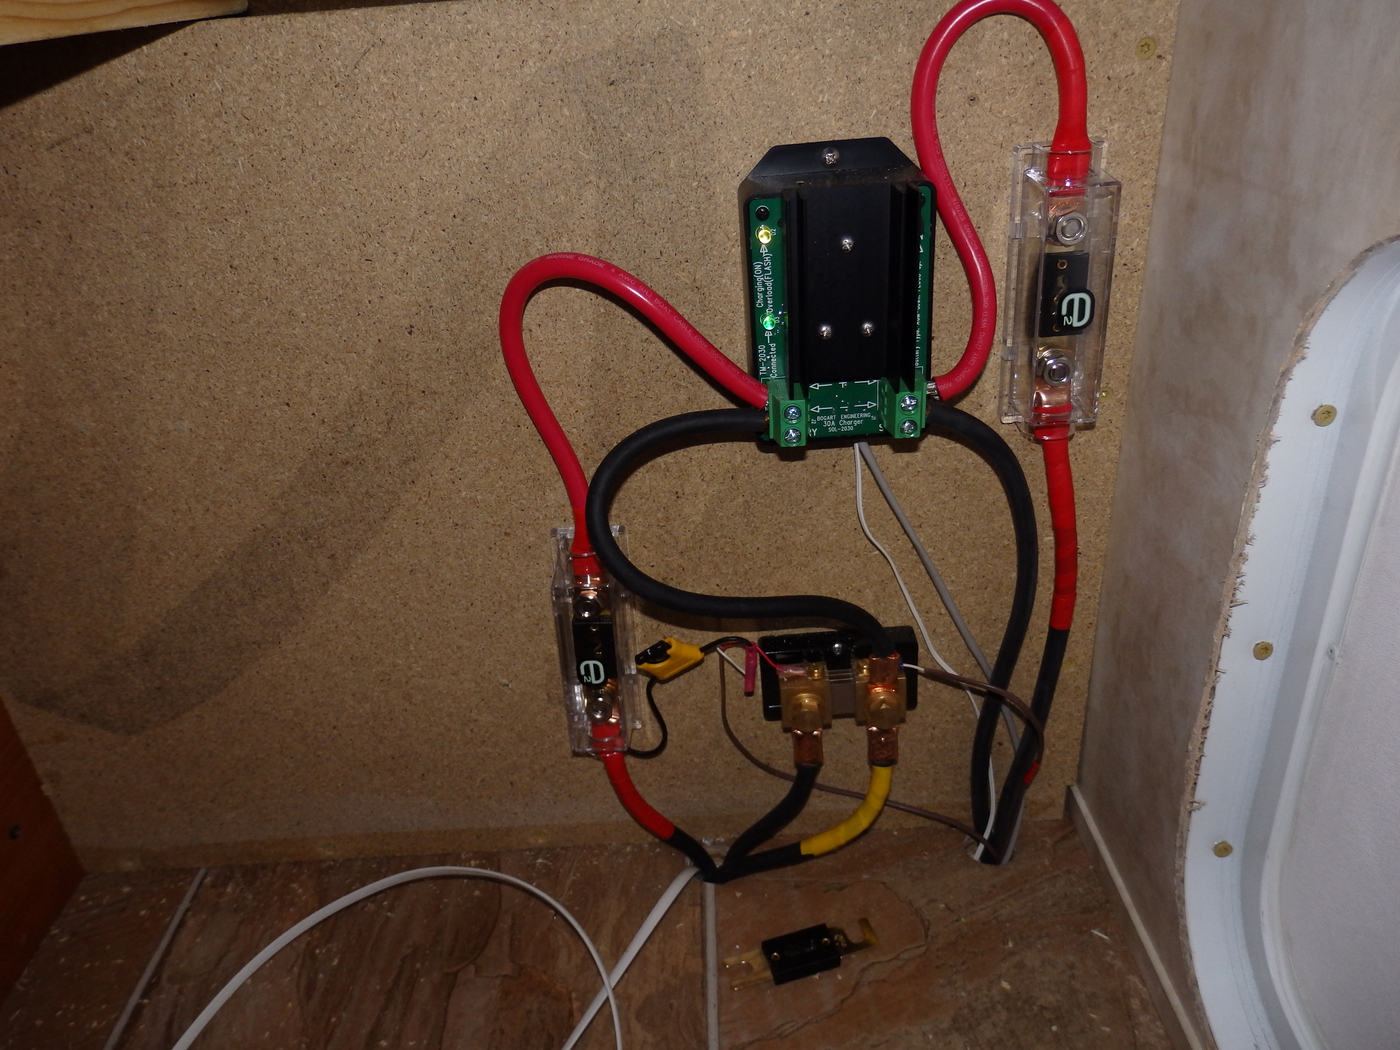
This small word doc shows where all the wires go
Plus:
Small white wire from controller is attached to battery for temperature sensing
Small grey wire is a phone cable going back to the Trimetric remote monitor panel
Brown wires coming off the shunt are also going back to the Trimetric for power and monitoring from the shunt
UPDATE 12-12-15
December 12th and 62 degrees up here in New England…I’m loving this Global Warming!
The wooden battery box I made was temporary. It started to delaminate after only a few months. I wanted to make one out of diamond plate aluminum to match the splash guard on the front of the trailer. But when I went to my metal supplier I found out that the aluminum I’d need was nearly $200!!
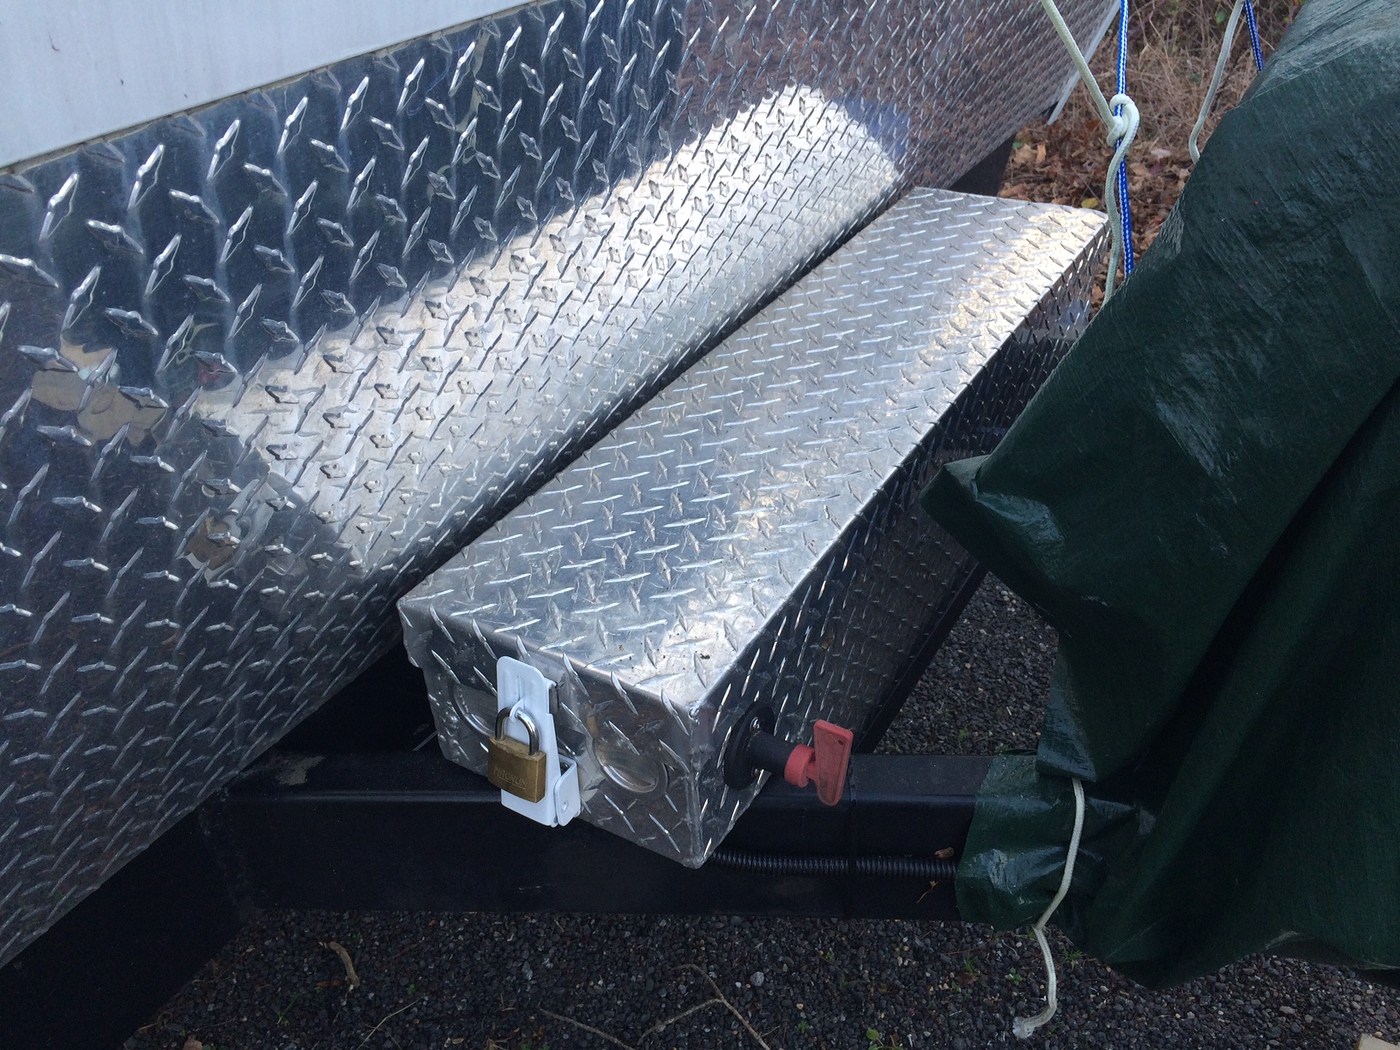
A neighbor of mine stopped by for me to do some welding on his utility trailer. He mounted a diamond plate aluminum truck box in the tongue of the trailer. He says he bought it at a garage sale for $50. I told him if he ever sees another one like it for around that amount to buy it and I’d pay him back. A few days later he shows up at my house with a near perfect truck cross box he found at another garage sale. He wouldn’t let me pay him. He said it was payment for all the welding I’ve done for him over the years. Great neighbor.
This is what I started out with. It was a shame to cut it all up since it was in such great condition.
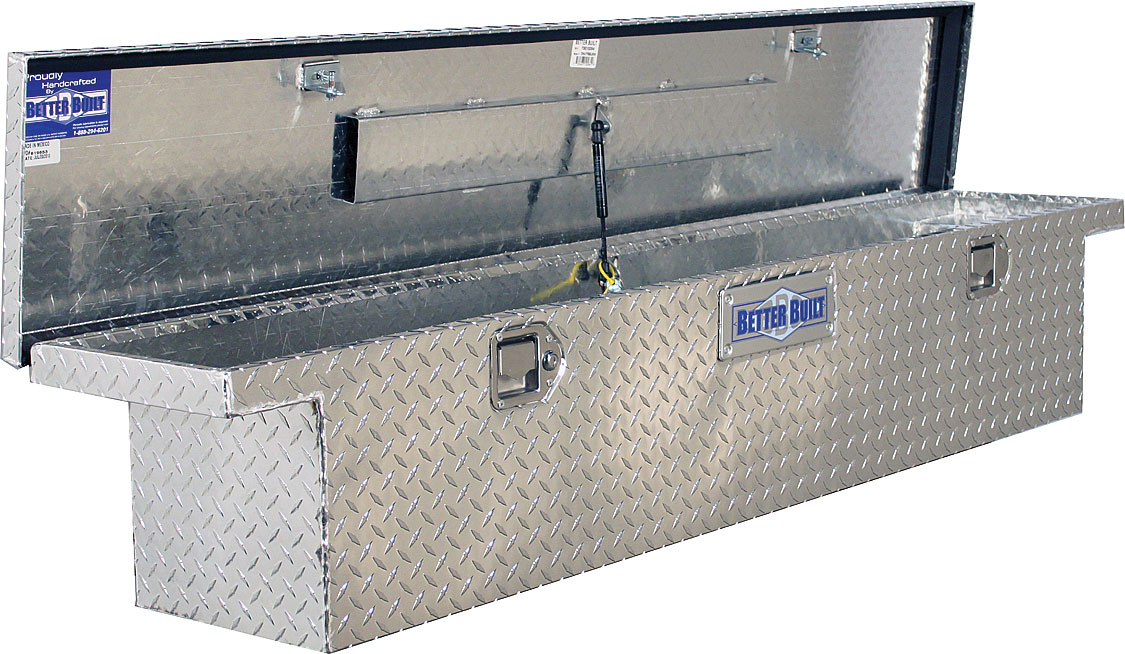
(Representative picture)
So sabersaw in hand, I hacked it up and TIG welded it into this:
A few hours of work and I think it came out pretty good!
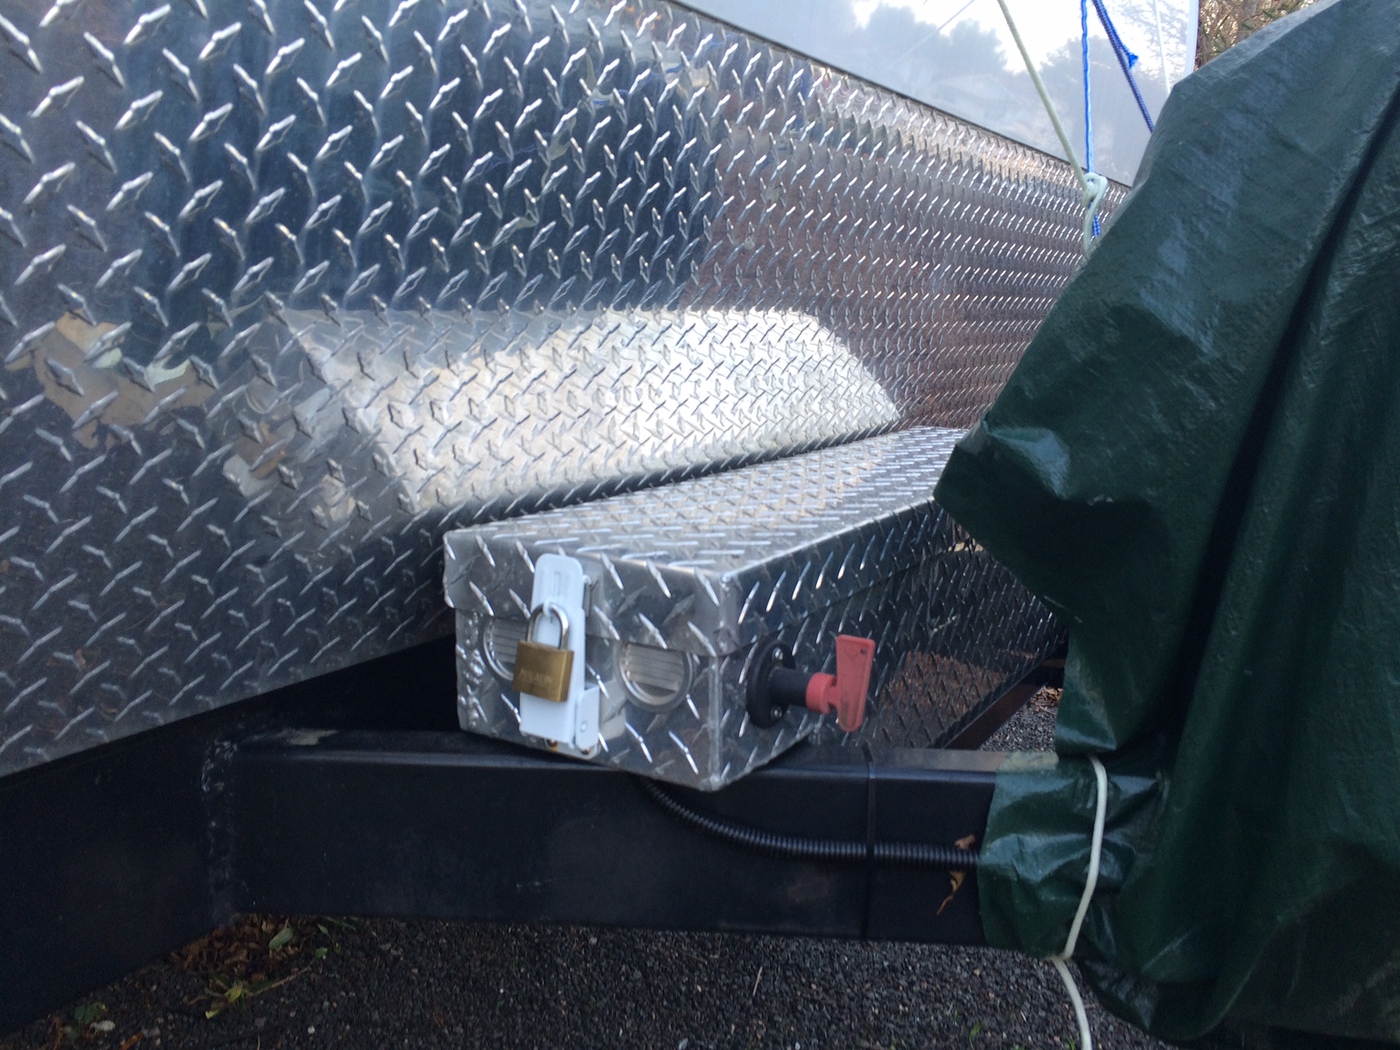
Moved all the wiring over to the new box.
A few vents on the sides and insulated with 1/2″ closed cell foam.
Â
DONE!
Â
PRICING
These prices are as of 8-24-15
All purchased from :
altE Store
330 Codman Hill Rd
Boxboro, MA 01719
877-878-4060
1 BOGTM-2030-A-F TM-2030-A-F             Trimetric Meter           1          $150.50 EA          $150.50
2 BOGSC-2030 SC-2030 PWM                 Charge Controller          1          $119.00 EA          $119.00
3 BOGTS2 Temp Sensor (TS-2)                 for SC-2030 Charger       1           $12.00 EA          $12.00
4 GENSHNT500/50 500A,                     50mV Shunt               1           $24.24 EA          $24.24
5 ALT140-12P altE ALT140-12P                 140W 12V Module         2          $230.00 EA        $460.00
6 XANPROWATSW1000 PROwatt SW1000 12V,  1000W Inverter           1          $250.25 EA         $250.25
7 XANPROWATSWREM PROwatt               SW Remote with 25′ cable  1           $19.20 EA          $19.20
TOTAL Â Â Â Â Â Â Â Â Â Â Â Â Â Â Â Â Â Â Â Â Â Â Â Â Â Â Â Â Â Â Â Â Â Â Â Â Â Â Â Â Â Â Â Â Â Â Â Â Â Â Â Â Â Â Â Â Â Â Â Â Â Â Â Â Â Â Â Â Â Â Â Â Â Â Â Â Â Â Â Â Â Â Â Â Â Â Â Â Â Â Â Â Â $1035.19
8 80′ / 4g Welding Cable                        (estimate $2 per foot)                                   $160.00
9 Misc Stainless fasteners, aluminum angle, other hardware                                                 $50.00
GRAND TOTAL Â Â Â Â Â Â Â Â Â Â Â Â Â Â Â Â Â Â Â Â Â Â Â Â Â Â Â Â Â Â Â Â Â Â Â Â Â Â Â Â Â Â Â Â Â Â Â Â Â Â Â Â Â Â Â Â Â Â Â Â Â Â Â Â Â Â Â Â Â Â Â Â Â Â Â Â Â Â Â Â Â Â Â Â Â Â $1245.19
Â
UPDATE 12-14-16 Â Third Solar Panel Added
So here it is December in New England. A few weeks ago my solar supplier, AltE had a price reduction and then a 10% off sale. So I took a ride up there and bought another 140w / 12V panel like the other two already installed.
And of course, we have been having extremely mild weather here in Southeastern Massachusetts for weeks. But as soon as I want to work on the trailer, the temperature plumets! So my plan was to take the panel with me to Arizona when I go down there in February, and install it there.
But today we get one last reprive before the cold artic blast hits tomorrow. Today, in the sun , it was 62 degrees! Tomorrow it is supposed to go down to 20 degrees and stay there for a week or more.
So up on the roof, tools in hand, and installed the third panel. Only took about an hour and that included making the aluminum andle oron brackets to mount the panel to the roof.
Fortunatly I had planned on a third panel so the space for it was available and nothing had to be relocated. Now 420w….Two Group 31 batteries…I think I got the balance just right!
Screwed down, sealed, connected….DONE!

Â
Â
Â
Â
Â
Â
UPDATE….2-24-17 Realworld Performance Report
I left Massachusetts on Feb 10, 2017….Right after a 12″ snow fall and before the next storm was to arrive, dumping another 6-8″. Heading to Phoenix for the “Winter Range” SASS Cowboy Action Shoot.
I made it to Knoxville, TN and stopped at a rest area for the night. It was cold and I ran the heater for about 7 hours. Turning on every 20 minutes or so. In the morning I made coffee two time with the 750w Kurig machine, turned a few lights on, watched the news on DirecTV NOW with my Ipad Mini hooked up to my 32″ TV Â and charged devices….all off my two AGM Group 31 batteries. As I left the rest stop my Bogart TriMetric said I was at 12.7V and my battery bank was at 89%.
Driving all day I made it to the border of Texas / Arkansas, Texarkana and pulled into a truck stop for the night. Checking battery levels I was back at 100% and showing 13.7v. Same scenerio as the previous night…..same useage.
Next day I drove to Abilene TX and treated my self to a KOA park. Simply because it was convenient and I needed propane and to dump my tanks. Again, batteries were back to 100% and voltage at 13.8V. I did use shore power as it was available so no battery use this night.
Next day it was a haul with amazing headwinds to Las Cruces, NM. Lots of stops during the day to conduct business using my HotSpot and WeBoost cell booster. A few hours total of this use. Being much further south, and with much better sun, the solar system was dumping 15-18Amps into the battery bank. I’ve never seen this type of performance up in New England. During the day, I was producing much more energy than I was using with computer and various electronic devices. In Las Cruces I once again parked at an RV park and used their electricity and their WiFi which was fantastic.
From here is was off to Deming NM to stay a few days with my friends at Hidden Valley RV park (BTW, an amazing RV park. Best RV park I’ve ever stayed in…Period! more on this in a future post) At Hidden Valley I used shore power and had very poor data connection with Verizon, T-Mobile or Sprint. Cell phone on Verizon worked, but being in quite a deep valley, other connections were very spotty. But the RV park WiFi was simply amazing. Absolute state of the art system and all for $200 a day!.
From here is was off to the Ben Avery Shooting Facility, north of Phoenix. I arrived on Saturday afternoon, Feb 18 in a driving rain storm. You want to talk about MUD!!! Rained all day Saturday and Sunday. Using lots of battery power for heat, lights, TV, computer for two days, I finally had to break out the Honda generator and run it for a few hours. On Monday the sun shined brightly and the batteries were 100% charged by noon! And this is from a 70% level! Very impressed with this SW sun!
Today is February 24, My wife flew in on the 21st to join me, and she uses lots of electricity. We are in a dry camping space with no hookups. I have not run the generator since the 19th. Totally running on Solar with furnace every night, coffee machine running off my inverter at leasdt 6-8 times a day, electric tooth brushes being charged, lights, DirecTV NOW, watching DVD movies, WEBoost, fan over the stove, even an electric stem iron off the inverter…..You name it, we ran it…….Five days so far without hook up and no generator use, and the solar system has kept up in perfect form.
To say I’m pleased with how this solar system has worked out would be a huge understatement. Easily the best thing I’ve done for my camping experience!
System
(3) 140W / 12V Â AltE Panels flat mounted, no tilt
Bogart 2030 Charge Controller
Bogart TriMetric
Xantrex Inverter
(2) Sam’s Club Duracell Group 31 AGM 12V batteries
Â
QUICK LONG TERM UPDATE…NEARLY 5 YEARS OF USE….
I’ve been working out of this travel trailer for a couple years. Although recently retired in 2019.
I have over 50,000 miles on the trailer!
As seen in the above article, Three, 140w/12v solar panels for a total of 420w solar into a Bogart CC and Bogart monitor to two group31 110AH AGM batteries wired 12V. 220Ah total with 110Ah usable (50%)
I run a laptop running on a 12V cigarette lighter car converter and a 12V Tv/Monitor for 6-8 hours a day.
I run a small printer off the inverter and make a dozen or so copies/shipping labels a day
Watch TV on a 12V Tv for 5-6 hours a night.
Run a RoKu device and a HotSpot for streaming video. Both on USB chargers constantly
WeBoost cellular booster running just about always
Make a couple cups of coffee on a 750W Keurig throughout the day
Toast in the AM with a 750W toaster
AC electrical devices running off a 1000w PSE inverter as needed
LED lights throughout the camper
Refrigerator runs on propane
For heat I use a propane catalytic heater as the furnace uses way too much electricity running the blower
I run EVERYTHING off batteries. Only use the generator (Honda 2000) for Air Conditioning and wifes blow dryer when she travels with me.
In five years, I have only plugged in at a RV park or campground 10-12 times. Boondocking 99% of the time
This system was installed 5 years ago and is still going great on the original batteries.
With the use listed above, the batteries have never been below 60%.
Hope this is helpful to you.
Â
Thanks for looking!
Don’t forget to checkout the other post on the various “Farkles” I’ve done and will be doing to the Toy Hauler
Â
Pingback: Cellular and WiFi Booster Install | RVB Precision
Pingback: Adding More Solar to Existing System (Portable Panels) | RVB Precision
Pingback: 50,000 miles In a Travel Trailer....My Opinions | RVB Precision
Pingback: Roofnest Falcon Modifications | RVB Precision
Pingback: RV Lead Acid/AGM to LITHIUM | RVB Precision