A few years ago I added three 140 watt solar panels to the roof of my Forest River 19RR Toy Hauler
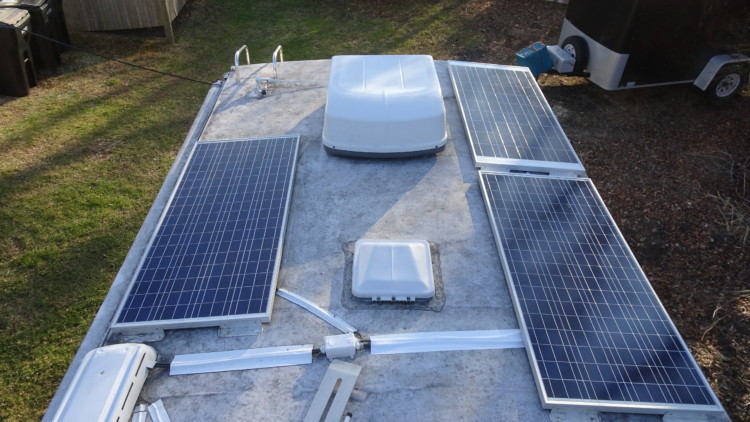
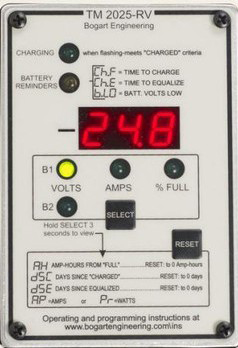
These panels are controlled by a Bogart Engineering Charge Controller and monitored via a Bogart Engineering TriMetric Solar Monitor.

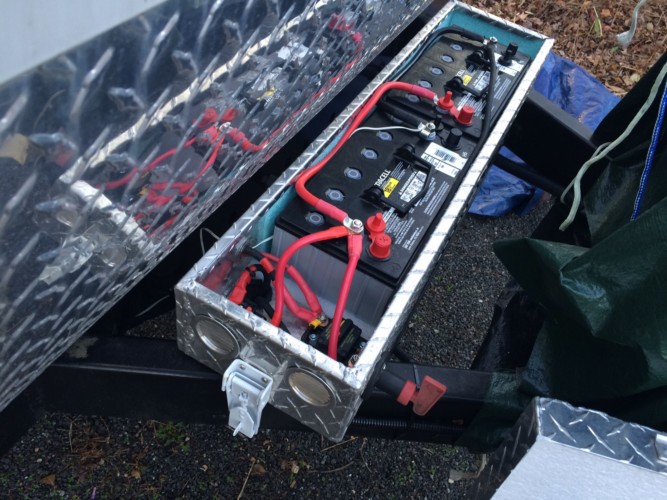
For storage I’m using two Group 31, 110 amp, AGM batteries that sit in a custom aluminum box on the hitch
This system has worked out amazingly well. When boondocking I never have to use the generator except for Air Conditioning and my wifes Hair Dryer.
You can read all about this system and the installation of it here:
But there are times when I’m forced to park under trees or in some other shaded area and the flat mounted panels on the roof simply do not perform like they do in direct sunlight.
I decided to add a boost of solar with a portable panel system.

After a ton of research I chose the Eco Worthy folding , 120 watt system. At the time of this writing 10/19 it was selling for under $150 on Ebay

As with most things I buy, modifications were needed!
First, the solar controller is hard mounted with some type of adhesive to the back of the glass panels. For better solar performance the controller should be mounted as close to the batteries as possible.
I haven’t calculated it, but having the solar controller some distance from the batteries and using the very thin wire that was included with the ECO Worthy system would have significant losses.
Not wanting to try and remove the controller from the panel, and risk breaking the glass, I ordered a generic solar controller that gets great reviews and offers more information than the included controller.
At the time of this writing this unit was under $15 on Ebay

It was mounted in my “Electrical Closet” at the front of the camper that is mear inches from the battery bank.
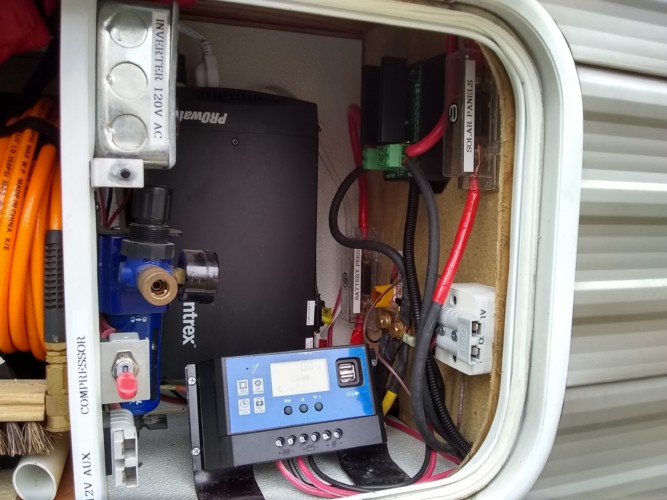
Wired through the TriMetric shunt allows me to monitor the entire solar gain from all panels.
I used #10ga wire in this area as the runs total less than 18″….the loss would be negligible.
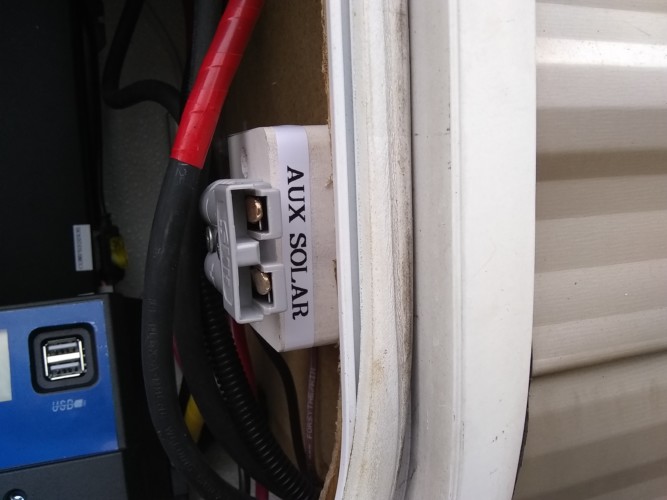
The wire from the panel to the camper is only 10′. Not long enough to get the panels away from the camper and into direct sunlight. And it is only about #14g. Too short and too thin.
This wire was replaced with 25′ of #8ga pure copper welding wire. This thicker wire will reduce loss from the panels substantially.
Connections at the panel and at the camper are made via high current connectors
It is interesting to note, that here in the Boston area with the sun low in October, and it being 3PM when I tested…..The 420 watt , flat mounted, roof top panels were only generating 2 amps…..the 120 watt portable panels aimed directly at the low sun were generating 1 amp!
I can’t wait to try out this new addition to my solar array this winter when I’m boondocking in New Mexico and Arizona…….
HAD SOME TIME ON MY HANDS THIS AFTERNOON….
So I built a carry case for the portable solar panels
Simple construction… 3/4″ pine for the ends and 3/16″ plywood for the sides.
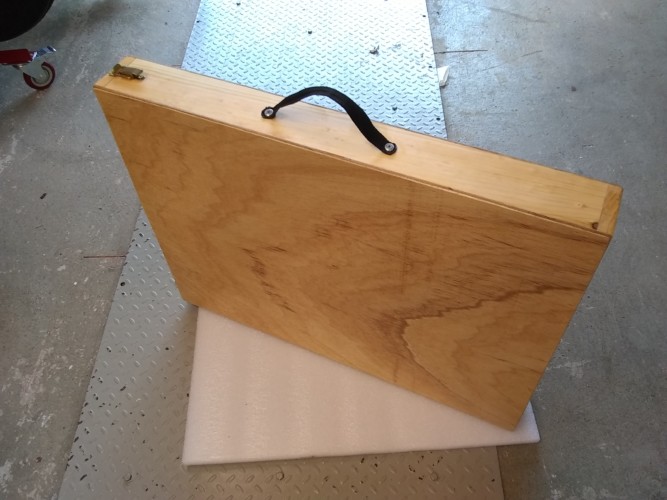
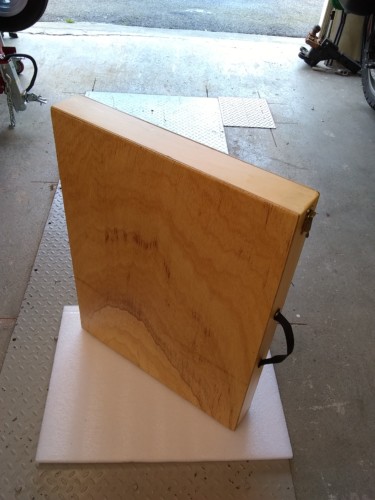
It opens on the short end with a simple hinge and a brass clasp
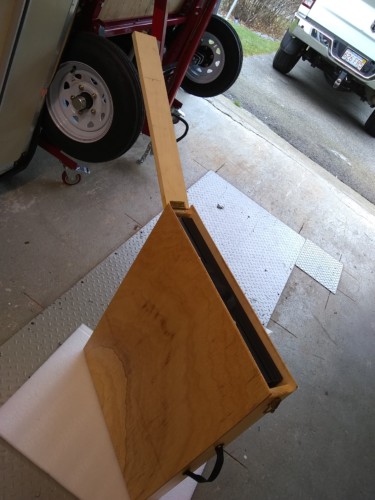
To remove the panel I had to add a handle made out of nylon webbing
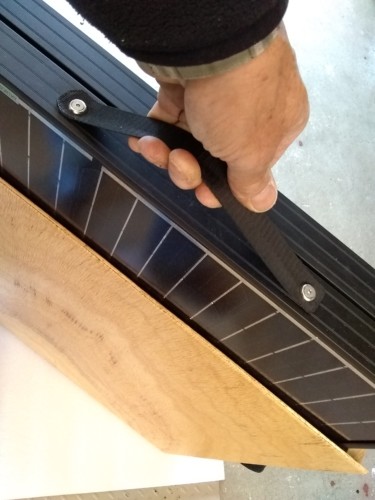
Seems strange to me that all these portable panels close with the actual panel exposed. Wouldn’t it be better and safer for the panels if they were on the inside when closed?
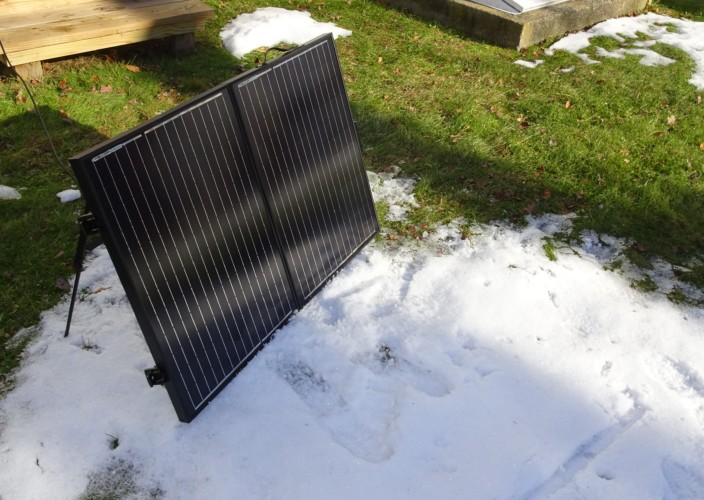
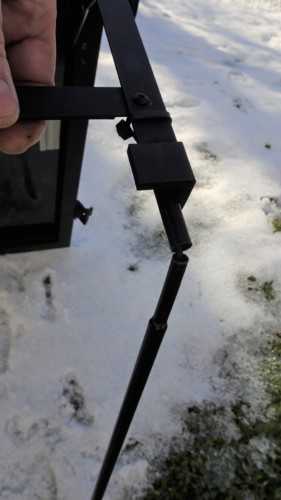
FOLDING PANEL LEG MODIFICATION
Winter in New England, the sun is very low on the horizon. With the solar panels deployed with the included legs, they lean back at too far of an angle. Experimenting with propping them up nearly vertical I increased the solar output demonstrably.
I needed to find something in my junk box to increase the length of the legs. A search turned up some broken tent poles with shock cord to hold them together.
A few wire ties and I’m in business!

Before:
AFTER: