
I decided I needed something a little larger than my Palomino Bronco truck camper. And I wanted the use of the truck while camping. It simply isn’t practical to remove a truck camper at every camp site. And if my wife or grandkids want to stay in camp, I can’t take off with the camper still in the truck.
My requirements were:
Under 20′ for ease of towing and manuvering
Must be a “Toy Hauler” so I can take my motorcycle and have room to work on hobbies while on the road
Must have a REAL shower. No standing on the toilet to take a shower!
Must have a real bed that I can sleep in without removing the motorcycle. (Amazing how few small toy haulers accomplish this feat. Pull into a rest stop to sleep a bit and you need to remove the motorcycle(s) to access the bed…)
Must carry at least 50gal fresh water
Dual propane tanks
Lots of free roof area for “Off The Grid” solar system.
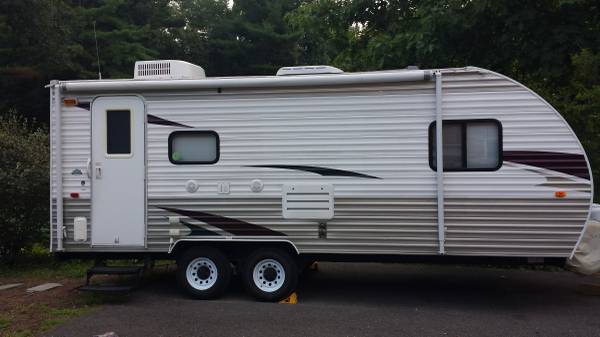
Months of research led me to only one TH (Toy Hauler) that met ALLÂ my criteria……Forest River Cherokee Grey Wolf 19RR.
Link to Forest River Specifications Page
As you can see, it has a fantastic layout for one or two individuals on an extended trip…..
I’ll be towing it with a Dodge Cummins Diesel 2500 4X4……At 4100 pounds I won’t even know it’s there!
If you’ve read any of my other articles on this web site ( www.rvbprecision.com ) you will know I can’t leave anything “unmodified”….In the motorcycle world we call modifying a motorcycle…”FARKLING”
So…LET THE FARKLING BEGIN!
FARKLE (Noun / Verb)…”I’ve added a farkle to my motorcycle”…..”I will farkle this motorcycle”…The word is generally accepted to mean a combination of “function” and “sparkle”, hence, farkle. Motorcycle enthusiasts may install accessories, called farkles (also spelled farkel), to customize their machine. farkle definition by Urban Dictionary.
Here is all the stuff I’ll be installing over the long Labor Day weekend (2015)

I’ll take you on a little tour
I plan on utilizing the indoor and outdoor loudspeakers, but I might replace the factory radio / CD player so I will use this A/B speaker selector switch (UPDATED: stayed with the existing stereo system for now. Works well enough after I rewired all the speakers that were out of phase and wired improperly at the factory)

A small, LED reading light for over the bed:

I love this all-in-one alarm clock, inside/outside temperature gauge, DC volt meter…and you can change color from red to blue. Red doesn’t mess with your night vision. It will be mounted next to the bed. Runs on 12V so the time always stays accurate.

LED Flood Lights on all four sides of the camper. I’ve already installed three sides. This one will go over the front hitch


Great when backing into a dark camp site. I plan on installing a camera back here also.

New stereo amplifier with PA capability for use at motorcycle rallies I officiate

Digital thermostat ….looks much more modern and easier to use.

This is a great reading lamp for over the couch. The head removes and it is a rechargeable LED flashlight. Got it on Amazon.
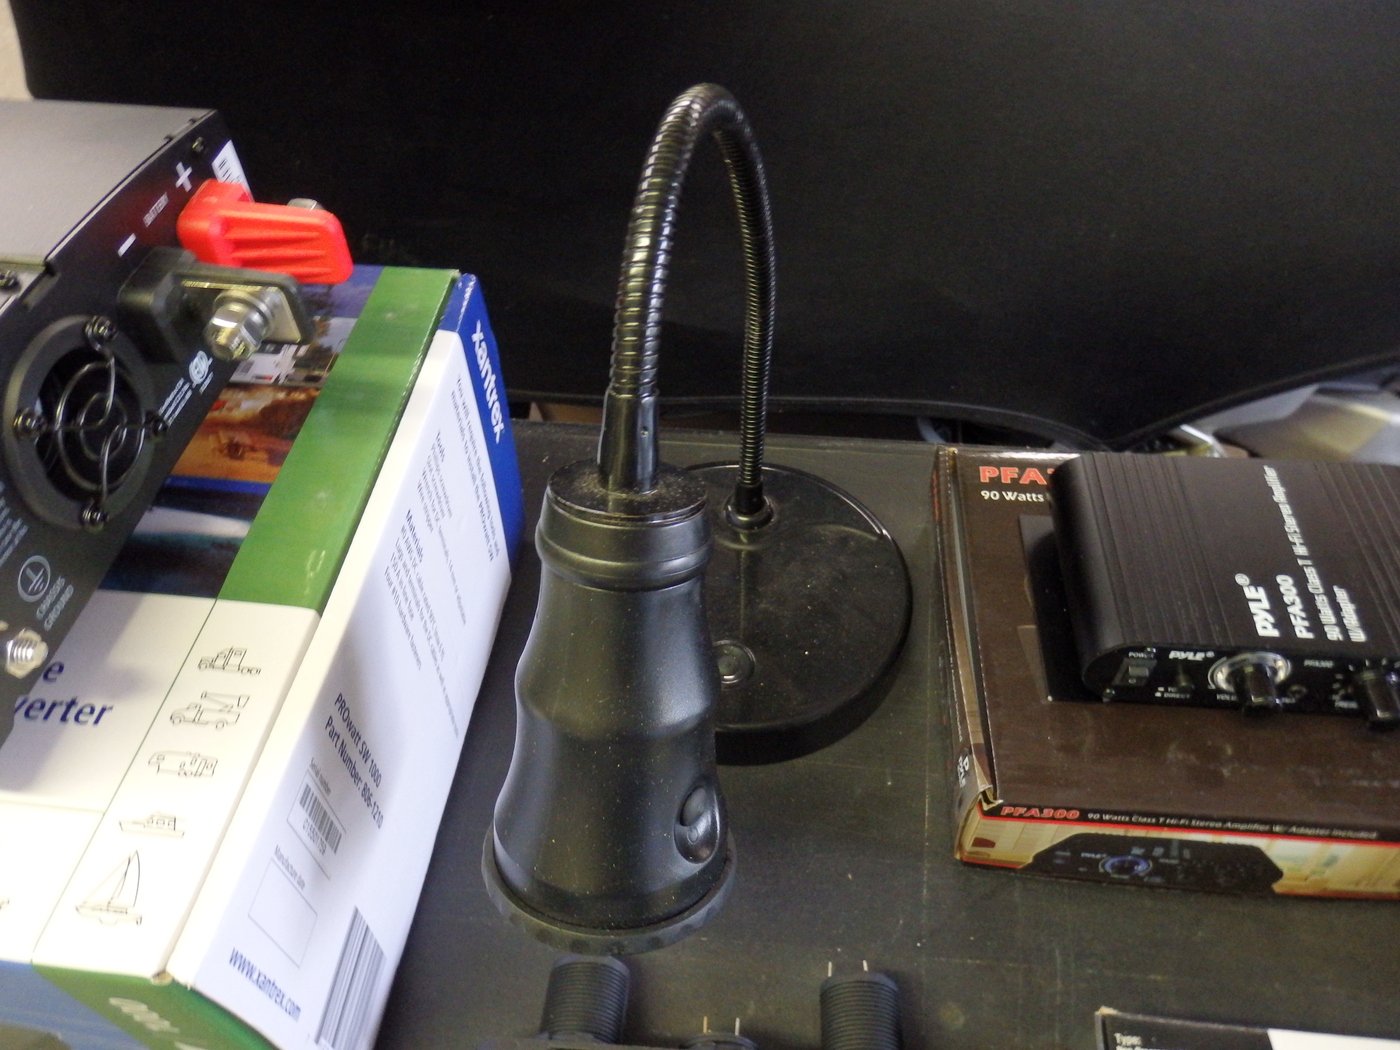

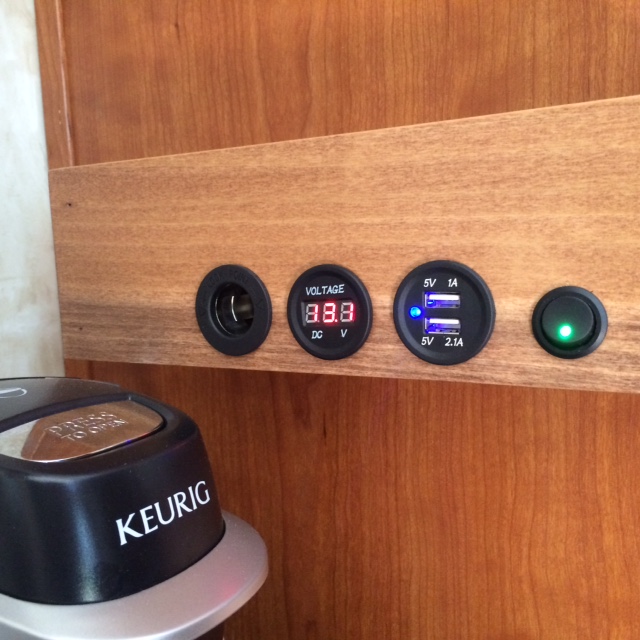
Got to have a place to recharge stuff. These units have a USB charge jack, cigarette lighter jack and a voltage display. I’ll mount them here and there to be accessible.

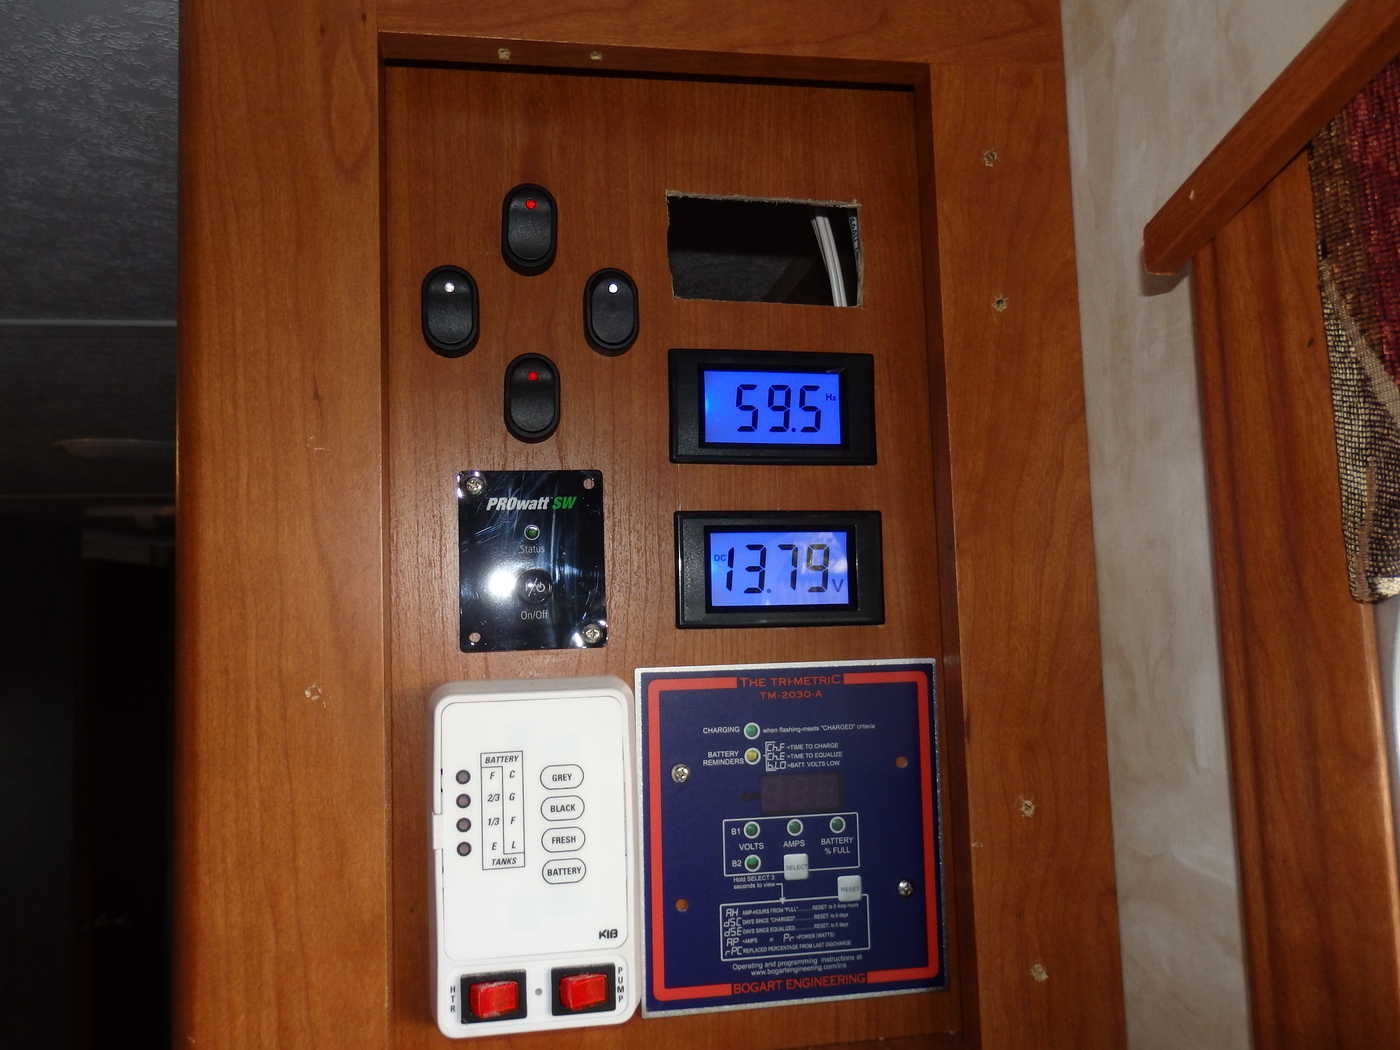
Meters…Three will be installed…AC Volts, AC Frequency (60hz), DC Volts

Motion sensing porch light….Great unit that I had on the truck camper.

1000watt inverter

With remote status and power access

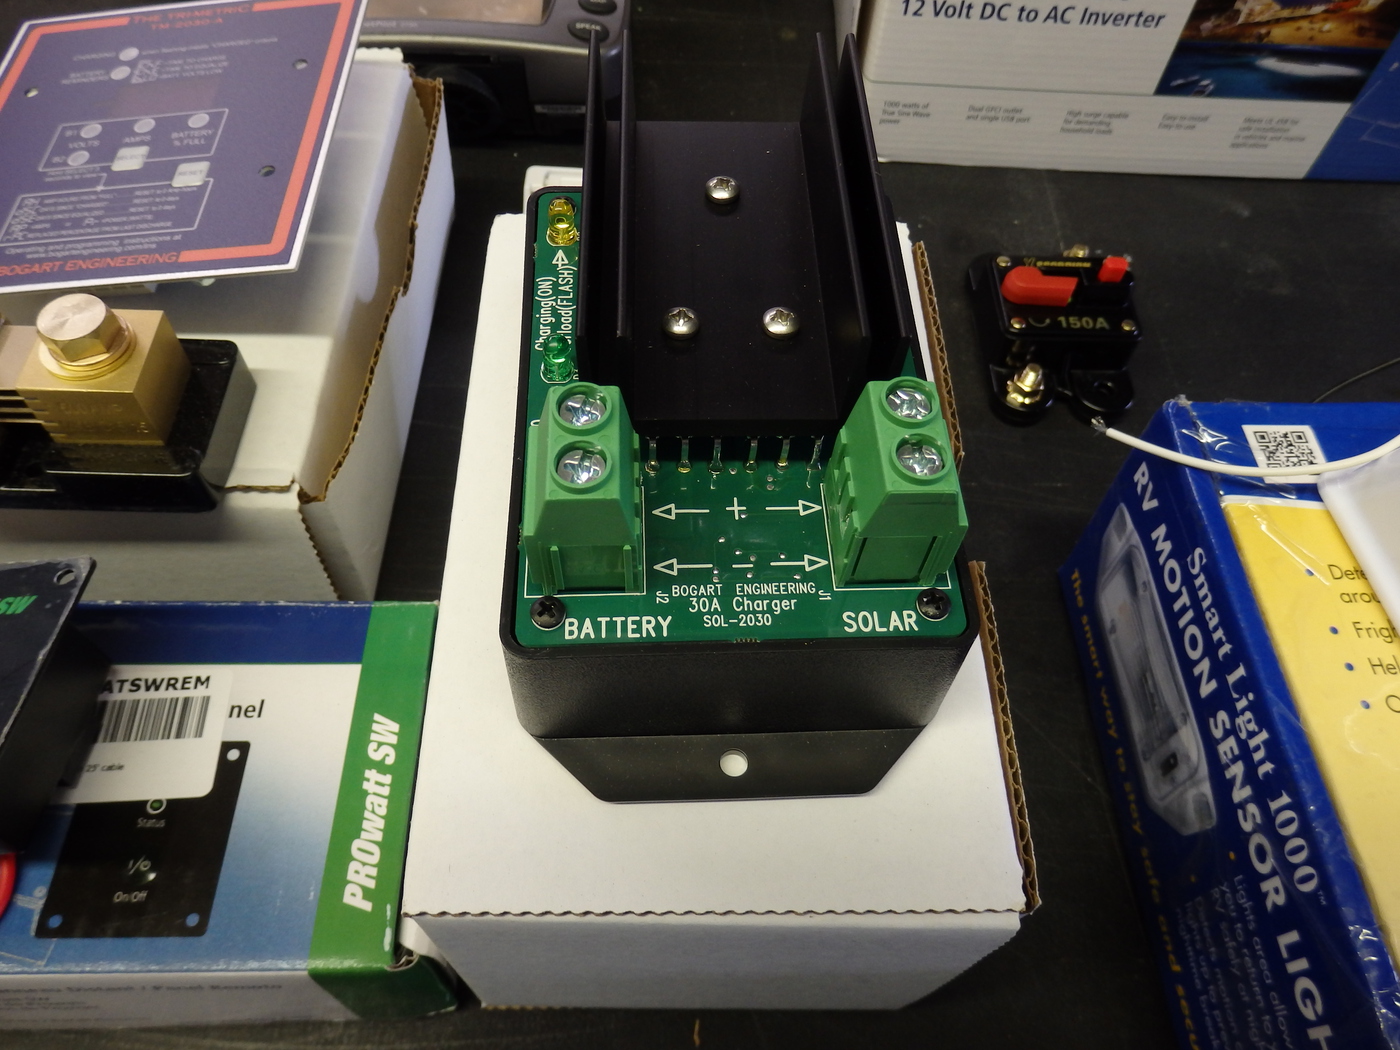
150A circuit breaker for above

outside access port for various communication antenna wires that need to go through the campers wall.

XM Radio, MP3 Player and Maps (UP GRADED to stand alone XM receiver  10-15-15…See below)

And now for the solar installation
Two 140watt AltE panels

Bogart Engineering SC-2030 Solar Controller   Link to Bogart SC-2030 Info
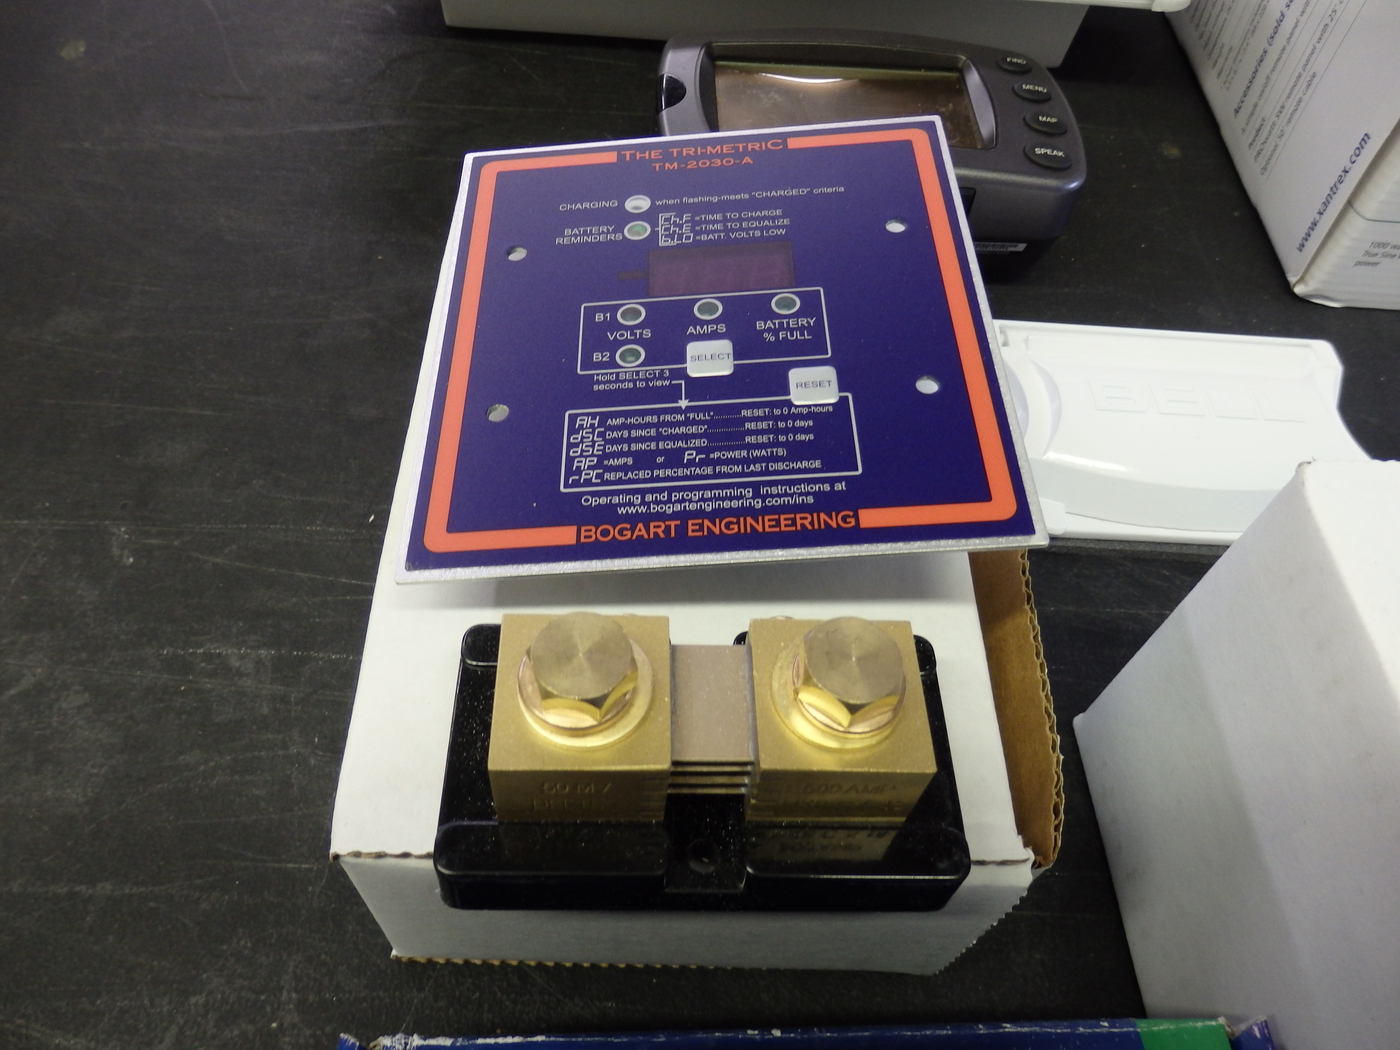
Bogart Engineering Trimetric TM-2030A system monitor Link to Trimetric ionfo (500A Shunt shown)
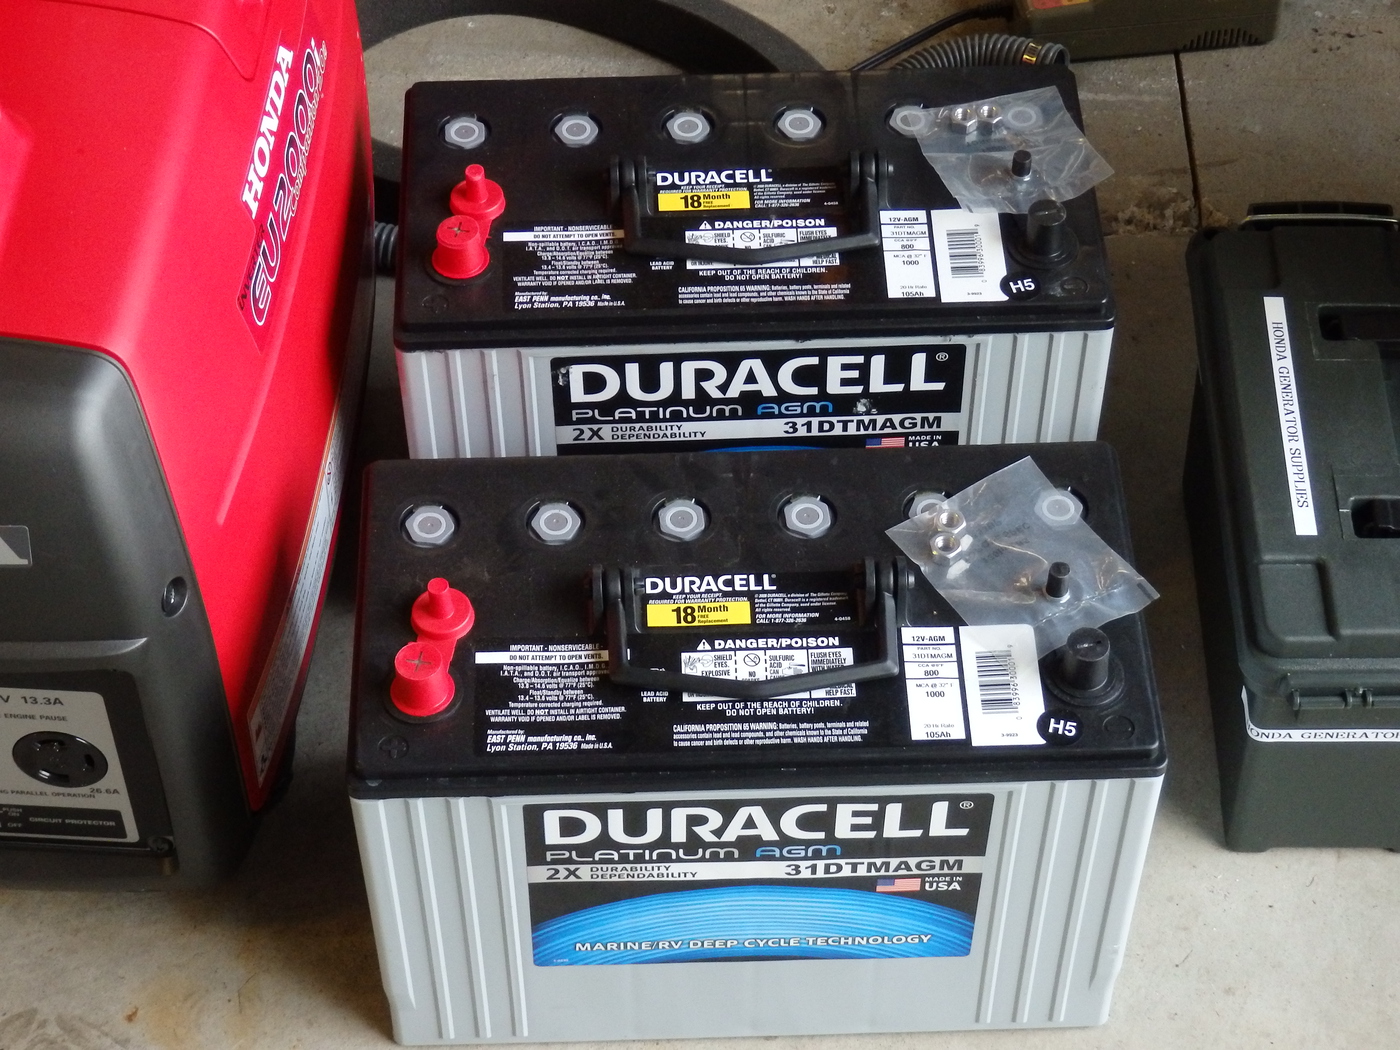
Two Duracell Group 31 AMG 12V batteries
So that’s the STUFF…………….
I’ve already started some of the modifications.
First I removed the small, useless, cabinet from the rear corner of the TH

And relocated it as an end table to the side of the couch

In the corner I will be building an entertainment center that will be 45 degrees to the walls…TV, Stereo, Game Console…
One note…Upon removing the power center, stereo, microwave, etc…I couldn’t believe the amount of trash, papers, sawdust that the manufacturer left behind. Kindling? All that wood, paper and sawdust might start a fire? A veritable buffet for carpenter ants!!!I guess Forest River can’t afford a vacuum cleaner!

I also found that the vent on the fresh water tank was never installed. Upon filling the tank water starts pouring out of the vent onto the ground under the trailer. This causes only about 45 gallons of water to be loaded and the fresh water tank is open to bugs, road stuff and God forbid you travel through some high water, you just contaminated your fresh water supply. I attached a hose to move it higher and covered the end with a piece of screen. At some point I’ll figure out a way to snake a hose up to the fill cap where it is supposed to be connected.


Added a few coat hooks in the bedroom

Created a much larger “Changing Area” at the foot of the bed by relocating the curtain track


Relocated the light switches so I can reach them from outside without having to enter the trailer. Bought this switch panel at the local RV store

This leaves room in this area for the solar monitor panel, switches for outside lights and the inverter remote panel. Not sure if I’m going to reinstall the door. Might just leave it off and fill the holes with “Wood Color Stick”

All the wires are run for the outside lights and the new range hood that should be here any day.

Added “POP-A-Plate” and Paper Towel holder

Bungy cord in the medicine cabinet to keep stuff in place while underway

TO DO LIST:
Install Solar
Install new outside  storage access door for under bed area
Install “Fence Post Cover” sewer hose storage under trailer
Fabricate new battery box
Get the hell out of here and go CAMPING!
Check out the page on my Solar Install…..
Grey Wolf 19RR Toy Hauler Solar Install
UPDATE! Â 9-4-15
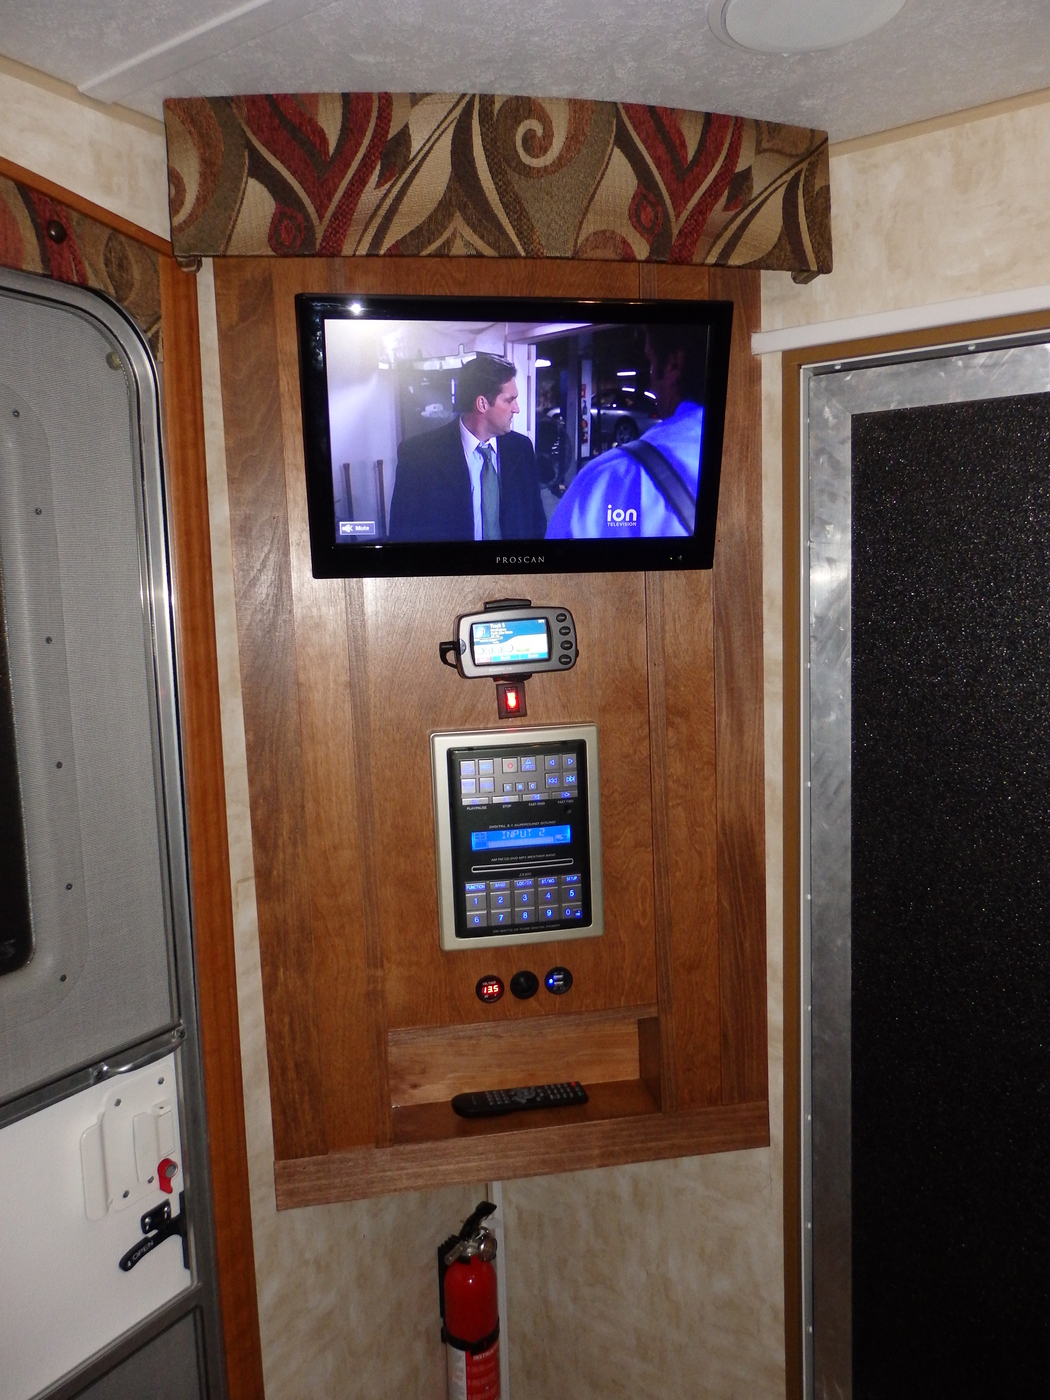
Entertainment Center….
As stated above, I removed and relocated the small “useless” cabinet that was in the corner of the TH over to the side of the couch where it now serves as an end table. In its place I built an “Entertainment” center
The plan was to remove the factory stereo and replace it with the Pyle amplifier posted above.
But upon further review, I realized that this “stereo” has a DVD player, speaker selector, surround sound, weather channel and inputs for a few other devices. So I decided to keep it. The weak audio link is the loudspeakers. They are terrible. Going to replace them at some point in time.

I had removed the valance that was over the sink so I could install a paper towel holder and a “Pop-A’Plate” dispenser and repurposed it here
The tree small circular thingies are for charging cell phones, tablets, etc

DC volt meter, Cigarette lighter socket, USB charging
UPDATE: I added a power switch to all these 12V charge stations. At night they are very bright if you are not charging a device and the very small 12V draw isn’t needed.

TV is mounted on a tilt / swivel removable bracket so I can take it into the bedroom or outside if needed.
The wood is simple birch plywood and poplar trim, stained with Minwax “Cherry” stain and semi gloss polyurethane.
Not bad for a wood butcher!
UPDATE 9-5-15
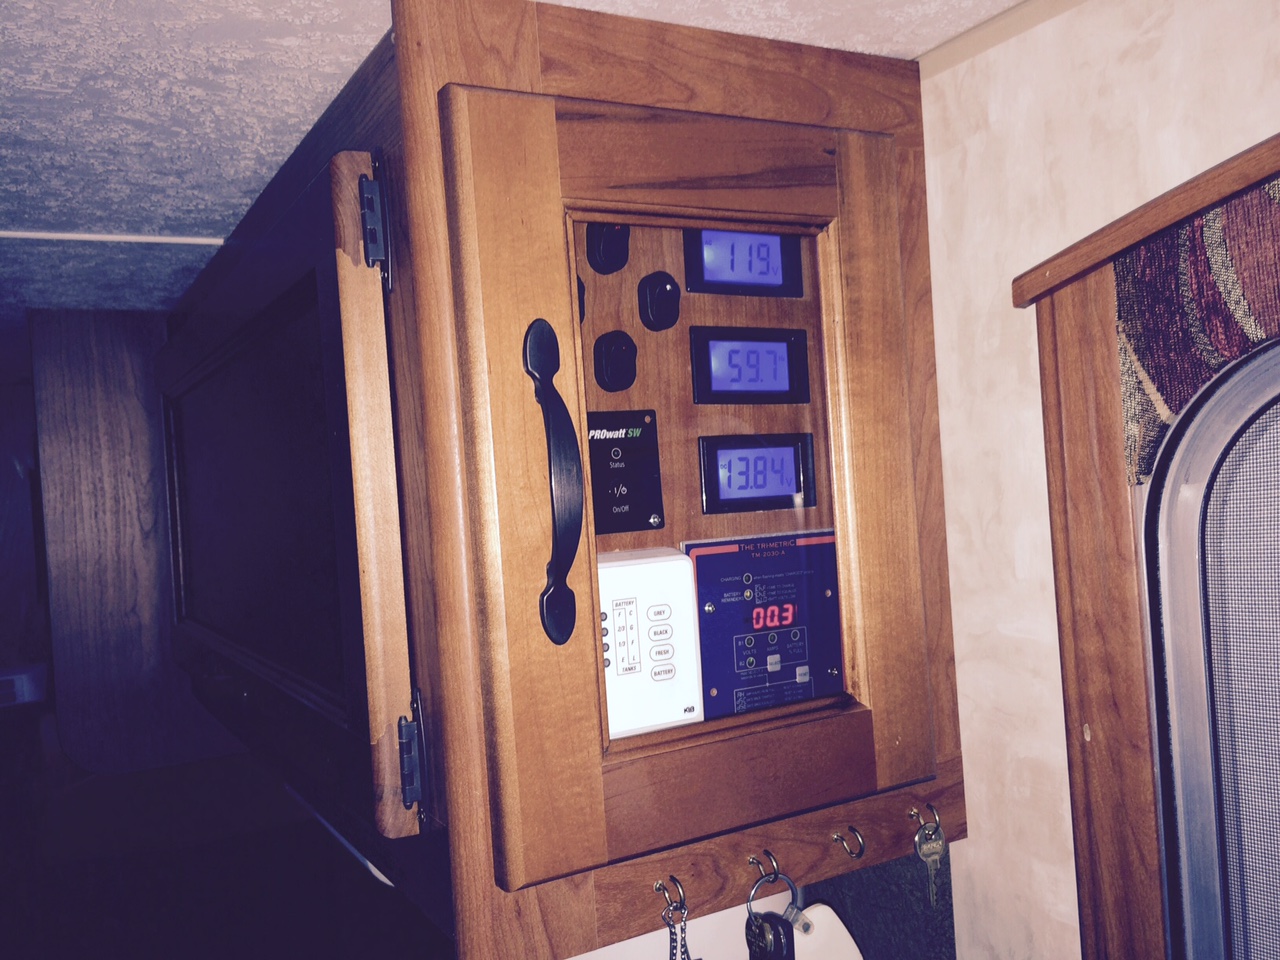
Finished (Almost…waiting for one more gauge to ship) the electrical monitor central control panel!
Read more about it in the Solar Install post
Grey Wolf 19RR Toy Hauler Solar Install
UPDATE 9-6-15
A few shelves are in order
Need a shelf next to the couch to hold the TV remote and to plug in various devices for charging or to use them off the house batteries.


And the bedroom needed a bigger shelf next to the bed for ac reading lamp, DC outlets, alarm clock, etc…

UPDATE: Power switches added to all the 12V charging stations
LED reading light

DC charge station

I love this little guy! It’s an alarm clock, DC volt meter, Inside/outside temperature gauge…..and you can change the color from red to blue.

I also replaced the roof vent with a 12V powered fan unit from “Ventline”

Thanks for looking!
New Item!
One of the best additions I made to the trailer….Wireless remote temperature sensing for the refrigerator. Place a sender in the freezer and one in the refrigerator and take the receiver into the tow vehicle and monitor temperatures as you drive. Saves food if you should lose propane while driving.
Bring the receiver into the house while you are cooling down the refrigerator getting ready for a trip. Monitor temperature of freezer and refrigerator. Remotely!
AcuRite 00986 Refrigerator/Freezer Wireless Digital Thermometer
http://www.amazon.com/gp/product/B004QJVU78?psc=1&redirect=true&ref_=oh_aui_detailpage_o03_s01

MORE FARKLING Â 9-12-15
Hey, I got an idea….Let’s cut a big freak’n hole in the side of the Toy Hauler!
Even better, let’s cut two!
This Forest River 19RR did not have a cargo door on the right front side. I needed to correct this as that space under the bed was useless without easy access. Lifting up the heavy mattress was not an option.
On Ebay I found a company that sells surplus and salvage RV parts. He had exactly the  cargo door I need…42.5″ X 15.5″ and it was an exact match looks wize to the cargo door on the other side of the TH. Tri State Surplus LLC, Hudson Michigan….$35.00 and $29.00 shipping. A GREAT deal!

It was here in three days! Great service…
I drew out the cut lines and then I was nervous about cutting into the side of the TH. What if I screwed it up! After about three hours staring at it and  “pondering”, I took my vibrating paddle saw and had at it.
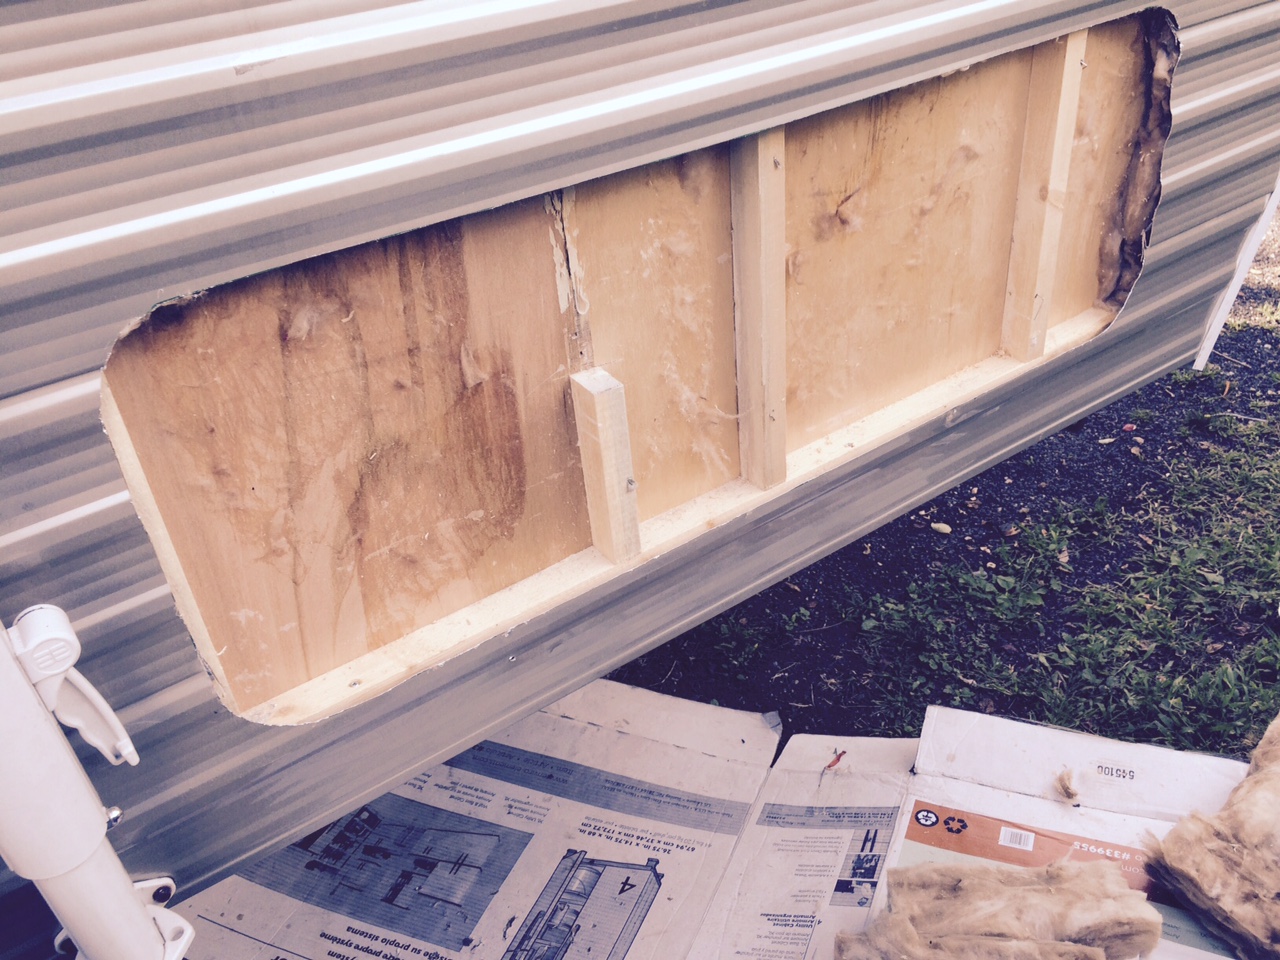
Much easier than I expected and the hole turned out great. I had to cut through two supports that I will reinforce with angle iron on the inside when I reconfigure the bed storage.
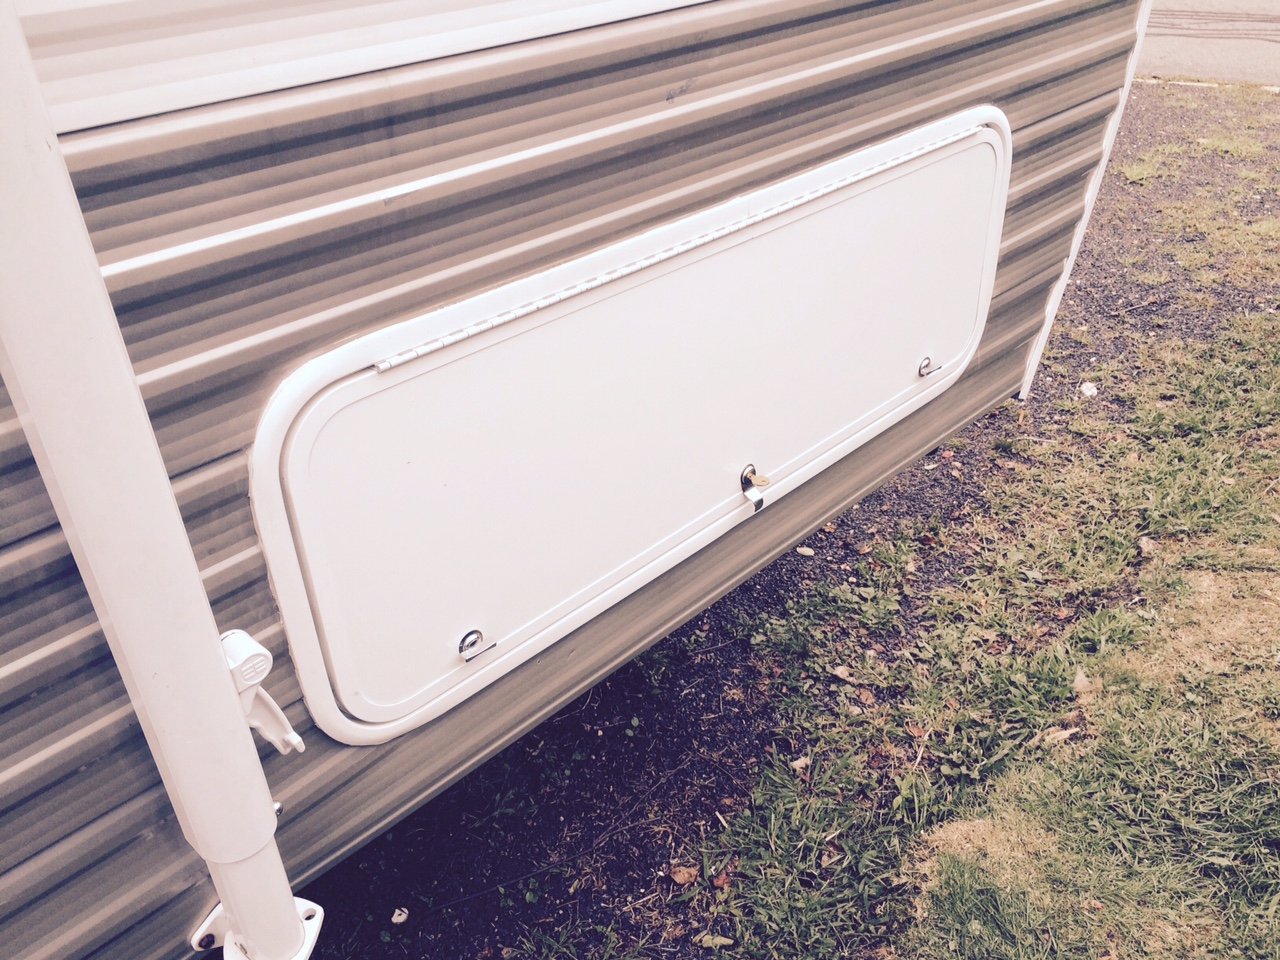
The new door popped right in and caulked up nicely.

From the inside

So since I was feeling bold I figured Id get the over range power vent installed
This was quite easy.

and another hole!

I also made new shelves and installed adjustable shelf brackets in the closet

This cabinet is very deep. So I set the shelves back and then built a couple of inside door storage units.

I installed glass in the door that covers the electronic monitoring panel….(See my solar install in another post on this site)
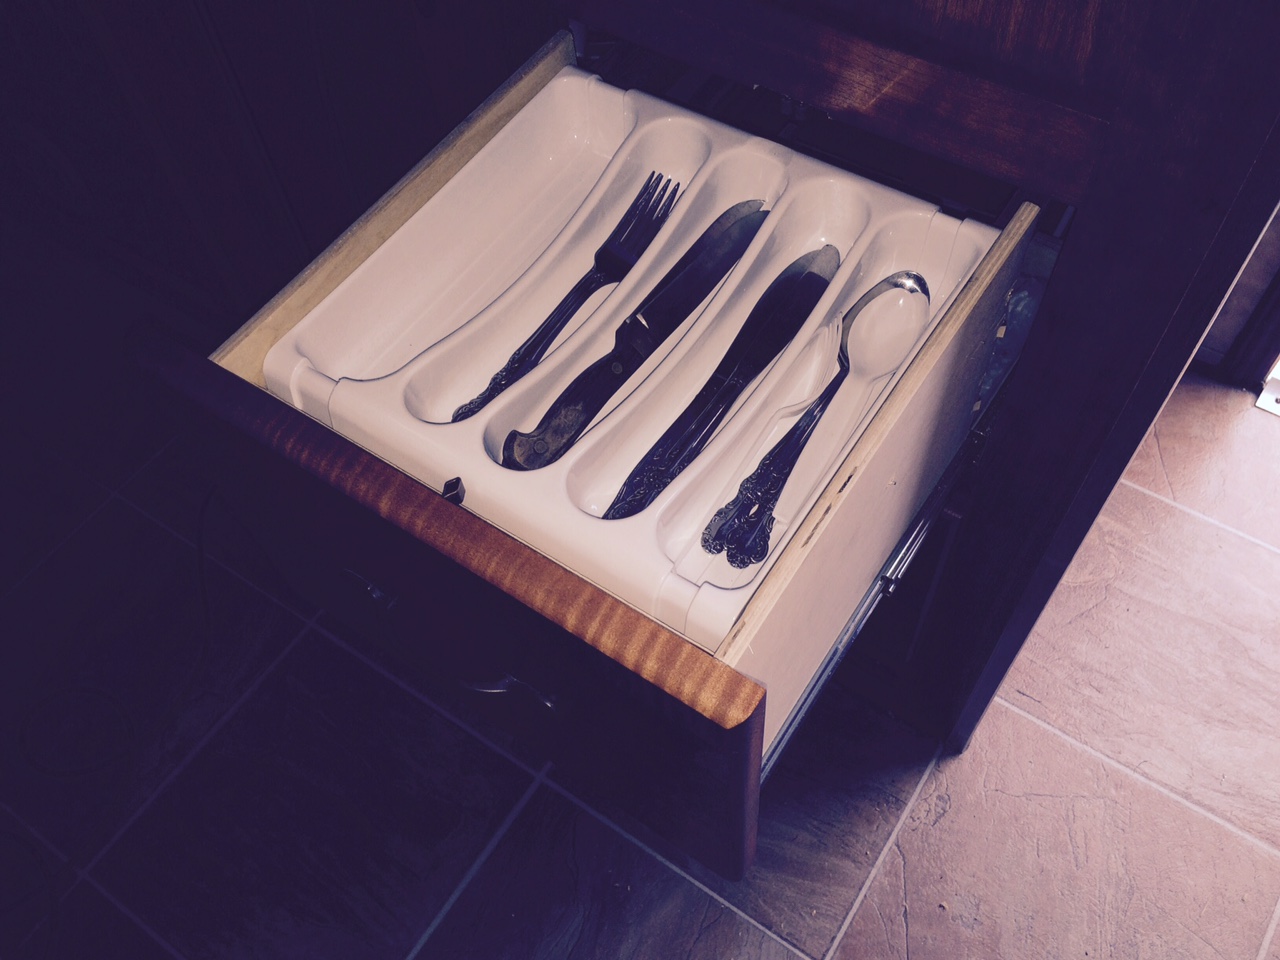
Here’s one I think you’ll really like!
The drawers are shallow and the cabinet is deep. This afford you to create a sliding silverware drawer.
I found a neat adjustable silver ware organizer on Amazon.com. It adjust width wise to fit any drawer.
Camco 43503 Adjustable Cutlery Tray
I notched out the back of the top drawer, added a couple of hardwood rails that extend past the back of the drawer. The silverware organizer simply slides back to allow access to the area below.

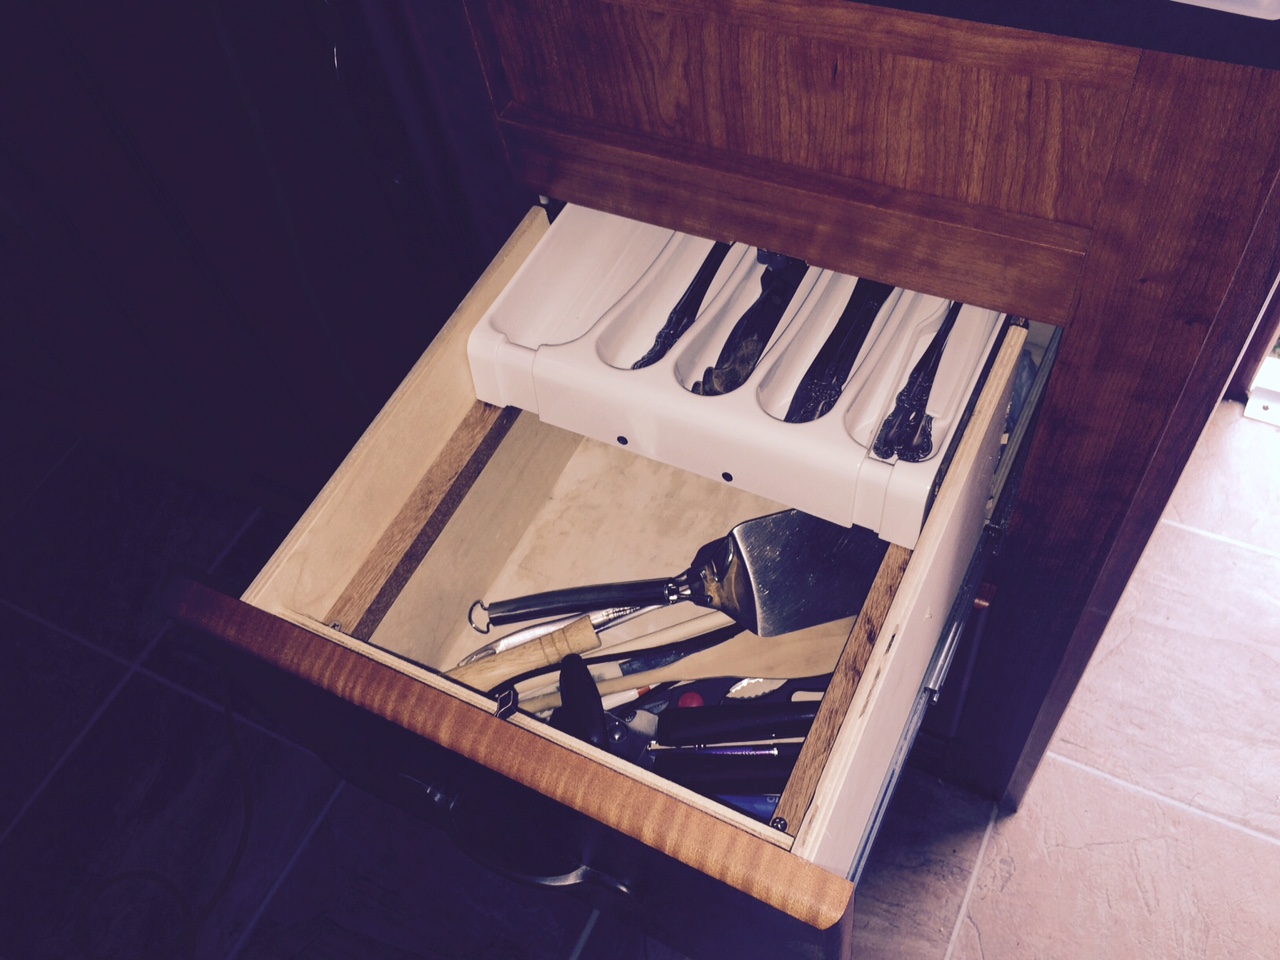

Here it is with the drawer removed
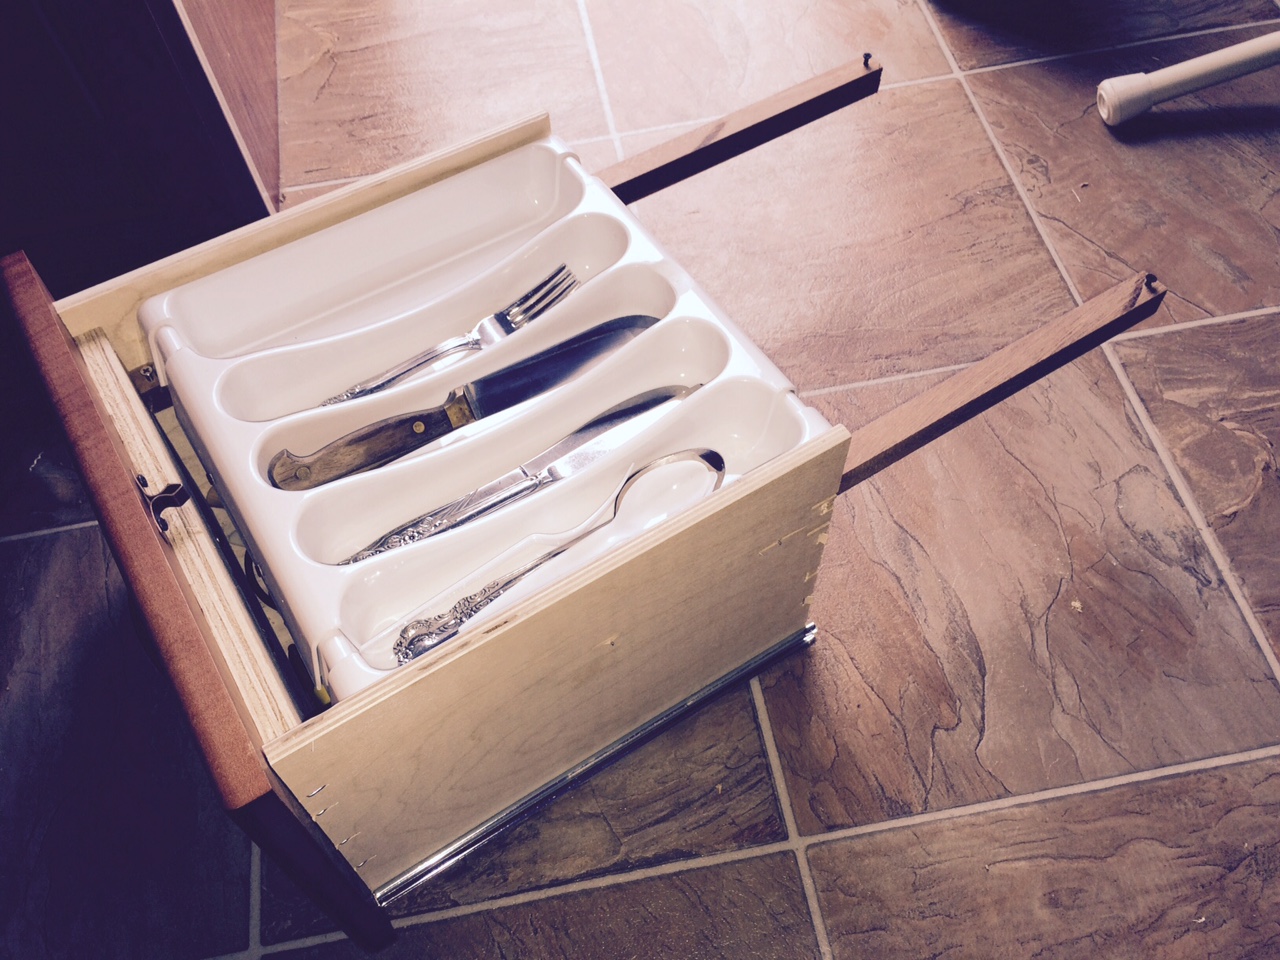
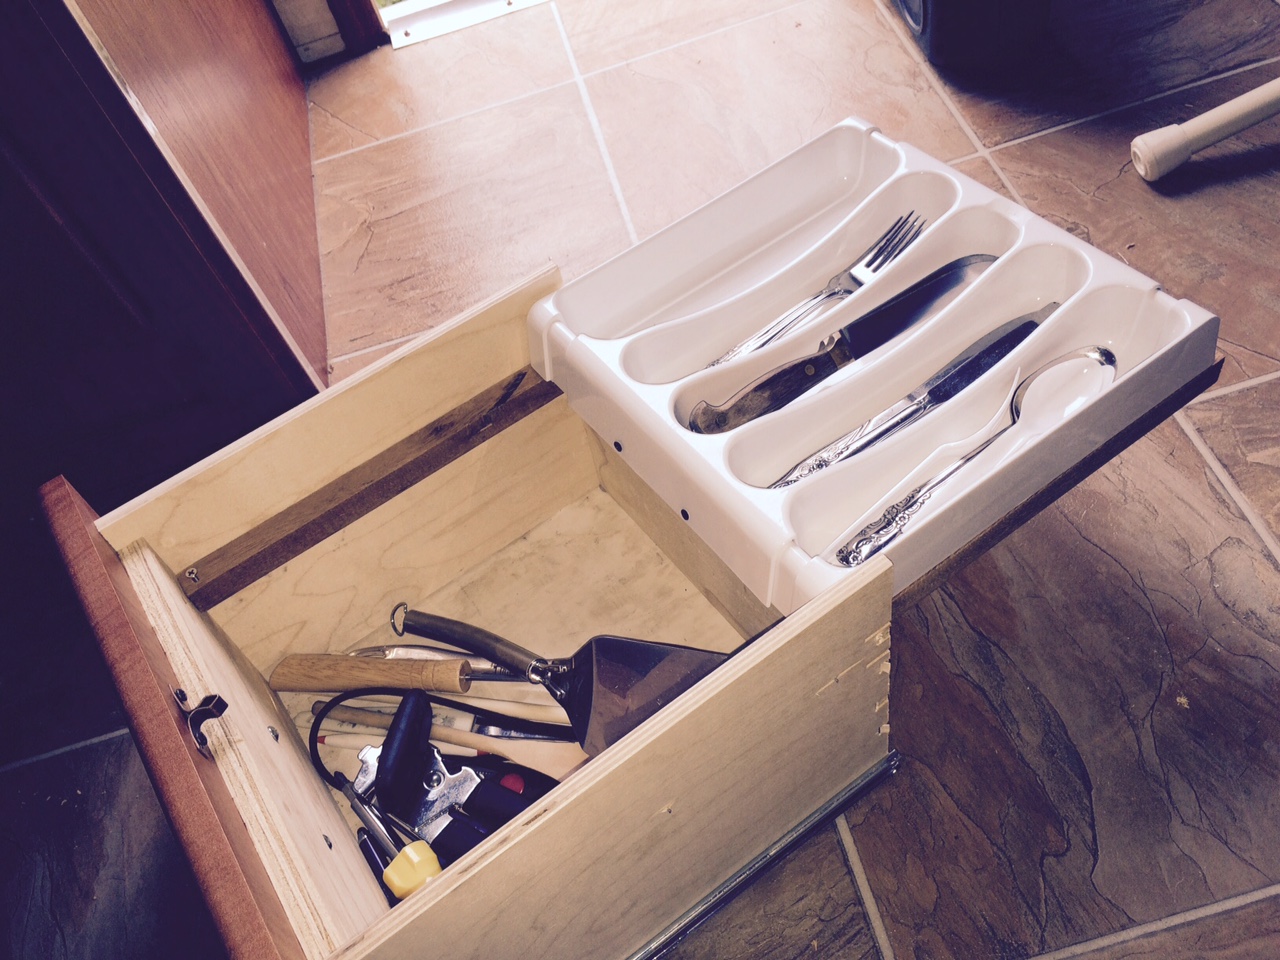
If you look closely, you’ll see two small screws at the end of the runners to stop the organizer from sliding off the tracks and two more small screws at the front of the rails to keep it in place while underway. To slide it, with the drawer open, you lift it up a quarter of an inch to clear the front screws and slide it back.
Neat huh!
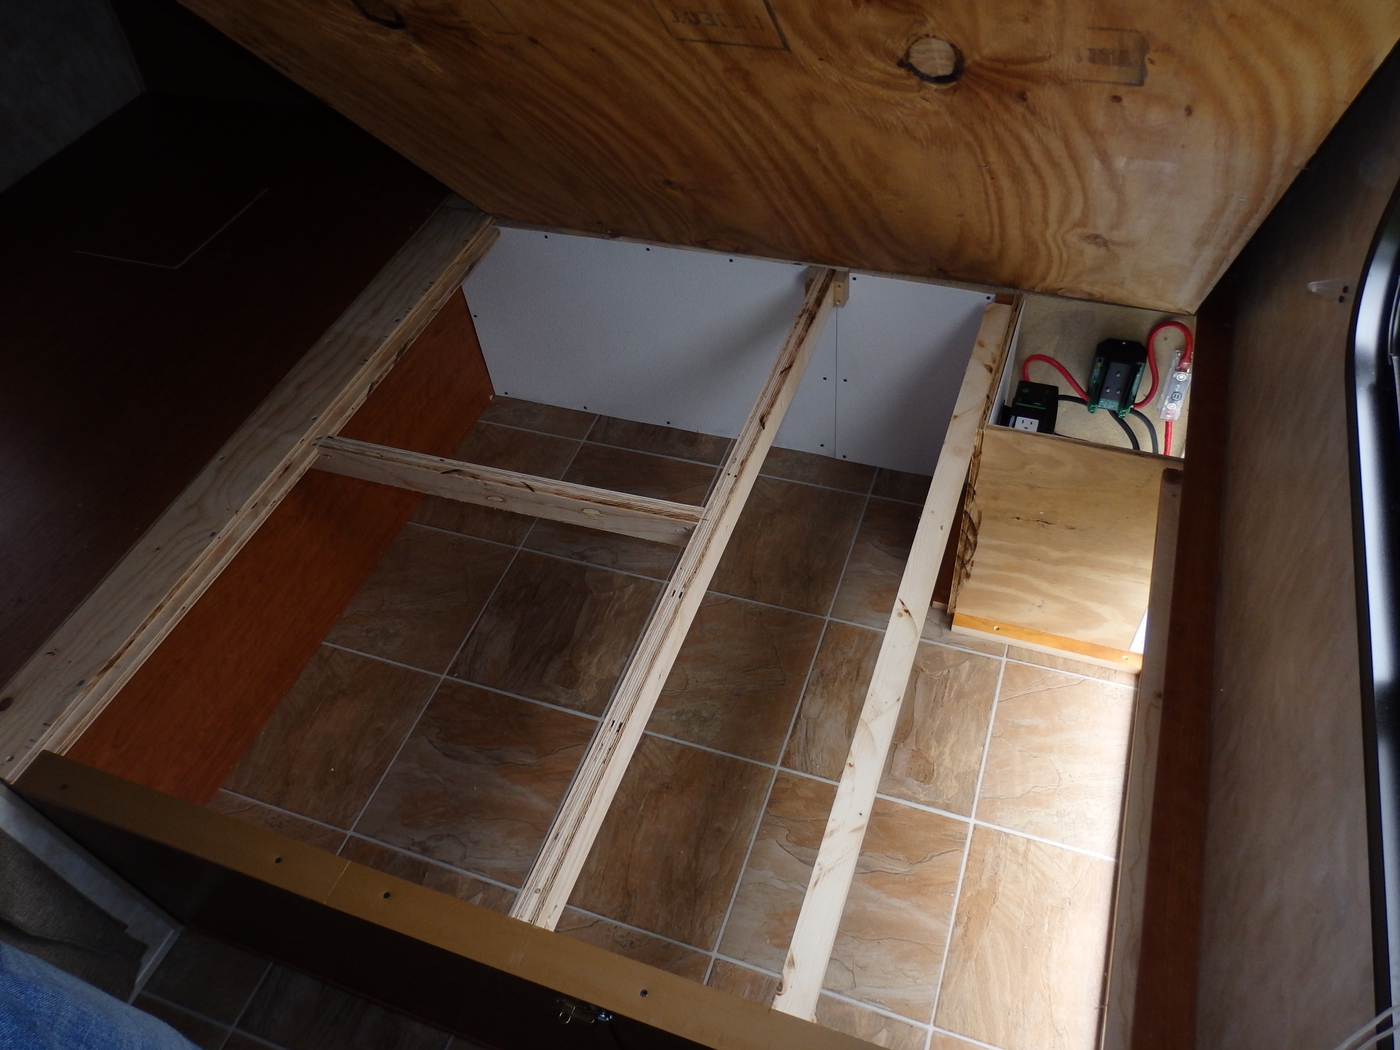
UPDATE 9-13-15 Reconfigure Under Bed Storage Area
Did lots more today on the Forest River Grey Wolf 19RR. Getting ready to go away for a week starting tomorrow night
Totally reconfigured the storage area under the bed. Having this hatch open “East / West” was ridiculous. The mattress hits the sloped nose and it is a bear to lift. In it;’s original configuration it was just about unusable space. No outside access. The only access was by “attempting” to lift a heavy mattress….
I decided to create access on three sides…Top with the lid opening “North / South – Front- from inside the trailer – and outside through the new cargo door I recently installed.
First I finished the solar control area and separated it from the storage area. Made a little “White Room” just for the solar controller and the inverter.
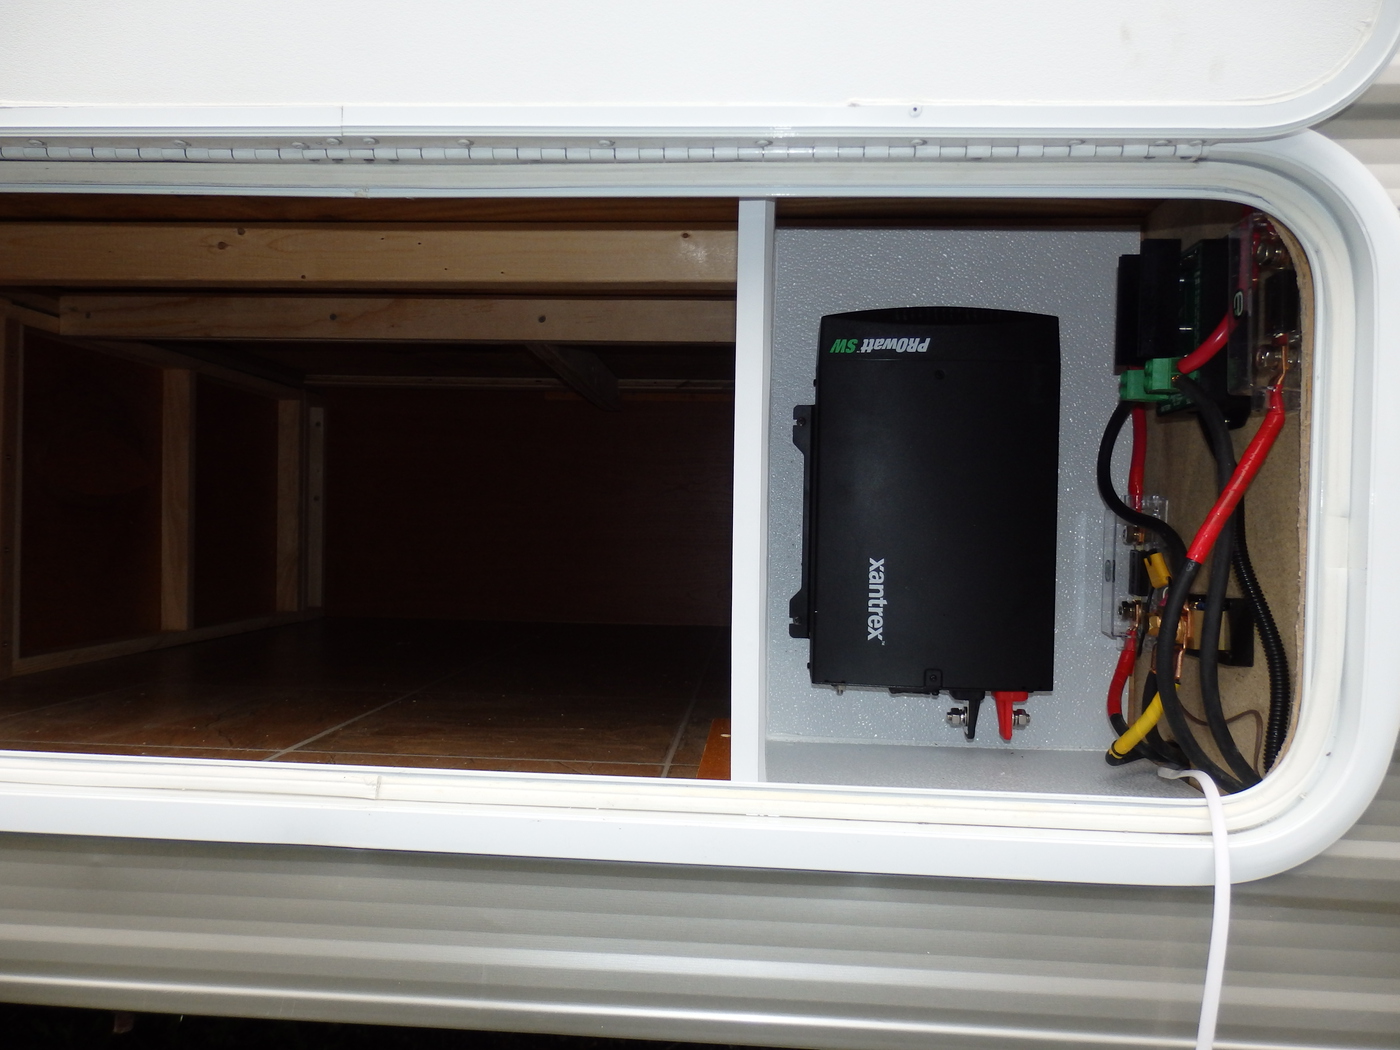
Still have to hook up the inverter….
The newly installed cargo door now makes all this area outside accessible
I tore everything out in the bed area and reused just about every piece of wood and cherry paneling. All I had to buy was a 48″ X 48″ piece of 3/4″ plywood for the new mattress deck. When finished I had a piece of cherry paneling 4″ X 6″ and two small pieces of pine studs. Also interesting to note how easily everything came apart. I would estimate less than 20% of the staples hit studs or other support areas. And less than 50% of the screws found purchase! Terrible workmanship!
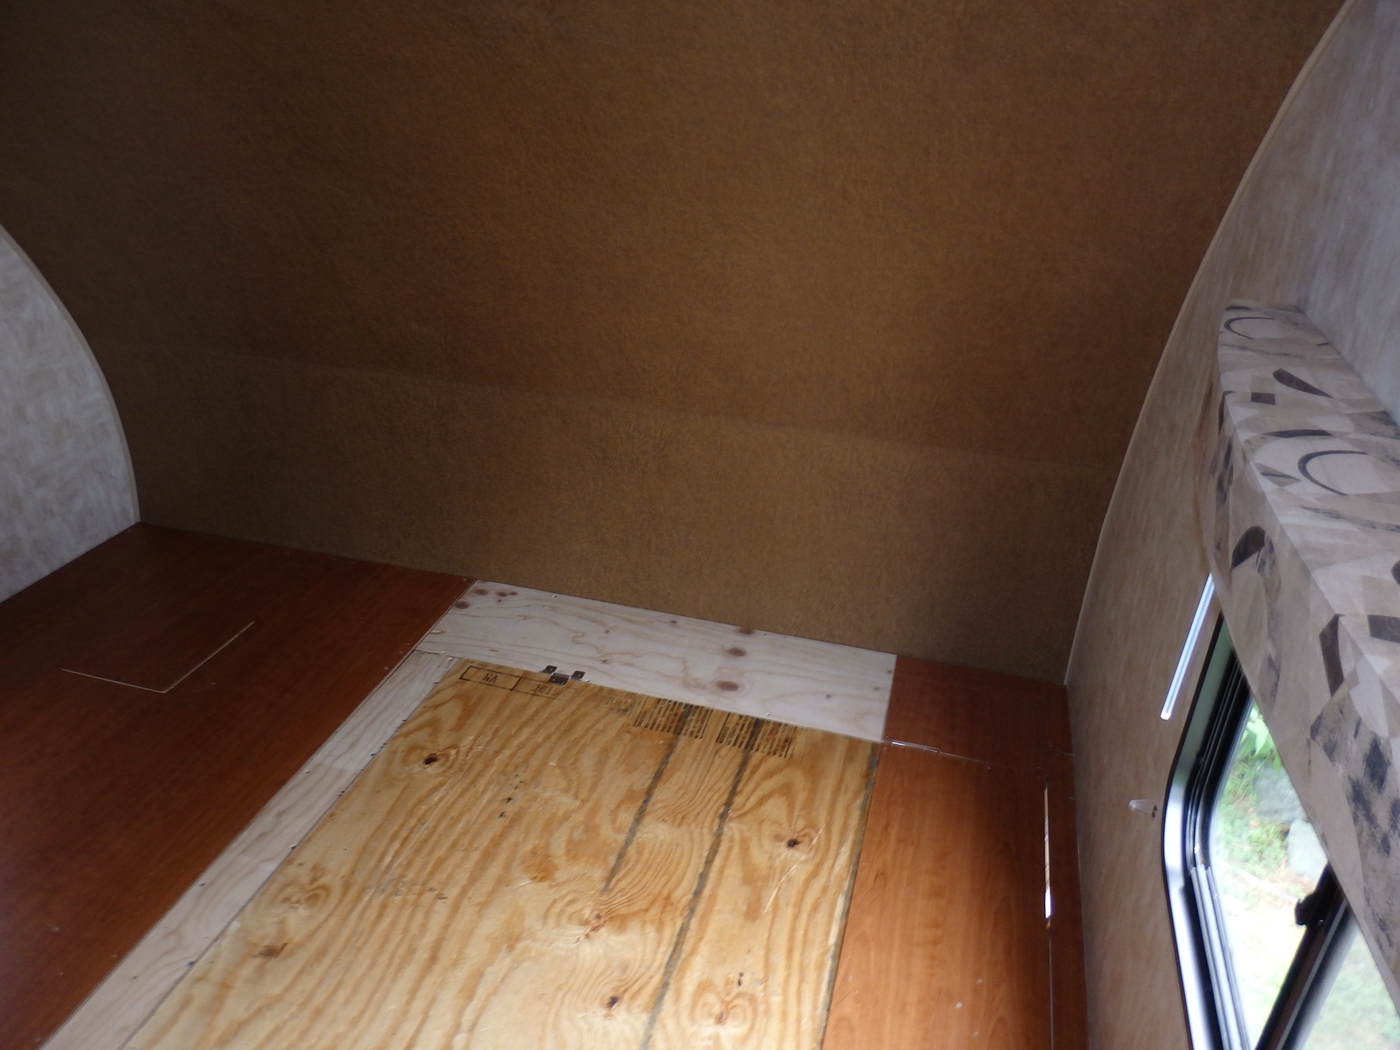
The top now opens relatively easily
You can see the little solar / inverter area in the top corner
There is a ton of great cargo space in here!
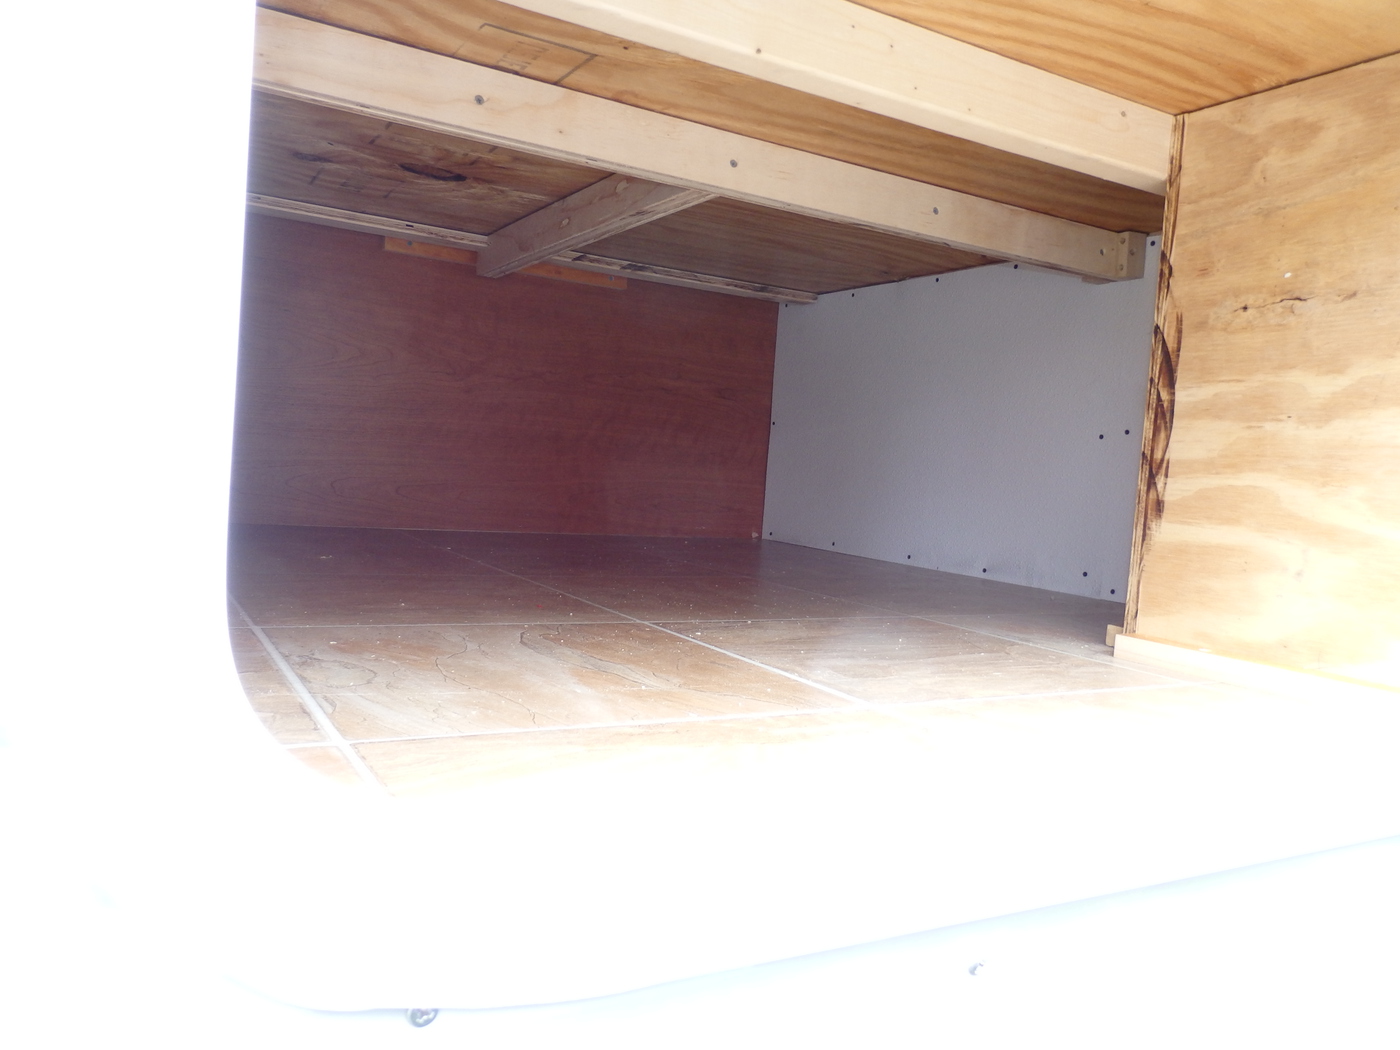
The front area now has a door to access the storage area without lifting the mattress. And a space at the foot of the bed for extra blankets , shoes, etc.
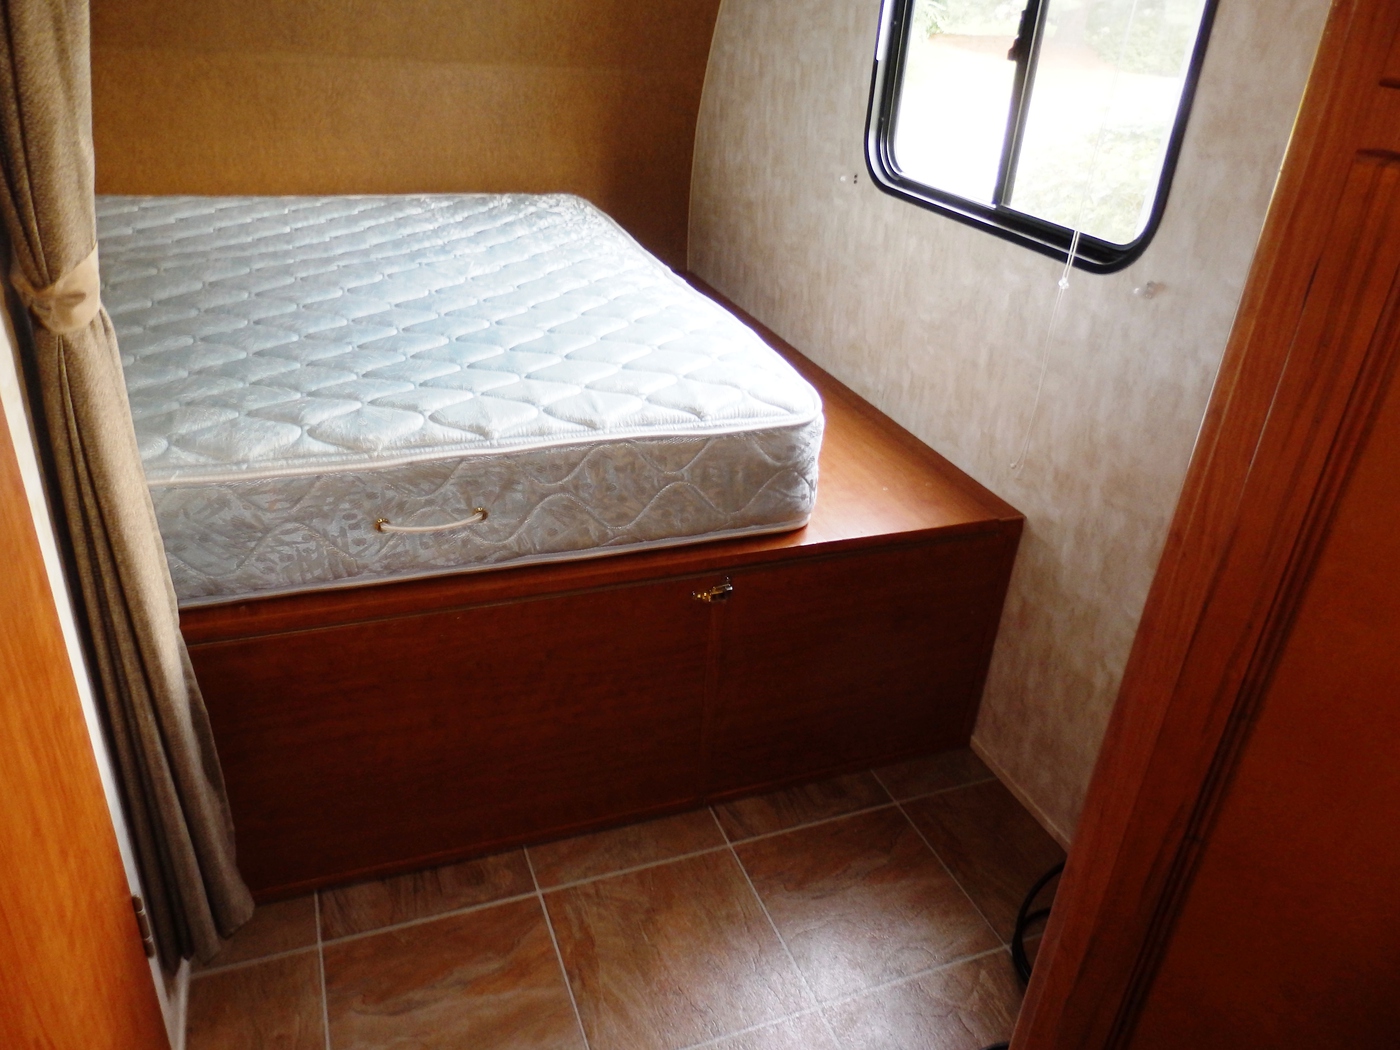
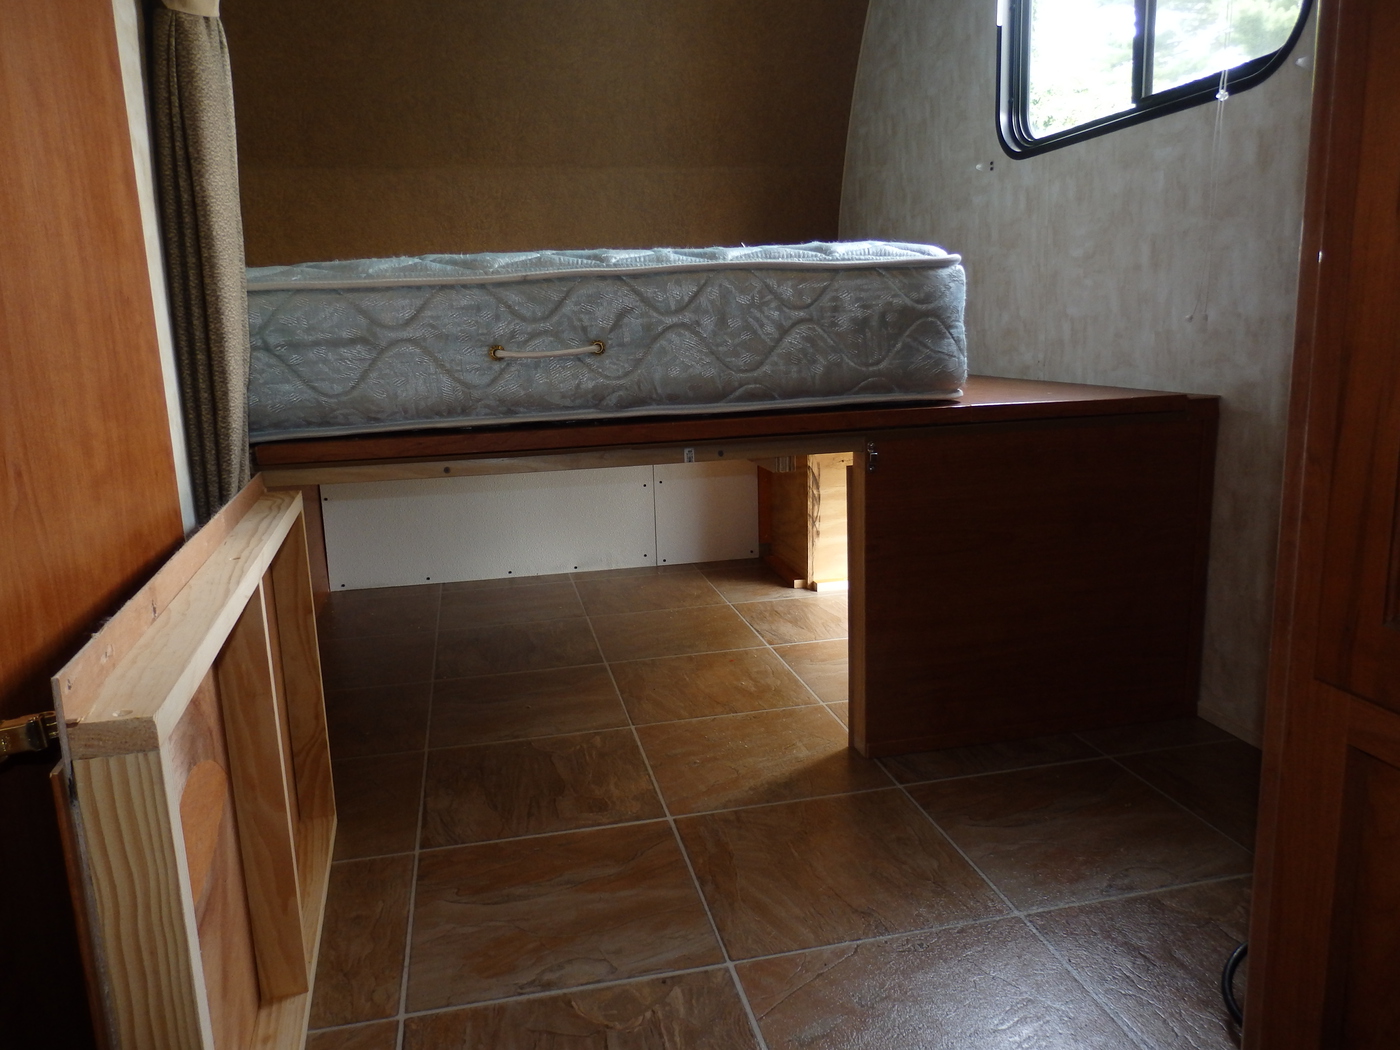
All in all I’m super pleased with this modification!

UPDATE 9-15-15 Â Inverter Install
Got the 1000 watt Xantrex inverter installed today.
First order of business was to install a second, larger capacity, circuit breaker. The “House” system is on a 50amp circuit breaker and the inverter will be on a 150amp circuit breaker.
The inverter is wired into the Trimetric solar monitoring system. Drawing its negative feed from the shunt

once that was accomplished, I installed two dedicated outlets. One in the storage compartment and one in the bedroom
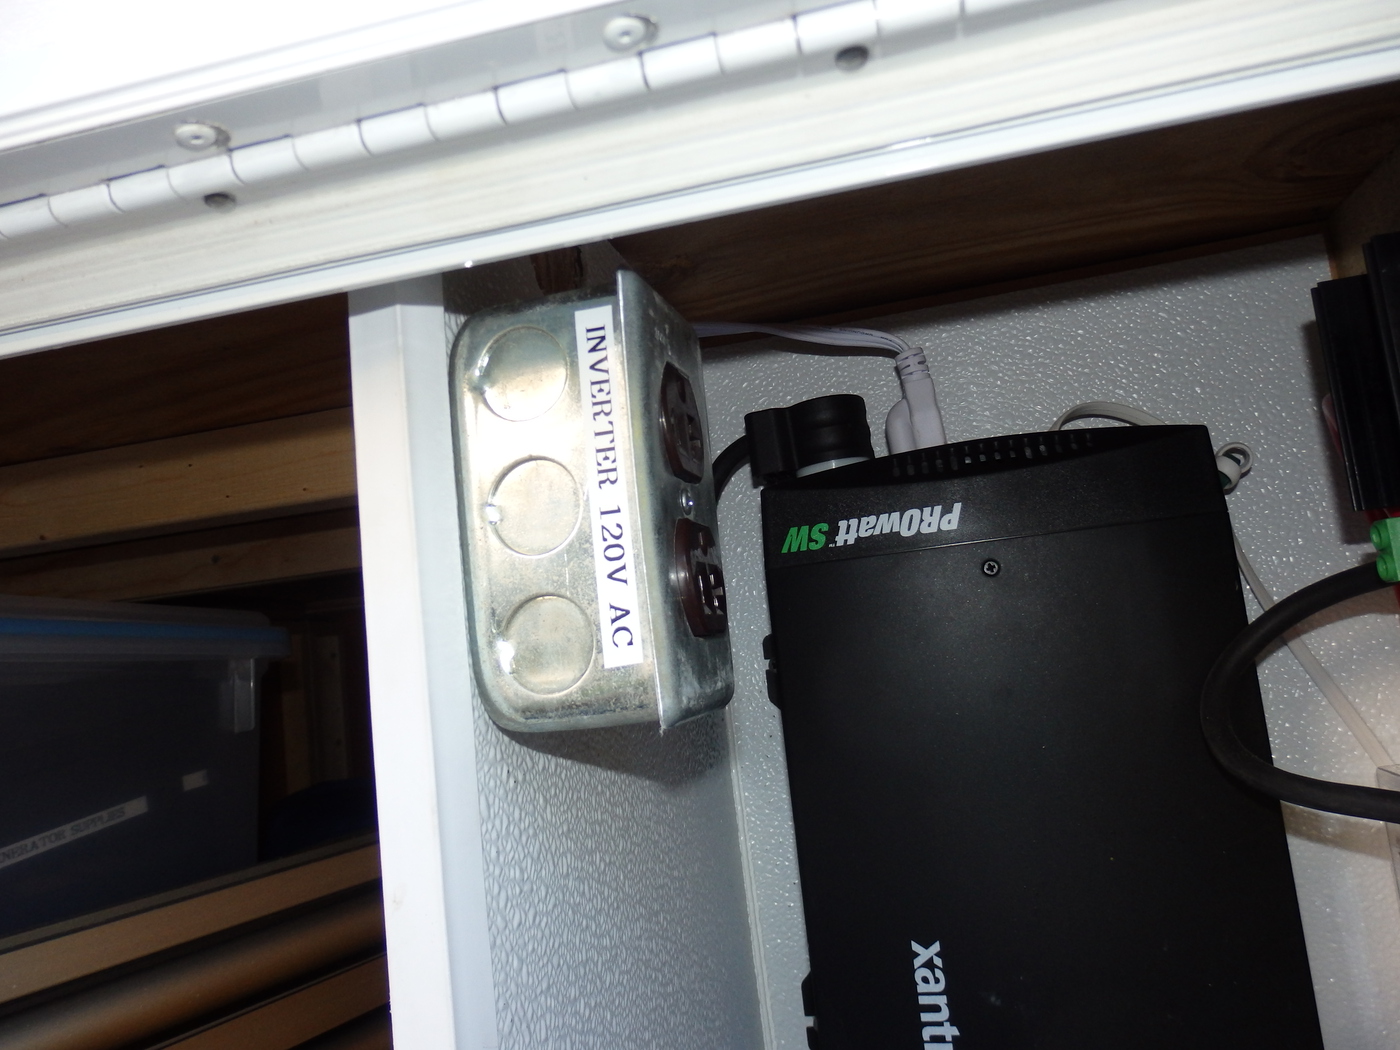

last to do was to terminate the wire connecting the ProWatt remote to the inverter. In this way I can turn the inverter on and off without leaving the trailer.

Done…And it works great. Hooked up the vacuum cleaner and gave the trailer a good cleaning…all on the inverter off 12V…. Love it!
MORE FARKLING!
Installed a “Fence Post Cover” sever hose storage system……6″ square X 8′ long mounted to the trailer chassis with a few pieces of aluminum.angle iron
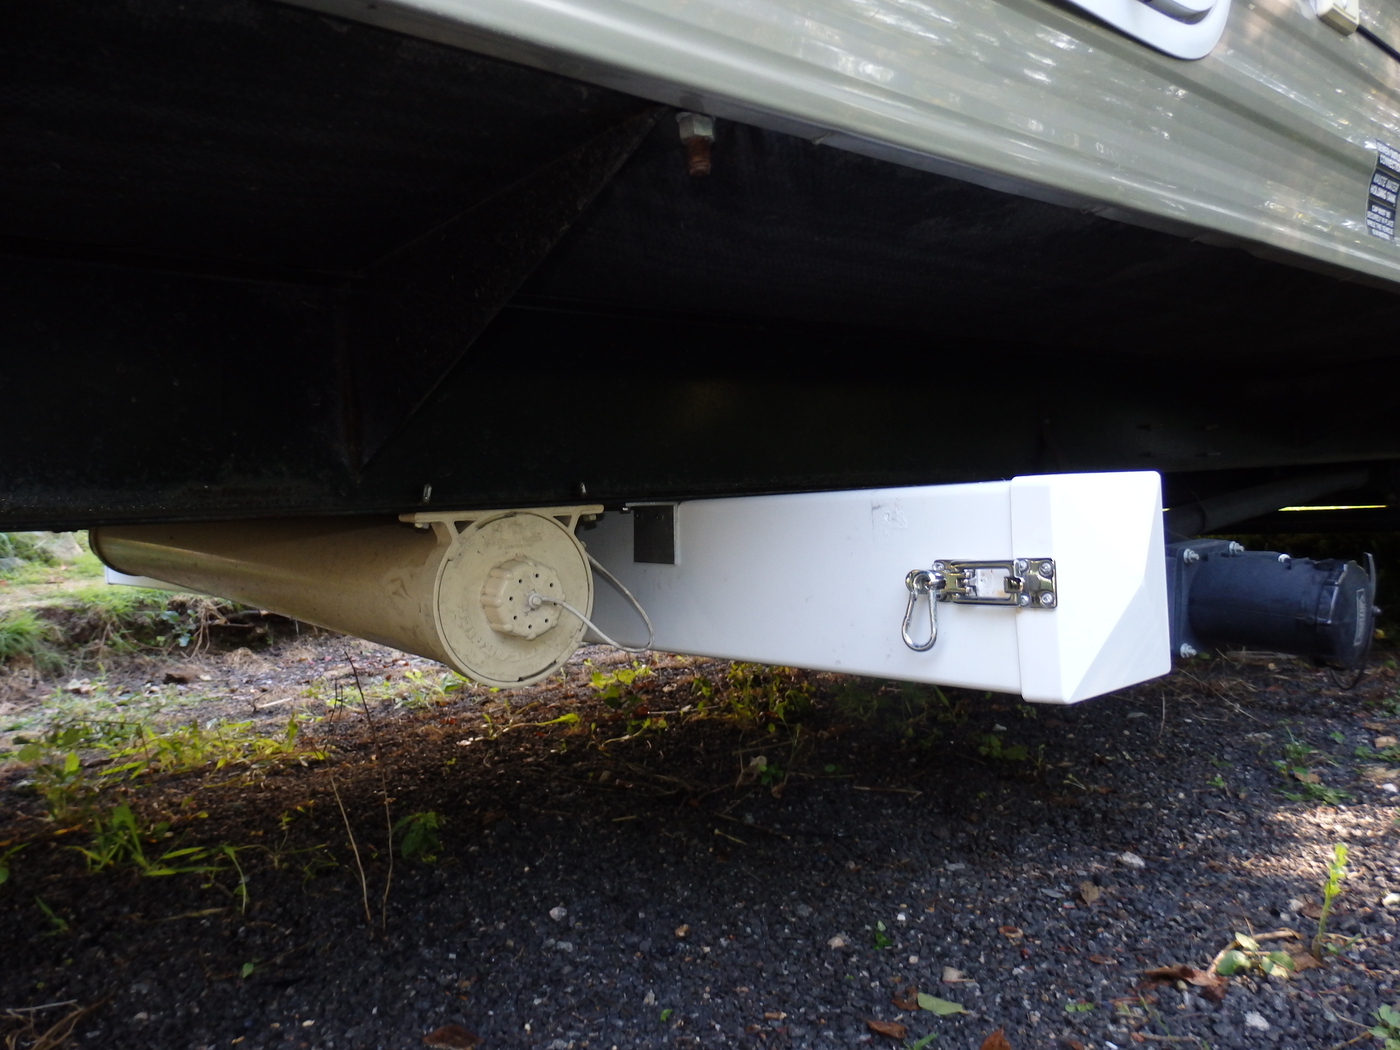
The “drawer” is simply a piece of vinyl gutter that slides in and out of the square tubing.
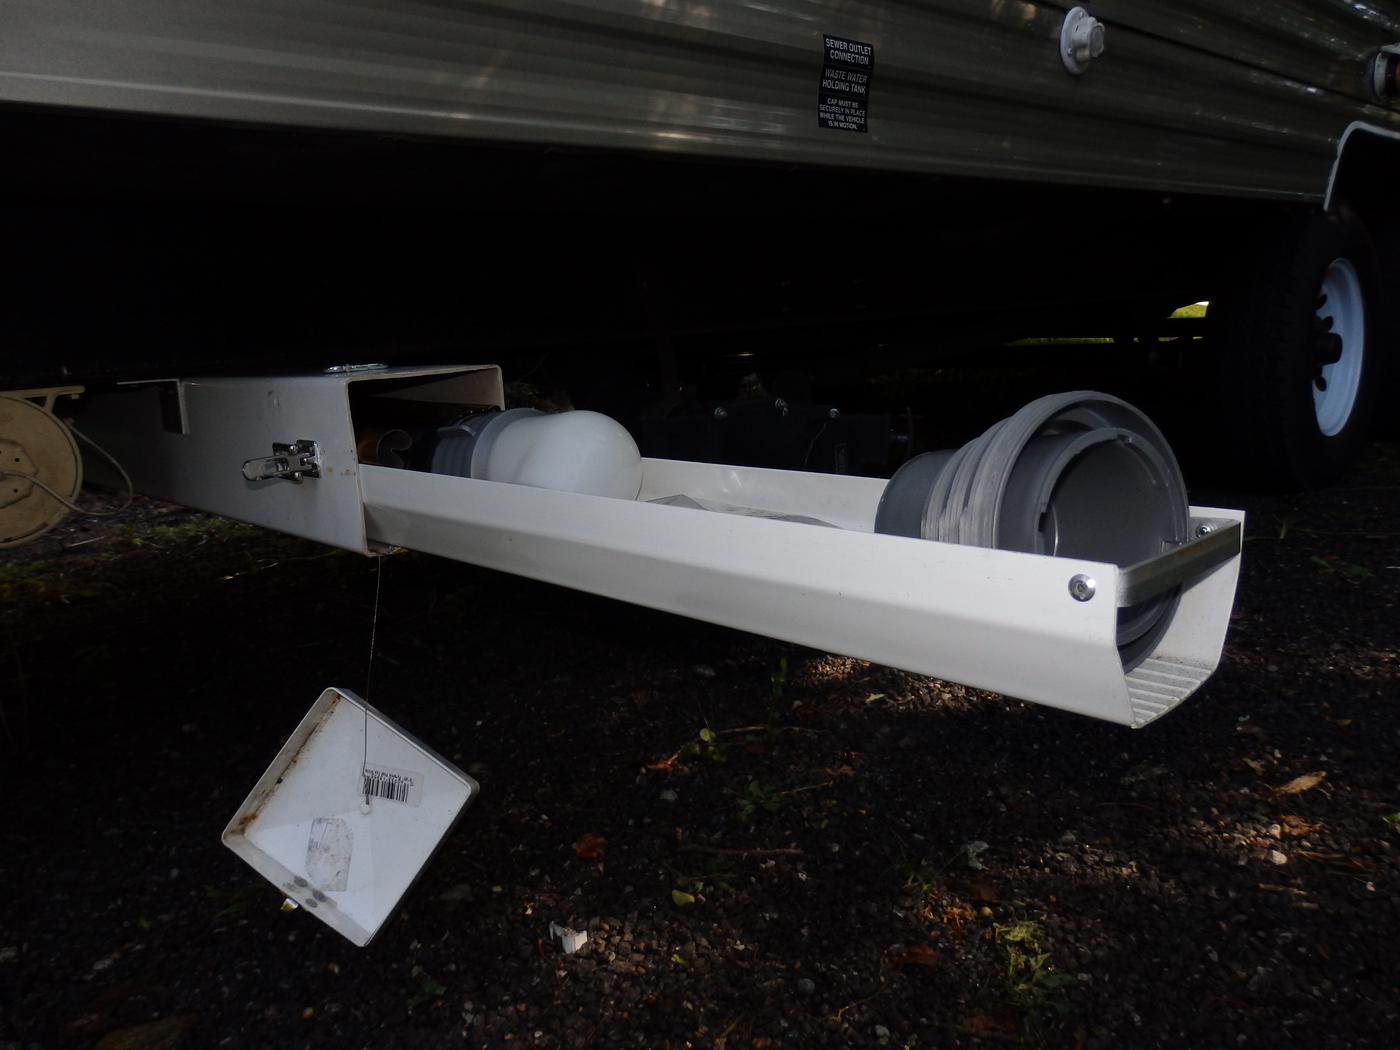
This drawer can also double as a support if the hose isn’t draining properly
Also added a few tie downs on the sides of the ramp to secure the table and other things while underway.
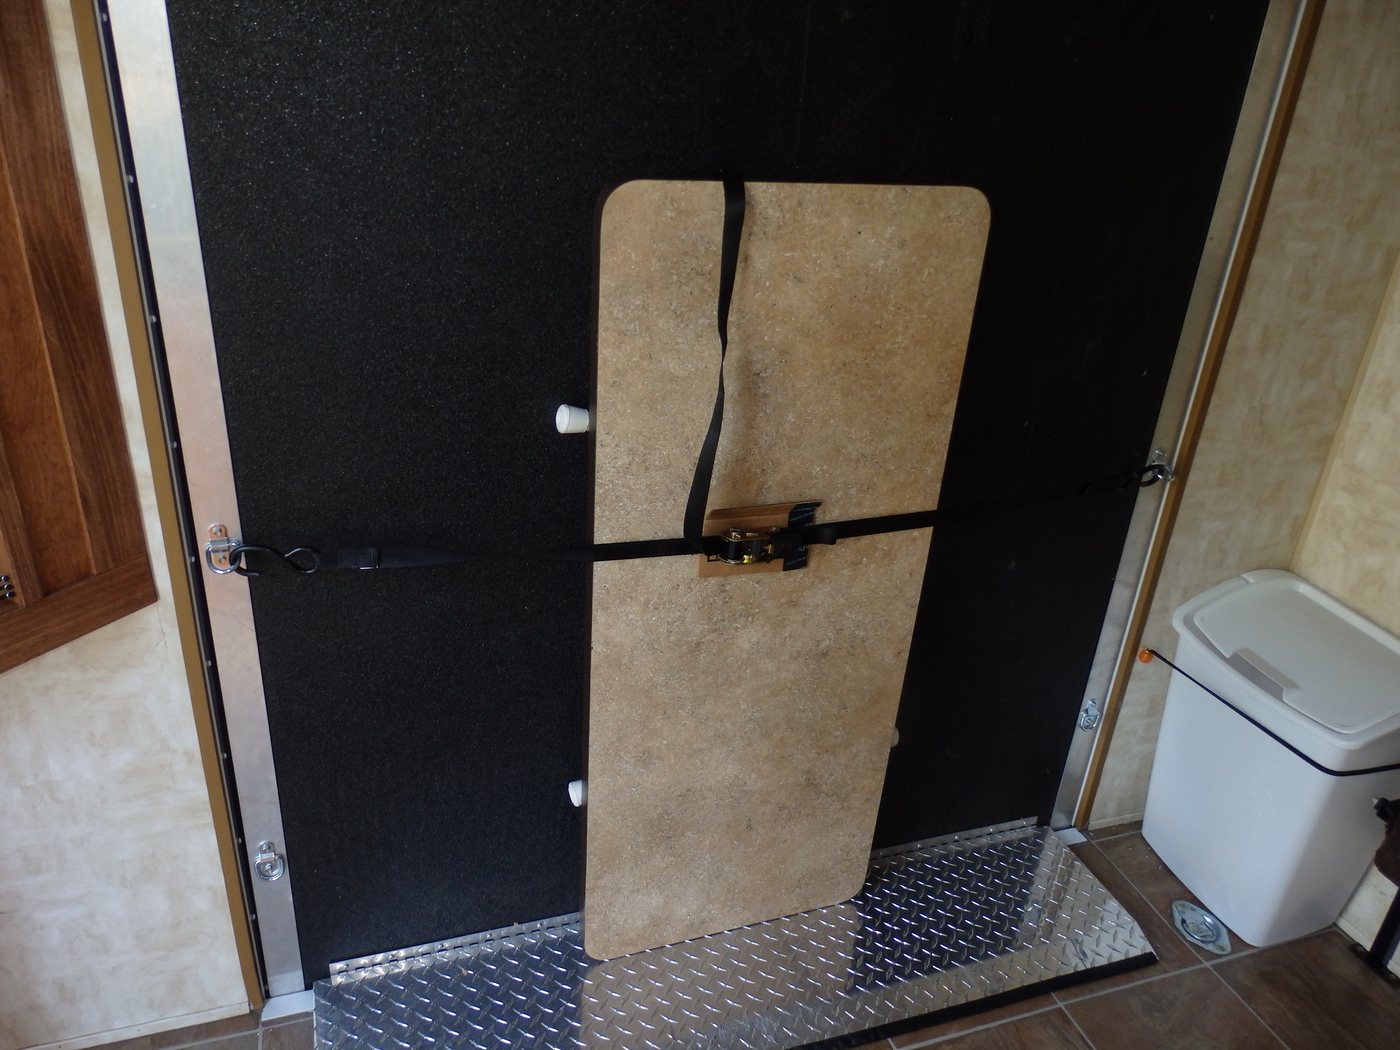
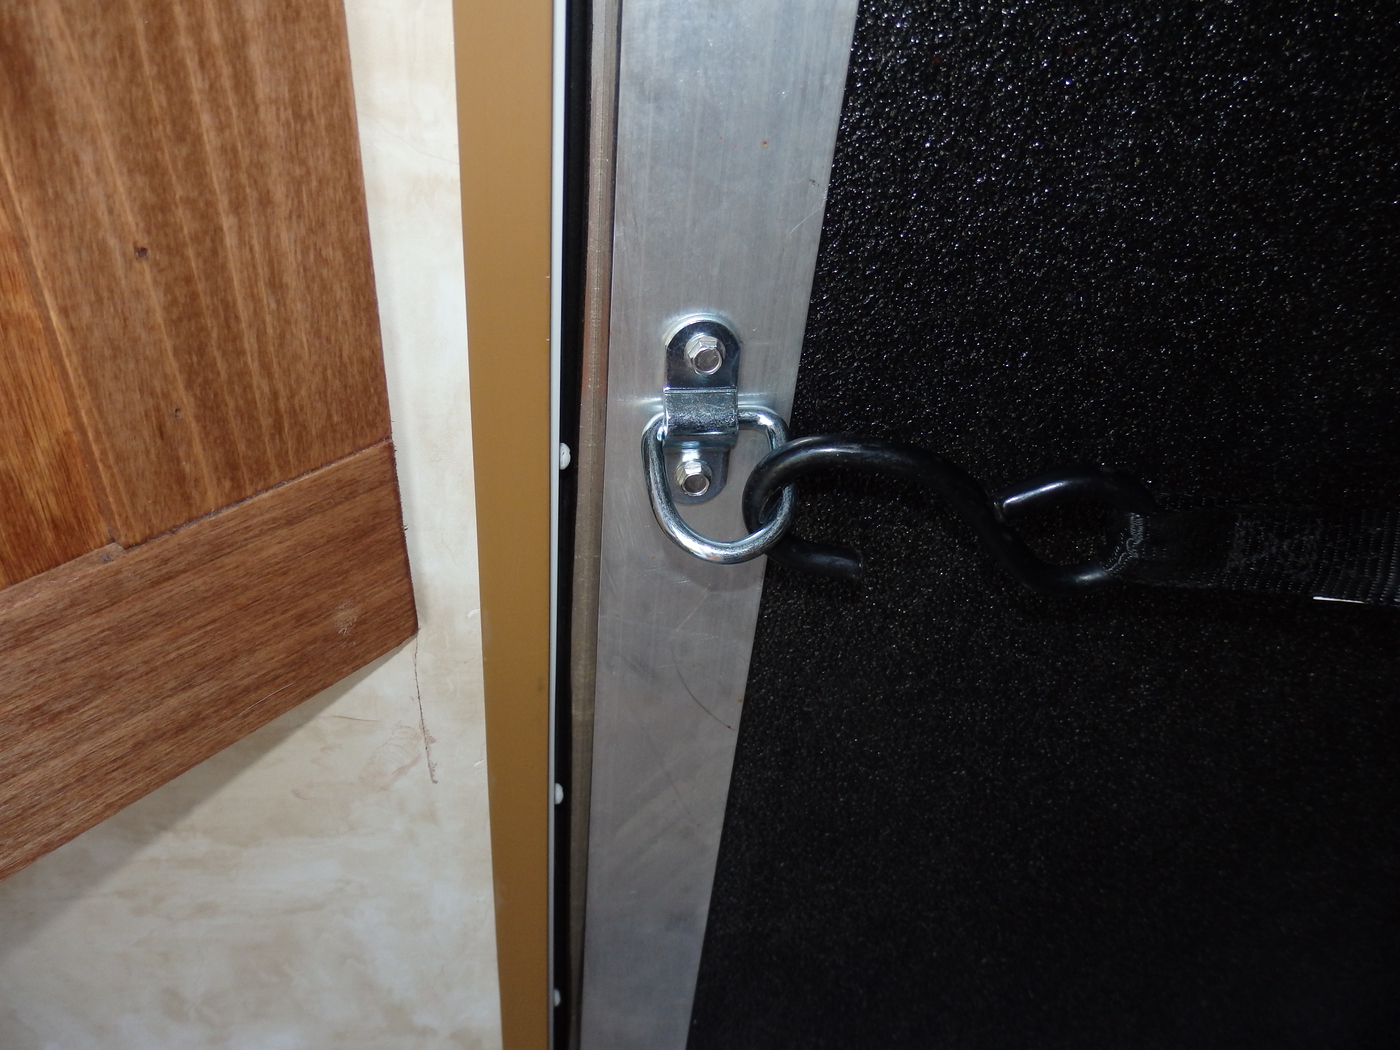
These hold downs are available at Harbor Freight for a couple bucks each. Self tapping stainless steel screws finishes the deal.
UPDATE….This table is no longer used as a stand alone table. It has been converted into a folding desk top….http://rvbprecision.com/rv-projects/work-table-desk-addition-loading-ramp.html
I mounted the spare tire to the ramp. The previous owner had it mounted on the A-Frame hitch and it was in the way to service the batteries and I just didn’t like the look of it.

I used the bracket he had mounted on the hitch. This put the attachment point down low where the door has more strength. Two steel backing plated were fabricated for the inside

Looks more bettah!


UPDATE 11-15-15 Â Trailer Rear Camera Install
Most RVers love the idea of a backup camera. Great for actually “Backing Up!” and also to watch the toad or to simply see what is behind you while traveling down the road.
Backup camera systems can be purchased on Ebay and Amazon for under $50. And the video quality is quite good. I’ve installed over a dozen of them in friends and families vehicles over the past few years.
I couple years ago I bought this system and installed it on my truck which tows the Toy Hauler and various other trailers. For $38 it is amazing piece of electronics gear.
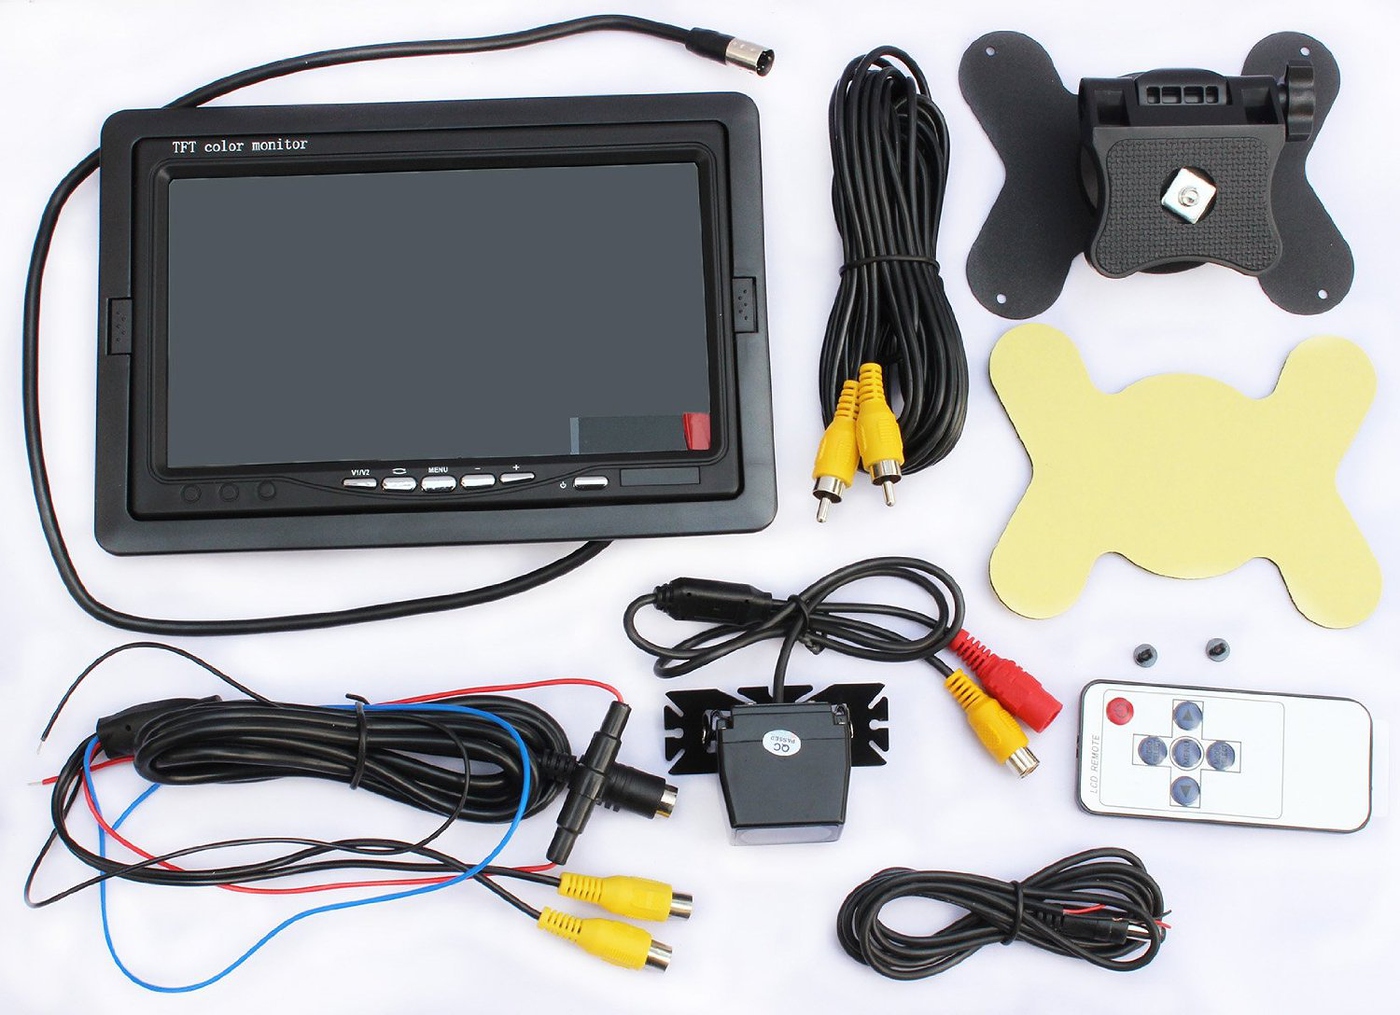
http://www.amazon.com/gp/product/B00…&s=car&sr=1-17
The camera is mounted over the license plate and it is a huge aid to backing up to attach the trailer.
But I also want a camera at the rear of the trailer. Backing into a tight camping spot or simply to see what is behind me while traveling down the road.
I bought a second camera similar to the one that came with the above system on Amazon. The TV monitor has two inputs so I would be able to switch back and forth between them.
But running a wire 23′ from the back of the trailer to the truck and then another 20 feet or so to the trucks dashboard seemed daunting. Plus I’d need some type of quick disconnect for when the trailer wasn’t attached.
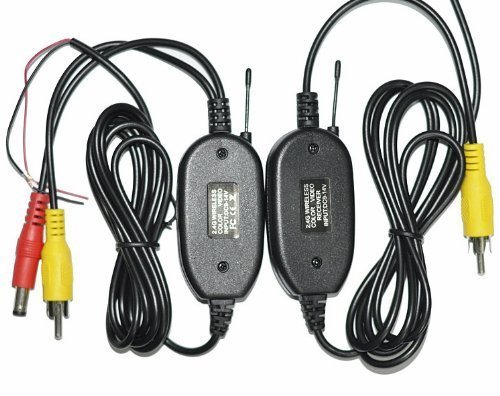
In searching for another solution I found a 2.4G wireless transmitter and receiver that can send the video signal from the camera to the TV monitor, in full color, wirelessly. This kit only cost $10 so I figured I’d take a chance.
http://www.amazon.com/gp/product/B00…ilpage_o00_s00
I work in the RF broadcast industry. We build and market digital modulators for the transmission of HD video signal over coax cable. We always preach Rule #1….”If you can use wire…use it!”…”Trust the copper!”… I’m not a huge fan of anything “wireless” as I see lots of issues with interference and poor video quality. But sometimes ease of installation trumps using the wire…
So this wireless system shows up in under 48 hours from Amazon (How do they do that!!!)and I hooked the receiver up in the truck. The transmitter I hooked to a small 12V test battery I use and tried out the distance by walking away with the camera and into the rear yard of my house. At over 150′ away, going through a couple walls and the steel body of the truck, it worked GREAT! Video quality is amazing!
From the rear of the trailer to the cab of the truck is no problem.
I mounted the camera above the rear loading gate on the Toy Hauler and grabbed power from the center clearance light. Took all of 20 minutes!


The transmitter was located out of the weather, under the air conditioner cover

With the wires run across the top of the roof and secured with Eternabond

I modified the dash board in the truck to locate a new Garmin 760RV gps up higher and created a “drawer” for the TV screen for the two rear view cameras.
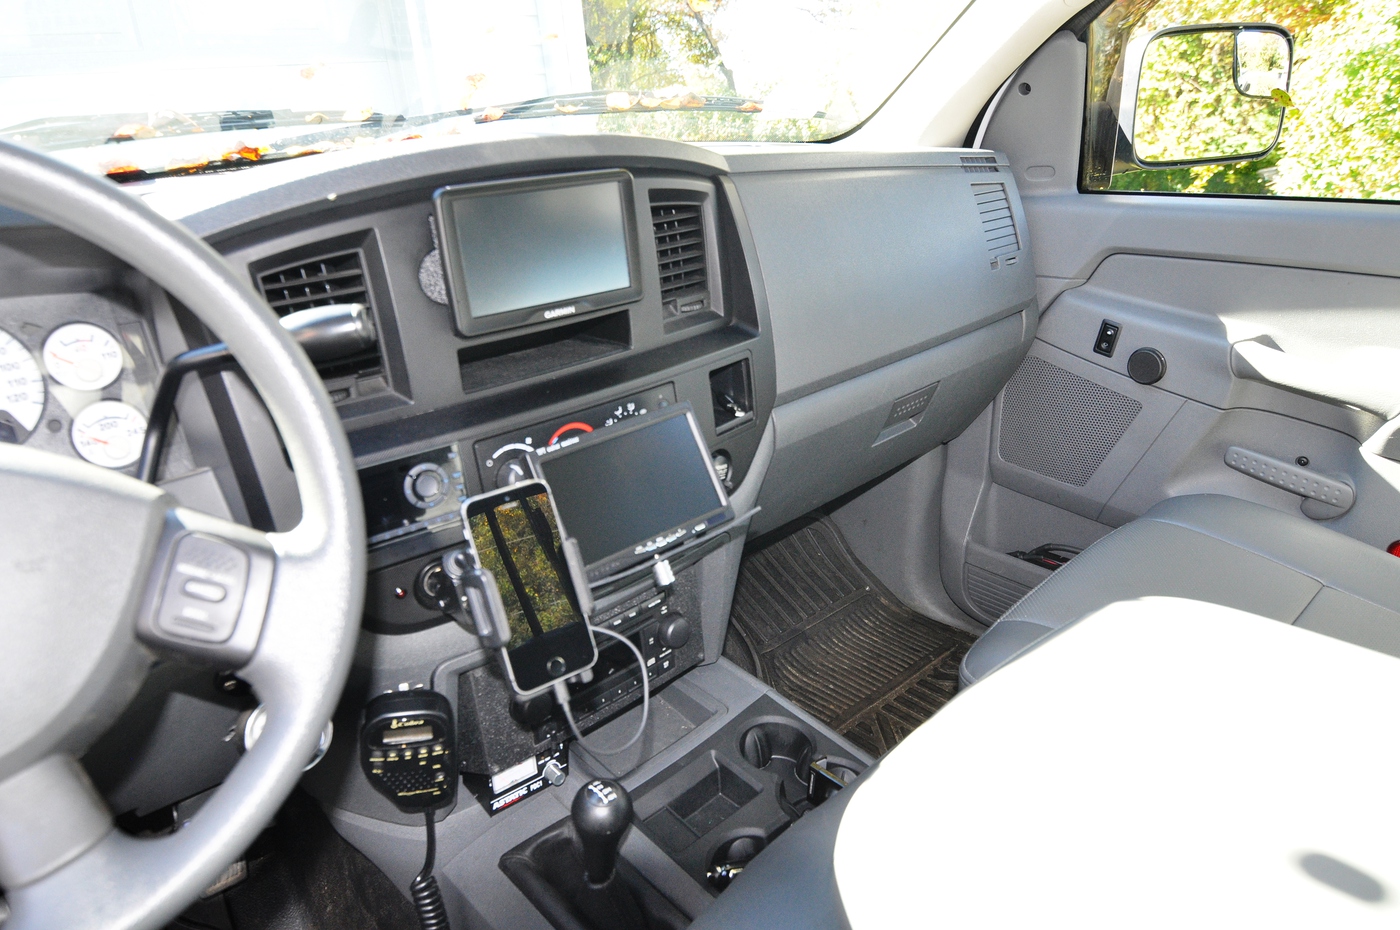


Since both rear view cameras work off the truck and trailer running lights, I simply turn on the trucks lights, turn on the rear view monitor and Voila! I can see what is behind me!
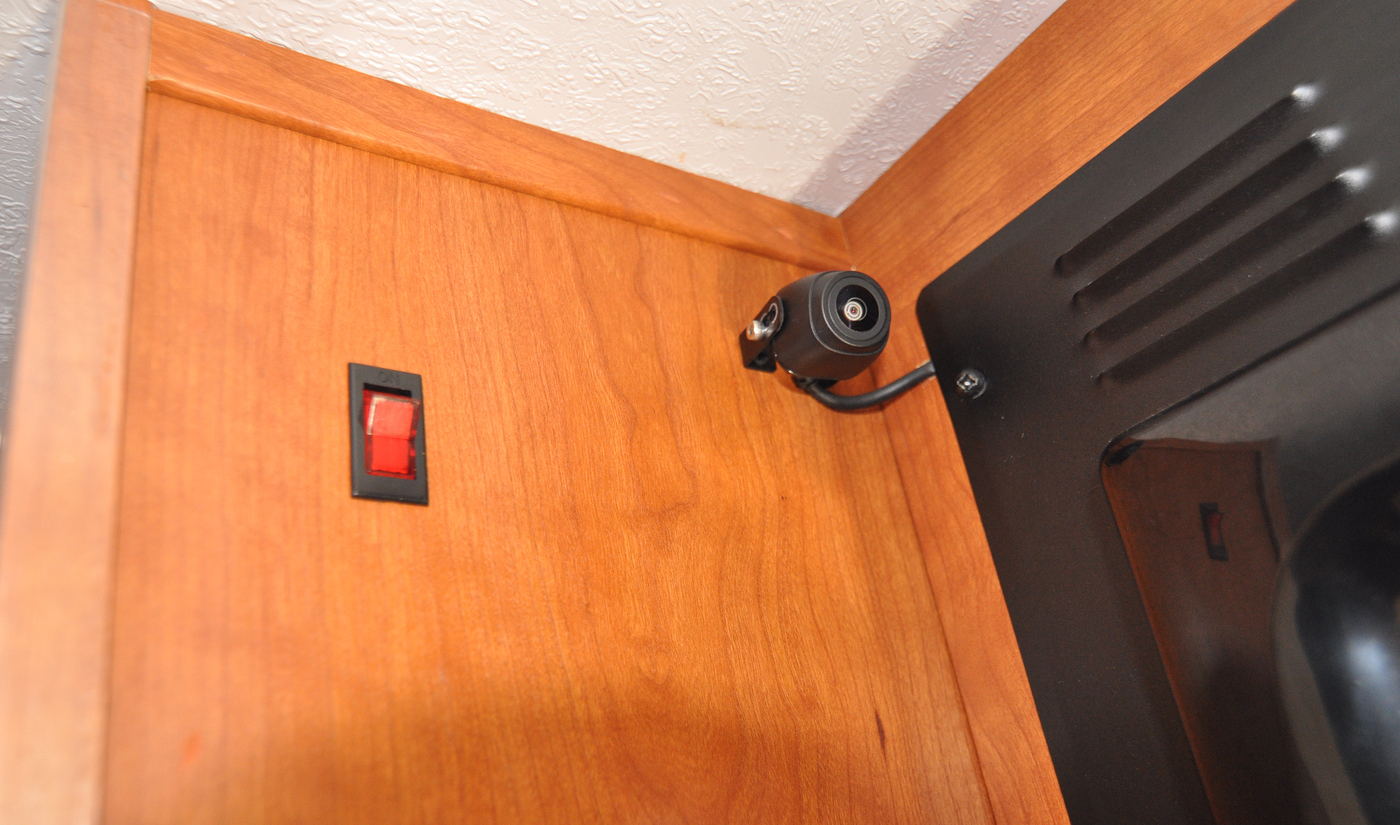
So now as I said above, I installed the New Garmin RV760LMT GPS unit. This unit included a FREE wireless backup camera that works through the GPS screen. Since I already had the cameras on the back of the truck and the rear of the trailer, I decided to install this “extra” camera INSIDE the Toy Hauler. This way I can be sure the motorcycle is tied down and secure as I drive down the road.
The cameras was mounted on the side of the kitchen cabinet with a small illuminated toggle switch to turn it on and off

UPDATE 12-1-15 IMPROVING FM RECEPTION
The factory radio in the Forest River Cherokee 19RR is a pretty good unit. But it had terrible FM reception. I tracked it down to a poor FM external antenna.
I decided to spend some real$$ and go for a top end Marine Grade AM/FM antenna.

I fabricated a galvanized metal plate for the roof that would give good purchase for the AM/FM antenna and also a place for the magnetic XM radio antenna to adhere to.

Here is the antenna I purchased. I sourced it through WEST MARINE but it can be bought most any marine supply store. Be sure to order the appropriate base as it does not include one.
http://www.westmarine.com/buy/shakespeare–am-fm-marine-antenna–380644
The radio performance is 1000 times better…..Great Improvement!
UPDATE 12-12-15 Â ALUMINUM BATTERY BOX
December 12th and 62 degrees up here in New England…I’m loving this Global Warming!
The wooden battery box I made was temporary. It started to delaminate after only a few months. I wanted to make one out of diamond plate aluminum to match the splash guard on the front of the trailer. But when I went to my metal supplier I found out that the aluminum I’d need was nearly $200!!
A neighbor of mine stopped by for me to do some welding on his utility trailer. He mounted a diamond plate aluminum truck box in the tongue of the trailer. He says he bought it at a garage sale for $50. I told him if he ever sees another one like it for around that amount to buy it and I’d pay him back. A few days later he shows up at my house with a near perfect truck cross box he found at another garage sale. He wouldn’t let me pay him. He said it was payment for all the welding I’ve done for him over the years. Great neighbor.
This is what I started out with. It was a shame to cut it all up since it was in such great condition.
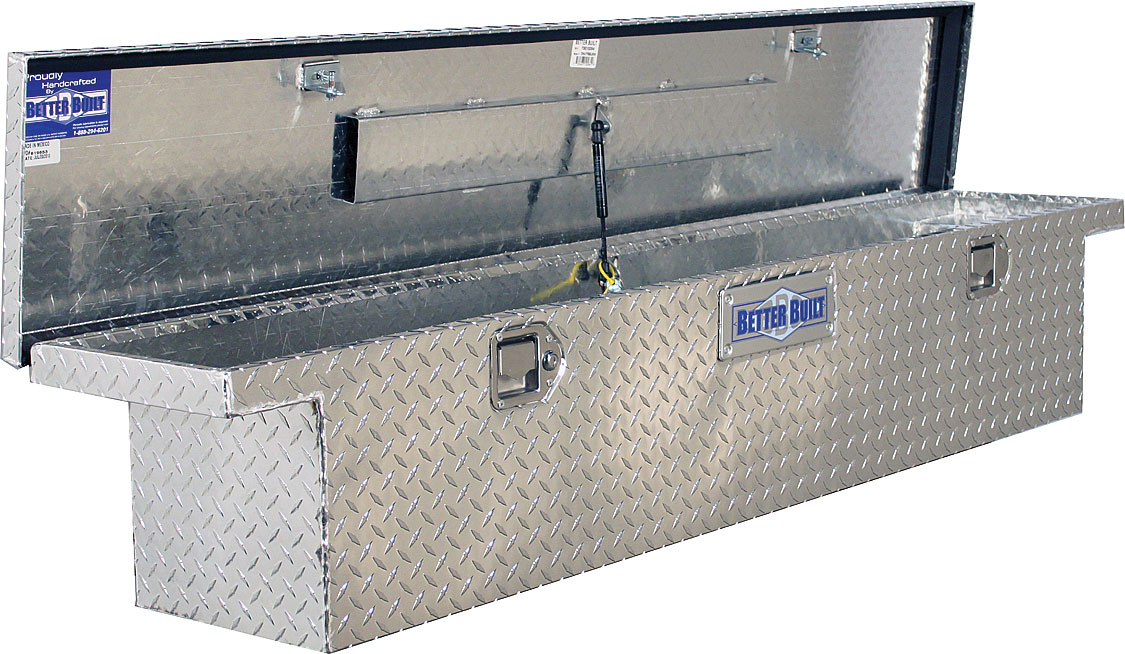
(Representative picture)
So sabersaw in hand, I hacked it up and TIG welded it into this:
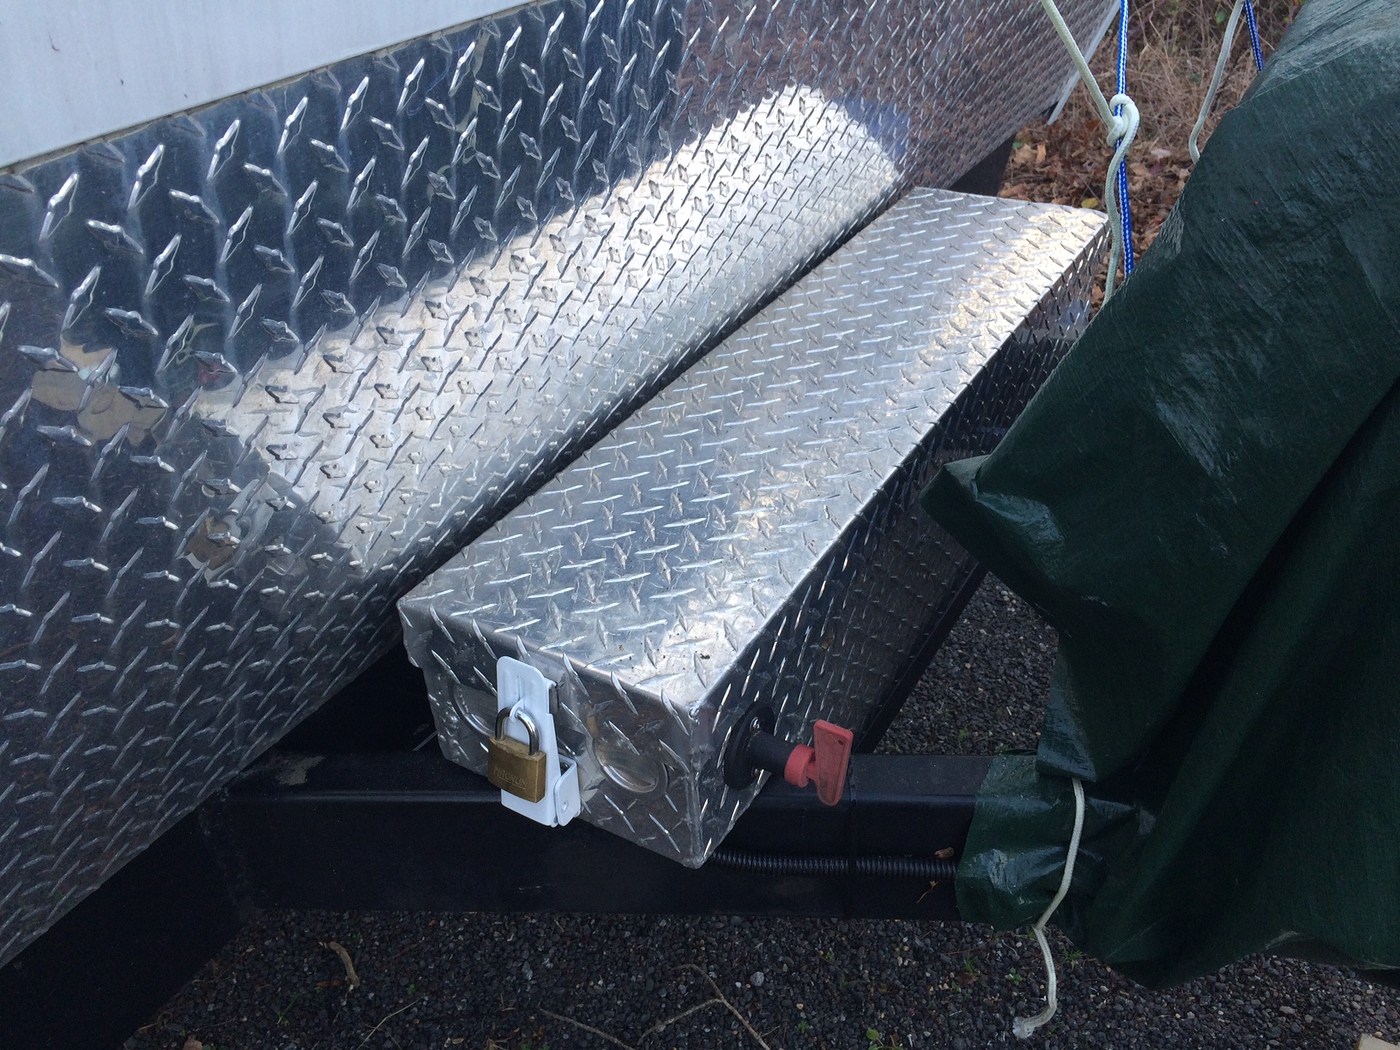
A few hours of work and I think it came out pretty good!
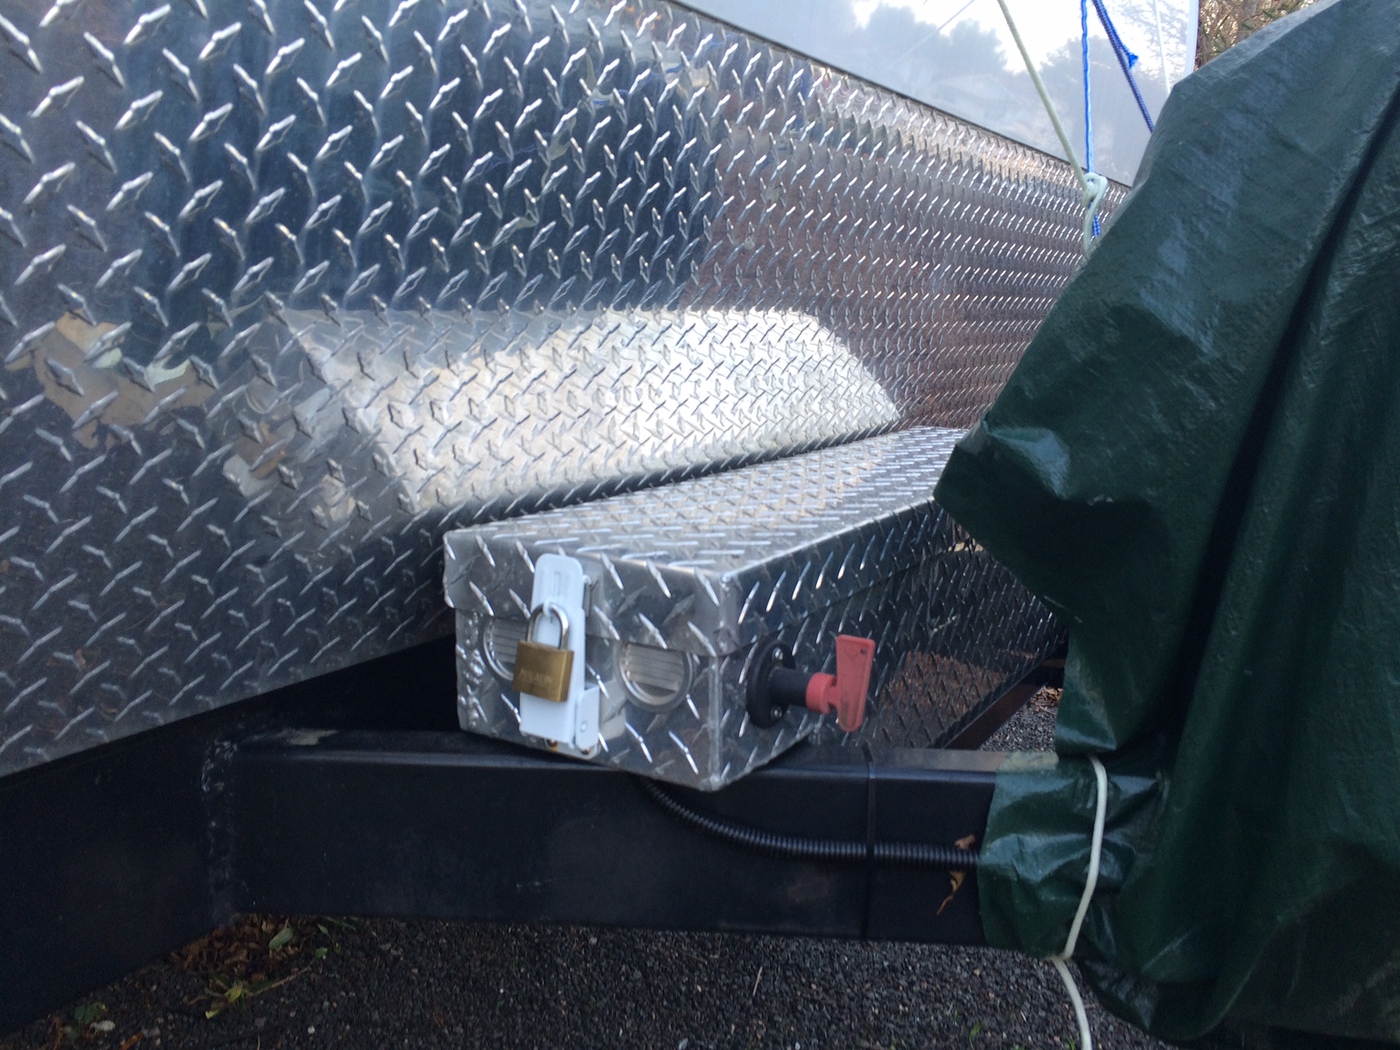
Moved all the wiring over to the new box.
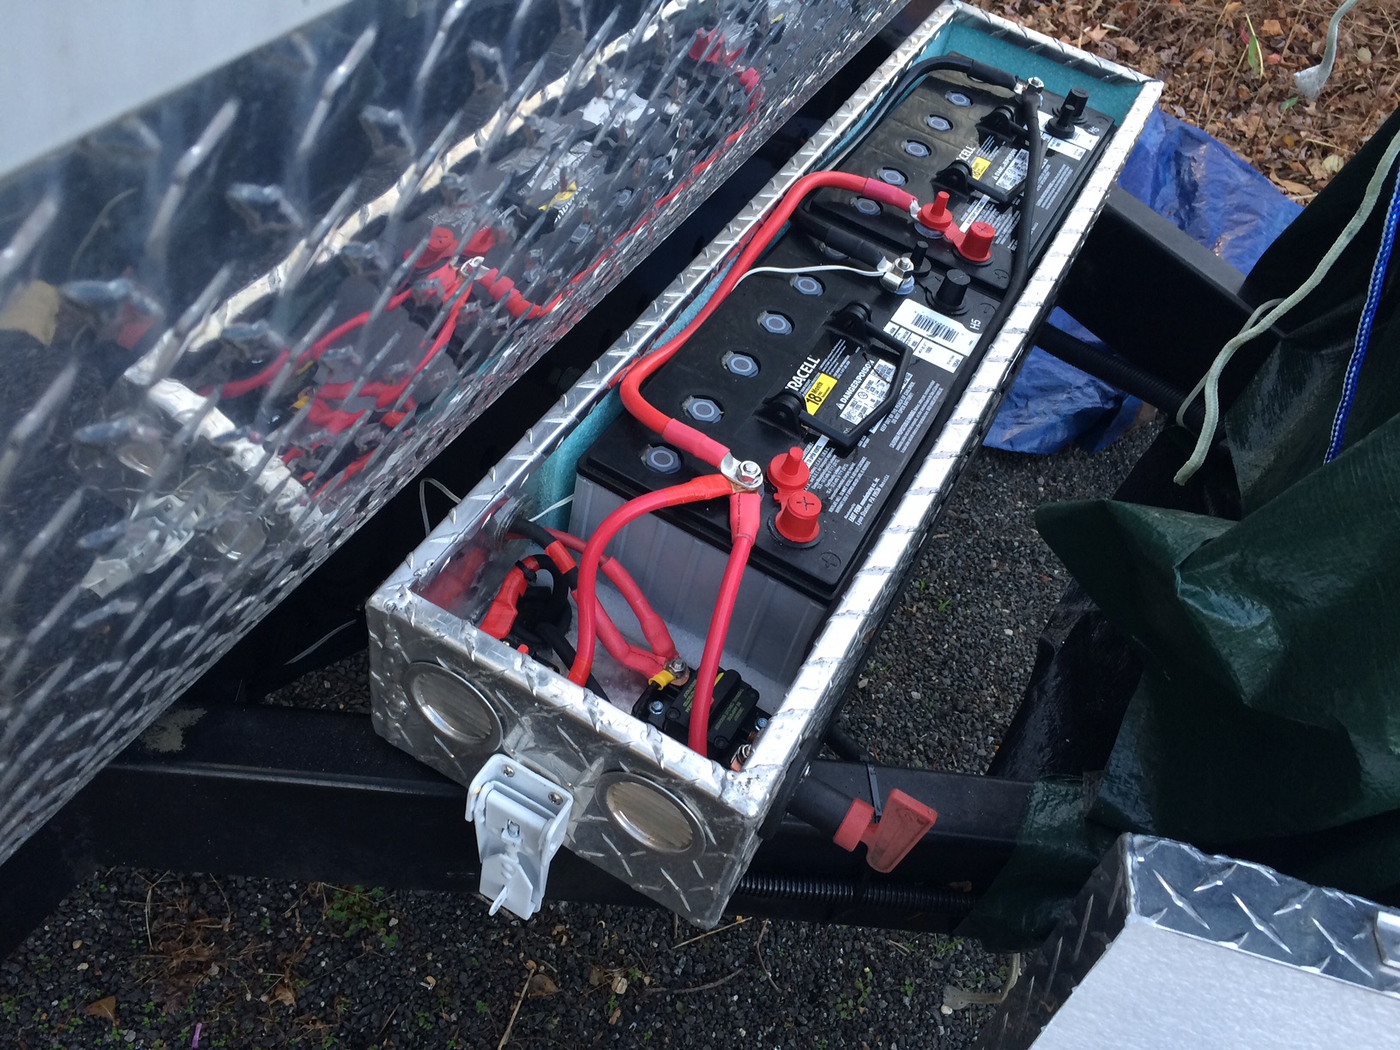
A few vents on the sides and insulated with 1/2″ closed cell foam. The cover has a piece of 3/4 rigit foam to insulate the battery posts from the aluminum cover.
You can read more about the trailer’s electrical system on the Solar Install Post:
DONE!
UPDATE 11-25-15 Â New XM Radio Receiver……New TV and a TV for the Bedroom.
This is the year to buy TVs. The retail TV industry is overstocked with TVs and the deals simply can’t be beat. With this in mind I headed over to Best Buy to see what they had on sale that operated on a 12V power supply.
Currently in the living area I have a 19″, 12v TV
This is simply too small when viewing from the couch. The largest I could fit is a 24″. Best Buy had one that operated with a 12V power supply for $129

More Bettor!
I also replaced the combination GPS / XM Radio unit in my truck so I ordered a second car mounting kit and installed it under the TV. The output runs through the trailers stereo system so now I have XM radio throughout the camper

The 19″ TV that was in the living area is now mounted over the window in the bedroom.

UPDATE 12-15-15…Deer Antler Hat Rack
A piece of wood, a couple pieces of deer antler and I got me a hat rack!

UPDATE 12-20-15 Â Long Range Cellular Antenna
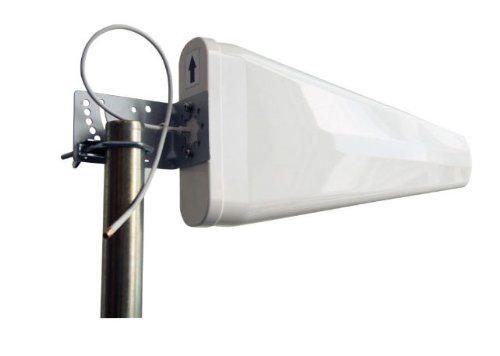
I tend to find myself camping in areas with little to no cellular reception for both my cell phone and my “Hot Spot” MiFi connection. I needed a way to reach out and touch someone.
I purchased this long range Yagi antenna from Amazon
And a 16′ extendable painters pole from Lowes Home Improvement.
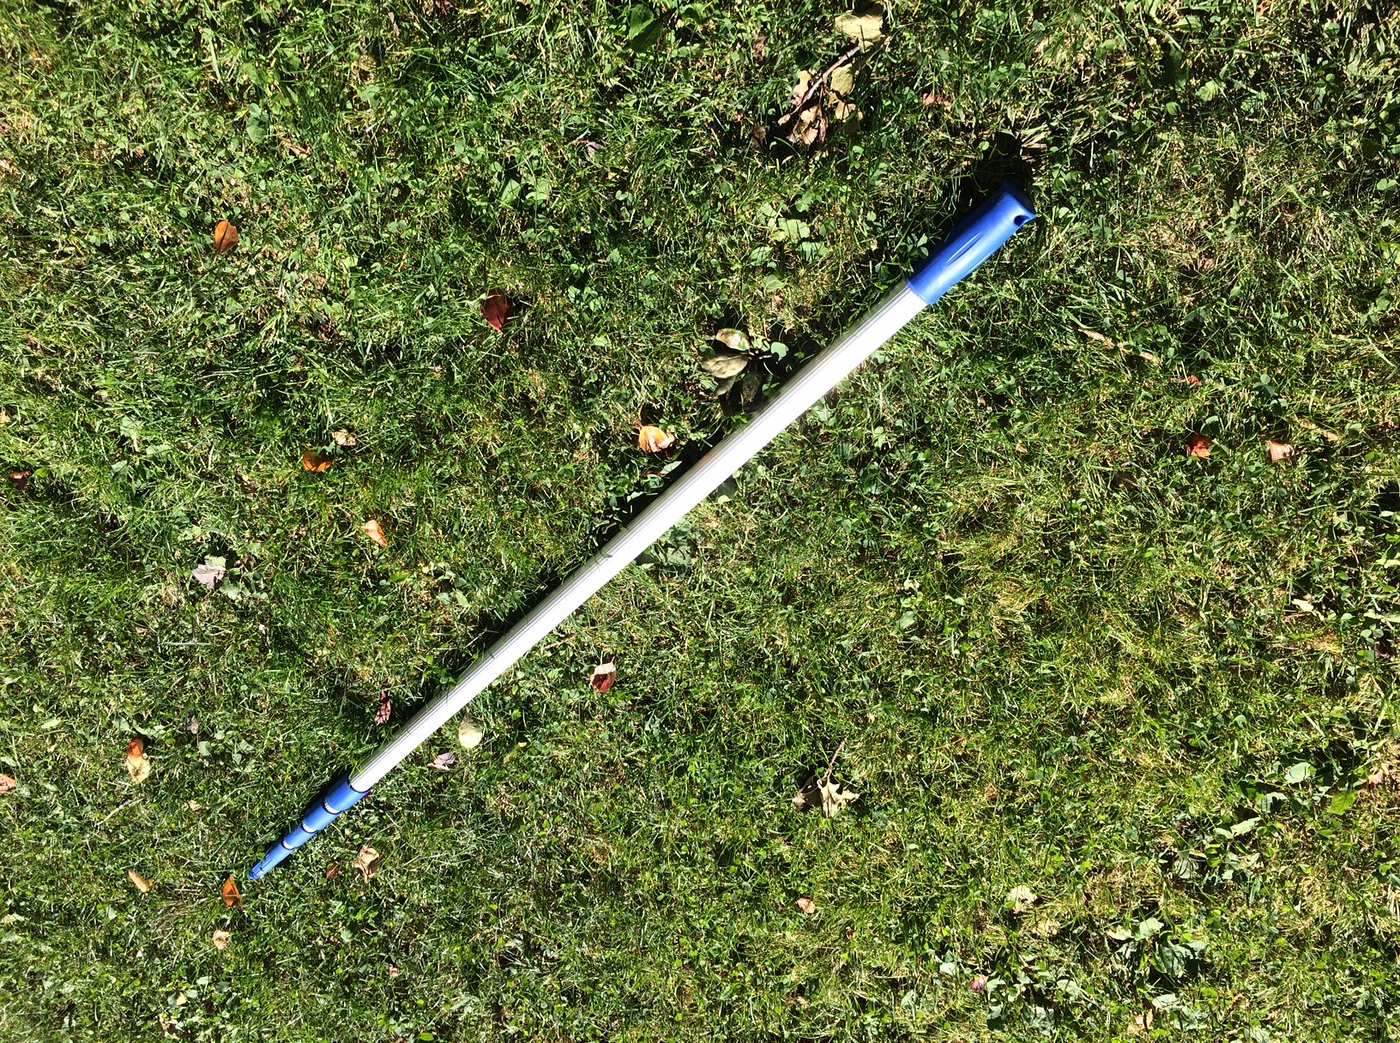
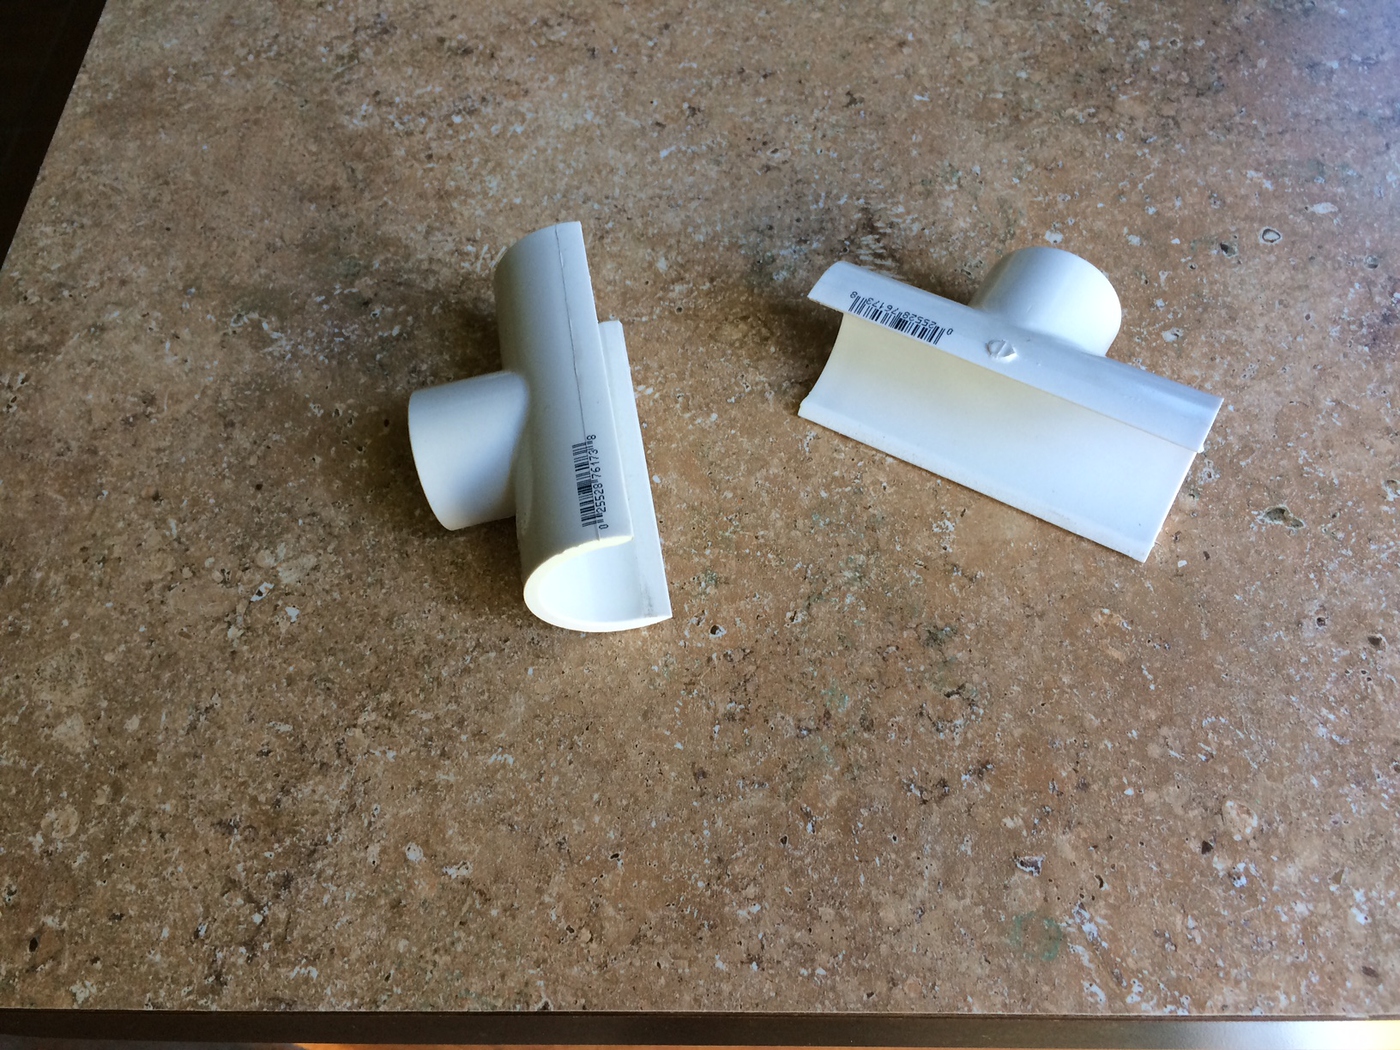
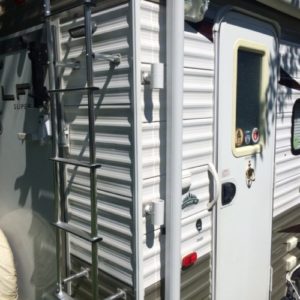
Fabricated a couple of mounts from PVC pipe fixtures and mounted them on the side of the camper
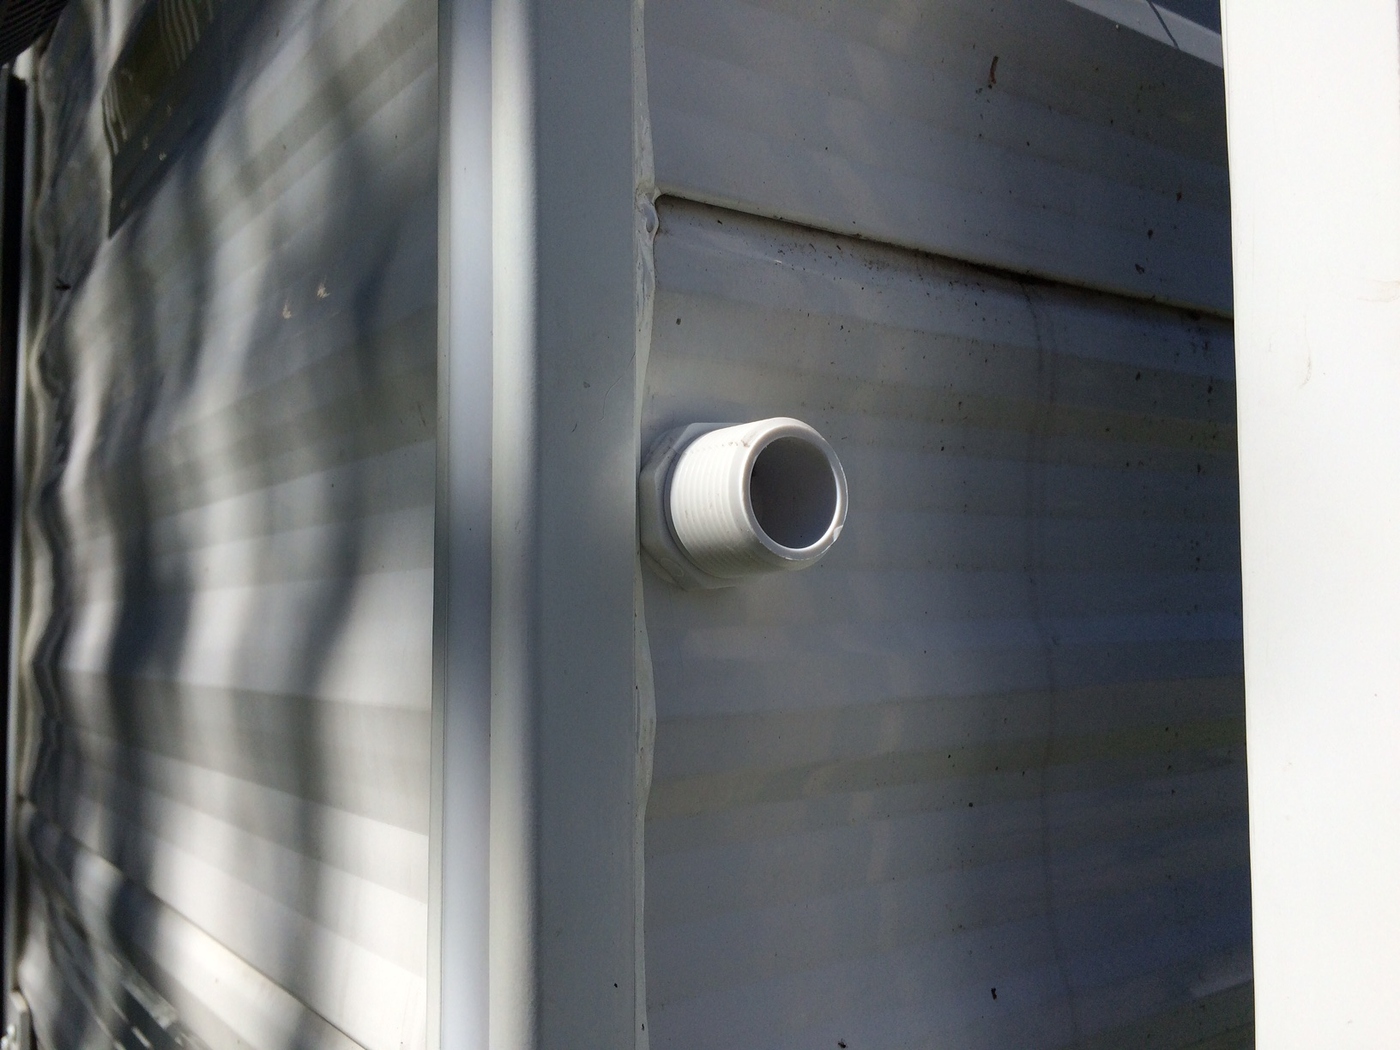
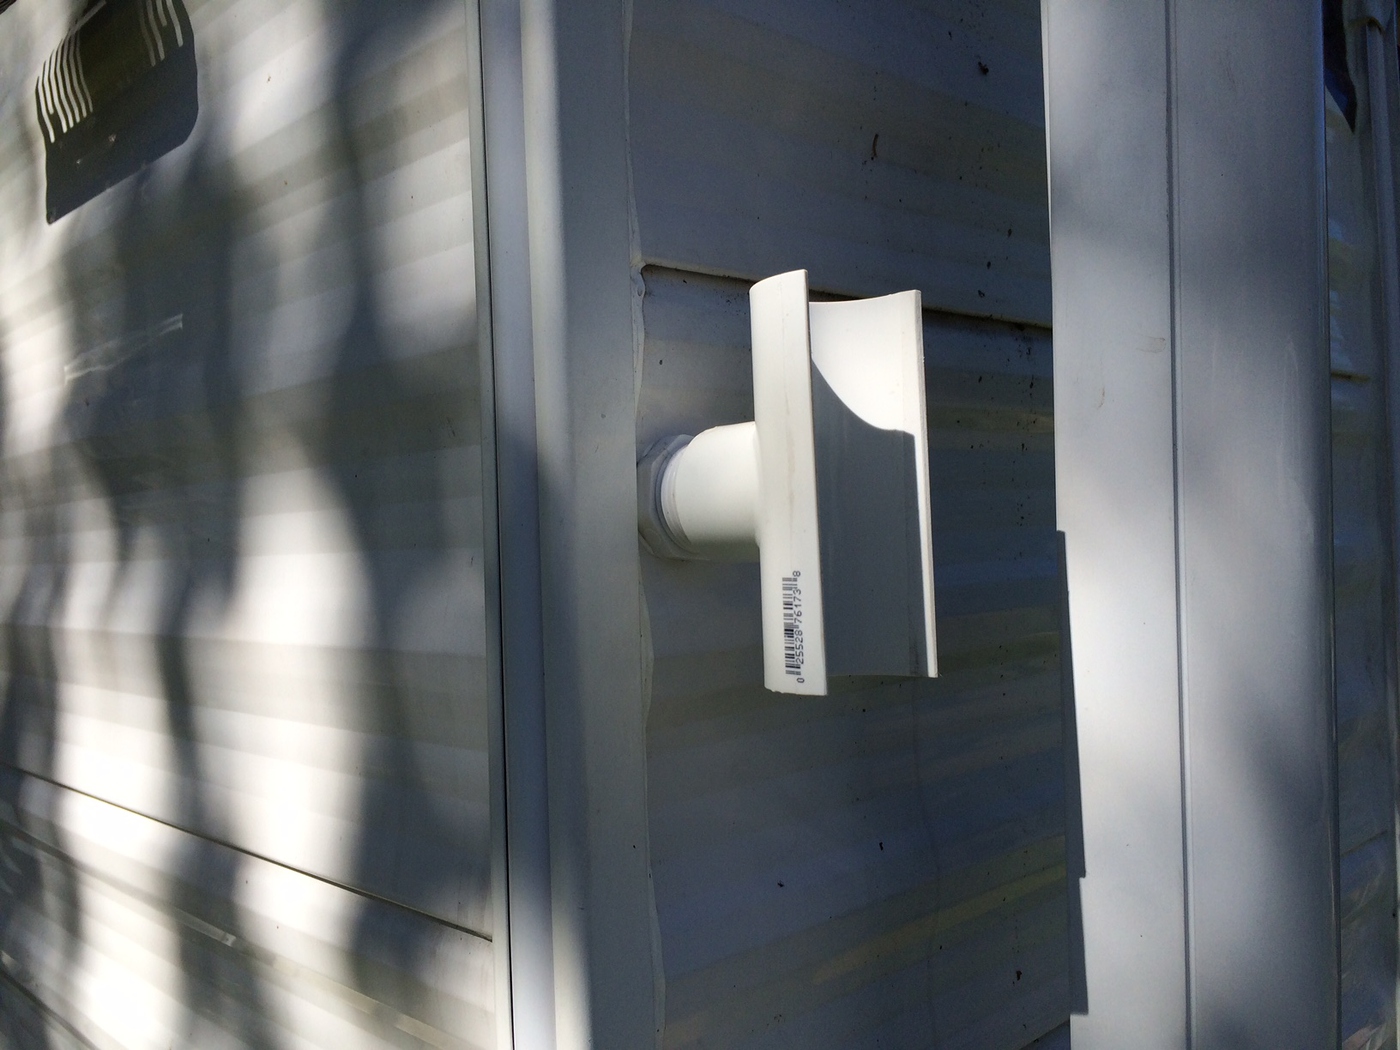
The painters pole simply snaps into these “clips and is held extremely securely
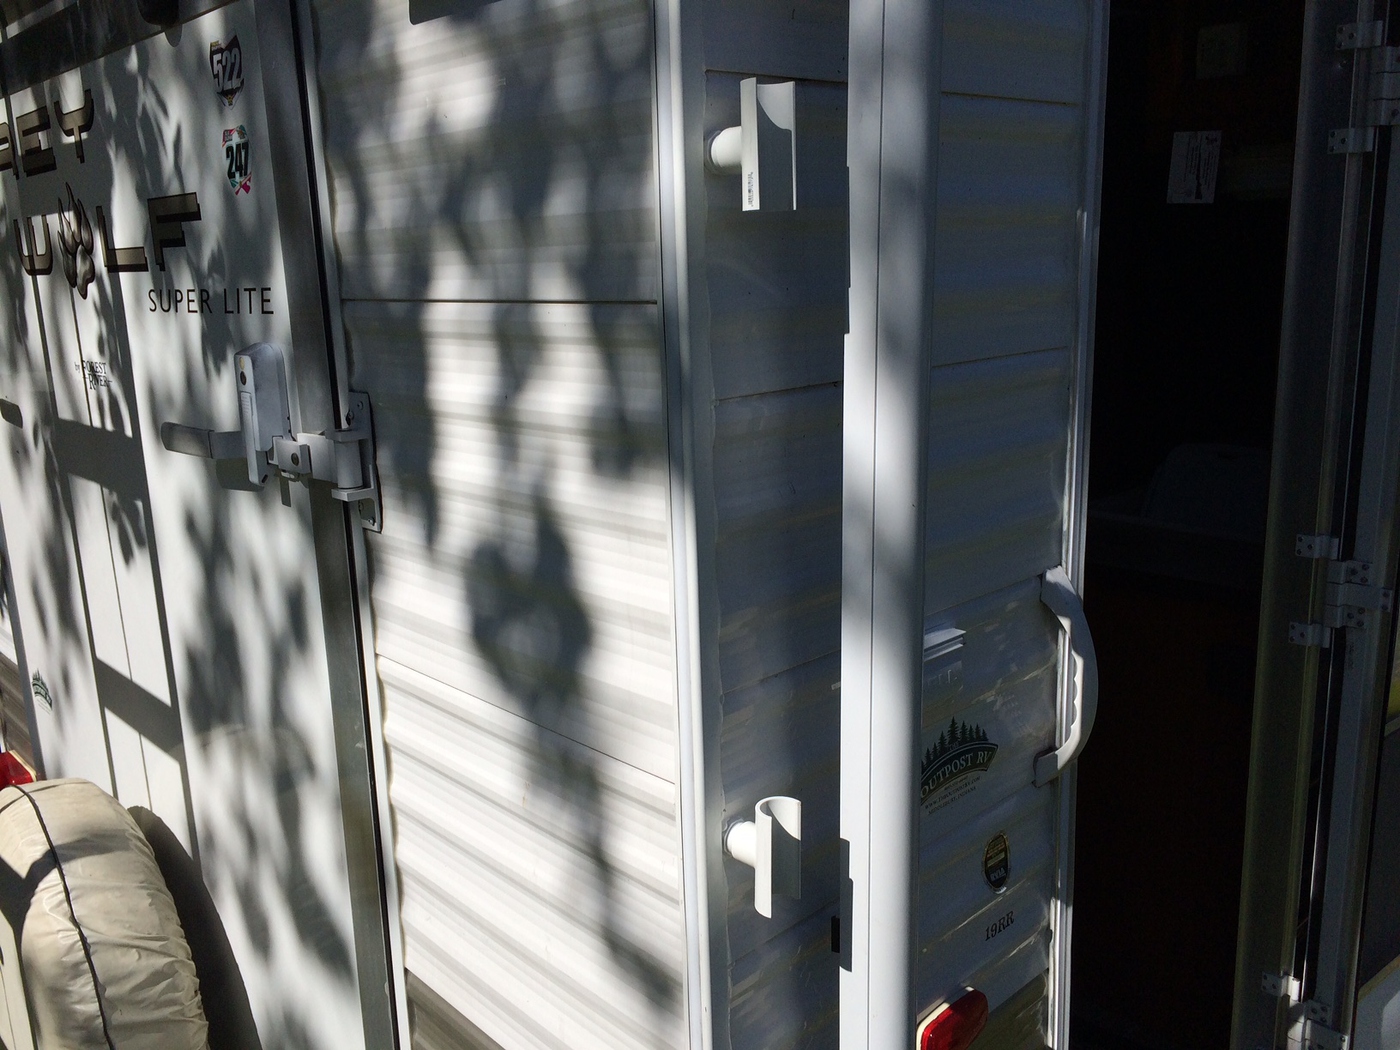
A wire comes down from the antenna and runs through the access door I installed previously and connects to the MiFi unit within the trailer. The Cell phone, LapTop, Ipad etc simply WiFis into the MiFi Hot Spot and we are connected
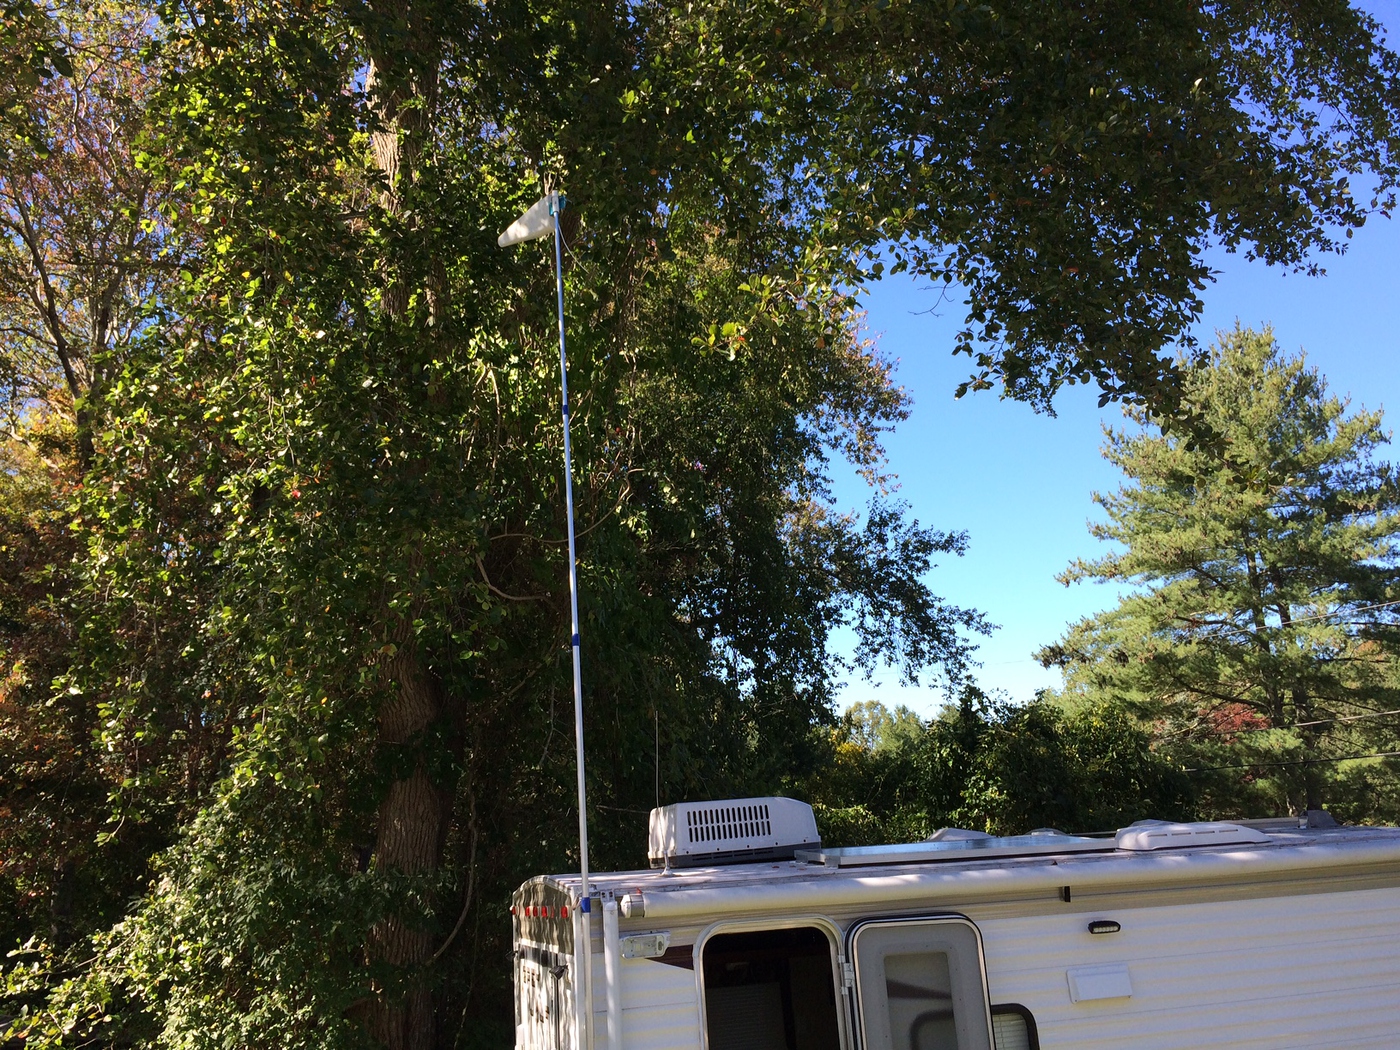
The mast for the antenna is easily rotated to find the best signal strength. This system works amazingly well and is not very expensive. Everything was under $125 in total.
UPDATE!…..Did I say those clips held the painters pole SECURE? Secure is a relative term. In a strong wind they were not so “secure”…So I redesigned it. Used full circle pipe “T”s.
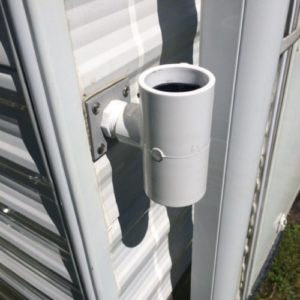
And I bolted them to a square piece of aluminum stock which was screwed and sealed to the trailer
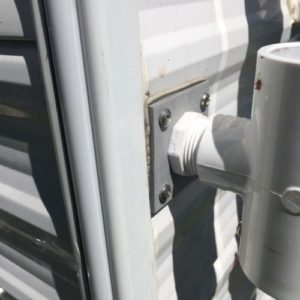
In the bottom mount I used a screw to stop the painters pole from sliding down and a piece of rubber from an inner tube to make the fit snug
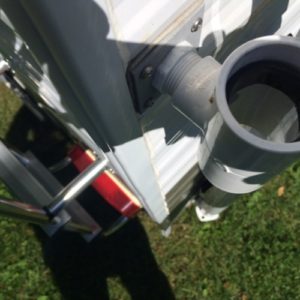
Now the pole ain’t going nowhere!
I hope you find all this stuff informative….THANKS!
Pingback: Solar Install-Grey Wolf 19RR Toy Hauler | RVB Precision
Pingback: Dodge Ram 2500 Dash Modification | RVB Precision
Pingback: SIMPLE CARGO SLIDE for RV | RVB Precision
Pingback: Cellular and WiFi Booster Install | RVB Precision
Pingback: Installez Cellular Booster et WiFi Booster RV | Répéteur et accélérateur WIFI