
This is a quick article on my journey of converting my John Deere 316 Kohler from very noisy Rag Joints to much improved Universal Joints.
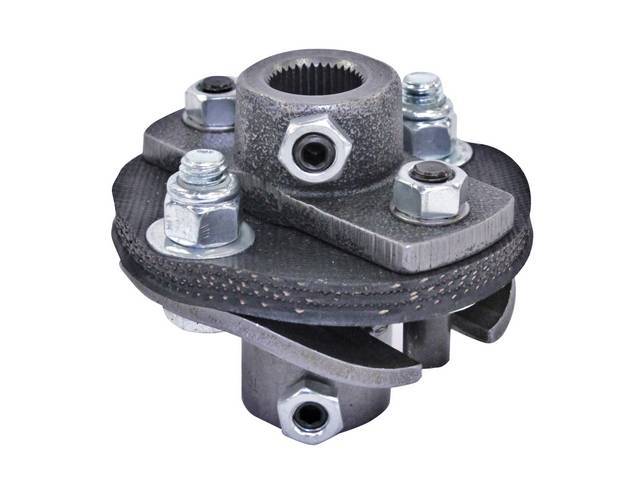
First, what IS a Rag Joint? The early JD Tractors and other brands used Rag Joints to transfer the power from the engine to the transmission. One at each end of the drive shaft (DS). This allowed a certain amount of misalignment or flex in the DS to be filtered out. It consists of two metal connections with some type of flexible material in between.
Back when tractors were 8-10 HP these worked fine. As power increased, they are a poor substitute for a true Universal Joint.
Today they are rarely seen in power transmission and you’ll mostly find them in steering systems.
RAG JOINT
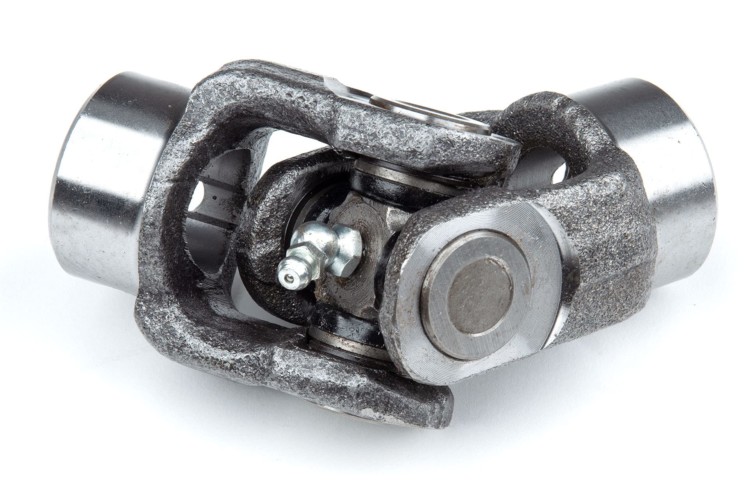
What is a Universal Joint?….A universal Joint is a much more robust way to transfer power from an engine to a transmission. Made of heavy metal with ball bearings to smooth out this transfer of power.
UNIVERSAL JOINT
Recently I converted my third tractor from gas engine to electric motor. I chose a John Deere 316 for this conversion as I wanted a Hydraulic Drive system with dual brakes and two Hydraulic Spools for implements. The JD 316 “Kohler” version offered this.
I found a great deal locally for a tractor with a non running engine. It had a 13HP Kohler engine with a Rag Joint drive shaft. I sold the motor, tires, wheels and a bunch other parts not needed in an electric conversion and ended up with the JD 316 making me a few bucks!
Once the conversion was finished, I was surprised on how loud the tractor was. At first I thought it was the electric motor. I disconnected the DS from it and it proved to be quiet as a church mouse. (See Video Below) And the noise seem to be coming from the DS. I was convinced that the Rag Joints had to go!
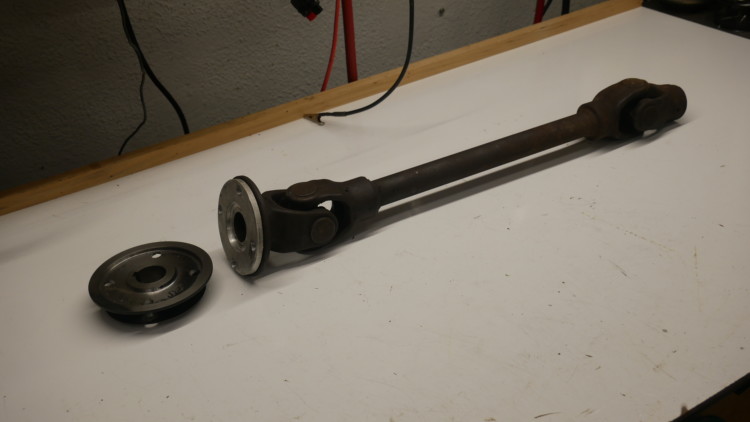
I found a JD DS on Ebay that was for a 316/317/318 tractor for $30 including shipping! Ordered it up and when it arrived it was in perfect condition. Tight as a “Well Drillers A%&”…..
But in no way on God’s Green Earth was this going to just POP into a 316 Kohler. This 316 Kohler was a one year only tractor……Everything a 317 had, but a single cylinder Kohler 341K motor. The replacement was the John Deere 317…
Now to install it…. Not a task for the faint hearted!
First I needed to figure out how to connect it to the electric motor.
The motor has a 1″ keyed shaft. I had a pully that fit the motor perfectly. I fabricated a disc that would go between this pully and the connection plate on one end of the new DS. This plate filled in the space between the pully and the DS flange. I could have machined the pully flat, but I didn’t want to weaken this area by removing so much material.
This adapter plate and the pully were drilled to mate up to the DS
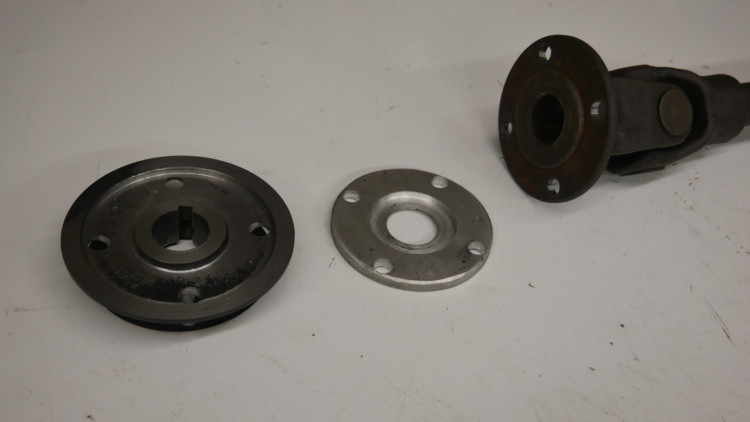
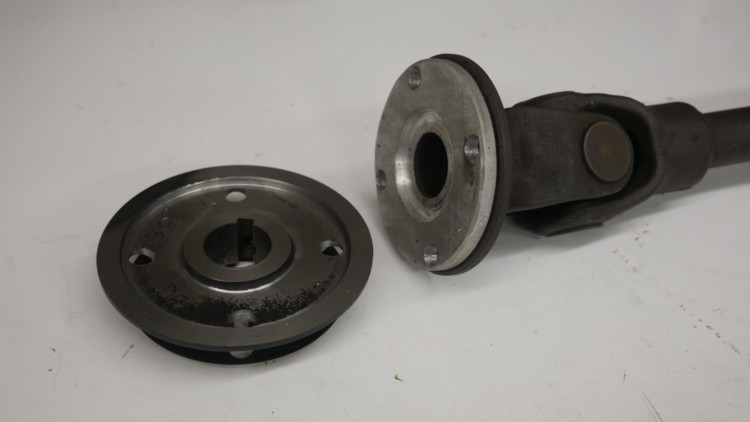
This worked out great!
Now on to the transmission end…
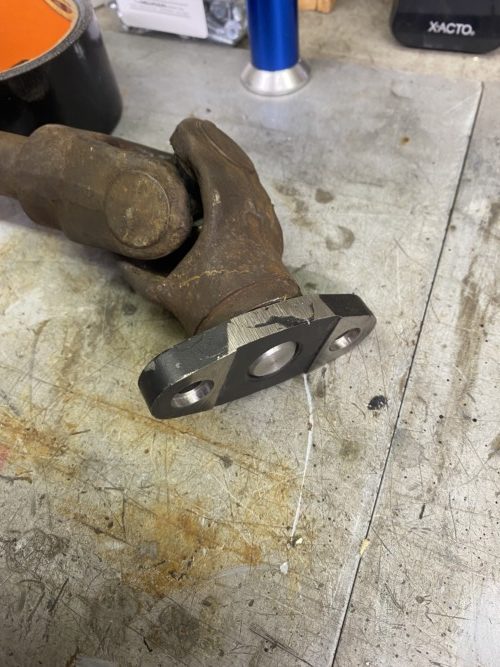
The Hydro Pump on the tractor that the other end of the DS needed to attach to had one half of the Rag Joint already attached.
The replacement DS end was splined.

The shaft of the hydro pump, under this connection, was not splined and simply has a through pin to hold it in place on a smooth round shaft.
I decided to fabricate a simple connection from the other half of the Rag Joint and insert it into the spline.
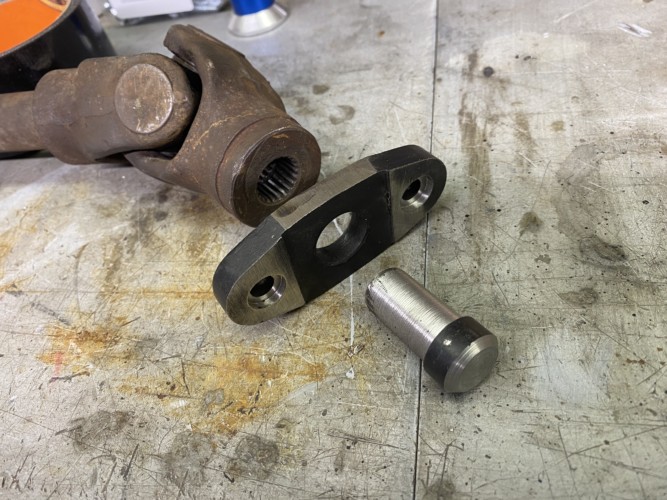
At first I was going to weld all of this together. But then I decided to just pin it so if all of this didn’t work out it could be easily disassembled and “Plan B” (Really didn’t have a plan B at this point) could be undertaken.
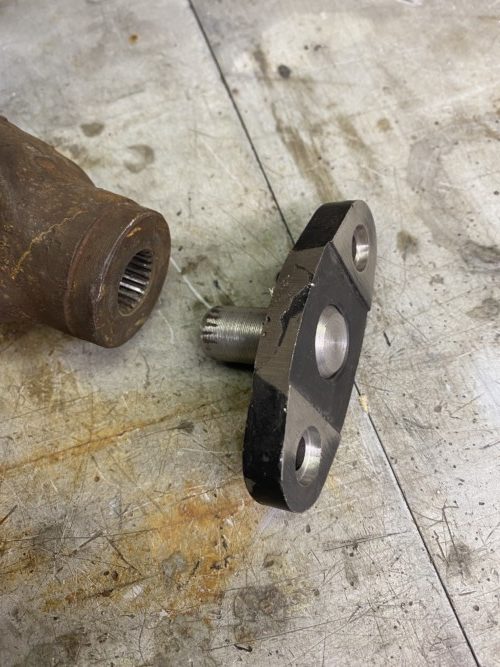
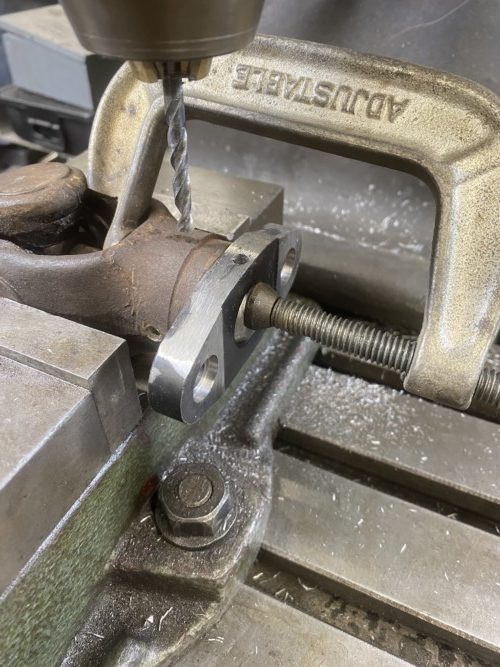
My milling machine was used to create the two pockets around the bolt holes to mate with the bosses on the hydro pumps flange. This relieves a lot of pressure off the two bolts and distributes it over four points rather than just two. (The motor end of the drive shaft has four bolts to spread the load)
I used a C-Clamp to hold everything tight as the hole was drilled for the pin in the milling machine.
Once all together, now the fun begins!
To simply get this DS into the tractor required a ton of work.
First I had to unbolt the control valves for the two spools just to make enough room to get the darn thing in place….Getting to the nuts and bolts was quite a chore. There is a lot of stuff going on under these hydro tractors!
Once that was done I realized that later 316/317 tractors had a “bump out” on the chassis plate to allow the universal joint to spin without hitting anything.
I had to cut away a good chunk of the chassis to accommodate the universal joint. A angle grinder and a Dremel tool were called into play.
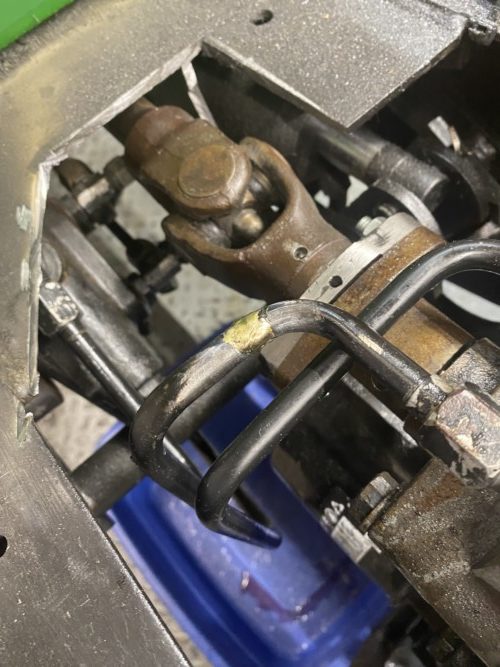
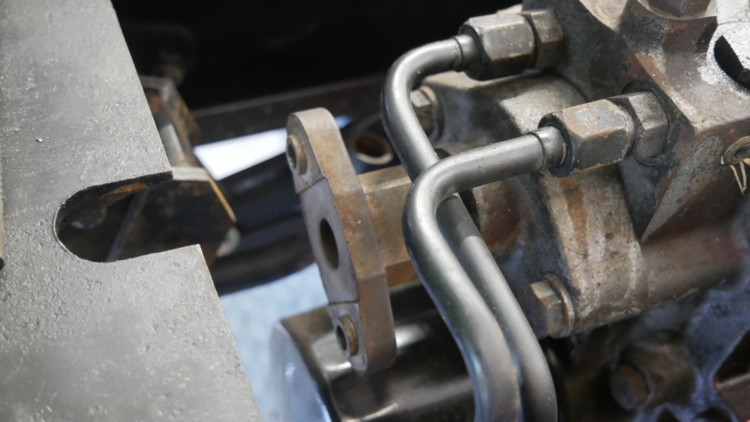
(We’ll talk about that brazing on the return line of the hydro pump in a moment…)
Then I spent the better part of an hour messing with the motor placement to afford the least bit of runout and best alignment of the DS. But as it turns out, if I get the runout to near zero, then various moving levers for the hydraulics with interfere with the revolving DS. In the end I had to be satisfied with about a 1 degree down and to the left alignment.. “Good enough for government work!” BUT, with such a short drive shaft….one degree is really more than I’d like to see. But it is what it is….
The motor was set back about 1.5″ from where it was with the rag joint shaft. I could have cut the shaft and rewelded it, but I decided to leave it alone and set the motor back the 1.5″ using Hockey Pucks as spacers….This also removed some of the vibration inherent in a non balanced drive shaft. (Sure wish JD had balanced these shafts as there is quite a bit of vibration inherent in this type of power transmission if not balanced. In gas tractors we thing most of the vibration is coming from the motor. Not so. An electric motor has near ZERO vibration and adding the shaft introduced it.)
So now it is all together and time to test it…
DISASTER!!!
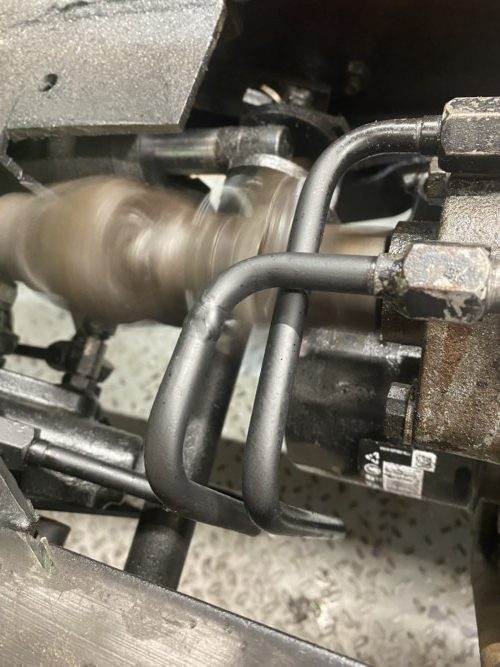
When using the angle grinder to remove part of the chassis to fit the universal joint, I accidently nicked the return line to the Hydro Pump! When I turns on the motor, T-Oil when EVERYWHERE! Ruined a nice pair of pants, shirt and everything within 15 feet of the tractor. WHAT A MESS!
It was a small nick on the lower pressure return side of the pump. So I wrapped it with a piece of innertube rubber and threw a few hose clams on it to test my new DS. It worked with out leaking.
I went on line to see if anyone had a repair solution and Templeton JD Guy on Weekend Freedom Machines forum suggested that he had brazed many damaged hard hydro lines on JD tractors. (BTW, just this past week I had reason to visit with JD Guy in Templeton Massachusetts. What an amazing collection of extremely good running John Deere tractors he has for sale. Every model you can think of. Worth a call or visit if you are in the market)
A few minutes with the torch and some 10,000 pound brazing rod and all is well with the world once again….
So….Was all this work a success…YES!
The video above shows the tractor running with the new universal joint DS…..The camera and being in the shop makes it appear much louder than it really is. And most of the noise is still coming from the unbalanced drive shaft vibration……But SO much better….
Here is a video of the Electric motor disconnected from the Rag Joint drive shaft to prove to myself that the electric motor wasn’t the culprit…
And here is a video of the tractor running with the Rag Joint DS…Outside and it was stupid loud!…
Here is an early “Walk Around” of the tractor. (It’s wearing a 214 hood as this was the best hood I had). I’ll be writing a full article for this web page on the entire conversion….Stay Tuned!
I hope you enjoyed this quick article on the John Deere 316 Drive Shaft conversion.
You can find the other articles, videos, etc on the Toro Tractor conversion and the John Deere 214 tractor electric conversions that I did on my web site here…
THANKS!