
(Houston…We have a problem…Updated 12-22-09 see Below)
I recently got back into the hobby of photography. With six grandkids, the need for portrait works would soon be needed. I researched a set of studio lights and found them to be either extremely poorly made or very expensive. I figured I could easily build a set myself.
Before you start. Be aware you are dealing with 120Volt AC house current with this project. If you don’t know what you are doing, it WILL kill you. If you are not comfortable playing with electricity, have an electrician do the final wiring.
OK, with that out of the way. Here is what you’ll need.
Electric Drill with a drill bit selection
Hack Saw
Screw Driver
Wire Strippers
Epoxy
The parts you will need are all available from Lowes Home Improvement. I didn’t check, but I’d bet Home Depot and ACE Hardware would have what you need also.

Starting at the top:
A simple single pole light switch    ($1.75)
PVC Plug  ($.44)
Light Switch Cover    ($.99)
Servalite 9657U rear mount light socket with switch  ($4.46)
(2) 1″ X 7″ X 1/8″ Aluminum Stock  ($2.50)
1″ X 1/4-20 Bolt and nut ($.40)
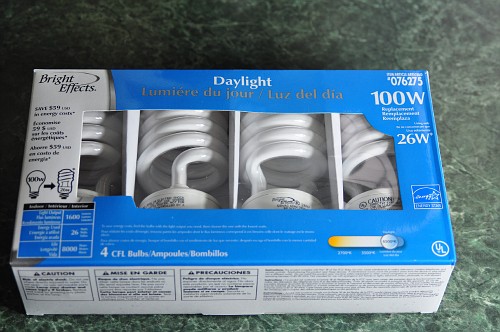
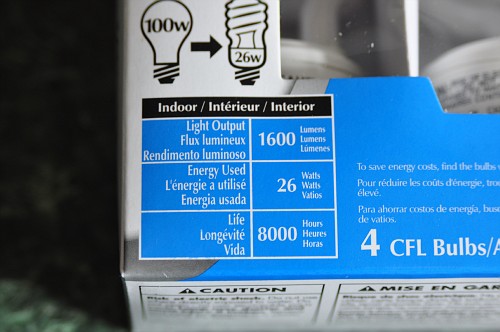
(4) Compact Fluorescent light bulbs ($9.95 for 4 pack)
Out door surface mount electric box ($3.25)
15′ Electric cord (not shown)Â Â ($8.95)
TOTALÂ Â Â Â $46.07
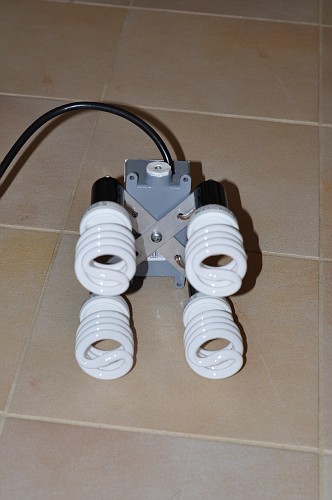
The construction is quite simple. Drill a hole large enough for the bulb socket base, 1/2″ from the end of each aluminum strap. And a 1/4″ hole in the center of each piece of aluminum stock.
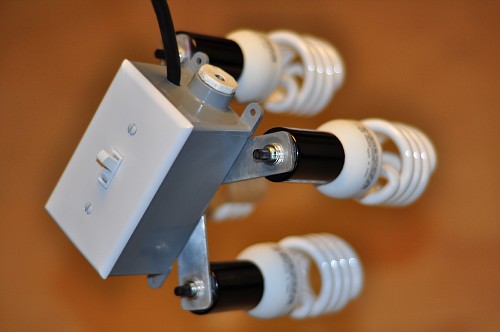
Drill a 1/4″ hole in the center of the electrical box.
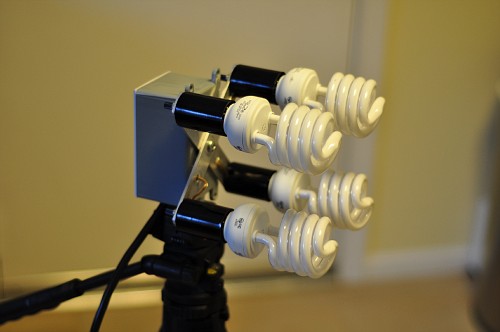
Bolt the two aluminum “arms” to the electric box ijn an “X” configuration and then drill four holes for the electrical wire to go through the aluminum strap and into the electric box.
Install the four bulb sockets
The nice feature about these particular sockets, besides being extremely easy to mount, is they each have their own on-off switch. You can easily control the amount of light by turning off individual bulbs as needed.
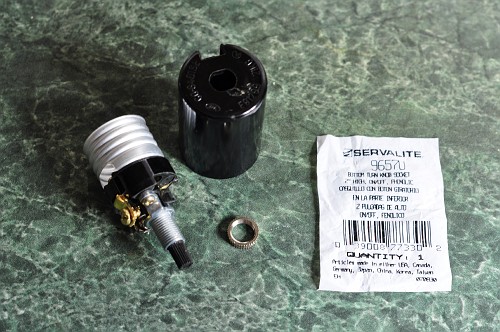
The bottom of the electric box has a convenient hole into which I used a PVC cap that I found in the plumbing department with a 1/4-20 “T” nut epoxied to the inside to accept a tripod mount. The PVC plug was them glued into the electric box socket. Drill a hole for the electric cord. If you didn’t want to mess with the “T” nut / epoxy thing, you could simply drill and thread the plug for a 1/4-20 bolt.

Now it’s time to wire everything up and install the switch and cover plate. I used a three wire (grounded) cord and grounded the aluminum straps and the switch. The cord I chose is 15′ long which is a nice length to deal with.
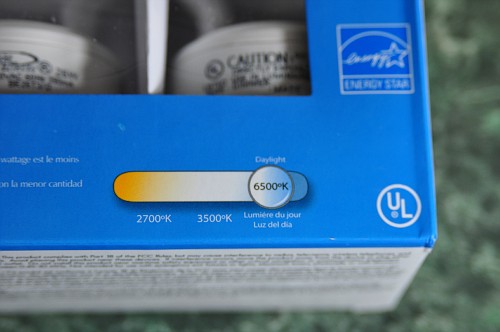
For bulbs, I was able to buy 6500 K , 26W bulbs at Lowes. You might have to search around for 6500K bulbs. If you can’t find them, B&H Photo and Adorama sells them. They also have higher wattage bulbs if you feel you need more light output.
The whole unit easily mounts onto a tripod or you could purchase a couple of light stands from your local photo shop.
A couple of nice white umbrellas and this project is done!
UPDATE 12-22-09
So…I ordered a couple of 43″ white umbrellas from Amazon.com. (PHOTO BASICS #451, 43″ White Umbrella…$13.40 each)
Now I needed a way to attach them to the lights. At first I simply used a little “U” bracket and attached the umbrella pole to the top of the electrical box. But the lights were not centered in the umbrella and it caused a loss of light.
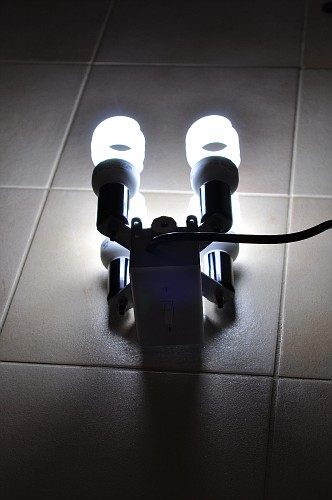
I set my camera up in my dark garage, focused on a large white cabinet. Using the light meter on my Nikon D90 I could see the effect of different locations of the umbrella to the lights. The lights need to be centered for the most light output. Both reflected off the umbrella and firing directly through the umbrella fabric.
This required a complete relocation of the lights on the electrical box…
BEFORE:
AFTER:

As you can see, I needed to move the aluminum “X” up and drilled a larger hole to accommodate the umbrella shaft through the center of the four lightbulbs.
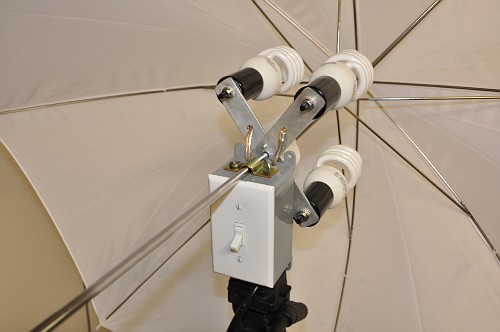
Now the lights are centered on the umbrella.
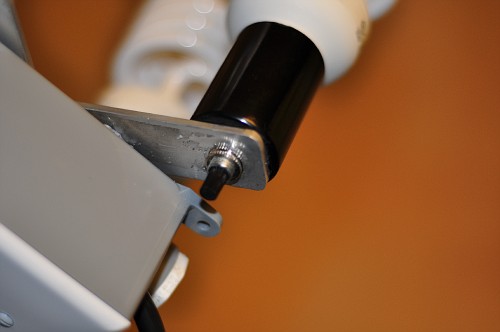
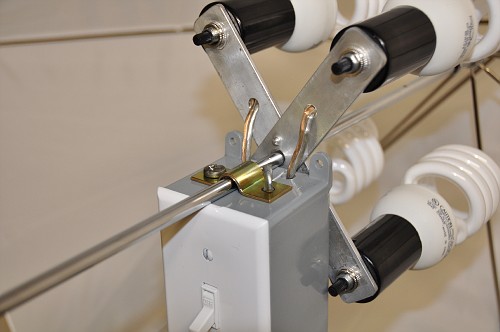
It wasn’t difficult to effect this change. A couple nuts and bolts holds the “X” to the electrical box and a little clamp I found in my junk drawer and two holes drilled and tapped to accept a 1/4-20 bolt and a 1/4-20 Thumb Screw. Loosen the thumb screw and you can remove or adjust the umbrella in and out against the lights as needed.
I used a “Pop Rivet” just above the umbrella shaft hole on the aluminum X to keep everything aligned. You can see it in the photo below.
BTW, those holes in the aluminum now have rubber grommets to keep the electrical wire from chafing.
This is the finished product…
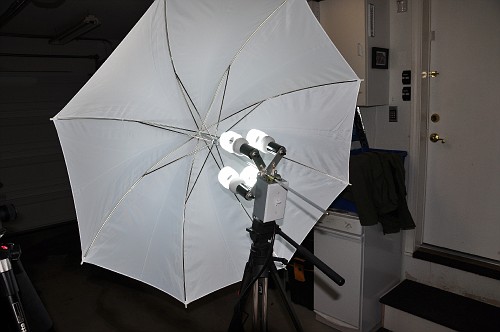
Now all I need is a few “models” to test them out…Where are those grandkids of mine!
More Pictures here:
Photo Album
Thanks for looking!
5 comments on “Diy Photography Studio Lights”