
This is not a difficult R&R, but it is very cramped at the top of the shock towers. If you have Xtra Large hands, it will be a challenge.
First thing is to jack up the rear of the car and remove the rear tire:
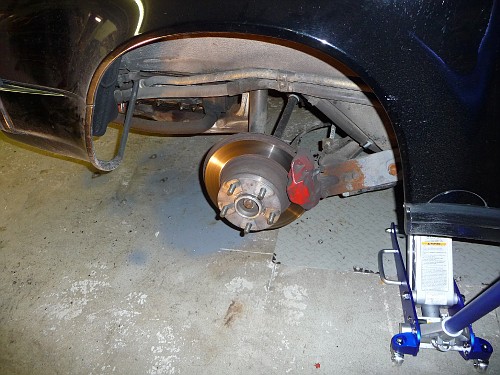
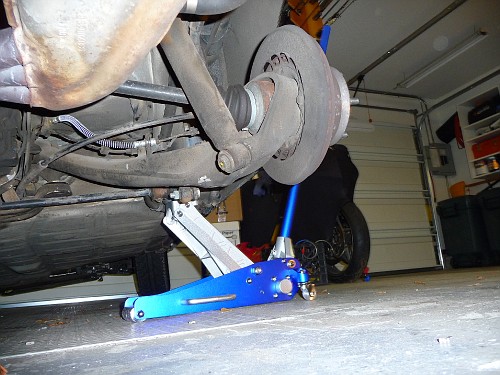
Secure the car with jack stands.
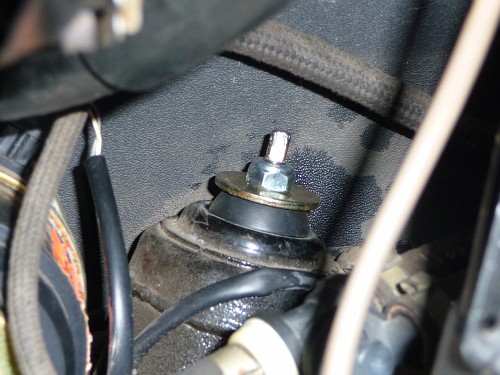
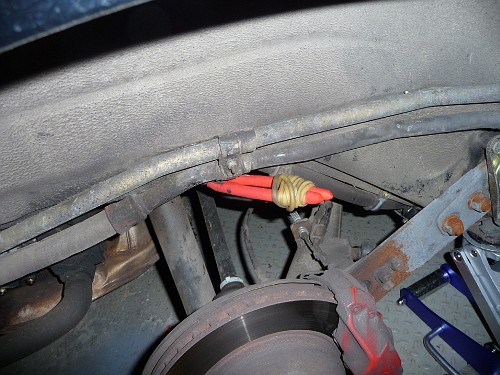
The top of the shock absorber is hidden in the rear of the engine compartment. On my car they were covered with hoses a bit of digging around was needed. Once located the top nut needs to be removed with a 17mm wrench.
The problem here is that you need to stop the pin from spinning as you turn the 17mm wrench. If there was room, you could easily grab the pin with a set of vice grips and then turn the nut. But room is at a premium and I couldn’t get vice grips into the space along with the wrench.
So I used something else.
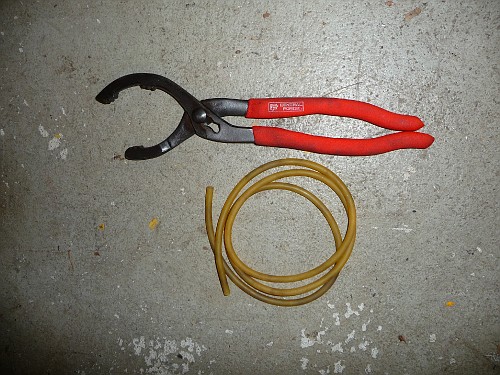
A set of oil filter pliers and some surgical tubing.
The oil filter pliers and the tubing was used to hold the top of the shock absorber from the bottom, while I turned the nut above. Obviously if you had another set of hands you could accomplish the same thing with out the surgical tubing
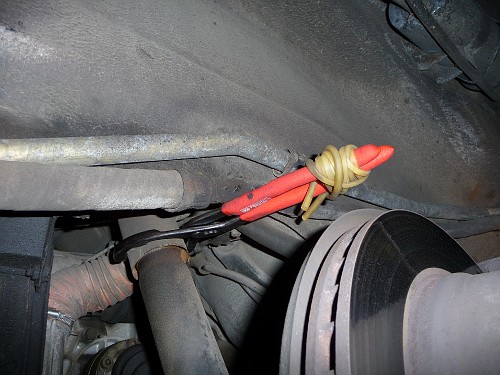
The tubing simply keeps the pliers tight and once you start turning the nut above, the pliers will find something to jam against and hold the shock rod stationary.
Once the top nut is off, you can remove the bottom bolt. But before you do this you need to put a jack under the swing arm as the shock absorber carries some of the weight of the swing arm and the bolt will be near impossible to remove with this weight on it. I don’t have a picture of the jack i used under the swing arm. Just jack it up a little to take the weight off.
Now you can remove the big bolt holding the bottom of the shock. (Hint- An air wrench is your friend here!)
Install the new shock. Tighten the top nut reversing the procedure outlined above. And you’re good to go!
A few hints:
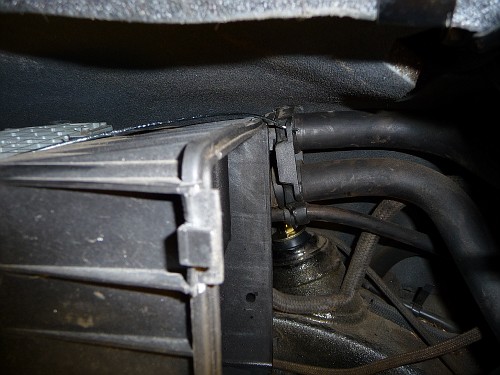
To access the top of the right shock, you need to remove the air filter cover and the bracket attached to the rear of the air filter box that hold a few hoses. It is held on with two phillips head screws. Remove them and use a piece of wire to hold the hoses out of your way.
When you are tightening down the top nut, you need to be sure to tighten until you can turn it any more. This picture shows the nut not tightened enough.
Because there is a metal tube extending up through the rubber grommet, you will not be able to run the nut too far down and damage the rubber bushings. Tighten the nut until you feel it hit this bushing. You should also see a few threads above the nut.
That’s it! Now go and enjoy your new found solid ride……..
ADVERTISEMENT:
This web site is part of my income stream. If this article was helpful and you’d like to toss a few bucks at me, please use my PayPal account
rvb100@comcast.net
Certainly not necessary, but appreciated!
Thanks
RoyB
Pingback: Shocking - My 31 year-old bolts are frozen... - Page 2 - Pelican Parts Technical BBS
Pingback: DIY Questions: Rear Shock Replacement and CV Joint Issue - Pelican Parts Technical BBS