
I needed a PORTABLE GENERATOR which we used to can a simple battery box. There were used for years with trolling motors onfishing boats. Now with the huge interest in OVERLANDING and BOONDOCK CAMPING they are now Portable Generators…
First, I needed a box of some type. I looked into AMMO CANS and tool boxes but nothing would work for what I wanted to do
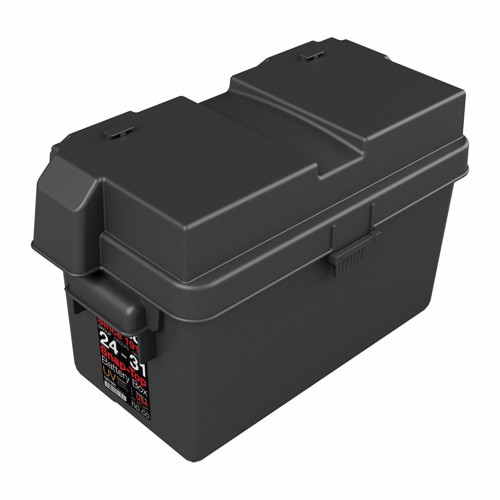
So a simple, low cost battery box was obtained from Amazon… $12
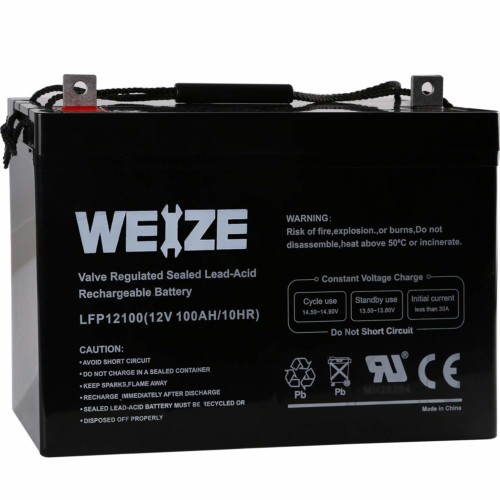
And into this box went a 100Ah AGM Group 31 battery that was also sourced through Amazon…$159 with free shipping! Great value here (11-1-2019)
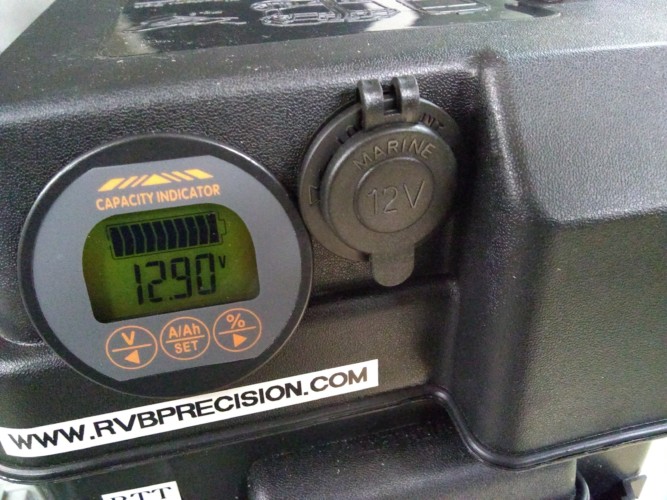
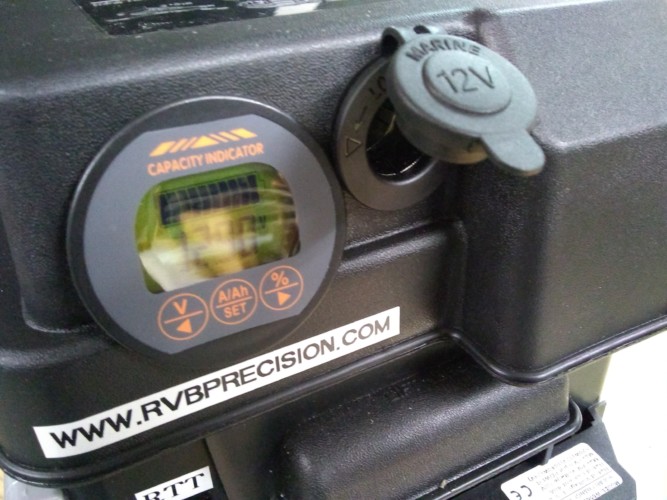
To monitor the condition of the battery and see what the solar system is doing I ordered again from the big “A†a AiLi 350A battery monitor with shunt…. $43. This monitor gets great reviews and I have to say, it appears extremely well made.

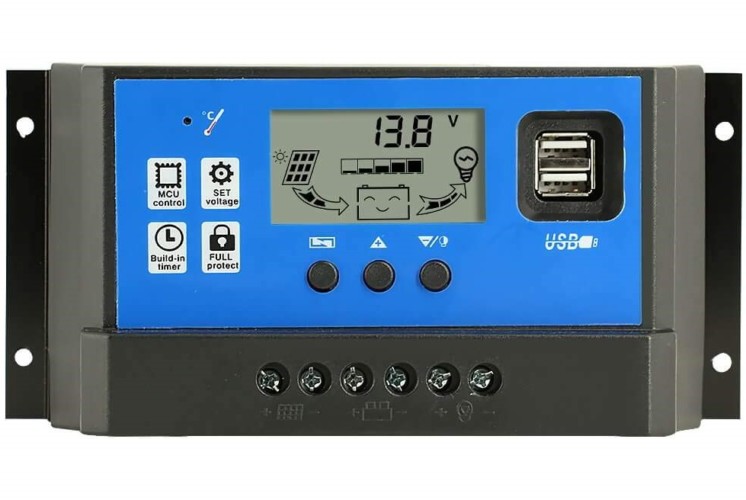
And as a Solar Controller, I went with a PowMr CM-40A. Can’t beat it for the price ($18) and although I’m only using 120 watts of solar currently, it has the capability of 40 amps so I can add more panels later. I like the USB jacks on the front for charging personal devices even if the RTT is not on the truck…(BUT, so far I have not figured out how to get it to charge Apple products. I charges my Android phone and my two Hot Spots fine. But it will not charge my Ipad Mini 2…Ugh!)
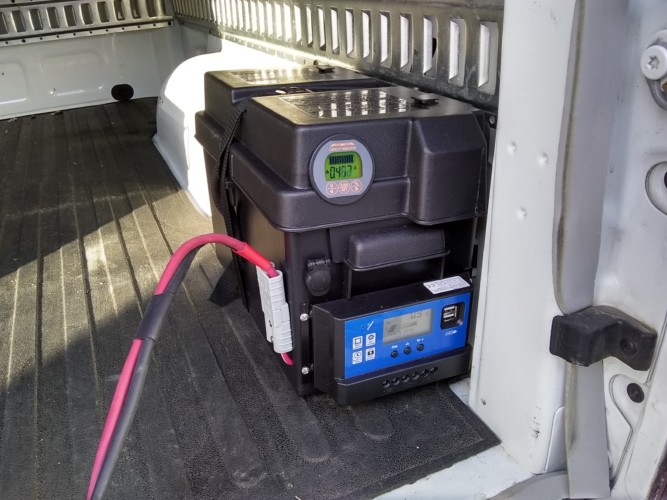
OK, all of this needs to be wired into the battery box which will be mounted in the bed of my pickup truck. And this battery box will be removable to be used in various vehicles as needed.
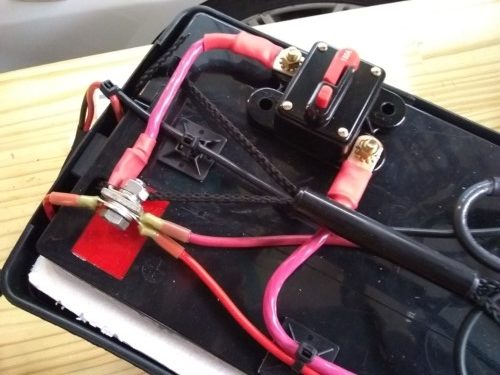
Here is an overview of the wiring involved…


The 350 amp shunt is on top. All ground (NEG) wires go through this shunt so the AiLi Monitor can see in and out current to and from the battery
Below is a four circuit fuse block. One circuit is the RTT feed and the other is power to the shunt. The other two circuits are in reserve for now.
And below that is a 30 amp fuse between the solar controller and the battery.
All “high current†wiring in the box is 10G.
All these devices are attached to the battery with 3M VHB tape.
The AiLi monitor and the charge controller were mounted on the end of the battery box. Accessable when the tailgate is down.
A hole was cut into the cover of the battery box to flush mount the AiLi monitor and the charge controller was simply screwed to the battery box with stainless steel screws.
Holes were drilled as needed for wires to enter the box.

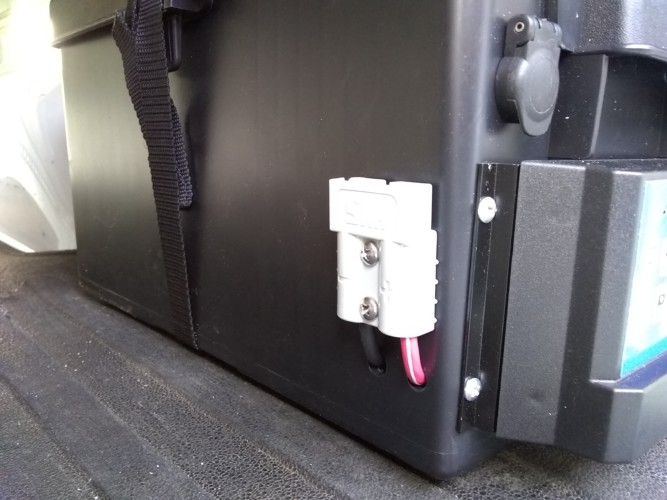
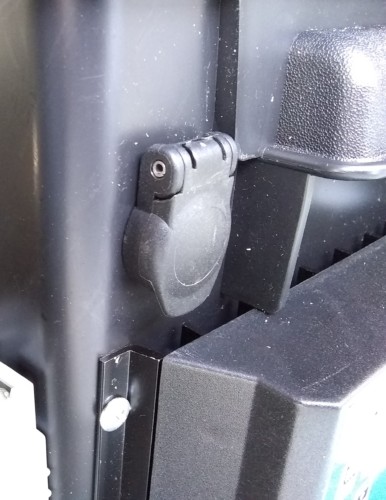
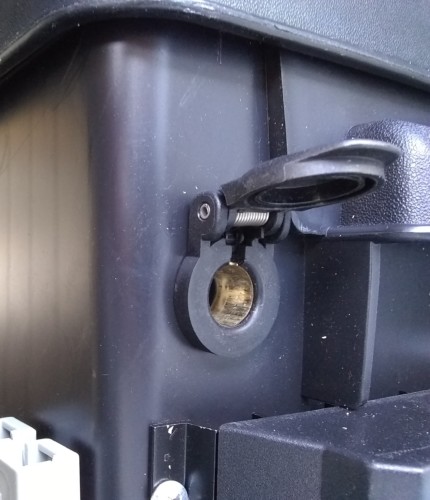
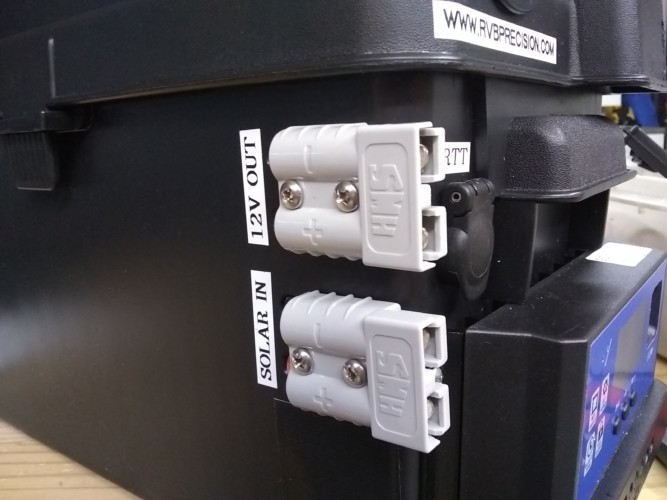
To get the power from the portable solar panels to the battery, I used very high current Anderson connectors
A 25′ extension cord of #8 welding cable is used between the panels and the battery box. Welding cable is extremely flexible and great for this purpose.
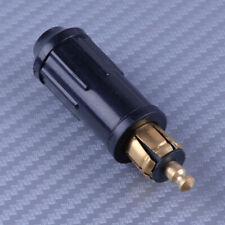
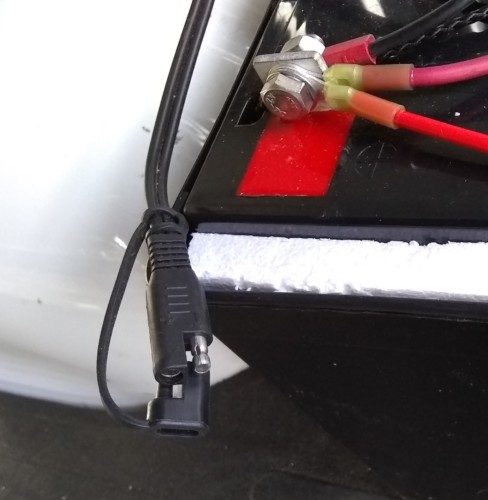
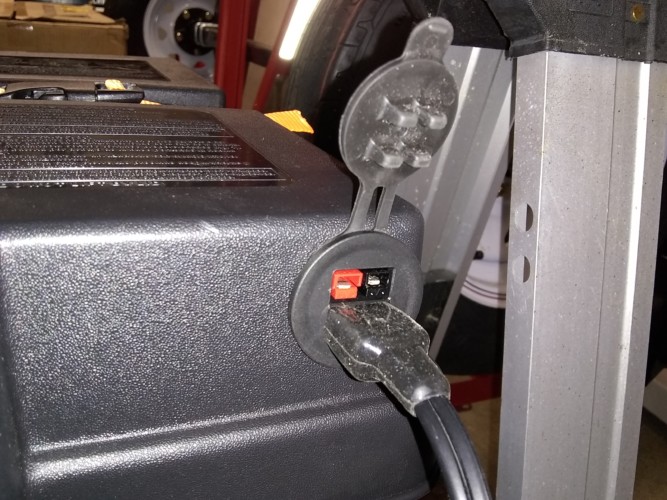
To get power to the RTT, I employed a BMW motorcycle connector and socket. These connectors are also called “John Deere†connectors as they are also used on John Deere equipment.
When the 120W portable solar panel is not deployed, I have two 10w ECO Worthy solar panels mounted on the camper shell to simply keep the battery maintained. ($21 each)

These feed the battery through a dedicated solar controller permenently mounted in the camper cap. Rengy Wanderer got the nod for this job ($18)
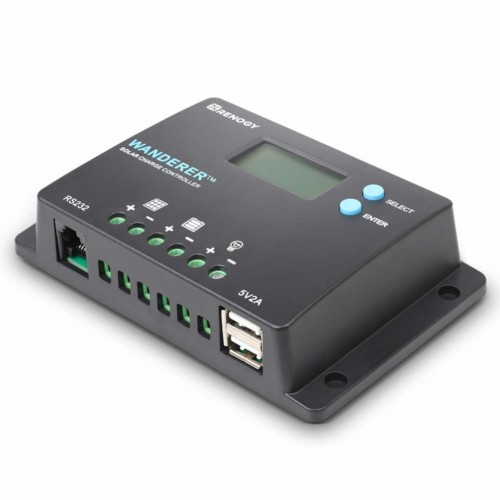
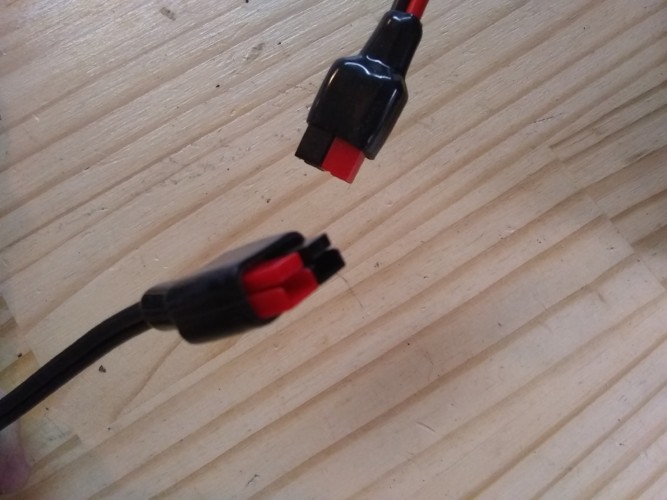
The output of the Renogy solar controller feeds the battery through a piece of Dual 10g wire and polarized connectors
UPDATE: This connector was replaced by the 30A Anderson Connectors
When stationary, the battery is charged via a 120W ECO Worth portable folding panel ($148 on Ebay) See my write up on this system .

The battery box is secured to the truck’s bed with a strap
UPDATE 11-6-19
A Few additions to the Portable Battery Box
I figured, since I have this battery mounted in the bed of my Pickup truck….And I use a winch mounted on a trailer hitch receiver, I might as well add a way to power the winch at the rear of the truck. Might come in handy to pull myself out of a mess rather than further in and to loads various things onto my trailer.
Another Anderson High Current plug and 150A circuit breaker were added
I ran this through the 350A shunt. It will be interesting to see how much current my 4500 pound winch uses on a pull.
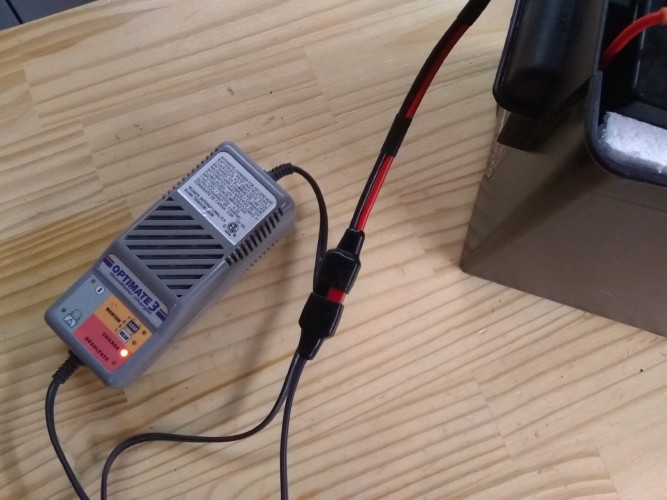
I also added a smaller set of Anderson plugs on an Optimate charger I have to be used in the off season to maintain the battery while the box is in storage. (BTW…Nothing like these Optimate chargers. I have one on a AGM battery for my sump pump backup. That battery is 12 years old and still perfect in voltage and capacity. I also use one on my 12 year old Suzuki V Strom motorcycle and it is still using the original battery! All other chargers I’ve tried destroyed batteries in short order.)
That should do it! …..But maybe a cigarette light socket is needed…..Stay Tuned!
UPDATE…UPDATE…UPDATE
Added cigarette lighter socket….Just because! And it allows the connection of a small inverter to charge my laptop and other low current demand AC devices.

UPDATE-UPDATE-UPDATE-UPDATE
Although I have 20w of solar on the top of the cap to keep the battery maintained when the truck is parked, I wanted a way to quickly charge the battery when on the move or when the weather did not cooperate with solar.
I ordered the new (2019) Renogy 40A- DC to DC charger. This device is connected to the trucks battery which is fed from my 220A alternator and sends upwards of 40A to the battery when the truck is running. It will also allow me to connect the batteries in the travel trailer to it and charge them while traveling. The cost of this unit is less than half of competing units at $169 (AMAZON 12-1-2019)

Stay tuned for an update once installed
ANOTHER TWEEK…
I had a simple piece of wire hanging out of the back of the battery box to connect the 20w solar panels and the trickle charger. I replaced this piece of wire with a panel mount Anderson socket. Much more secure and looks better….
UPDATE_UPDATE_UPDATE_UPDATE 2-4-20
I’ve added a 1000 watt Pure Sine Wave inverter to the battery box. The unit I chose was highly recommended by folks on the various Expedition and Camping forums. At the time of this writting, $139 on AMAZON. Being Pure Sine Wave it will have no issues charging my various electronic devices that might not like a Modified Sine Wave inverter. It also has enough power to run my Kurig coffee maker. Which to me is EXTREMELY important!
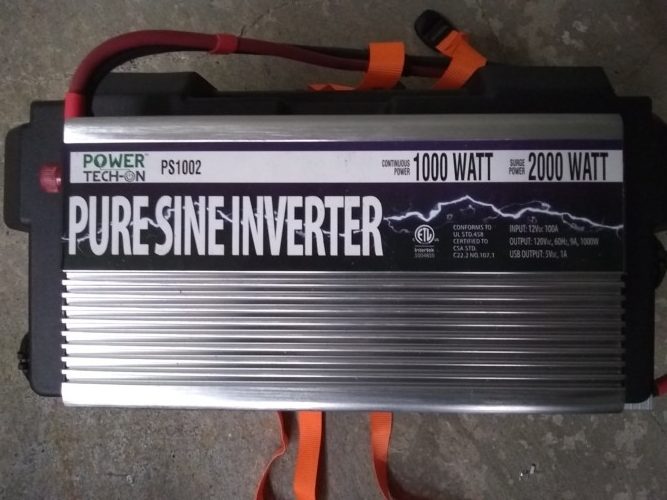
I simply strapped it to the top of the battery box. This allows easy removal when not needed or it can be hooked directly to the trucks battery as needed.

An Anderson Plug connects it to the Battery Box

Folks are asking for a cost break-down for this battery box and the addition of the Inverter and the DC to DC Car Charger I will be using to keep it charged while traveling. Hope this helps….
ALL PRICES ARE AS OF November 2020
| BATTERY BOX WITH SOLAR CHARGE | |||
| Solar Panels | EcoWorthy 120W / 12V “Suitcase†| Ebay | $148.04 |
| Battery | Weize 100AH AGM | AMAZON | $159.99 |
| Battery Box | NOCO HM318BKS | AMAZON | $12.37 |
| Battery Meter | AiLi US-TR16-80V 350A | AMAZON | $43.00 |
| Solar Charge Controller | PowMr 40A CM-40A | AMAZON | $18.49 |
| Anderson Connectors | Andderson 50 amp connectors / Grey | AMAZON | $19.50 |
| Misc Hookup Wire / Connectors | Crimp connectors/Fuse Panel/Wire | Various | $75.00 |
| 50′ Welding Cable Solar Panel Extention | EWC 4g Premium Welding Cable | AMAZON | $69.60 |
| TOTAL | $545.99 | ||
| ADD INVERTER | |||
| 1000W Inverter | GoWise PS1000 Pure Sine Wave | AMAZON | $139.51 |
| Circuit breaker | ZOOKOTO 50 Amp | AMAZON | $12.99 |
| TOTAL | $152.50 | ||
| ADD DC to DC CAR CHARGER | |||
| DC to DC Charger | Renogy 40A DC to DC Charger | AMAZON | $169.99 |
| Battery Temp Sensor | Renogy for 40A DC to DC Charger | AMAZON | $17.99 |
| 50′ 2g Welding Wire/Front of car to rear | TEMCo 2G Welding Cable | Ebay | $79.00 |
| Circuit breaker | ZOOKOTO 150Amp | AMAZON | $11.99 |
| TOTAL | |||
| $278.97 | |||
| TOTAL | |||
7 comments on “12V AGM Portable Generator / Battery Box”