
My travel trailer is a 2011 Forest River Grey Wolf 19RR Toy Hauler. It is a great trailer but it can always be improved upon.
Cruising the various RV forums I’ve heard mention the Dexter E-Z Flex Suspension system. A quick search found me at Eastern Marine and a sale on the exact kit for my trailer. At the time of this writing, October-2016 the price is $163 for the entire kit.
http://www.easternmarine.com/dexter-e-z-flex-tandem-equalizer-suspension-kit-k71-652-00
A few clicks on the computer and it was at my house in two days! Great service from Eastern Marine
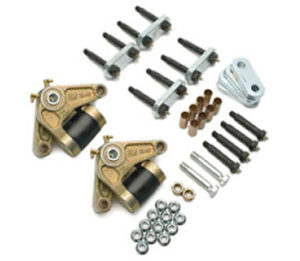
Here is what the kit includes and a brief description:
The Dexter E-Z Flex® Tandem Equalizer Suspension Kit is used with 1-3/4″ wide, 26″ double eye springs on trailers that have 33″ axle centers and axles up to 6000 lbs.
Kit Includes:
(12) Hex Lock Nut (006-092-01)
(2) Shackle Bolt – 9/16″ (007-003-01)
(4) Step Bolt – 9/16″ (007-187-00)
(2) Equalizer Assembly (013-143-03)
(8) Bushing, Bronze (014-077-00)
(4) Shackle Link (018-024-01)
(4) Shackle Link assembly (018-026-00)
(2) Hex Lock Nut 9/16″-18 Plated (006-007-01)
(1) Instruction Sheet (059-867-00)
Brand:Â Dexter Axle
MPN:Â K71-652-00
Be aware…..This is the part number for my trailer. You will need to check the Dexter web site for the correct part number for your trailer.
Once the kit was in hand, it was time to install.
Tools Needed:
Two Jacks
Two Jack Stands
Socket Wrenches
Hammer
Torque Wrench (30-50 pounds)
If you have access to an air impact wrench, it will save you a tremendous amount of time.
I did both sides of my trailer in 90 minutes using a 1/2″ air wrench.
First step is to jack up the trailer and remove the wheels
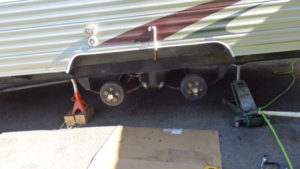
Next support both axles. Using a hydraulic jack for this will greatly help when it comes time to insert the carry bolts. The jack will allow you to manipulate the spring “eyes” to line up the holes.
I used a hydraulic jack and a scissor jack as that is what I had readily available.
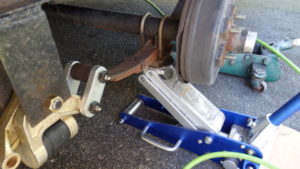
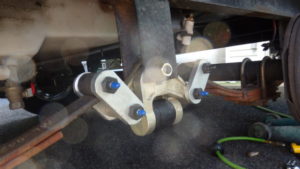
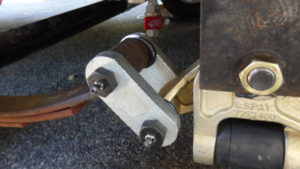
Next, remove all the nuts and bolts from the equalizer and remove.  Replace with the equalizer supplied in the kit.
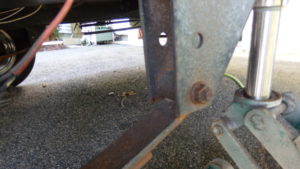
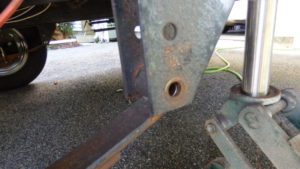
Drive out the existing bushings before installing the bronze bushings supplied with the kit.
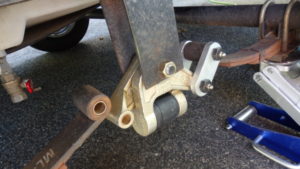
This is where manipulating the jacks under the axle can really help in lining up the equalizer and spring holes

(The Blue caps are Zerk Fitting Covers to keep the grease fitting clean)
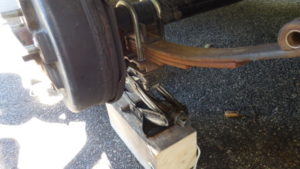
My trailer had plastic bushings. This trailer has less than 3000 miles and the bushings were totally worn out. Amazing that they would even think this was a good engineering idea!
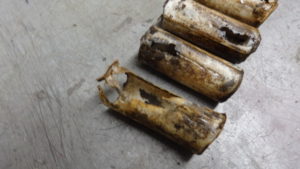
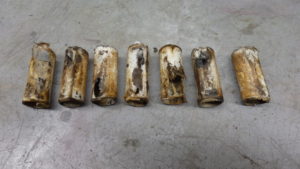
I had metal to metal contact…..lots of squeaking and groaning as I went down the road. Now nice and quiet and I have to believe tire wear will be greatly improved.
I mounted the hanger bolts with the grease fitting facing out. This way when I remove the wheels each year for bearing inspection, it will be real easy to grease the suspension components without crawling under the trailer. But you can mount them the other way if you like
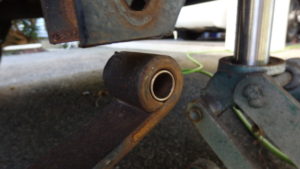
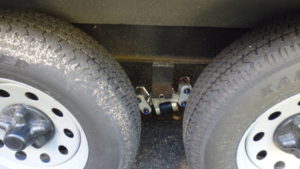
Same procedure was done on the two spring ends
Remove the bolts
Insert the bronze bushing using the jack to move the spring up and down
Torque the bolts to the specifications in the instructions, Grease everything up and you are done
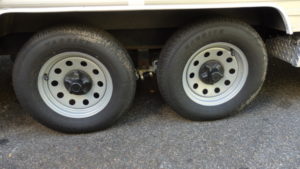
Wheels reinstalled and torqued…..Looks great!
I hope this little DIY was helpful. Even if you are not mechanical, this is a very easy modification. Just be extremely careful as you are jacking up a multi thousand pound trailer. Be sure to use jack stands and tire chocks. I left the trailer attached to the truck so there was no chance of it rolling off the jack.
I highly recommend borrowing an air wrench if you can. This made the removal of the nuts and bolts extremely easy.
Be sure to check out all the other modifications I’ve performed on my trailer at http://www.rvbprecison.com
Safe Travels!
Pingback: 50,000 miles In a Travel Trailer....My Opinions | RVB Precision