
I recently felt the need for yet another hobby since I don’t have enough distractions occupying my free time. I like shooting my lever action rifles and I’m a huge fan of the Single Action Army revolvers so Cowboy Action Shooting seemed a perfect fit.
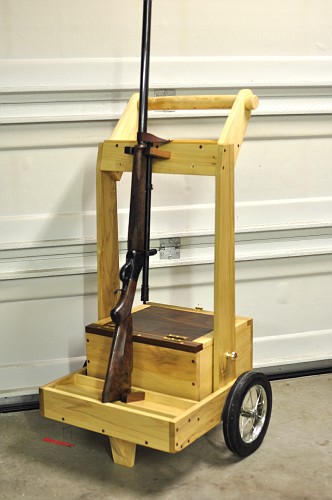
CAS require the shooting of four firearms. Two revolvers, a lever action rifle and a shotgun. The course of fire is spread out over three or four firing ranges and there is a need to transport your guns, ammo and other accessories from one “range” to another. All the folks shooting this sport have some type of conveyance, usually home made, to move this equipment around.
I spent a lot of time on the internet looking at other folks carts and attended a shoot to see what the “pards” were using first hand.
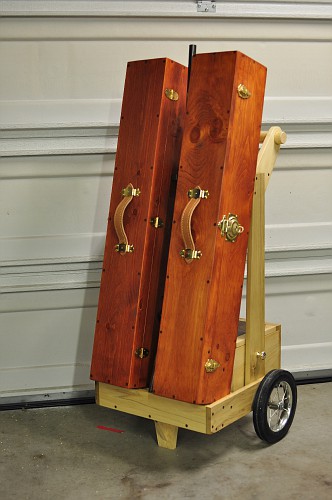
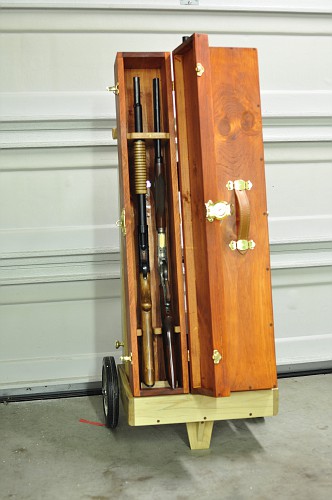
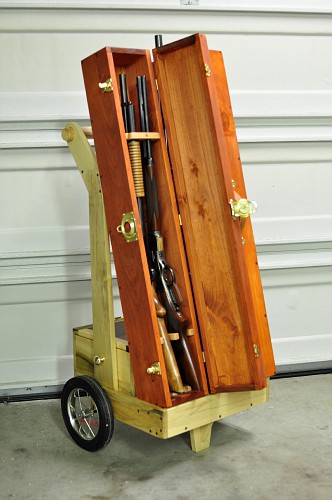
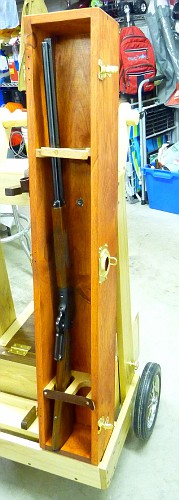
Most folks transport their rifles to the meet in standard rifle cases and then transfer them to their cart. The rifles are fully exposed to dust, rain, etc while in these carts. My plan was to build a couple of “Period” correct “Wagon Boxes” to transport the rifle and shotgun, and then have these Wagon Boxes attach to a cart. I will also have a removable range box where my ammo, hearing protectors, etc can be easily transported.
So let’s get started.
First order of business is to build a couple of Wagon Boxes. I decided to use #2 Pine as this type of lumber has lots of knots and other imperfections that will add to the “Period” look. I decided to use simple Glue-Screw- Plug construction. Pine for the box itself, and walnut for the screw plugs.

The easiest construction technic is to build a simple box and then cut it in two on the table saw. In this way everything lines up perfectly. And it’s super easy!
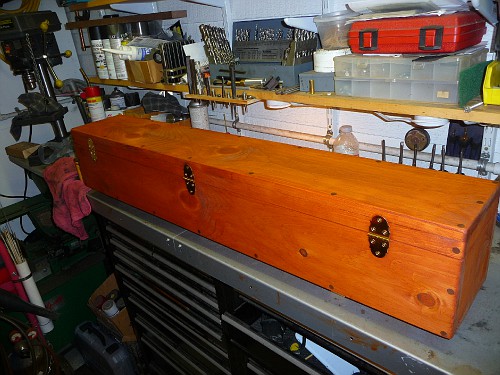
Once the box was cut into two, plugs sanded flush and Minwax “Gun Stock” stain applied, they look pretty good!
My boxes are 44″ long, 8″ wide and 9″ deep. These dimensions can be modified to accommodate various firearms.
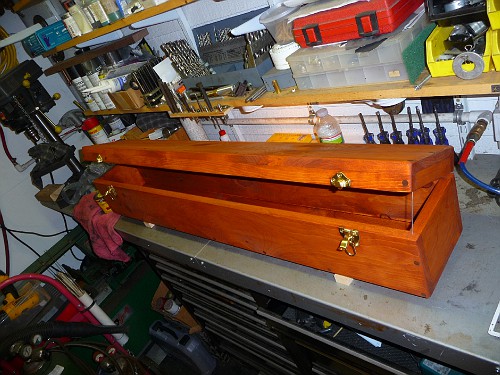
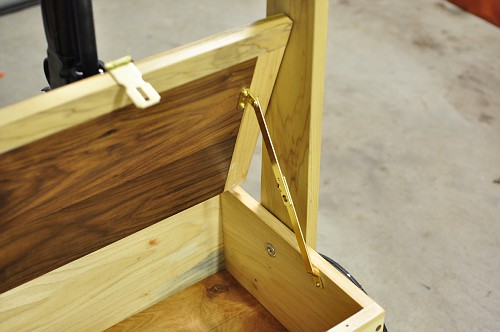
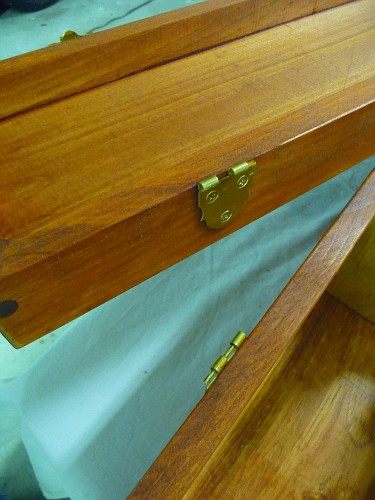
For hinges I used simple flat hinges that I bought at Lowes.
Toggle clasps were installed. Also sourced at Lowes.
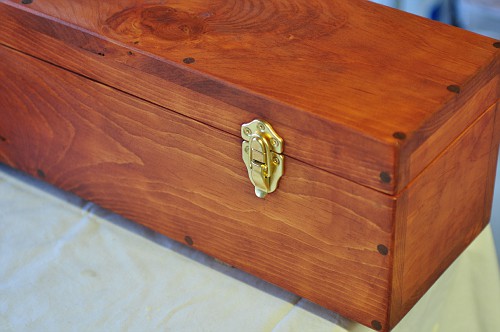
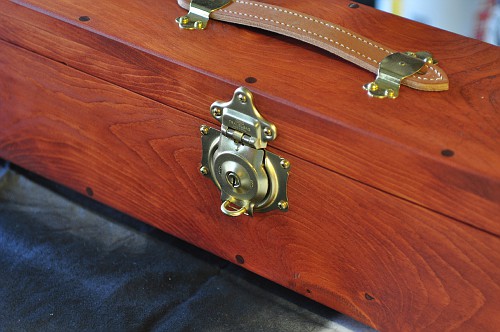
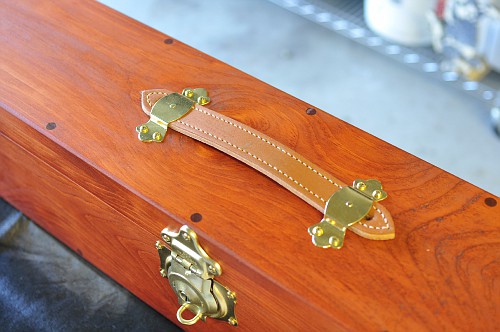
Rockler Woodworking Hardware was the source for “Steamer Trunk locks” and leather carrying handles.
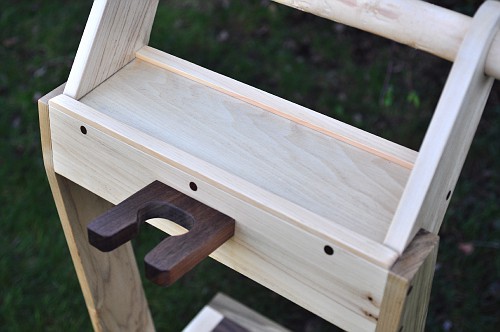
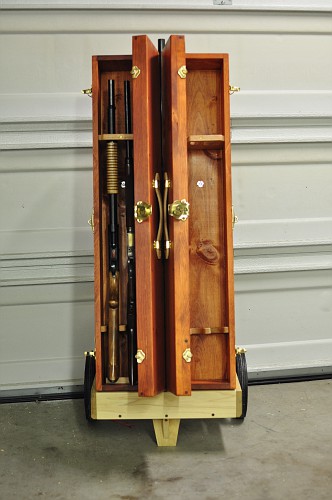
The interior has partitions made of Oak. These were cut specifically for a Winchester 1873 Lever Action with a 20″ barrel and a Winchester 1897 Shotgun.
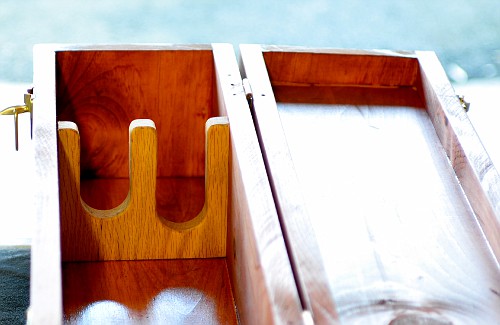
The partition that secures the barrels received a “toggle” made of Oak and attached with a brass screw. This will hold the firearms in an upright position securely.
A few coats of spray Minwax Satin Polyurethane, rubbed out with 0000 steel wool between spraying and a final rub with paste wax and the Wagon Boxes are done.
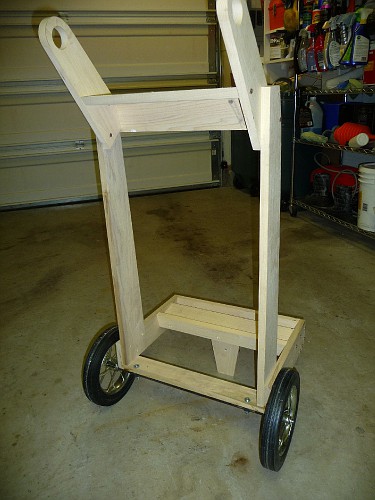
Next was the cart.
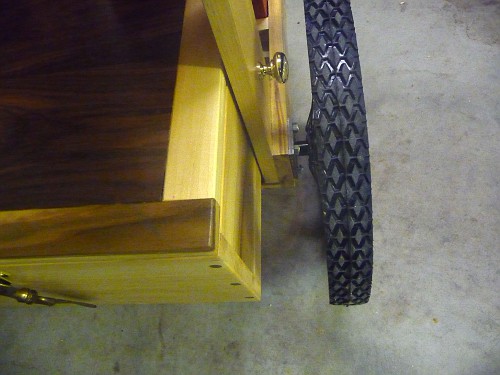
A nice set of spoke, rubber tire wheels were ordered from Amazon. (Simply amazing what you can buy from Amazon lately!)
I chose Poplar for the wood with a few pieces of Walnut as this is what I had in the scrap pile. I was trying to keep my cost to the absolute minimum.
The cart itself was very simple construction. Screw-Glue- Plug. I chose to use Walnut for the plugs as I wanted them to stand out against the light colored Poplar.
I had an old piece of 5/8″ steel rod hanging around. The wheels had 3/8″ axle holes so a little bit of turning on the lathe had a nice axle.
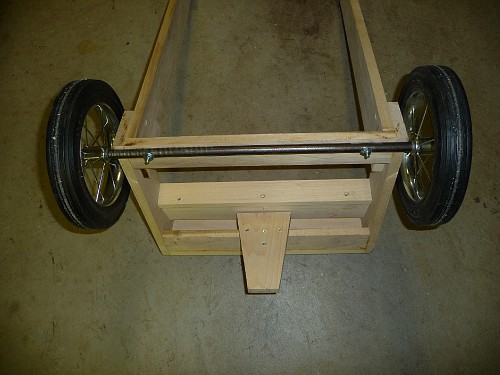
The axle was simply drilled for two 1/4-20 bolts and bolted to the bottom of the cart.
I used clevis pins to secure the wheels as I wanted them to be easily removed for transport if needed.
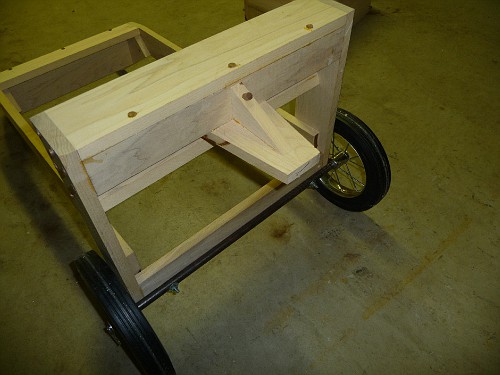
I built a “Third Leg” out of Polar and mounted it to the front of the cart. “A three legged stool is steady on all irregular surfaces”.
Between the handles I added a little shelf.
And I finished it off with a couple pieces of 3/4″ stock to stop items from rolling off.
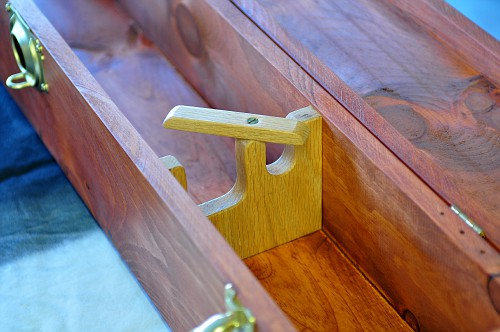
As you can see above, between the two wagon boxes I made a little support to hold a long double barrel shotgun or a longer rifle for Buffalo side matches. More on this later.
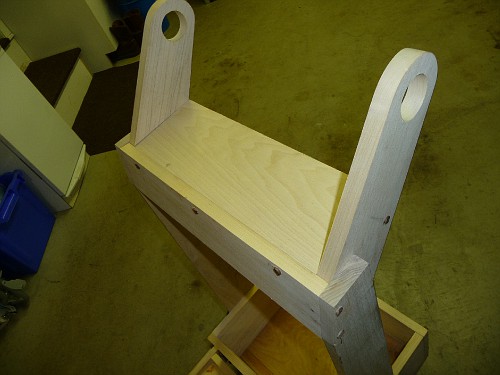
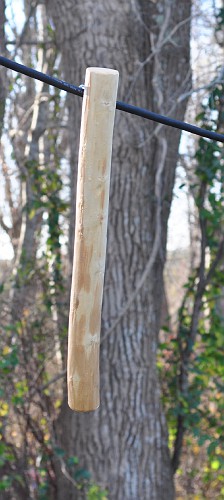
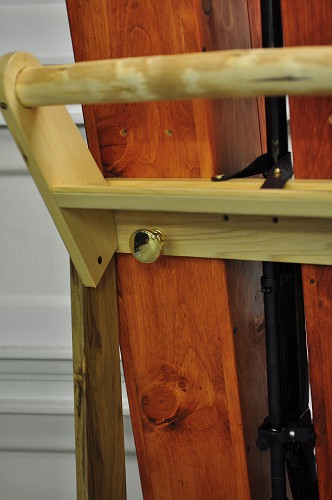
For the handle I went for a walk in the woods behind my house. Lots of trees were blown down by a storm we had a few months ago so I figured I’d be able to find a relatively dry piece of wood, 1.75″ in diameter to use in the raw. Sort of like a Hitching Rail. Here is the piece of wood one I put the spoke shave to it and letting the poly dry.
And here it is installed on the cart.
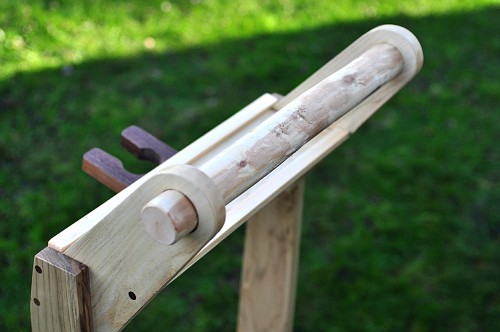
I really like this detail!
Next up was the “Range Box” to carry all my “stuff”. I wanted it to be removable as the cart will be transported laying down.
Once again, simple Glue-Screw_Plug construction was employed. I ran out of Poplar so a walnut lid was fabricated. Kinda nice if I say so myself!

It secures to the cart with a couple of modified cabinet drawer pulls I picked up at Lowes. These were drilled and tapped for a 5/16-18 threaded shaft.
And “T” Nuts were installed on the insides of the box to receive the threaded rods.

To finish it off, a “Lid Support” and hasp for a lock were installed. Also available from Lowes.
The box sits to the rear of the cart to facilitate the doors opening on the wagon boxes and to keep the center of gravity low.

Now to install the Wagon Boxes.
The boxes sit on a simple inclined shelf and lean upon a cross piece near the handles.
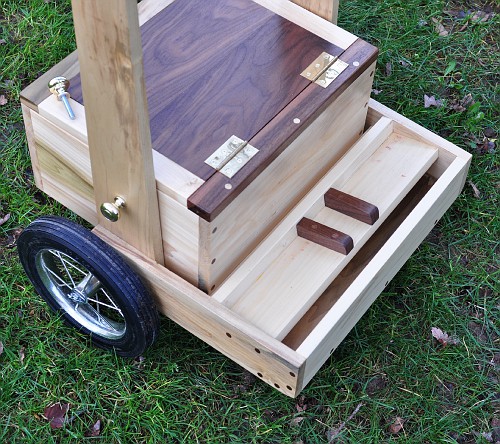

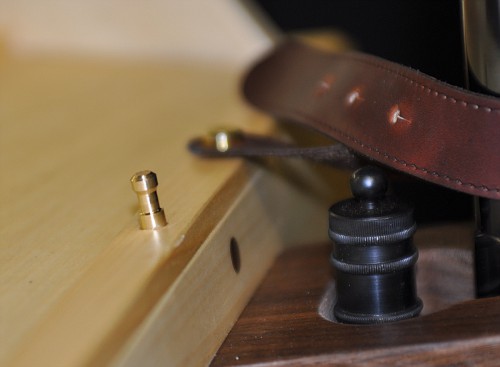
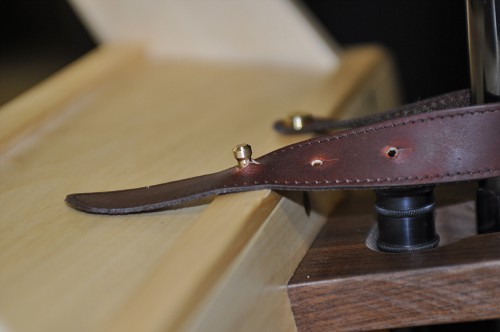
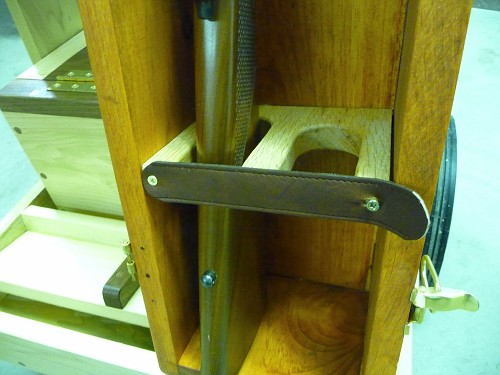
Between the two boxes I fabricated a support for another long rifle or shotgun.
This firearm will be secured with a leather strap (old belt) and a pin and a bolt I turned from a piece of brass rod.

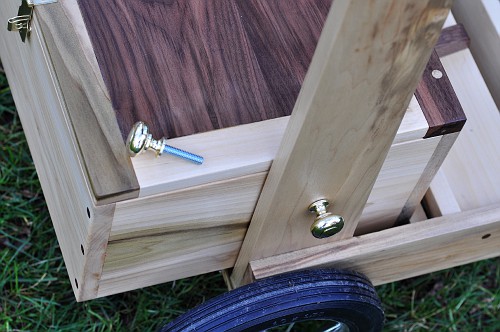
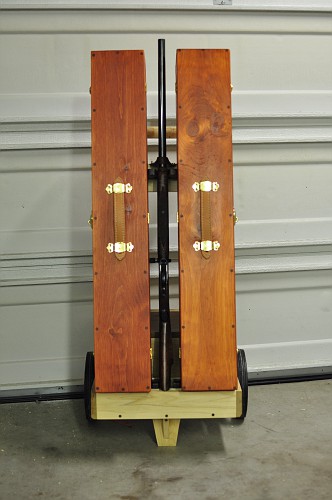
The two wagon boxes are held in place with the same method as the range box. A couple of knobs modified to accept 5/16-18 rod and a couple of “T” Nuts in the bottoms of the wagon boxes.
When secured as such, the boxes are rock solid!
So that’s about it! From “Truck to Firing Line” in one easy step!
Time to go shoot’n!
Please leave any comments you might have. I’d really like to know what you think of this design.
And be sure to visit the rest of my web site…..all kinds of eclectic stuff going on!
More pictures of this project in my photo albums
http://public.fotki.com/Rbertalotto/
THANKS!
UPDATE!
Houston….we have a problem!
Seems I didn’t read the CAS rules well enough. When transporting firearms around the shooting range, actions must be open to show the firearms are unloaded. Well you can’t open the actions when the covers to the wagon boxes are closed so I modified the hinges to make the covers removable.

With the covers off, the actions can be left open for all to see we are safe.
(Guess I should have opened the action for this picture. But you get the drift!)
I also had to add a retention strap to the bottom so the firearms don’t fall out while transporting. This is just a temporary fix for todays meet. Stay tuned for a real neat solution I dreamed up!
Onward and upward!
 UPDATE!……………BIGGER WHEELS!
I took folks advise and decided to go with bigger wheels. It was suggested that on rough surfaces, these smaller wheels would prove unstable and difficult to pull.
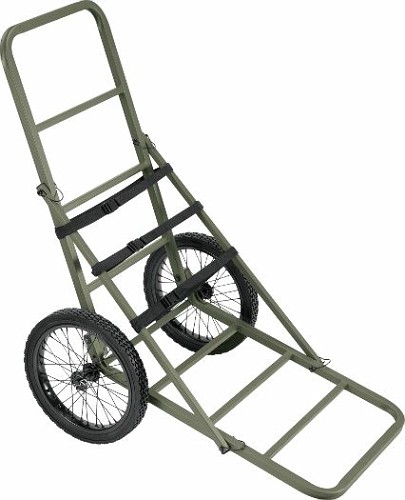
I searching for a set of wheels, I found 16″ spoked wheels for $20-$30 each. I didn’t want chrome, but that was all I could find. I figured I’d paint them black. As I was searching, I received an email from Cabelas and it had a Deer Cart on sale for $49 with 16″ Black wheels !
I ordered it and it showed up three days later. It included a nice set of black 16″ wheels, a few nylon tie down straps, 6 clevis locking pins an axle and a few nuts and bolts…..and a whole bunch of aluminum that can be used on various other projects!
The smaller wheels had an axle running the entire width of the cart.
This wouldn’t do as it witl raise the height of the cart too much.
I cut the axle that came with the deer cart for two “axle stubs”. I welded these to a couple small plates of steel. And usiong 4 nuts and bolts, I bolted them to the sides of the gun cart.
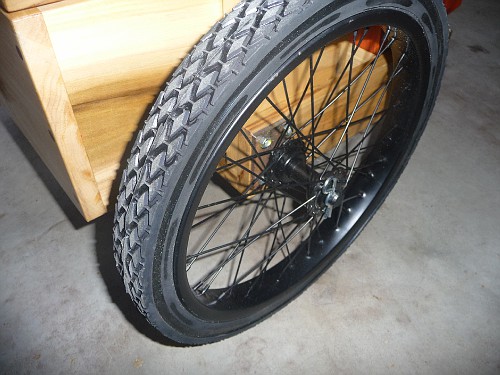
The cart rolls much nicer now over rough ground. And I think it looks a whole lot better……….


THANKS!
13 comments on “Cowboy Action Shooting Gun Cart”