
Recently I became a fan of Trap Shooting.
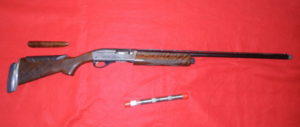
Went out and bought a beautiful Remington 11-87 Sporting Clays model shotgun.
Adjustable comb and butt plate. Twenty Eight inch ported / back bored barrel with extended choke tubes. Amazing wood and a nickle plated receiver. Loverly!
But when taken to the patterning board there was a problem. All the shot ended up below Point of Aim (POA). For a trap gun you want at least 50% of the shot above and 50% below the POA or a 50/50 gun. This gun was a 0/100 gun!
Searching the internet I discovered that folks are bending these shotgun barrels to correct or change Point of Impact (POI).
So with this info in hand….I needed to build a “Barrel Bending Jig”. I saw a few pictures on the internet of what others built. I’d build something similar but add a dial indicator so I could measure deflection.
Believe it or not, there are many reports of folks using the trailer hitch on their truck or the “Y” in an old oak tree or simply supporting both ends of the barrel and pounding it with a dead blow hammer or a bag of lead shot!
Yikes! I’m too much of an engineer to run down that path! Something with a little finesse was needed…
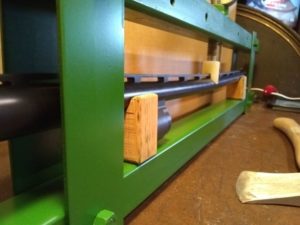
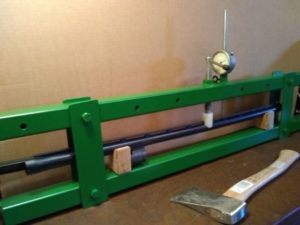
A few pieces of steel, a drill press, nuts and bolts and my welder and this is what I came up with:
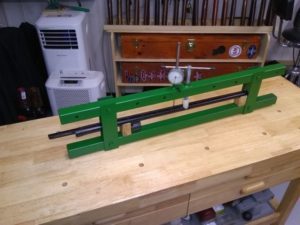
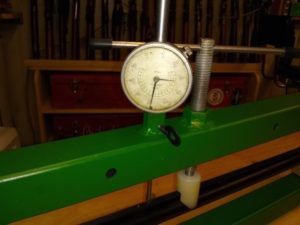
A dial Indicator will monitor the amount of deflection and spring back
A Delren piece of material will bear against the barrel’s ventilated rib’s foot:
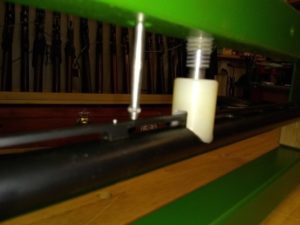
And a 1/2″ screw will apply the pressure needed to bend the barrel.
With my John Deere green barrel bending jig (BBJ), a couple boxes of shotgun shells and my low shooting shotgun….off to the range I go!
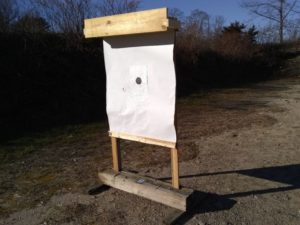
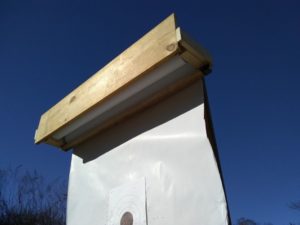
I recently built a patterning board with a replaceable roll of banquet table paper so I can easily change targets as needed.
 Â
  Â
 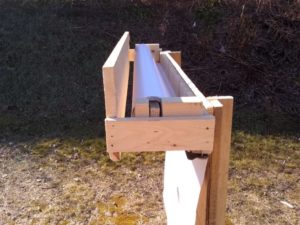
This board works great and makes patterning a shotgun much quicker.
So, here are the results of an afternoon at the range.
To start, the comb and butt plate were returned to neutral.
All shooting was done at 16yds from a bench rest
A 6 o’clock hold on the target dot was utilized
Winchester factory loads of 1160fps / #7 Shot was used
Modified choke tube was used (BTW, I tried all the choke tubes and all shot to same POI)
Two shots were fired at the target for each test.
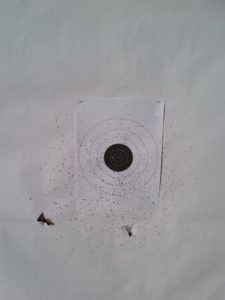
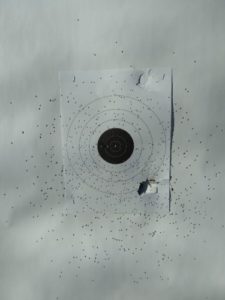
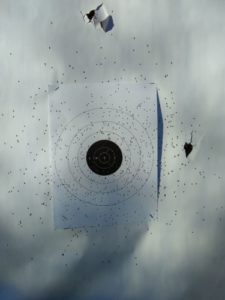
This is the first target with an unmodified barrel:

As you can see, nearly all the shot is below POA
The barrel was removed and inserted into the BBJ. The screw was turned until the dial indicator reported .050″ of “bend”
Barrel reinstalled in shotgun and two more shots fired
A very slight improvement was seen
Barrel removed and back to the BBJ. The screw was now turned to show .075″ of bend
Two more shots fired
Oops! I forgot to photograph this target but the pattern had moved up a bit more, but still not enough.
Back to the BBJ and now we are going to Devcon 3! I dialed in .150″ of bend. Friends that were watching were freaking out! Kind of like an old World War II movie about taking a submarine to deep!
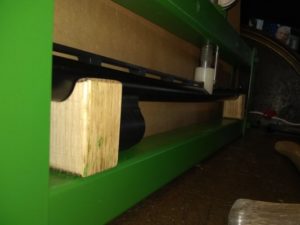
Here is what the barrel looked like with this much deflection:
Back to the patterning board and the results:
Looks like we are getting somewhere!
But still not good enough! “Scotti….We need more power (bend)!!!”
Devcon 4! Let’s really crank this bad boy! .230″ of deflection!
 Â
 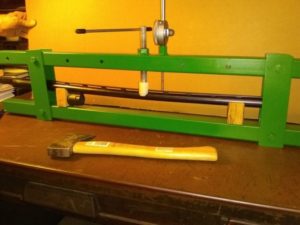
The pictures doesn’t show how bent the barrel really is! The axe was there to cut the hands off anyone that tried to stop me!
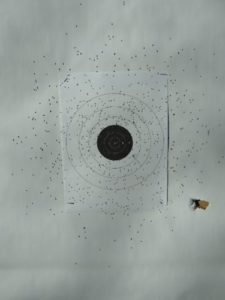
But the results were impressive! Looks like a 60/40 ? I didn’t have time to actually count pellets or use some of the available software. I will next time out.
One more visit to the BBJ and a “bend” of .250 and time ran out.
But the results are extremely encouraging:
Once the screw was turned, it was allowed to stay in position only 30 seconds. I was afraid of a permanent bend if it was left longer
Once pressure was relieved and the barrel was allowed to spring back, there was .012″ indicated “bend” in the barrel from the first procedure. Now I’m not sure all this is actually in the bend of the barrel. I’m not sure if the top bar of the BBJ offered some deflection or if the hard oak blocks I was using compressed a bit. All I know is the results speak volumes.
The spacer blocks were placed one behind the barrel carrier and the other just behind the screw in choke tubes so as not to bend this delicate area.
What amazes me is you can not see any bend in the barrel by looking at it or sighting down the rib! It looks perfectly normal. I was told to look down the bore and if the barrel was straight I would see concentric rings of light. There were no rings of light when I started, but after the procedure they were clear as day! Leads me to believe the barrel was possibly bent from the factory.
Before I left the range, I extended the comb 1/2″ and fired two more shots. Again I forgot to photograph the results but the pattern appeared to be 70/30. Exactly what I was aiming for (no pun intended)
As an aside…..When I purchased this gun, there was another similar shotgun from the same seller. They were purchased for a husband and wife and not shot much as they are both in like new condition. My good friend Jeff bought the other one which did not have an adjustable comb or butt plate:
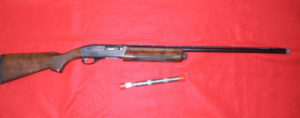
We patterned his on the board also. It shot a bit low, but nothing like mine. This week we will have at it with the BBJ to improve it a bit.
So, that’s the story about bending shotgun barrels to change the POI…..A real fun adventure to be sure
” The only difference between an ordeal and an adventure is your attitude!”
Be sure to check out my other articles on Gunsmithing, Shooting, RV Modifications and other nonsense here www.rvbprecision.com
Thanks!
11 comments on “Shotgun Barrel Bending to Change Point of Impact”