
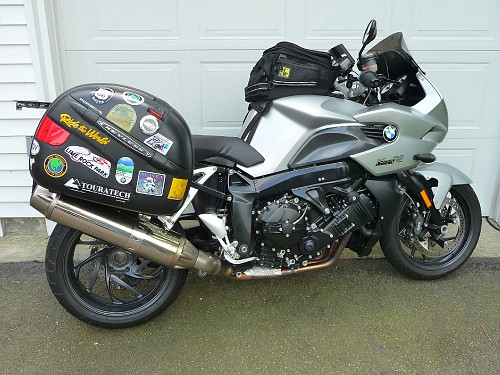
A few years ago, down at the Johnson City, TN BMW MOA Rally I saw a K 1200R “Sport”. Since this version of the K1200 “Wedge” bike was never cataloged and very few were ever imported into USA, I’d never seen one. The K1200S was always a great bike in my eyes, but the riding position was just a bit to aggressive. The K1200R is just to naked for my type of touring. And the looks afford a “love it – hate it” situation. The “Sport” has the ergos of the R with half the fairing of the S……..Perfect! Made only in year 2007, the hunt for a nice, low mileage bike was on.

My friends at MAX BMW up here in New England received a near perfect specimen. Proper color (they were only available in Silver and Blue), 8K miles, ABS with no ESA. I didn’t want ESA because of the huge costs associated with replacement at some point dopwn the road. ABS is a must have. I won’t tour on a bike that doesn’t have ABS.
I had two bikes in the barn that were not getting ridden much. A 2007 BMW 650 X-Challenge with under 2K miles and a museum quality 1987 BMW K100RS “M-Sport”. I made a deal with Max’s brother Ben and traded these two bikes for the K1200R Sport.
So now the “Farkling” must begin.
Here is what needs to be done:
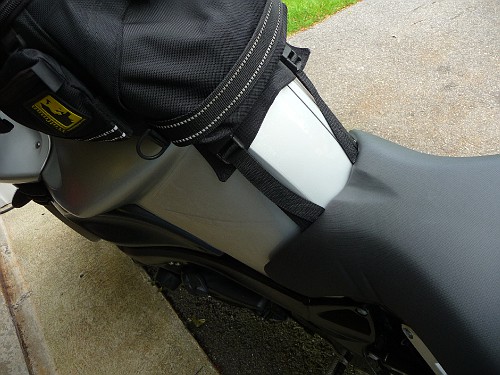
1) Modify a set of GIVI painer racks to accommodate my commuter bags and my touring bags. The BMW luggage from this series of bike are a joke. The GIVI 41L bags with top and side opening are fantastic and I’ve been using them on every biuke I’ve owned for years. And on the same mounting system a set of 21L bags can be hung for day trips or commuting.
2) Mount GPS
3) Mount Radar Detector and XM Radio antenna
4) Install Amplirider headphone amplifier
5) Mount phone /mp3 player
6) Install thermometer
7) Install 12V outlet to front and rear
8) Install Tank Bag hold down straps
9) Install “Booster Plug” (This is covered under another article here on this web page)
10) Aux Fuse Block
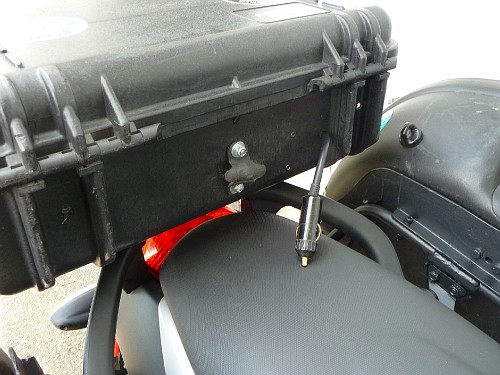
11) Mount Rear Box – Mobile Office
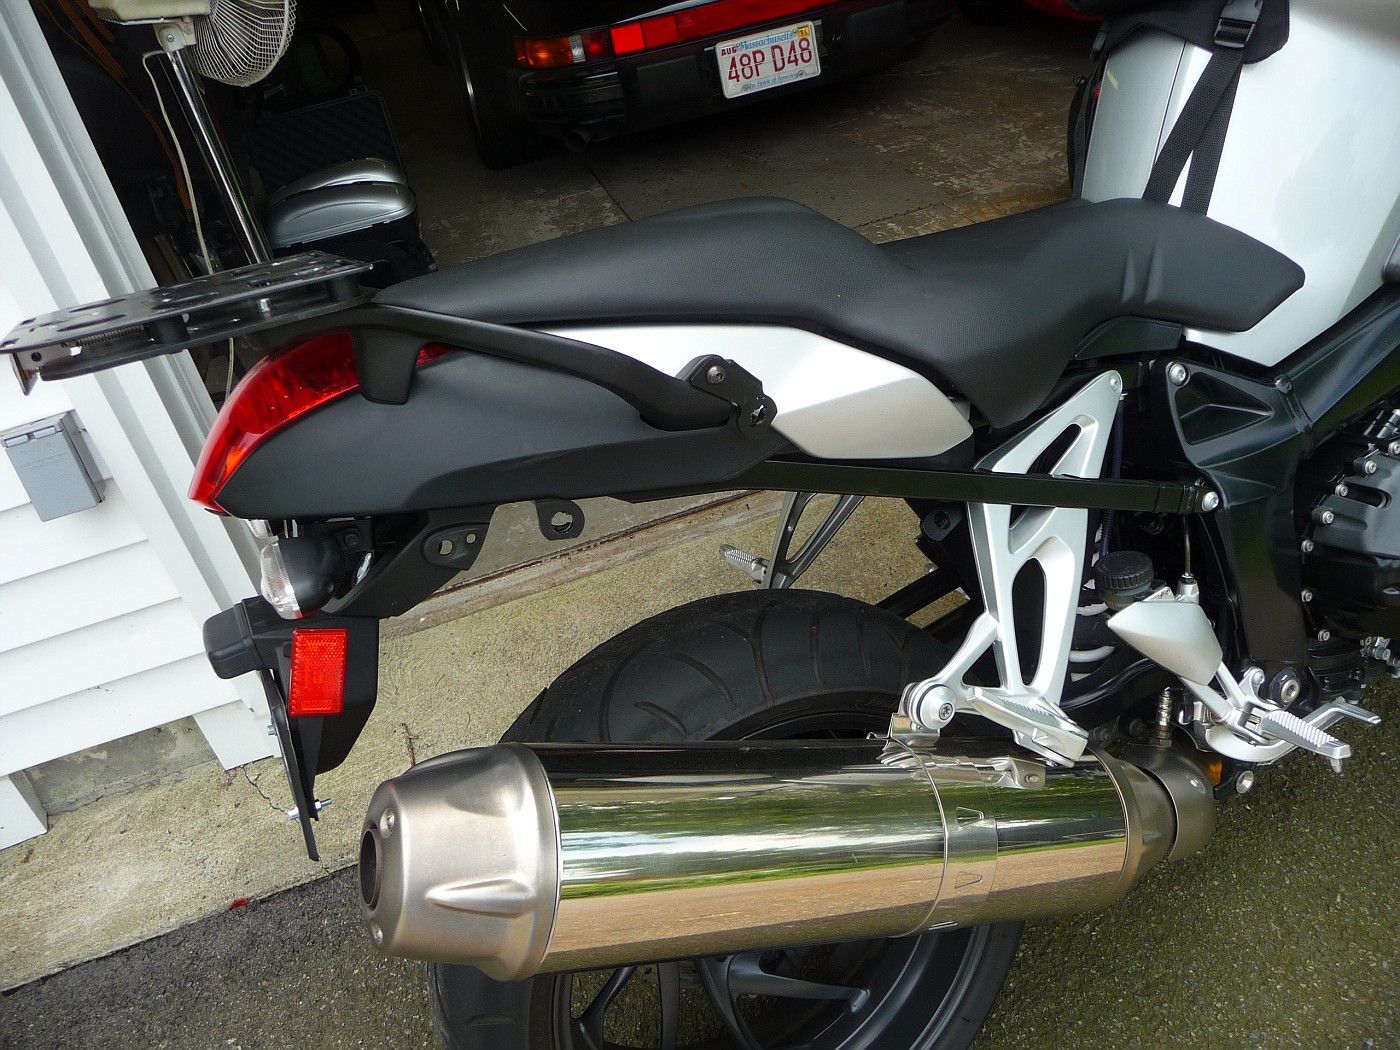
The first order of business was the installation of the painer racks. GIVI still makes racks for this bike, but they only accommodate the new style bags. I wanted to use my older style 41L and 21L bags. I ordered a set of PLX racks from Twisted Throttle ( http://www.twistedthrottle.com/trade/productview/5169/626/ ) and they were at my house within 24 hours! These racks feature the “Quick Release” mechanism where with a few twists of a special wrench, the racks remove from the bike. This is great for Friday night posing down at the drive-in diner.
Here is all that remains once the racks are removed. Three mounting tabs.
I had an older set of GIVI brackets that I had modified for my R1150RS. So with angle grinder and hack saw, I cut them apart and attached the mounting plate to the PLX racks with a four nuts and bolts. A couple spacers were made for the two bottom bolts to keep the bags straight.
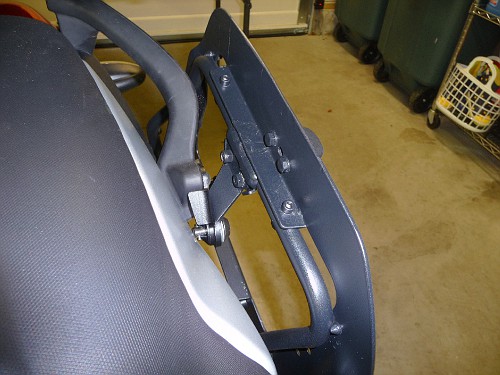
Racks with mounting plate installed:
With 41l bags:
And with 21L bags:

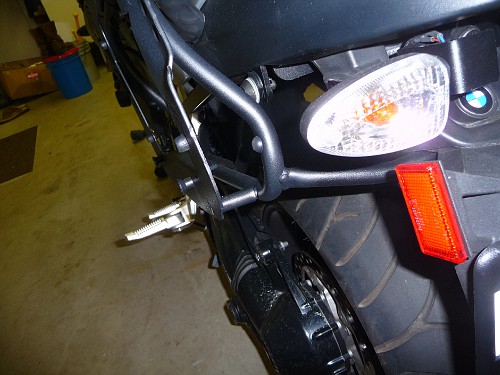
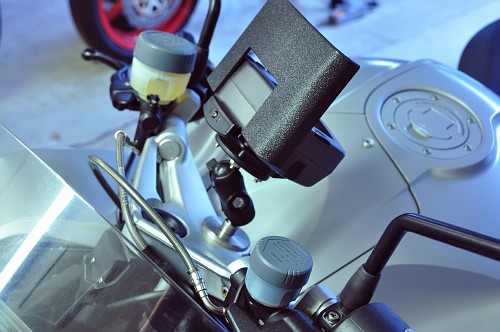
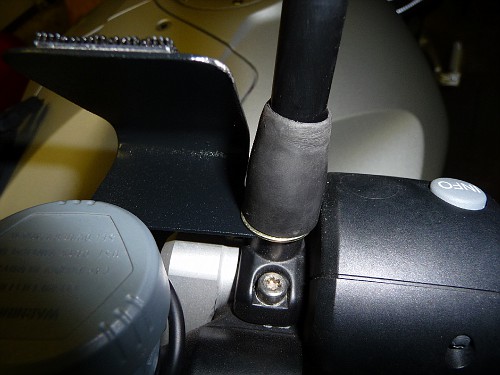
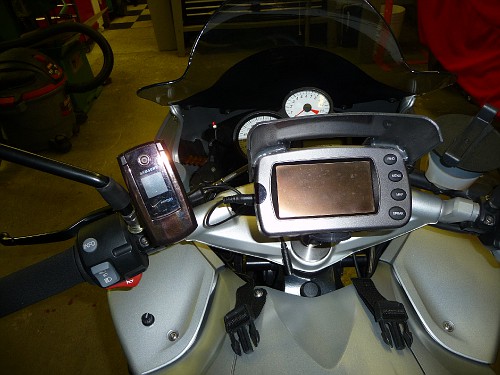
Next up is the mounting of the Garmin 2730 GPS unit with the XM antenna. I wanted the unit between the handlebars and just above the tank bag but not blocking any of the gauges. Under the BMW roundel in the center of the top yoke is a threaded hole.
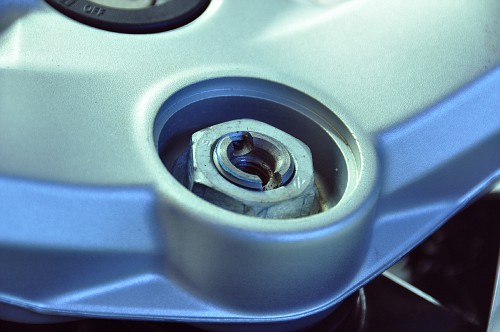
I found a large Metric bolt in my junk drawer that fit perfectly. In the lathe I drilled and taped this bolt to accept a 1/4-20 thread and turned a stainless steel plate to make it look pretty.
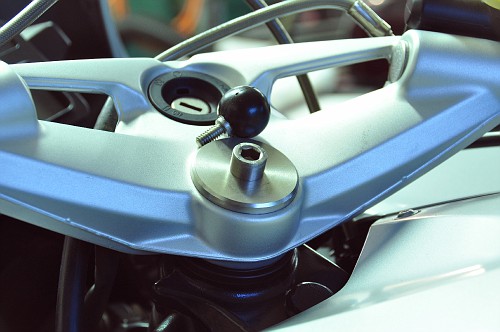
Into this threaded hole I mounted a “RAM” ball mount (Twisted Throttle)

And a short RAM mount and the GARMIN motorcycle mounting plate finishes the deal
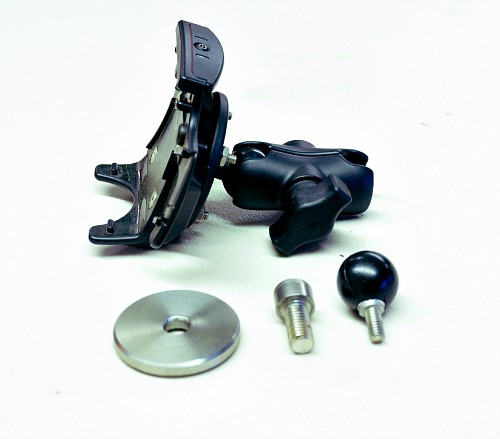
(Hint: If you search EBay, there are a couple of folks making these mounting plates and selling them at a reasonable price.)
The XM Antenna is mounted using a mount I fabricated simply mounted to the top of the brake fluid reservoir with Heavy Duty double sided tape. An elastic band cut from a dirtbike inner tube keeps everything in place.
RADAR DETECTOR:
I found this bike to be a real challenge to mount the Escort 8500 radar detector. I wanted it semi concealed and mostly out of the rain. But easily removable and able to be seen from a riding position.
The area I mounted it forgoes the use of Laser warning, but in all the years I’ve been riding with a Escort 8500, I’ve never been lasered. As long as it pickes up X, K and Ka band, I’m fine.
Using a piece od scrap metal, I made a little shelf off to the left of the dash panel and drilling one hole and using a piece of double sided mounting tape I installed it as shown:

Using heavy duty Hook and Loop fastener, the radar detector is easily removed for security and to use in other vehicles.
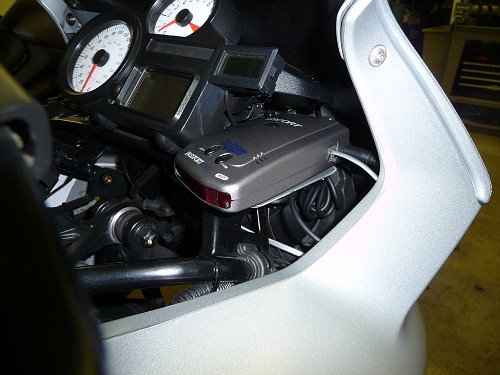
There will be no issue with the X,K and Ka radar waves getting through the plastic fairing.
AMPLIRIDER HEADPHONE AMPLIFIER:
The Amplirider headphone stereo amplifier system was installed under the left fairing. There is lots of room under the left and right side fairing of this bike. Unfortunatly I didn’t take any pictures of this part of the installation. Read all about the Amplirider here:
http://www.electric-avenues.com/amplirider.html
This is a fantastic unit with three inputs that allow GPS directions, MP3/Phone audio and Radar Detector alert….All at the same time. Simply set your volumes to override each other as needed. This unit sells for the amazing low price of $65. And the owner of Electric Ave, Gary, is a delight to deal with!
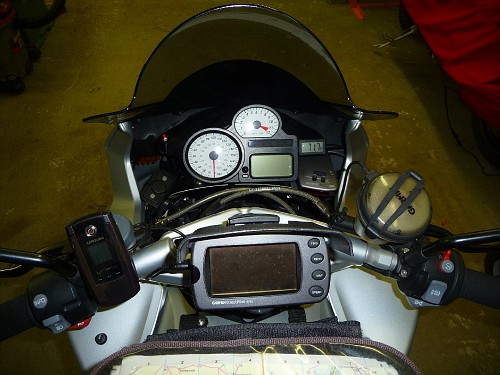
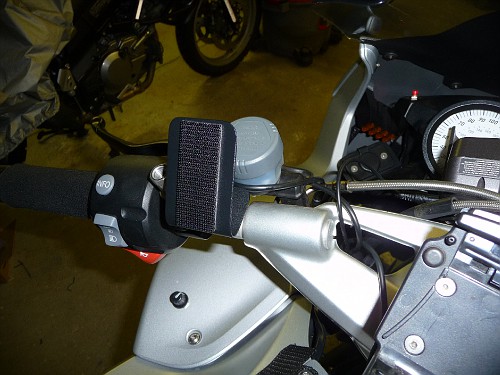
PHONE /MP# Player Mounting:
I don’t answer the cell phone while riding. But my work requires me to at least get back to folks if the call is important. My phone also is my MP3 player with hundreds of songs stored in its memory. So I needed it mounted where I can read incoming “missed” calls and access the music player.
A piece of scrap steel plate, bent, drilled and mounted under the mirror mount fit the bill:

All painted pretty like and phone mounted with HD Hook and Loop:
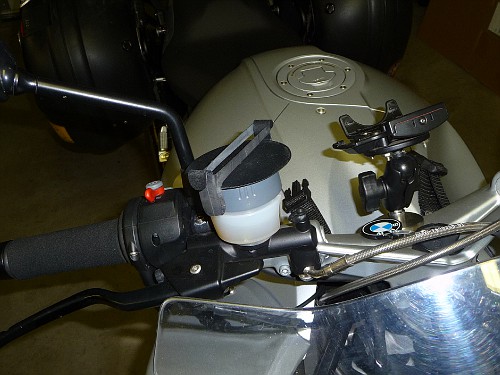
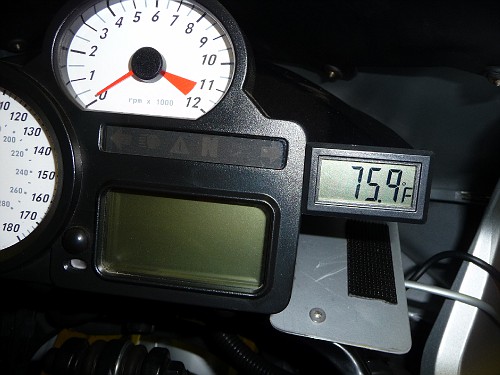
MOUNT TERMOMETER
The Aerostitch Thermometer is the best I’ve been able to locate. http://www.aerostich.com/mini-remote-thermometer.html I want to know when the temperature is approaching freezing so I have an idea on surface situations.
This unit is battery operated and I’ve had one operating for years on the same battery. A piece of HD Double Sided Tape fitted it to the side of the instrument panel.
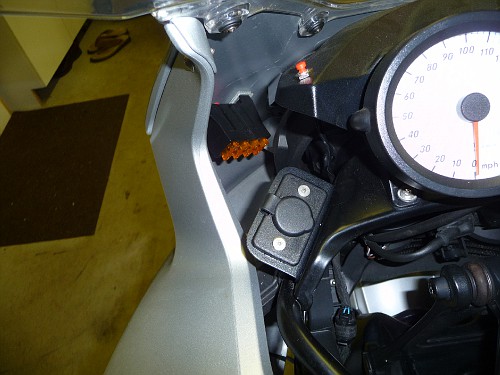
12V Lighter Receptacle front and rear
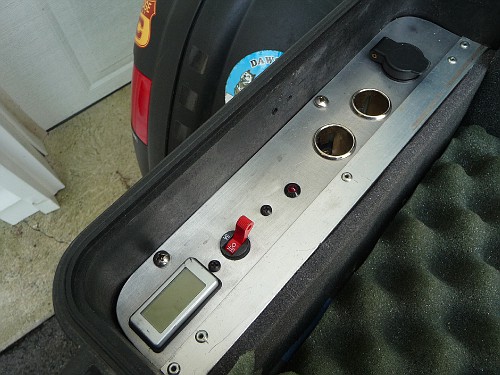
I needed a place to charge the phone and my rear top case has electrical connections to charge my laptop while on the road. My job affords me the luxury of being able to work from the road as long as I have internet access and cell service.
I fabricated a little bracket that mounted to the left of the instrument panel for the front socket.
And a simple cord with lighter jack runs under the seat to the rear of the bike. This cord runs directly to the battery, through its own fuse so I can use it for a high current draw compressor if needed.
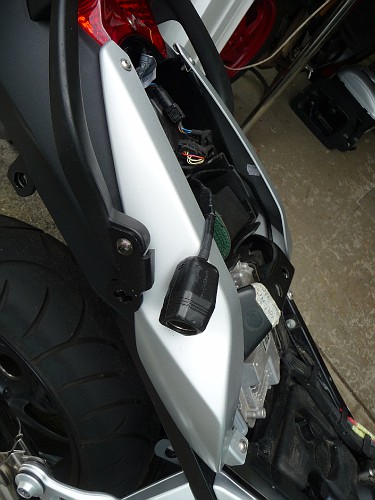
My “Mobile Office” plugs directly into this jack and powers up whatever I might have in the top box:

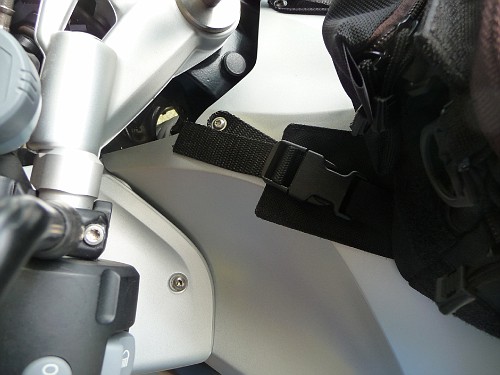
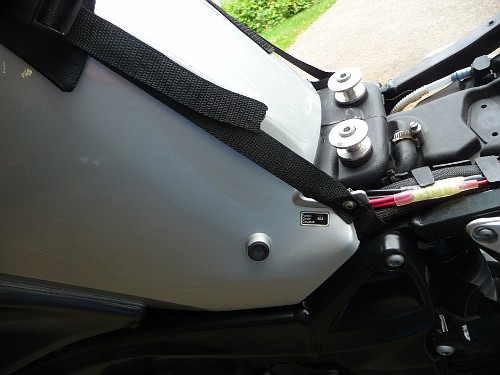
TANK BAG:
This bike has to be the easiest to attach a tank bag. Four straps with holes melted with a red hot nail and you’re done!
AUX FUSE BLOCK:
All this electrical stuff needs power. A small aux fuse block was mounted wit HDDST (Heavy Duty Double Sided Tape) to the left front fairing. A relay wired directly to the battery powers it up. I used the headlight wire as a trigger for the relay. In this way all accessories are unpowered during the initial start phase. This keeps all available voltage going to the starter. This is a nice feature of the BMW motorcycles with CanBus.
While I was at it, I hard wired the BMW supplied electrical outlet on the side of the bike directly to the battery. This will allow charging the battery during extended down times and a place to draw full voltage and current through a BMW type plug without going through the CanBus.
BTW, that little red button is hard wired to my garage door opener.
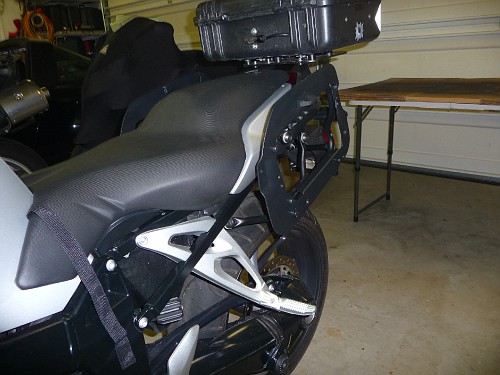
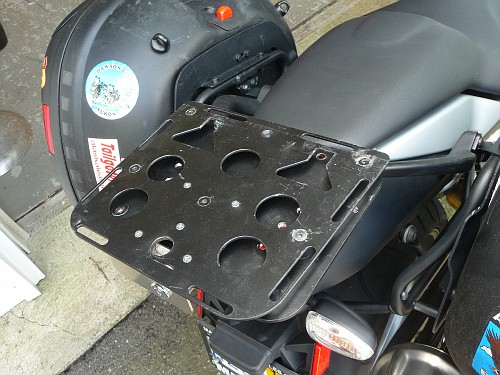
MOUNT REAR TOP BOX:
I have a number of different motorcycles and three different top boxes. I use the same Touratech mounting system for all bikes and all boxes. One box is the “Mobile Office, another is a complete “Cook Box” with everything including the kitchen sink for extended camp cooking trips and the third box is a small unit for day trips. This mount has a key lock for security.
The mount can be seen here http://www.touratech-usa.com/Search/?q=053-0050
It is extremely heavy duty, as is all of Touratech’s gear
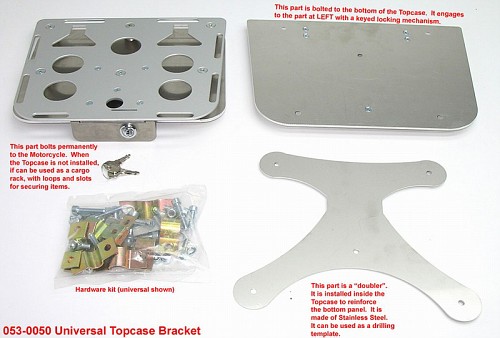
A couple of holes neded to be drilled in the Touratech mounting plate to line up with the threaded inserts on the BMW K1200 rear rack. And two spacers were cut from a piece of aluminum tubing to keep everything level.

That sums up the Farkling exercises. Now we are ready for some long distance touring!
Lots more pictures here:
http://public.fotki.com/Rbertalotto/motorcycle/motorcycles-current/2007-bmw-k1200r-sport/
And many more motorcycle projects here:
http://public.fotki.com/Rbertalotto/motorcycle/motorcycle-projects/
1 comment on “BMW 2007 K1200R Sport “Farkling””