My Dodge 2500 4X4 Diesel with 100K miles on the clock was in the need of front ball joints, u-joints and brake pads. I was intrigued by all the conversation on the various Dodge Diesel forums about the unit bearings failing and the expense to replace. So I did some research and found three companies offering a Free Wheeling, Locking Hubs kit for our trucks. Dyna Track, SpynTec and EMS Off Road. I called Tom Brister at EMS Off Road  http://www.emsoffroad.com/store/ to discuss my options. He assured me that all the kits were well made, but their kit was a few dollars less and used off the shelf bearings that could easily be replaced in an emergency. Although all three kits were back ordered at all vendors I checked, Tom said he could have a kit to me in a week so I ordered it up along with a set of non greasable U-Joints. At the time of this article, the kit cost $1495 and the two U-Joints were $110. Shipping from PA to MA was $60. Total $1665.00. The only other item I needed to purchase was high temperature wheel bearing grease and a bearing packer device. The grease was $12 and the bearing packer was $8.
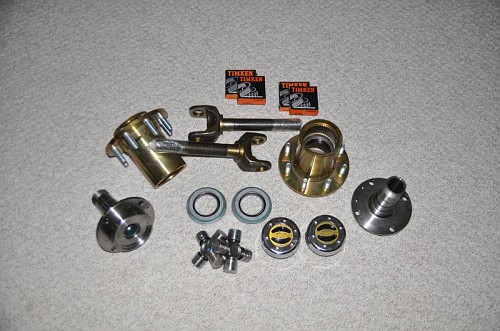
Less than a week later, the kit arrived. Packaged nicely with no issues.
The benefits of the Hub Conversion are:
- Stronger Axle Shaft 4340
- Better Fuel Mileage
- Easier Steering input(in 2wd)
- Service-able Timkin Bearings
- Eliminates front Drive shaft Vibrations, in 2wd
- If you do break a stub axle, the bearing will not fall apart.
- Less wear on front end (u-joints, gears, drive shaft, t-case)
- Driving with a Locked front end, in 2wd, will not fight the steering
You will need a couple of specialized tools:
12MM Allen Wrench
4 Point Hub Spanner Socket
Large Socket to fit the OEM hub nut
The installation went extremely easy. On a scale of 1-10 I’d say I’m an 8 as a mechanic. I can change shocks, oil, bleed brakes and pull and replace most parts. The hub conversion process is mostly “pull and replace”……..It took me 6 hours, working alone, to do the entire job, including ball joints and brake pads.
So, here we go……
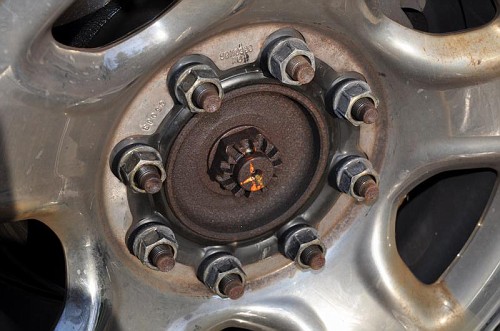
First, before you jack up the truck, remove the cotter pin and loosen the large nut on the wheel spindle. You need the tire on the ground for this and I used a 3/4″ drive socket with a breaker-bar and a 36” cheater pipe. A loud “pop” and it was loose.
Jack one side of the truck up. If you jack up both sides the front end differential oil will leak out. Jack up one side and it will flow to the low side and be much easier. Use jack stands so you don;t suffer “death by truck on your head syndrome”!
Next you need to remove the brake caliper. Two bolts hold it onto the hub assembly. Marked with arrows here:
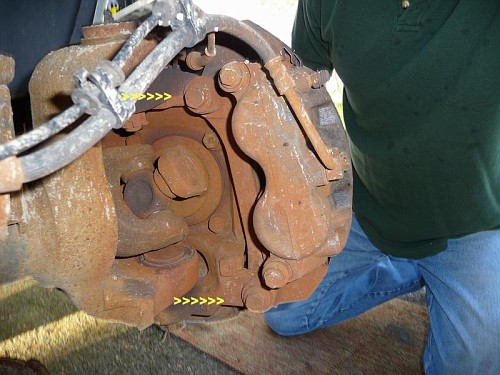
You will need some wire to tie the brake assembly out of the way.
Next the brake disc needs to be removed. This turned out to be the hardest part of the install. Lots of banging with a rubber mallet and they finally came off. Lots of rust was holding them on as you can see in the picture.

With the brake caliper held out of the way and the brake disc removed, it is time to remove the unit bearing.
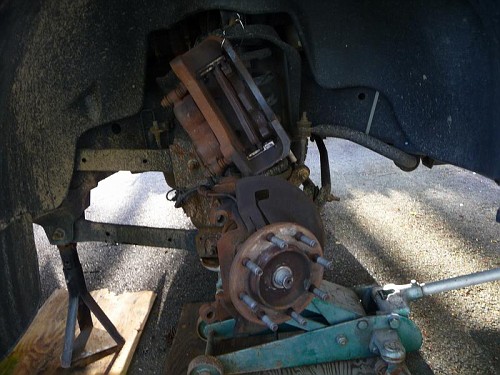
First you want to convert to Catholicism so you can go to church and make a Novena. Removing these unit bearings can bring tears to full grown men! But they do come off. In one piece! I used the power steering and a few 3/4″ socket extensions and various sockets to “push” on the rear of the retaining bolts and knock them out. LOTS of PB Blaster penetrating oil applied liberally a few days leading up to the install helps.
But first remove the Allen bolt that secures the ABS sensor and tie it out of harms way.
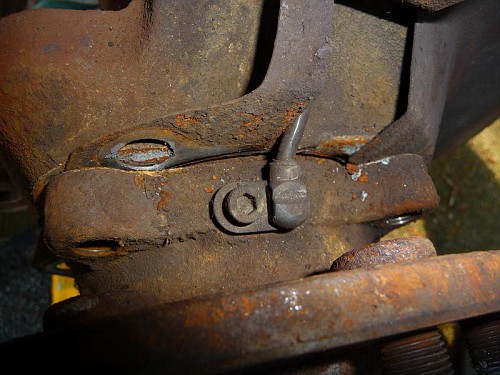
Now you need to loosen the four bolts that hold the unit bearing to the axle housing.
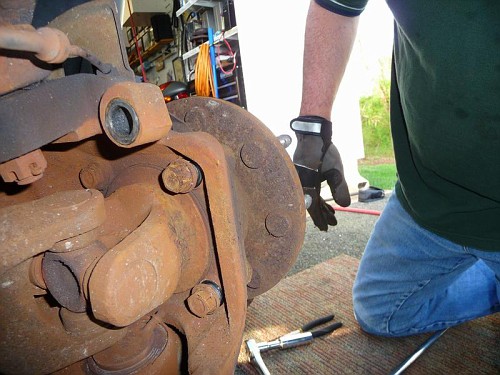
The various Dodge Diesel forums have thousands of posts on how to use the power steering to knock these out and Snap-On actually sells a tool just for this purpose. But the jest of it is a socket of proper size is installed over the bolt and and extension is inserted between the socket and the chassis of the truck. Then you start the truck and hang on the steering wheel like a maniac until you hear something that sounds like a rifle shot…..Do this four times (or 8-12 times) and the unit bearing will be pushed out of the axle housing. Trust me….It works!
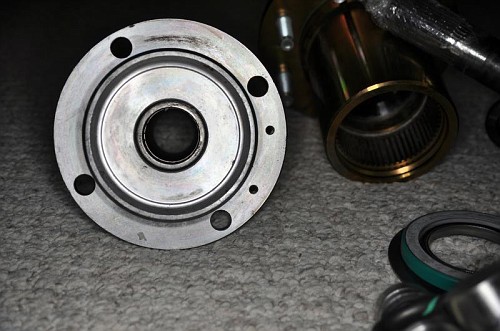
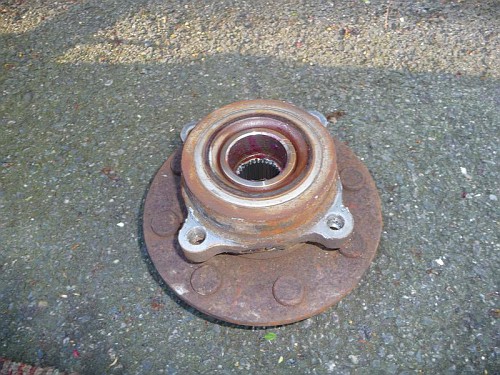
This is what the back side of the unit bearing looks like.
Once the Unit Bearing is off, you will see the axle in all its glory.
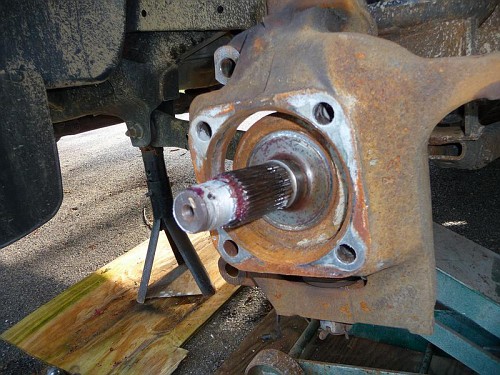
This axle simple slides right out. There will be a bit of friction at first. You might need to use a small pry bar to get it started, but it pulls out easily. Be carefull when you pull it out to keep it centered as you don’t want to damage the axle seals inside the axle tube.
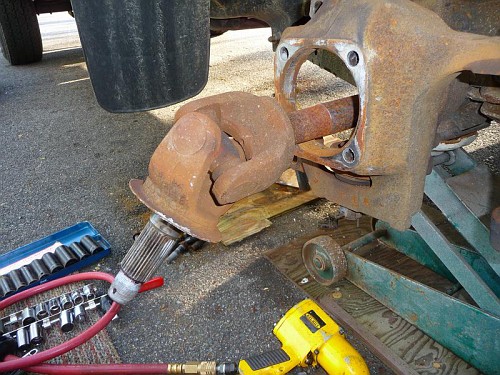
Once the axle is out, you need to replace the short shaft with the new unit provided in the kit. I would suggest new U-Joints. I have no idea how you could remove the OEM and reuse them. It just isn’t worth it. I couldn’t get the OEM U-Joints to budge. So I used my torch and cut them in pieces to make removal easier.
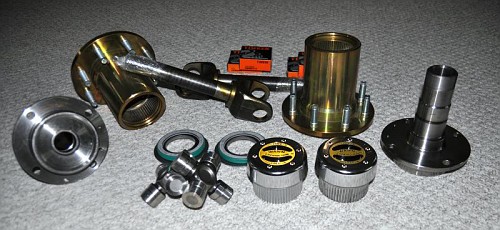

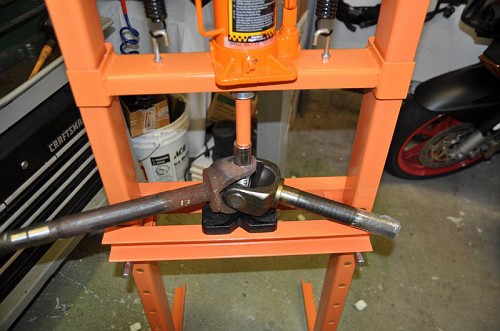
Once the old joints were removed, new joints were pressed into place using my new 18 Ton press that I bought a Harbor Freight for $79 with my 20% off coupon. Best $79 I ever spent!
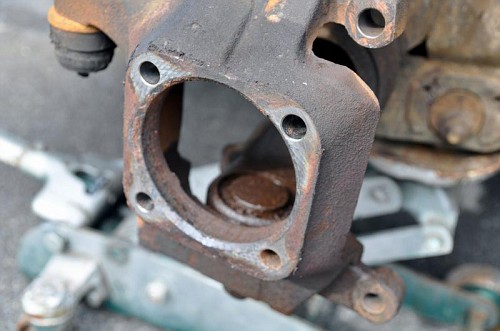
Now it’s time to put it all back together. But first you need to use a flap wheel or a sanding drum and really give the spindle support a good cleaning. Get all the rust out but you still want a snug fit on the new wheel spindle. Test your fit as you go.
Using the instructions included with the kit (You can download them ahead of time off the EMS web site), install all the seals as specified on the new axle shafts. Put grease on everything. The seals, splines etc all need a nice coat of grease.
Slide the axle back into the axle tube. It will pop right into place. I put a screw driver under the universal joint to keep it centered in the hub mounting hole. This will make installing the new axle hub easier.
Install the brake dust shield.
Grease up the inside of the new axle stub and slide it onto the axle spline and align the four holes.
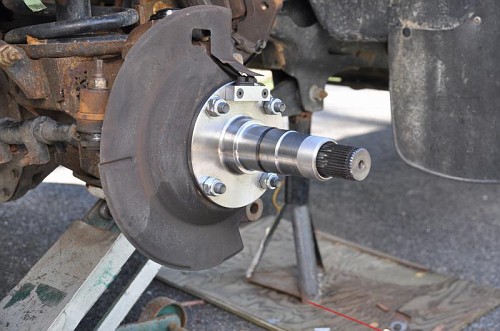
The four bolts that hold everything together are Allen bolts. The instructions tell you to install the bolts from the outside. If you do this, there is no way to hold the nuts properly to tighten the Allen Bolts to the specified torque. I simply reversed them and put the nuts on the outside. It worked fine and they will be much easier to remove if I ever have to years from now.
Next you need to install the ABS sensor mount.
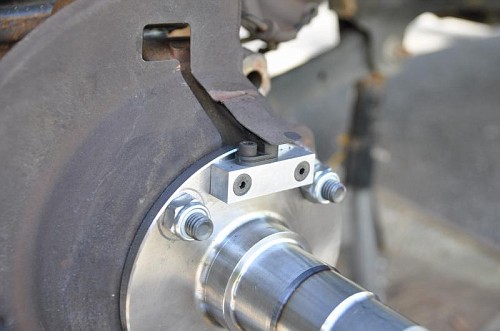
I had to use my Die Grinder to make a little relief cut for the ABS sensor wire. I told Tom about this and hopefully they will make the modification.
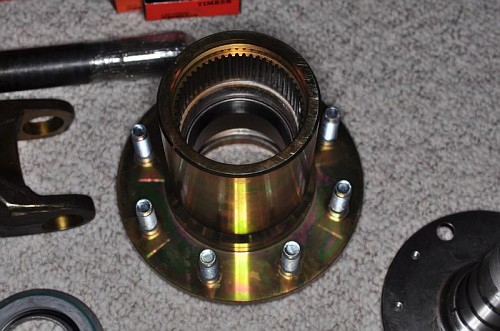
Be sure to remove all grinding dust 100% before you install your bearings and final hub.
Now its a simple matter of dropping the bearings into the new hub. Use lots of high temperature disc brake wheel grease. I would purchase a bearing packer to be sure there are no voids. The instructions clearly spell out this part of the install and the warn hubs come with clear instructions also.
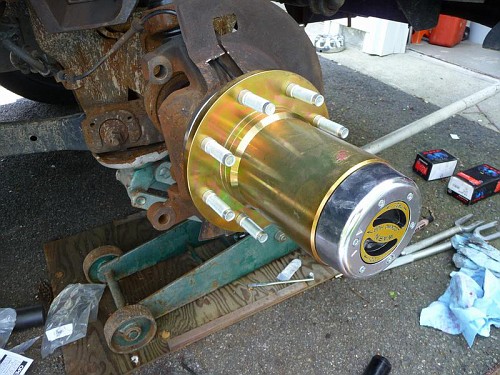
Put the wheel and tire back on and then do the other side!
A 4.5″ hole saw will make quick work of the hub cap. Once the hole is cut, it will snap right back on.

You’ll be rewarded with a very smooth ride, less vibration and maybe a mile or two better fuel mileage. Plus it just looks so cool!
Update:
The number one question I’m being asked is “How much do they stick out?”………

First, the reason the unit bearing fail so often is they don’t stick out enough! The two bearing in the unit bearing are very close together and the moment arm on the front spindle is great. The bearings being so close together don’t spread the load enough.
The EMS kit spreads this load out over a much greater area and onto two large bearings. Which are serviceable (greasable). They should last for hundreds of thousands of miles…….
So, that said, they stick out 2.75″……………

If you take your 8,000 pound diesel 4X4 rock crawling, this could be an issue, but for everyday hunting and fishing 4X4 activities, they won’t be a problem. I’ve owned many Ford F150 of 1970 and 1980 vintage that had the locking hubs sticking out like this and I took those trucks into some pretty gnarly situations and never had an issue. But if you really want to get far off road, that’s why God invented ATVs!
Lots of pictures here:
http://public.fotki.com/Rbertalotto/vehicles/dodge-cumming-diesel/
UPDATE!    7-13-11
Well it’s been just over a year and 30K miles later. I’m getting ready to tow a 10K pound trailer down to PA for a big BMW Motorcycle Rally. Just for hoots I decided to get up early yeaterday, while it was still cool, and pull my hubs to grease the bearings and check for wear.
So far, so good! The bearing are like new. Zero play. Spin free. Grease was in great shape but I removed all I could and regreased everything. Put everything back together and I don’t think I’ll look at them again for 100K miles!
This Free Wheel system is returning 1-2 MPG more and has cut down on the little bit of front drivetrain vibration I had. Now it rides like a limo.
But I did see that my rotors are getting shot. At 150K they will need replacing this fall before the trip out west for hunting season. I’ll go with EBC rotors and pads available from Amazon.com.
UPDATE 1-11-14
About 100K on the hubs and no problems. Some rough off road four wheel drive hunting trips, lots of 70-75mph highway, lots of trailer towing and now a 2500 pound camper……still no issues.
UPDATE 8-15-14
The hub kit has been in service just a bit over 4 years with another 20,000 miles on the truck. No issues what so ever. The hubs are performing perfectly.

4 comments on “Ems Off Road Free Wheeling Kit Install”