Recently I became intrigued with single driver loudspeakers. Where many, if not most HiFi loudspeakers have multiple drivers…woofer, midrange, tweeter, and sometimes multiples of each, there is a following for a simple design using a single, high quality, full range driver.

There are real advantages to this Single Driver design:
#1) Single sound source. All the sound energy emanates from a single point. There is zero phase distortion caused by the sound from the various drivers reaching your ear at slightly different times.
#2) No cross over. All mulity way loudspeakers needs a “traffic cop” called a crossover to direct the Highs to the tweeter, the Lows to the woofer and the Mids to the midrange. This is a whole bunch of capacitors, coils, resisters and wire right in the path of the music coming from your amplifier to the speakers.
#3) Expense…All the funds that would be spent on two or three (or more) drivers and a crossover can be invested in a single, much higher quality driver.
#4) For the Home Builder DIYer, a single driver speaker is extremely easy to build and very affordable.
Be aware, there are hybrids within the loudspeaker world. KEF one of the leading loudspeaker manufacturers offers a number of “single driver” speakers. But these are not full range drivers. They actually have a tweeter mounted in the center of the woofer. All of the advantages of single point driver, but they do have a crossover and more extended high frequency.
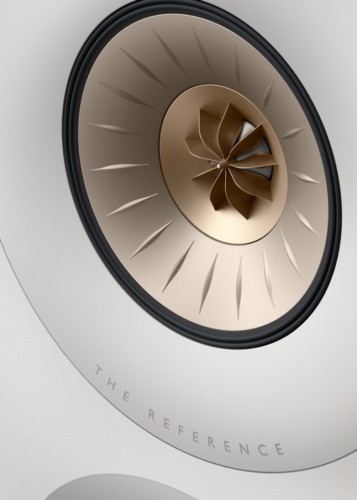

What are some disadvantages of a single full range driver…..For one, high frequency response might not obtain the heights of a separate tweeter and the bass response might not go as low as a separate woofer.
But the reality is, most speakers advertise a frequency response of 20Hz-20KHz…..The limit of a humans hearing when very young. After many years in our very noisy environment, you are lucky to be able to hear 40Hz to 15KHz……And most recorded music does not extend 20-20K….
So why build a pair of full range, single driver speakers?
Over the years I’ve built many multi-way loudspeakers…..designed enclosures, built crossovers, etc…..They all sounded fine. But recently after reading dozens of great reviews on the KEF LS50 Meta, single point source speakers, I took the plunge and bought a pair.

In a word….FANTASTIC!
I attribute the amazing HiFi sound quality to two things….A single sound source driver and a VERY rigid cabinet. We discussed the attributes of a single sound source above…..And a speaker cabinet that is extremely rigid, does not waste energy resonating the speaker cabinet. (Plus in this case, a very hi-tech design of the driver)
Spending time on YouTube and various internet HiFi forums, I became aware of a small loudspeaker company in Belgium called Pearl Accoustics. The owner and designer is Harley Lovegrove. A VERY interesting fellow who is also a classical music recorder, producer, engineer.
Here is his philosophy on loudspeakers:
“For me speaker building is more like instrument making. It’s a passion and a craft all at once. Sure there is science too but not many Luthiers know much about science, they don’t need to test their cellos, violins or classical guitars in anechoic chambers to know if they are any good or not. All I have done over these last five decades is to try to design and build the best possible enclosures and then to find really great drivers (ones that can cover the widest possible frequency range effortlessly). By teaming up with Mark Fenlon of Mark Audio, I now have my own custom drive units made exclusively for the Sibelius SG and CG models.”
-Harley Lovegrove
To read more about these amazing speakers and a very interesting fellow:
https://pearlacoustics.com/aboutus/
After reading up on Harvey and watching a few of his YouTube channels, I’m hooked. I want to try out a pair of Pearl Accoustic “SIBELIUS SG” loudspeakers……. Not so fast Cowboy! They start at $4000 a pair! Way above my pay grade…
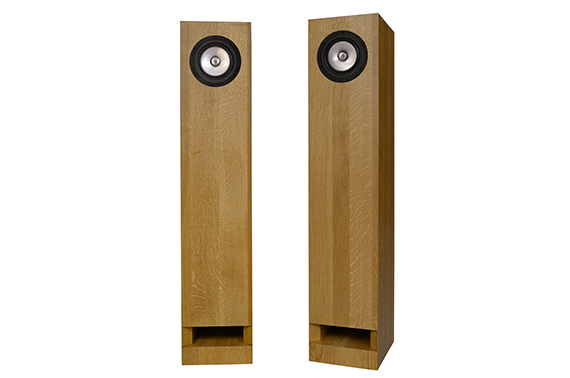
But in his speaker info, he says he uses drivers from a company called “Mark Audio”……A quick search of Mark Audio leads me to “Madisound Speaker Components” in Middleton, Wisconsin.
https://www.madisoundspeakerstore.com/
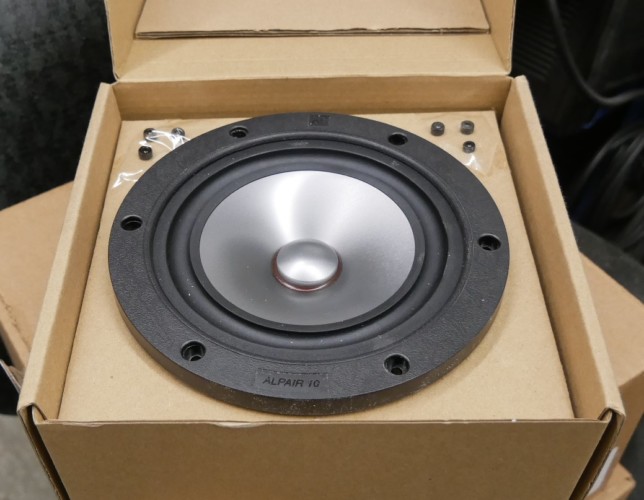
And BOOM….There is the Mark Audio driver that Pearl Acoustics uses….Although the driver they get from Mark Audio is modified to their specifications. An ALPAIR 10M driver…
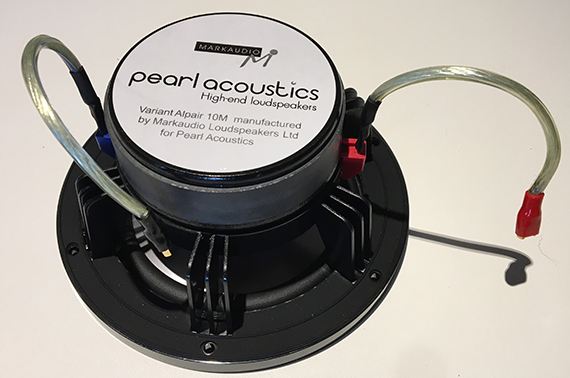
And the ALPAIR 10M available from Madisound…
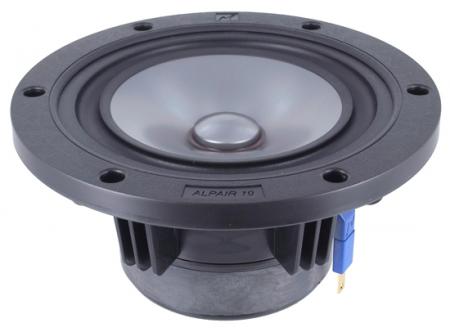
(At the time of this writing 3/22, these drivers sell for just a bit over $100 each.)
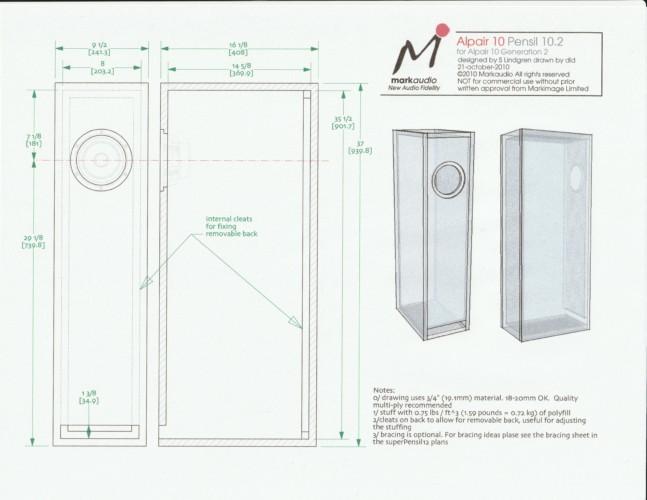
But wait, it gets better……A quick search of this ALPAIR 10M driver brings up dozens if not hundreds of posts of a line of DIY home built speakers using these drivers called “PENSIL” (I have no idea where this name comes from)…..Along with reviews and comments on the construction and finished products, there are detailed plans available, free to upload.
http://www.frugal-phile.com/boxlib/pensils/Pensil-Series-set-100711.pdf
I decided to build a pair of PENSIL 10.2 as they seemed to approximate a similar design to the SIBELIUS SG.
Looking at the plans I realize this is an extremely easy speaker to build. Basically a long box with the front panel a little bit shorter to create a “bass port” slot at the bottom. A few pieces of plywood or MDF (Medium Density Fiberboard), screws and glue….Viola! You could even have the lumber yard cut the wood to the plans dimensions or have a carpenter friend throw them together for not much money.
As my luck would have it, as I was Google searching for info on the Mark Audio Alpair 10M drivers, I found an older classified ad on a HiFi forum where a fellow was selling a pair of the exact drivers I needed . And he was also selling a neat little tube amplifier kit.
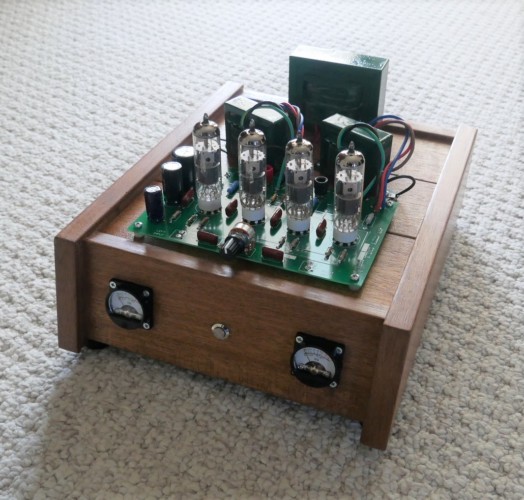
http://rvbprecision.com/stereo/k-12g-tube-amplifier-build.html
I contacted him and he offered to “unload” both the drivers and the amplifier kit for $200…Shipped! The good Lord smiled on me that day!

So, on to the build….
At first I was just going to build them out of MDF or Baltic Birch plywood. But then I started thinking about that rigidity thing. I actually thought about pouring concrete slabs in a form and assembling with this material. (As an experiment I built a set of small desk-top speakers out of concrete blocks….)

To maintain the solidity of concrete on the front baffle, I turned to Bamboo Plywood. As a teast, I cut a piece of Bamboo plywood, MDF and Baltic Birch Plywood……3″ X 12″ and all 1/2″ thick……A “bend” test showed the Bamboo to be easily two to three times stiffer. Unscientific , I know……But easily demonstrable!
So Bamboo Plywood it would be.
Turns out, It was the least expensive sheet goods at Lowes Home Improvement.
Usually you would build a speaker like this out of at least 3/4″ material. The Bamboo plywood was only available in 1/2″. So that’s what I went with.
I cut all the pieces needed and started assembly.
Once I had the cabinets done, I became concerned about “Oil Canning” of the long panels. To mitigate any “oil canning” I decided to dampen all the panels with glued and stapled diffusion blocks.
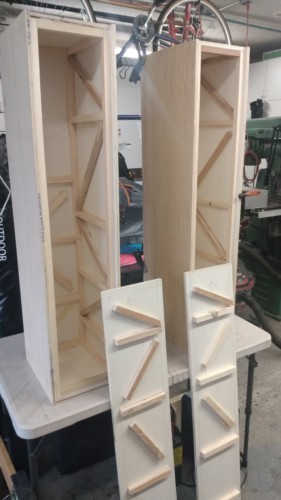
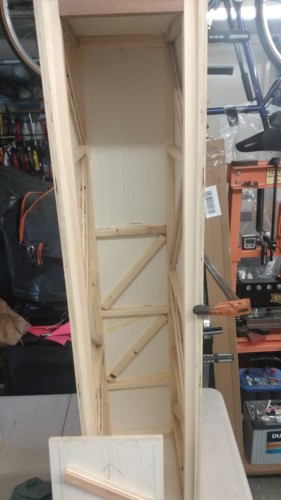
And then added cross bracing to stiffen the cabinets even more
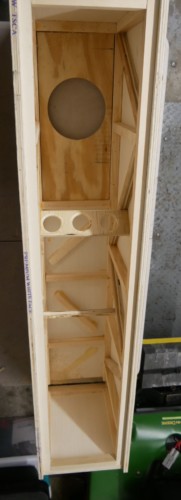
The entire cabinet interior was covered with 1/2″ carpet jut padding to stop any internal resonances.
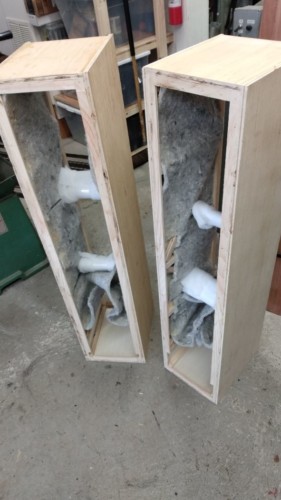
The back was made removable so I could tweak the internal packing if necessary
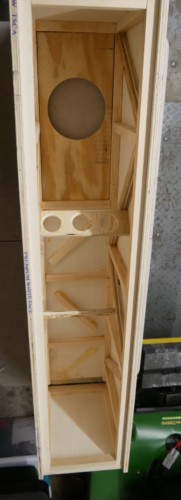
The holes were cut for the driver and the port with a router jig and the back was cut for the connection plate

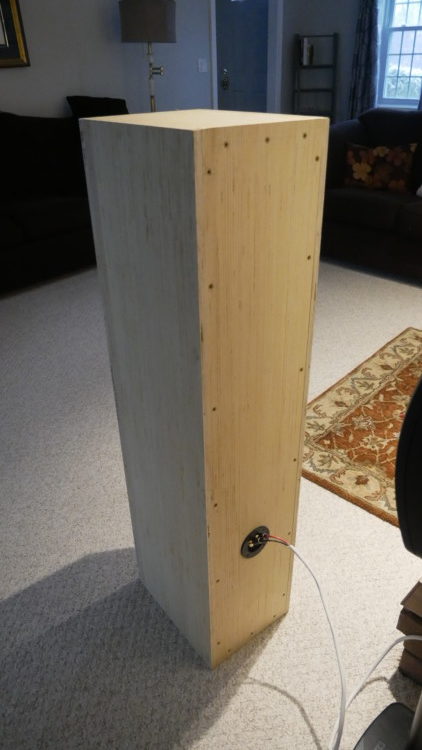
In this rough form, I connected them to a few different amplifiers and was instantly amazed. They really sounded great!
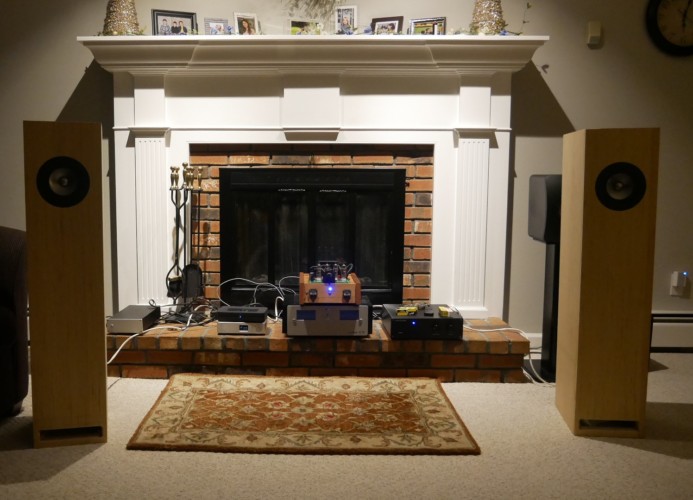
I performed a few tests using REW software and a reference microphone….Compared to my KEF LS50 Metas and then with the microphone in my listening position.
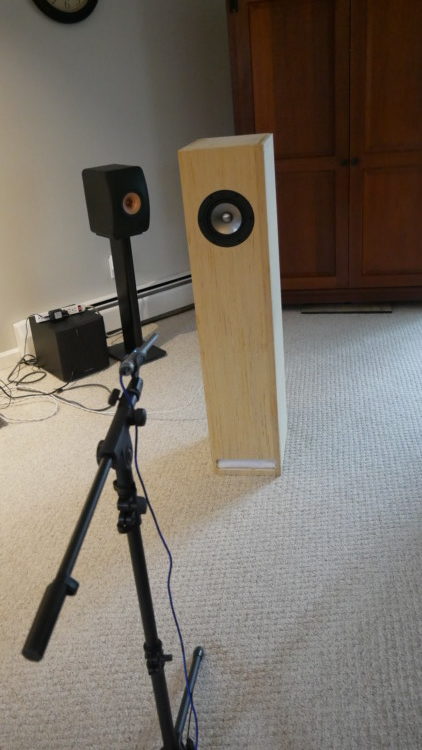


Overall, not bad at all!
So now it is time to finish the exterior of the speaker. The plan was to round over the edges with my router and simply paint them with a “Truck Bed Liner” material. Nothing fancy…..
Well, let me tell you. Routers and Bamboo plywood do not get along!
Bamboo gets its strength with “Strength In Numbers” ….Thousands of tiny hairs make up the actual Bamboo material. These little hairs get pulled out by the high speed router bit and wrap around the bits bearing, jamming it up and burning the side of the cabinet with friction….
But worse than that, the fibers pull the top surface of the plywood apart…….Yikes!
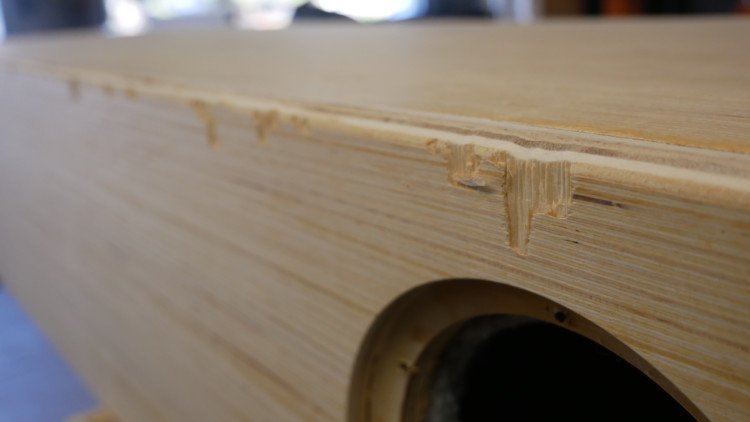
What a mess!
I thought about sending these cabinets to the fireplace and starting over. But they sounded so good and I’d already put too much work into them.
So PLAN B was to cover them with something…..I thought about a Carbon Fiber wrap or just filling in the tear outs with Bondo and spraying with Truck bed liner……. I could do better!
I remembered that I had a few pieces of African Mahogany left over from a long ago project. A few measurements and I had enough for two front baffles (or so I thought….)
For the sides I’d use 1/4″ MDF and paint them black.
The African Mahogany was cut to length, edge planed and glued up to make two boards wide enough to be front baffle boards.
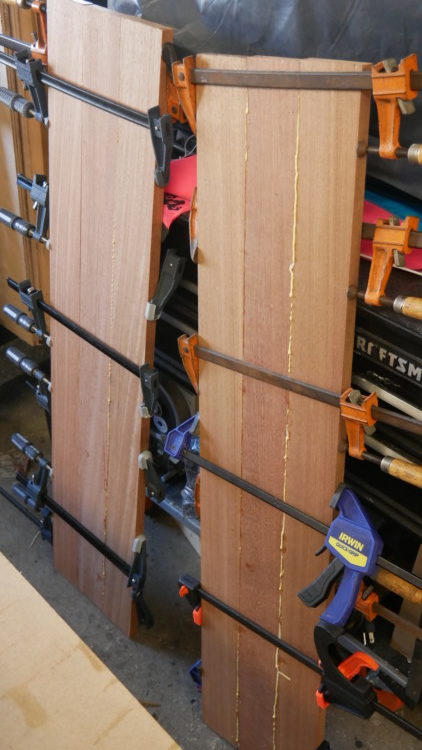
“Measure Twice…Cut Once!”…..I measured the width of the existing cabinets and added the 1/4″ X 2 for the MDF coverings and to my horror, my glued up baffle board was about 1/6″ too narrow……Plus I was going to use about a 1/6″ of resilient adhesive between the cabinet and the MDF side covering to cut down on even more resonance. So now I’m short by 3/16”!
And I’m totally out of African Mahogany…….But over in the corner of the shop is a piece of Poplar about 1.25″ wide…..PERFECT! Rip the glued up baffle boards down the middle and insert Poplar! Kinda like a racing stripe!

Once the glue dried the glued up board took a trip through my surface planer…..
The rest is pretty straight forward cabinet making. Lots of glue and tons of clamps…
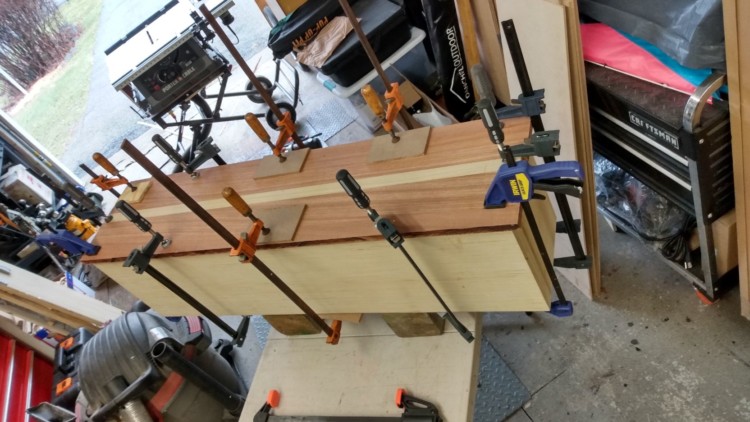

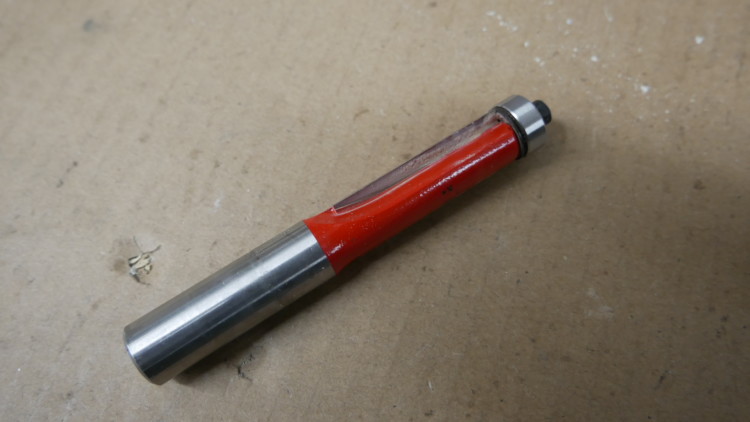
The overhanging MDF and front baffle was trimmed with a flush cut router bit. The speaker opening was cut with a router and a circle routing jig I fabricated out of a piece of Lexan…
The driver was semi flush mounted with only 1/16″ protruding from the cabinet face.

I was concerned that the area where the driver is actually bolted to was too thin. So i cut another piece of Bamboo plywood and backed up this area, making it a bit under an inch thick….More rigidity!
Cutting the bass port was a challenge. I built a router guide that I could clamp onto the front of the speaker and cut the slot with a router.

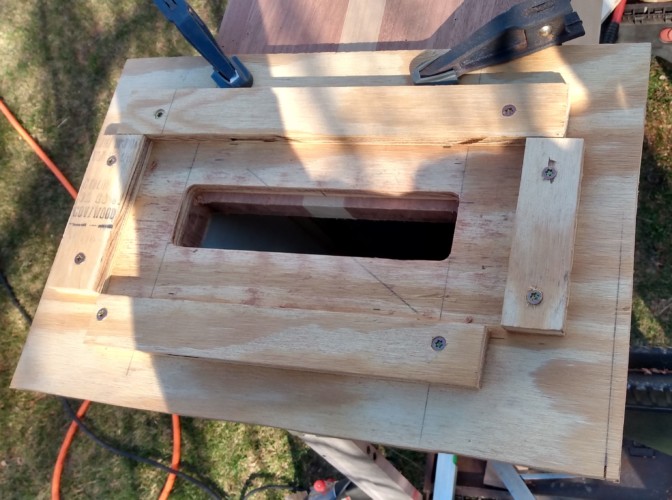
Came out great!
Everything was then rounded over with a router.

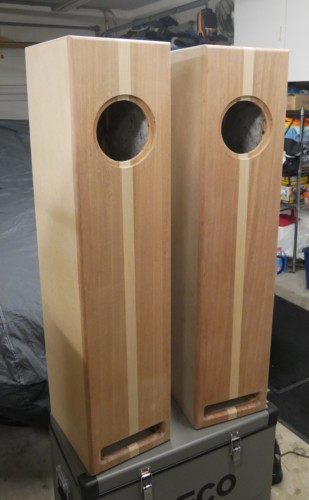

A whole bunch of sanding and 5 coats of waterbased Minwax Polyurethane on the front and three coats of Semi-Gloss black on the sides and back, and we’re done!
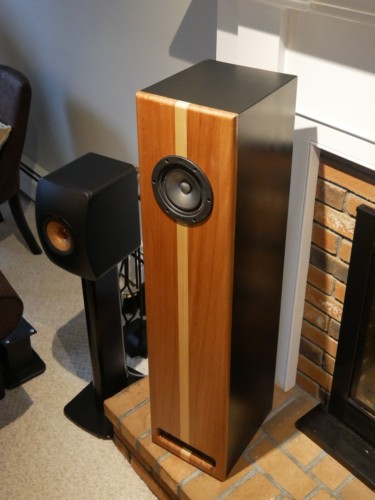

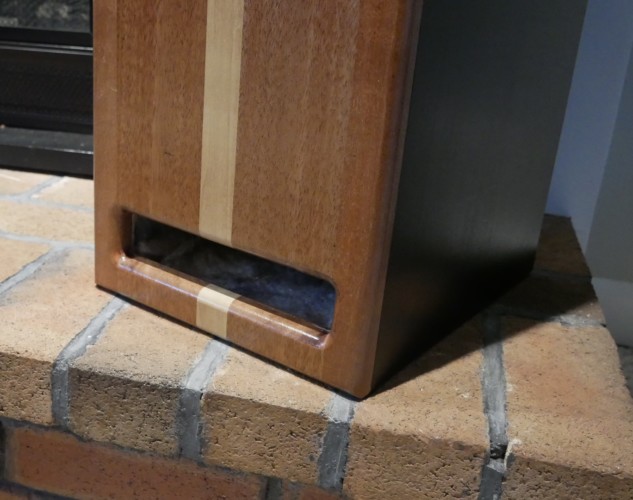
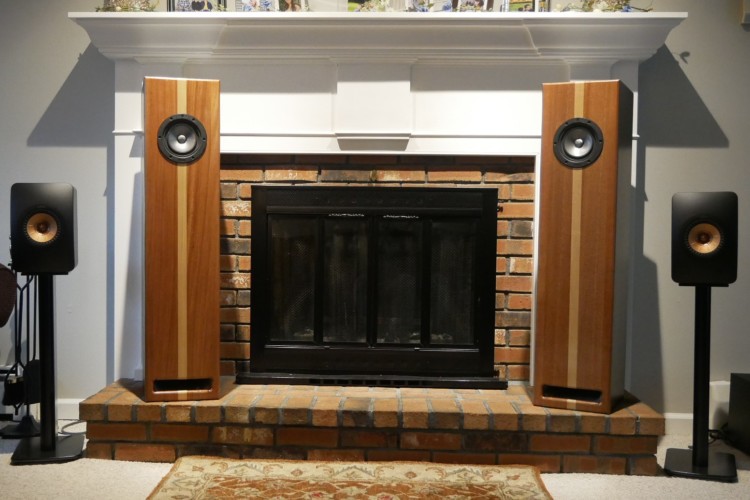

A bit of tuning might result in even better sound. The bass was a bit more than I like. Stuffing some Poly-Fill into the bass slot calmed it down perfectly.
A great speaker if you like Jazz, 70-80s rock, Classical, Female Vocals…….
That little 8w/ch tube amplifier I built can easily drive them to my preferred listening level of 85dB. With my ICE Power Class D amplifier of 200w/ch they can really roar!……Best amplifier so far is my Pass Labs First Watt F5v2 Class-A with 50w/ch……. A Match Made in Heaven!
Hope you enjoyed this project. Be sure to check out my other projects and adventures
And my YouTube Channel
https://www.youtube.com/results?search_query=Roy+Bertalotto
Have a Great Day!….Thanks!

7 comments on “BUILDING PENSIL 10.2 SPEAKERS”