
Need Speaker Stands and don’t want to spend a whole bunch of money? Do you want speaker stands that are incredibly ridged and weigh a ton?
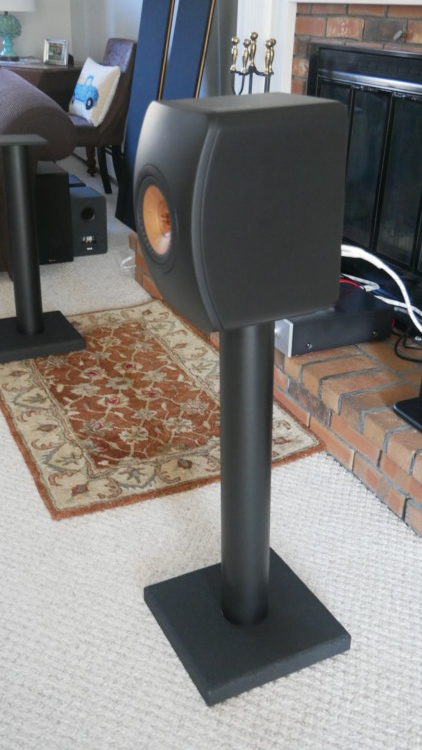
I came up with this idea as that is exactly what I was looking for.
Total cost for two…$64.39
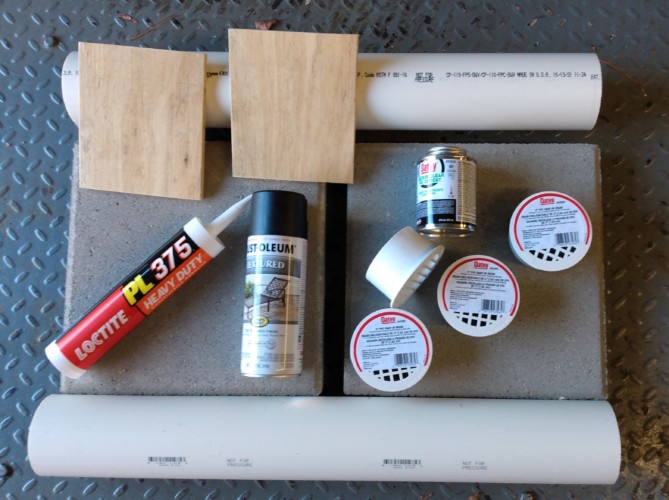
Here is what you will need:
(2) 24″ x 3″ Pieces of PVC Plumbing Pipe
(4) 3″ PVC Drain Plug
(2) 11.7″ X 11.7″ Patio Concrete Squares
(1) PVC Cement
(1) Tube of 3M 5200 or Loctite PL375 Adhesive
(1) Rustoleum Semi-Gloss Texture Paint
(8) Rubber Screw on Bumpers
(2) 5.5″ X 6.5″ pieces of 1/2″ plywood
(16) 1/4″ Hollow Wall Fasteners with screws
(8) 1/2″ Sheetmetal Screws
(16) Small washers
OK, you got your supplies, let’s get started…
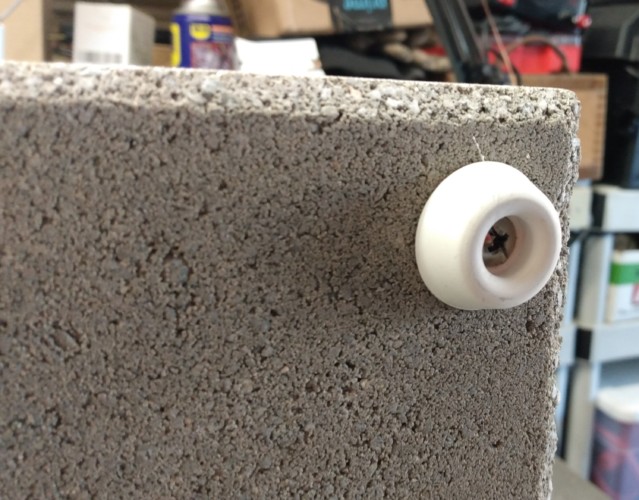
If you have access to a hammer drill, you can secure the PVC Drain Plugs to the concrete patio tiles using screws and hollow wall fasteners. I used screws AND adhesive on mine. If you do not have a hammer drill for drilling holes in concrete you can simply glue the PVC drain to the concrete patio bloc. Screws make the project go much faster as you don’t need to wait for the glue to dry.
First, find the center of the patio tile:
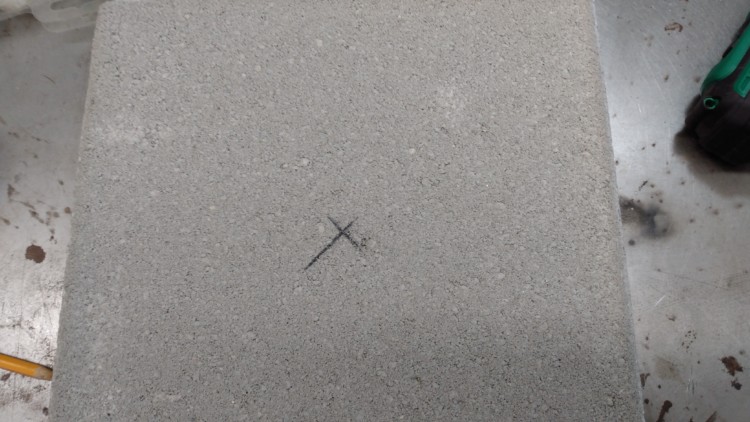
Next locate one of the PVC drains on this center mark. Drill four holes and install the Hollow Wall Fasteners. I added a little glue to the holes for extra security.

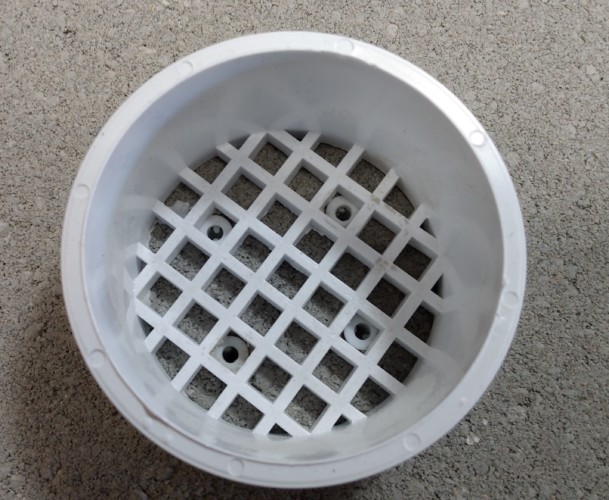
Next, install the PVC drain as shown using screws and washers. If just using glue, use glue and put a weight on top to hold it securely….You should wait at least 24 hours before proceeding for the adhesive to set up

There are two adhesives I use for projects like this. 3M 5200 is amazing stuff. Once it dries, it is there FOREVER! I use it to hold various devices to fiberglass boats and never had it fail. (Notice: I’ve never used it on masonry so not sure how it will work in this project) One small tube will do the whole project.

Or any good High Quality construction adhesive that will adhere to masonry will also work.

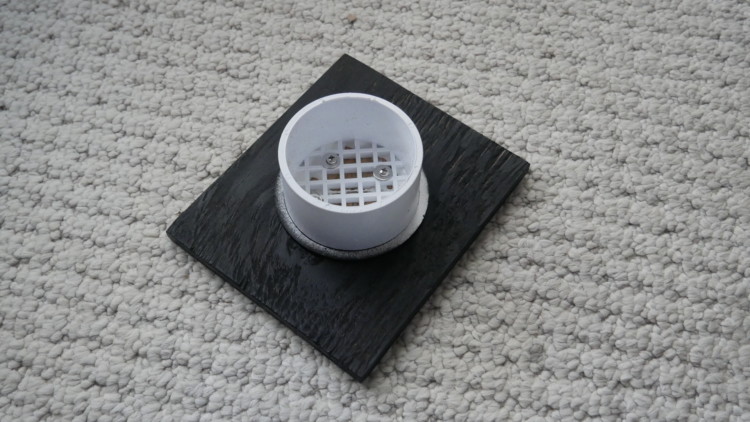
Next, flip the base over and drill a hole about an inch away from each edge. Install hollow wall fasteners and install the rubber bumpers. I’m going to be using these on a hardwood floor so spikes were not an option. If you are planning on using the stands on carpet, you might want to use spikes instead of rubber bumpers. You can make spikes out of nails or buy them at Parts Express and other online speaker component providers.

In the above picture you can see how the concrete patio block “blew out” when the drill bit exited the bottom. I should have only drilled as deep as necessary for the hollow wall fastener. Be careful if drilling for the rubber feet. Or just glue them in place.
Next, Using the PVC cement, glue the PVC tubes to the PVC drains.
Here is the UPC for the PVC tubing I used. It is available in precut, 24″ lengths ar both Lowes and Home Depot

Now for the top, using 1/2″ screws, adhesive and washers, attach the plywood tops to the PVC drain caps.
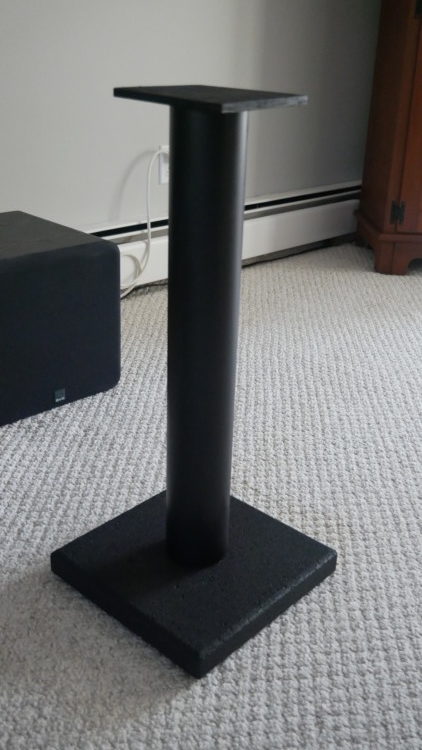
Basically done!
To finish them, lightly sand the PVC Pipe and the plywood tops and paint as you like…I used Rustoleum “Texture” paint as it matches my KEF LS50 Metas

Install four thin rubber pads on the tops to secure the speakers from vibrating off. I’m going to use “Museum Putty” to secure my speakers to the stands…

I did not glue the tops into my PVC pipe stands. I wanted them removable as I may want to build another set of tops with a slight angle. I’ll need to experiment with this a bit.

Lastly you want to do is fill the PVC tube with sand. You can buy clean Play-Sand at the local hardware store or go to the local DPW and ask for some.
You might want to put them in place and then add the sand as they get very heavy once the sand is installed…
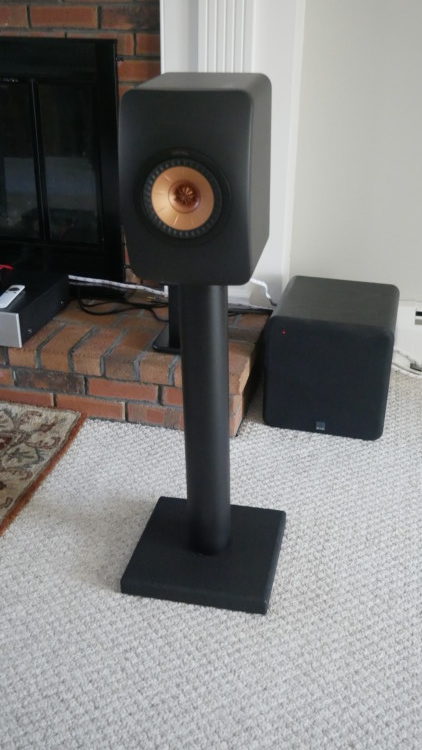
I bought a pair of very expensive KEF LS50 stands, but these are WAY more sturdy and much less chance of accidently knocking them over…

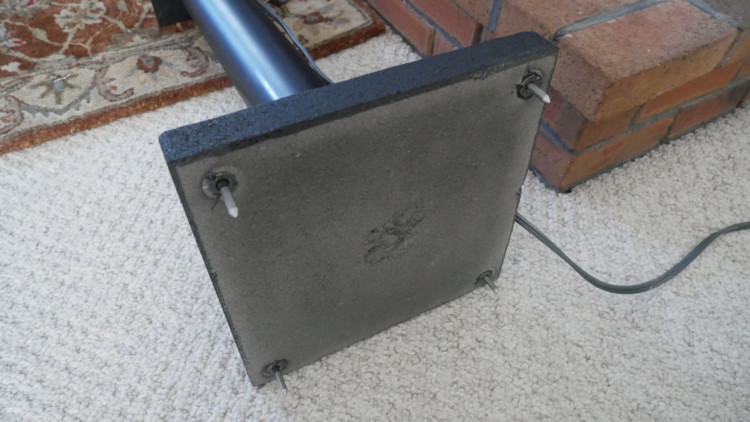
UPDATE MODIFICATION 11-20-21
Having the speaker stands on thick carpet was not working out. Much to “wobbly” . I decided to add “spikes” to the bottoms.
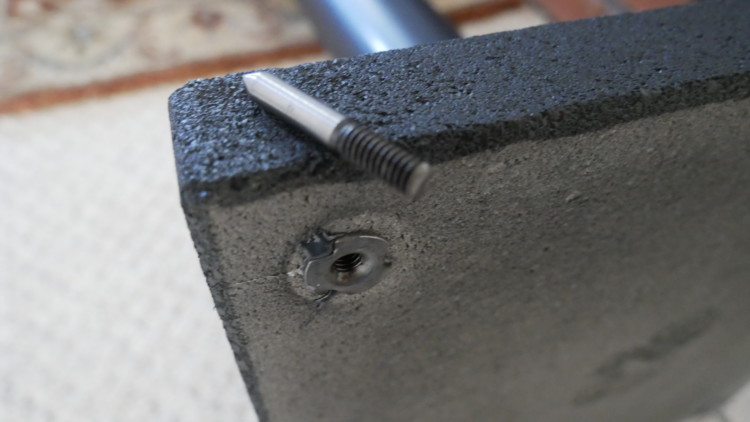
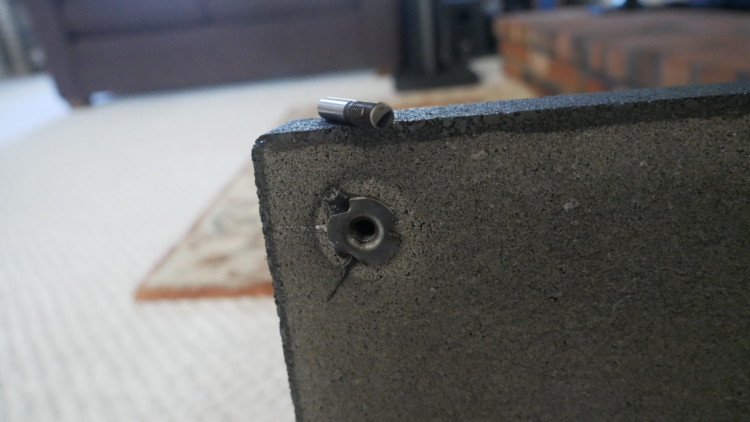
First I drilled out the hollow wall fasteners that I had used for the rubber feet.
Next I glued in with JB Weld , four “T” nuts with the little spikes that usually would be pounded into a wood ground off.
Cut the heads off eight 1/4-20 bolts.
Chuck the bolts in an electric drill and sharpen the ends by running against a grinding wheel )or use a metal lathe if you have access)
Done!

Enjoy the music!
Be sure to see other projects on my full web site…
Thank You!