
Over the past year I’ve been modifying and designing my Forest River Grey Wolf 19RR Toy Hauler to also double as a mobile office. My job consists of 50% travel to meet with clients to “shake hands and kiss babies” and to conduct training. The other 50% is sitting at a phone and computer and answering questions and mining for new customers. Seems like the perfect use of an RV!
I just needed to figure out a way to stay connected with telephone and internet and a place to work.
My camper of choice is a 19′ Toy Hauler by Forest River. Easy to tow, not overly expensive. Not too complicated which should add to reliability and I can take my motorcycle or a four wheeler with me if I want.
First order of business is some type of desk or work area. A toy hauler has a great big ramp on the rear that when closed is a huge blank wall. Unfortunately if you mount anything to this “wall”, when it is used as a ramp you will need to remove whatever you affixed or ride over it. Neither option was too appealing.
One issue I found with this particular toy hauler, is the ramp is at a very steep angle when loading a motorcycle. I solved this with a second, aux ramp. I installed a set of adjustable legs on the main ramp…
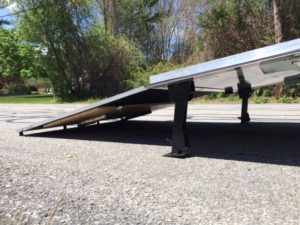
and then fabricated a second ramp from this point

The transition is now very gradual.
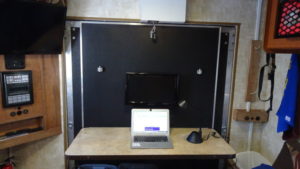
This modification had a side benefit. When the ramp is closed, the back of the second ramp is facing into the trailer! A perfect place to create a desk / workspace!
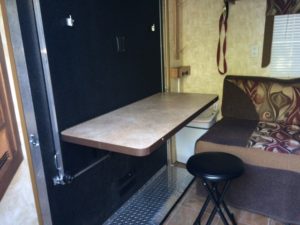
The Grey Wolf 19RR came with a table mounted on folding legs. I removed the legs and mounted the table with a piano hinge so it folds up and is out of the way when not in use and doesn’t impede the use of the ramp.
I fabricated a set of supports and attached them with more piano hinge
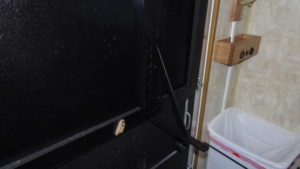
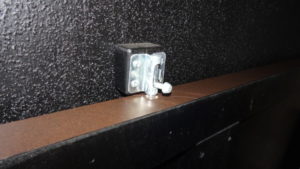
They fold flat and stay there with the help of a couple cabinet door magnets


The work table stay attached to the back side of the ramp with a couple of barrel bolts
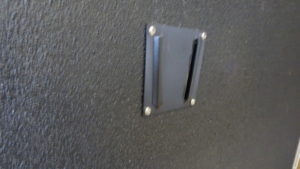
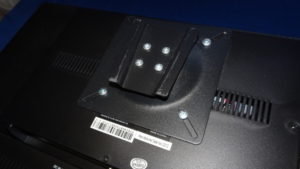
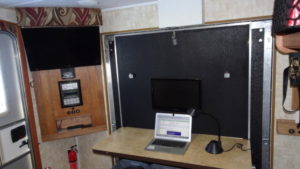
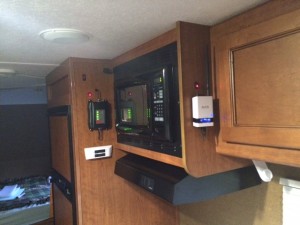
Once the table is down in working position, I mount a second monitor for the lap top computer on the wall using a simple TV mount bracket
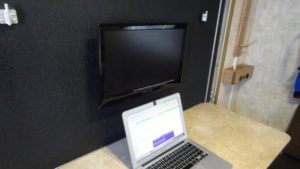
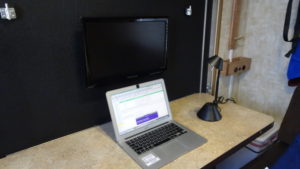
A small 12V desk lamp completes the work space
Now I need to get “Connected”
First order of business is a good internet connection. In most metropolitan areas, using my Verizon or Sprint HotSpot is sufficient. But at times I might be in the midwest or in some other country setting where good broadband internet might be elusive. The solution is a “Cellular Booster”
I chose to go with WeBoost. These folks used to be known as Wilson Cellular. The device I chose is the WeBoost 4G-M
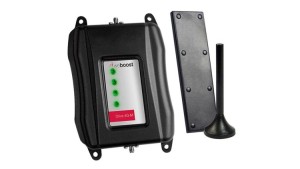
This unit consists of an outside magnetic mount antenna, a “Hersey Bar” interior antenna and the Booster module/ amplifier
For this device to work properly you need a metal “Ground Plain” under the antenna. My trailer has a rubber roof over plywood. A simple solution is a trip to the hardware store for a piece of galvanized sheet metal 16″ X 16″. I placed it towards the front of the trailer and adhered it to the roof using Eternabond tape
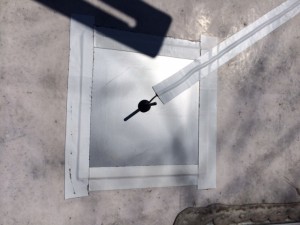
Using Eternabond tape allows attachment to the roof without drilling holes. I also used Eternabond tape to secure the coax wire that leads down the refrigerator vent to where the amplifier is located
The amplifier was located toward the center of the trailer on a cabinet wall. This allowed the internal “Hersey Bar” antenna to be as far as possible from the outside antenna. Very important to keep the two antennas as far apart as possible to stop oscillation.


A simple illuminated power switch was installed to turn the WeBoost off and on.
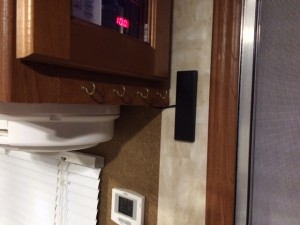
The Hersey Bar antenna was placed next to the door and affixed with Velcro. The HotSpot units have a strip of Velcro on the back and simply attach to the interior antenna
This WeBoost system works amazingly well! Â I’ve been in situations where I had no or very intermittent cellular coverage and the WeBoost gave me excellent signal and speed. Highly recommended!
But there are time where I’m in a situation where free public WiFi might be more practical and lessen the use of my Cellular Data Plan
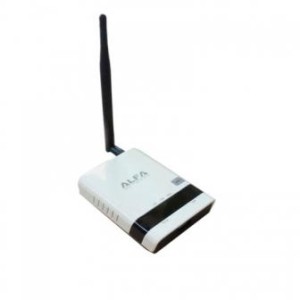
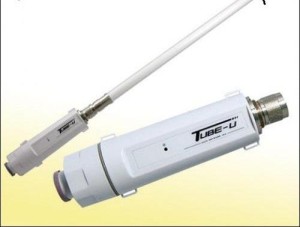
For this I went with a TechnoRV WiFi Booster system. This system consists of a ALFA 36 router that resides inside the trailer and a Booster Tube “Radio/Antenna” that mounts outside.
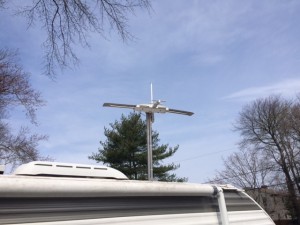
The radio antenna was mounted to my TV antenna which folds down for travel and gives me a bit more height when deployed
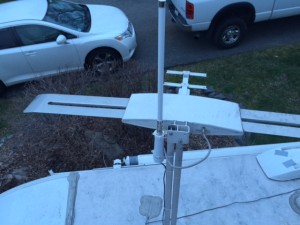
Using a couple heavy duty wireties did the trick
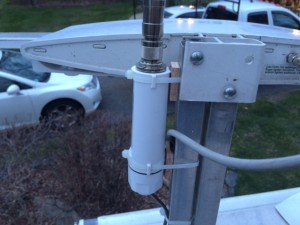
The wire for the antenna ran down the mount and once again down the refrigerator vent shaft
The router was mounted to another cabinet within the camper, with another illuminated switch to power on and off
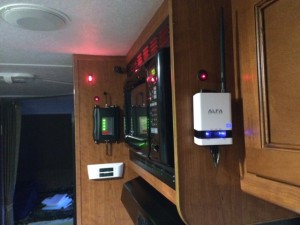
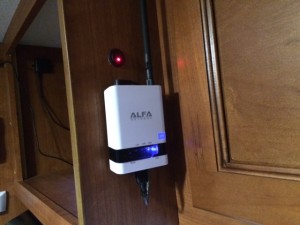
Both units give the trailer a bit of a “Hi-Tech” look!
So now I have both WiFi where possible (McDonalds, Starbucks, many restaurants, libraries, Xfinity, etc) and reliable Cellular when WiFi isn’t possible
But there are times when I might need to reach out even farther to capture Cellular or WiFi. For this I have two more tricks up my sleeve.
The WeBoost system works great in 95% of the cases. Every so often you need a bit more reach.
For this I fabricated a much taller antenna and a much more powerful and directional antenna
For the mast I used a simple 16′ aluminum painters pole that collapses down to convenient 4′
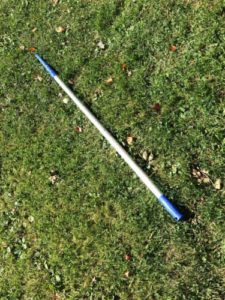
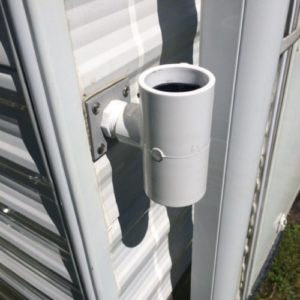
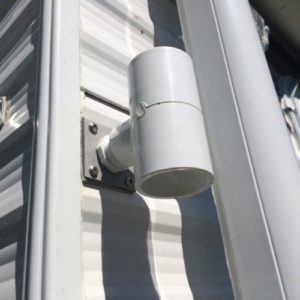
To mount it to the trailer I used a few pieces of PVC plumbing fixtures. A “T” and a few other devices makes the pole removable.

To the top of this mast I attache a very powerful and directional “Yagi” antenna

I can simply rotate the mast by stepping outside the trailers door while looking at the signal strength meter on the Hot Spot or the cell phone. This Yagi can either be attached directly to the HotSpot or to the WeBoost. Depending on situation. There are apps available that will show you the location of cell towers with regard to your present location. Look them up and point the antenna towards them…..Boom! Great cell service!
The wifi system uses an omnidirectional antenna. This makes it easy to locate free WiFi as you usually have no idea where the WiFi is located. But an omni antenna will not have the same performance as a more directional antenna.
When I know where the WiFi signal is coming from, I can use a bit more sophisticated system to “lock on”
Ubiquiti is a manufacturer of all things WiFi. Usually for enterprise systems but they can be used for our type of deployments
One product is the Ubiquiti Nano Station Loco M2.
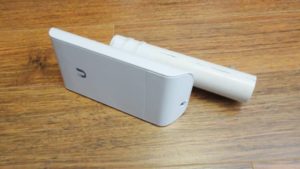
This is a very directional, powerful WiFi Radio / Antenna
Used together with the Ubiquiti airGateway-LR AirMax WISP access point and you have a VERY robust , inexpensive (about $100) WiFi booster
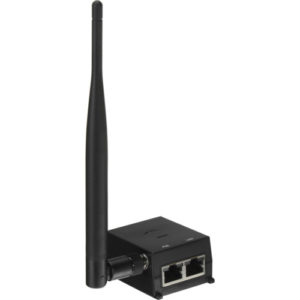
The access point is the internal antenna that communicates with your computers WiFi.
This whole Ubiquiti system can be placed in a small container and packed into your suitcase for WiFi access in hotels and other situations where local WiFi might be slow or nonexistent.
This is not a “Plug and Play” solution. It needs a bit of programming to get it up and running. Fortunately a Mr David Botts authors a fantastic web site “Outside Our Bubble”
http://www.outsideourbubble.com
And he has a bunch of YouTube videos. One of which outlines exactly how to configure the Ubiquiti system…Easy Peasy!
https://www.youtube.com/watch?v=-i8SmOf5ZTw
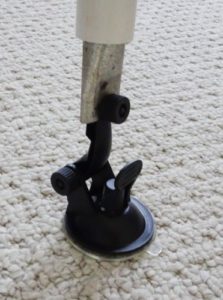
For my Ubiquiti antenna I fabricated a mount that can go on the painters pole and on a suction cup mount I had laying around. The painterspole mount gets it up high and the suction cup can be used in a McDonald’s parking lot or a hotel window.

So there you have it. A whole bunch of ways to work out of your RV with full internet and WiFi connectivity.
Now stop walking around the campsite listening to the birds and daydreaming and GET BACK TO WORK!!!!
Many more RV adventures and farkles in here
Thanks!