
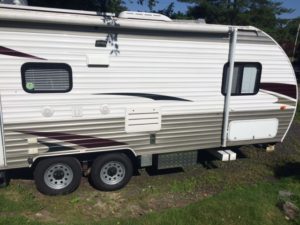
My Forest River Grey Wolf 19RR Toy Hauler did not come with an outside, quick disconnect, gas line to attach a portable gas grill to the trailers propane system.
I recently bought a Coleman Roadtrip XLE portable gas grill…Love it! It grills just as nice as my big grill back home and folds down and fits perfectly in the front storage compartment of the trailer. The pull out shelves on the sides are great when cooking in a campsite.
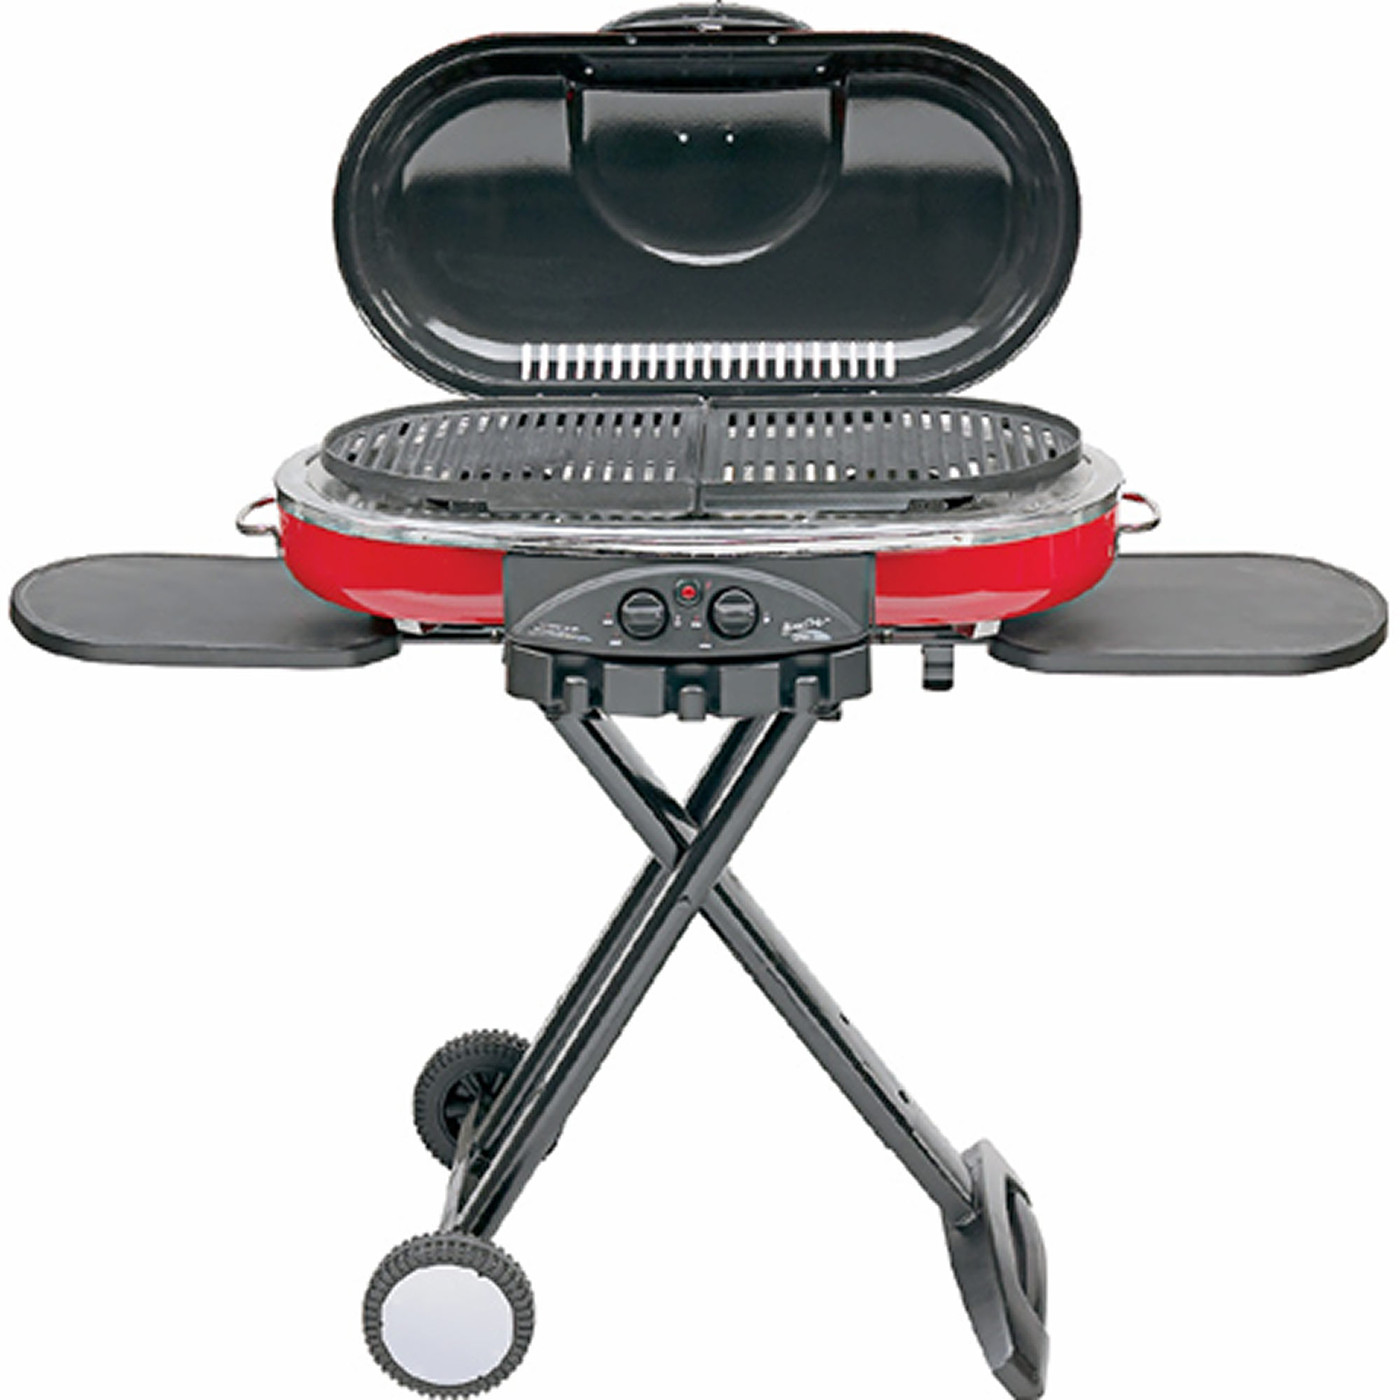
But this grill operates on the high pressure side of a propane system. It is designed to use the small one pound propane cylinders rather than operate off the low pressure side of a travel trailer. If you simply connected it to the low pressure side of the trailer (any gas line after the trailers propane regulator) and through the regulator on the grill, you would get much flame as the gas pressure would be too low.
So first, we need to remove the regulator from the grill and install an adapter kit.
Ebay is your friend! (Do a search for Torjik)
|
The Torjik CONVERTA•C® kit allows you to convert your Coleman® Roadtrip® LXE portable propane grill to a quick-connect setup for use on your RV’s regulated propane quick-connect supply port. The CONVERTA•C kit includes an 8 Ft. propane hose with necessary brass connections for the conversion, 1 oz. tube of Pipe Joint Compound and 2 oz. bottle of Torjik LEAK•SEE. The CONVERTA•C makes using your Coleman® Roadtrip® easier and more enjoyable than ever.Â
|
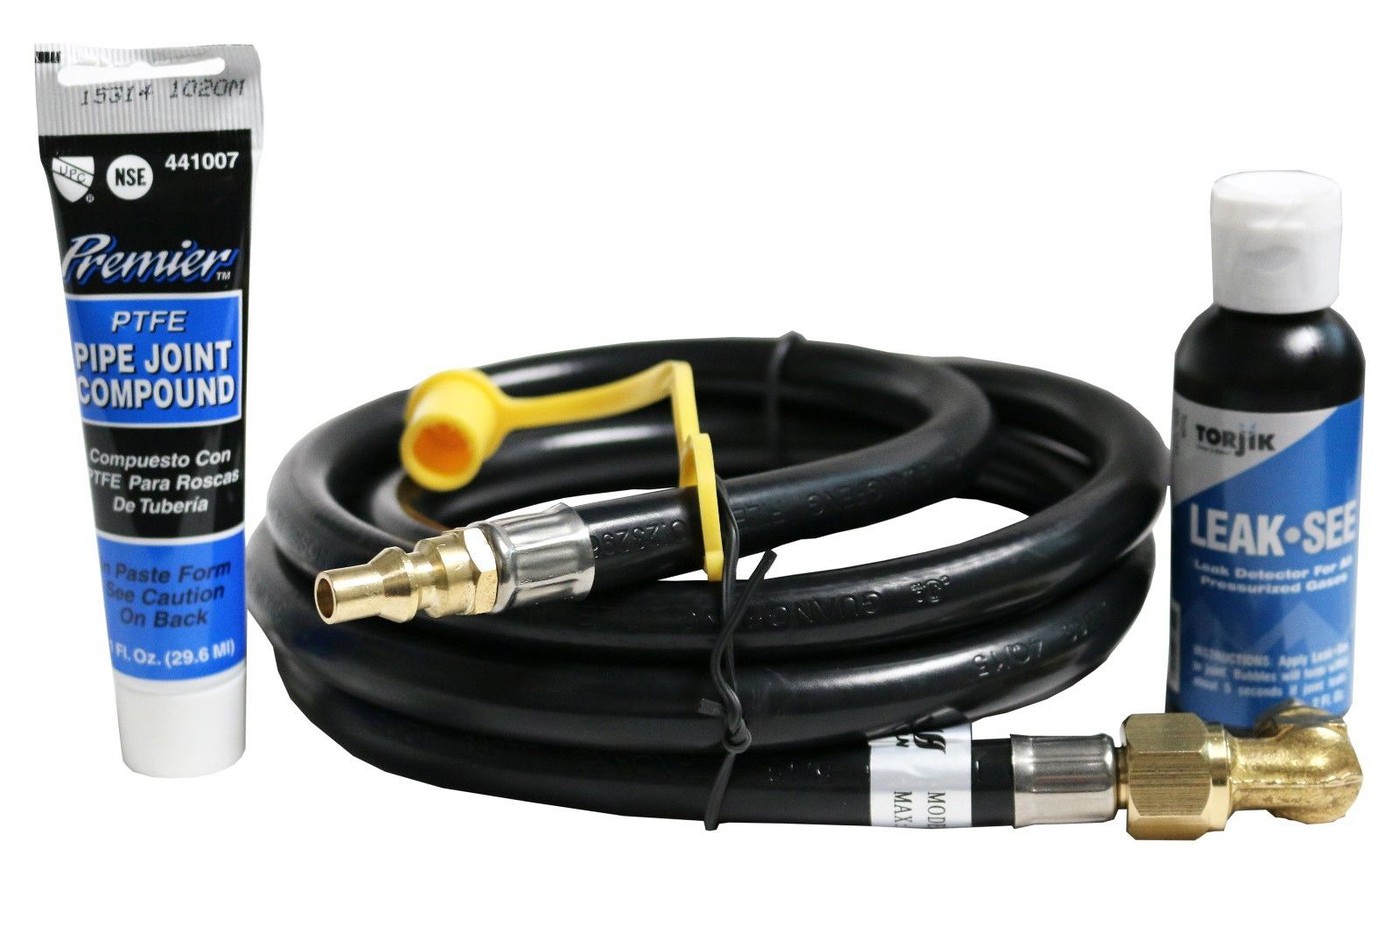
This kit offers everything you need to convert the grill to “plug and cook”. Instructions are included in the kit and there are a couple YouTubes that are very helpful.
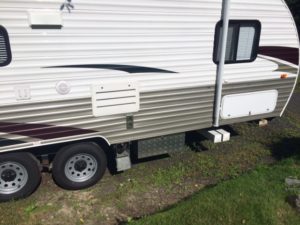
Now I needed to add a quick disconnect and gas line to the trailer.
I ordered, from Amazon, a “Camco” propane quick disconnect and shut off valve combined.

Camco 59853 Propane Quick Connect Kit –
- Full Flow Plug: 1/4″ Male NPT x Male Quick Connect
- For use with low-pressure propane systems
- Add a convenient connect/disconnect method
- Add an additional safety shut-off
( The kit  came with the male connector shown in the picture which we will not be using in this project. Save it for another propane appliance.)
To get gas to the disconnect, I had a number of options. I could have inserted a “T” in the refrigerator service door. Or cut into the soft copper pipe in any number of places. Or connected up front, where the two propane tanks connect to the hard pipe behind the hitch.
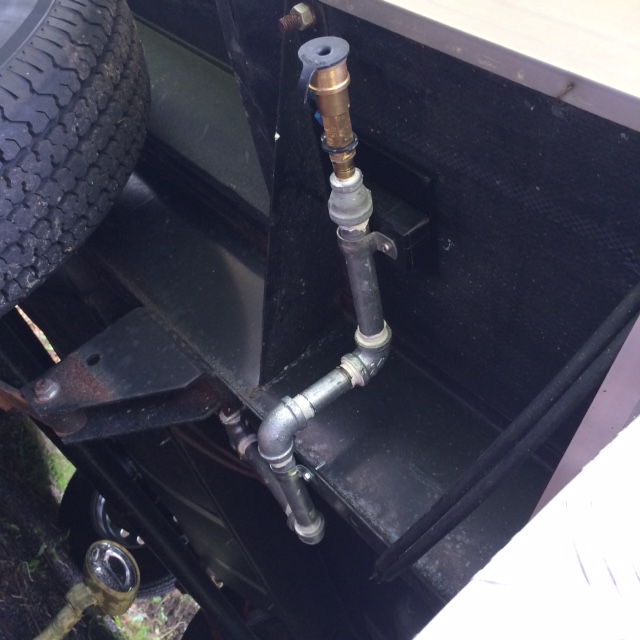
But I opted for a connection under the trailer that was directly opposite the area I wanted the quick connect to terminate. Here was the feeds for the refrigerator, stove and heater.
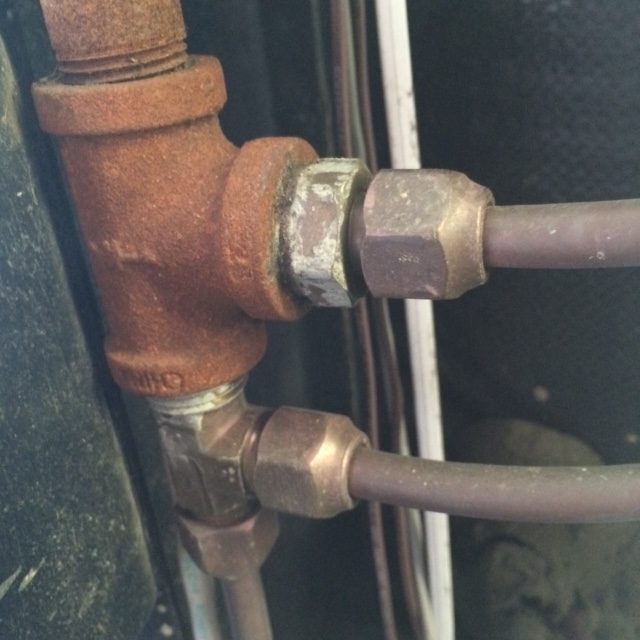
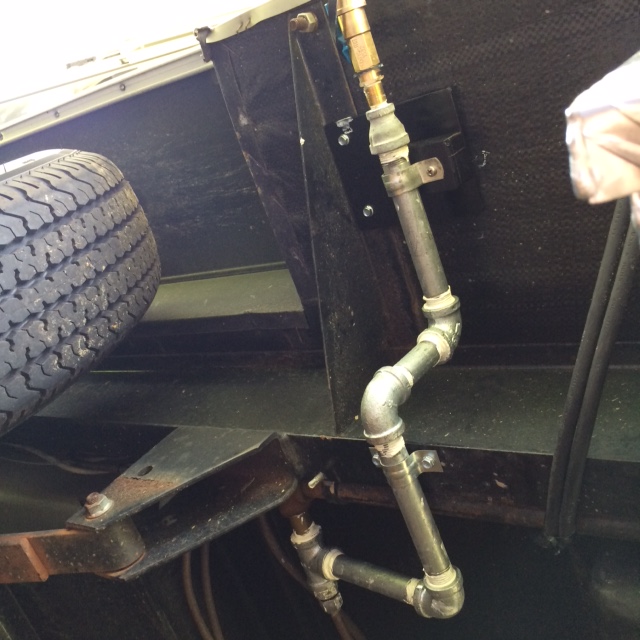
I decided to remove the brass adapter at the top of this picture….insert a galvanized “T” and use hard pipe from there to the edge of the trailer.
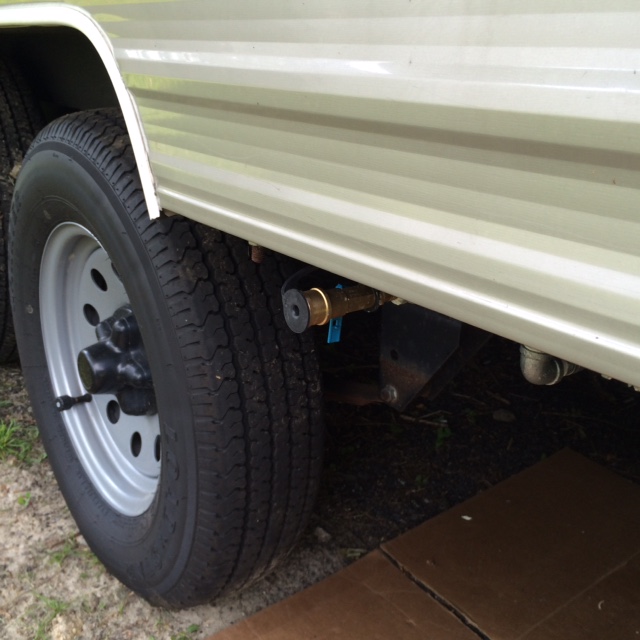
And here is the result:


A piece of rubber bicycle inner tube and a couple elastic bands will be used to protect the disconnect while traveling.
This is my first attempt at this type of plumbing project. Other than having “pipe sealant” all over me, my tools and my clothes……it was a success.
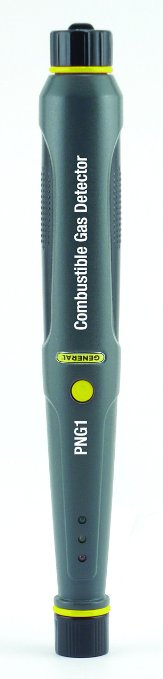
I tested all the joints with the “Leak Detect” fluid that the conversion kit came with….and as a double check, I used a propane sniffer that I recently bought to check again……NO LEAKS!
So now I can cook under the canopy and up to 8′ from the trailer as I like. Easy Peasy!
I hope you enjoyed this little project.
UPDATE! Â 7-14-16
There was concern from the “experts” over on the various RV forums that my propane plumbing was in harms way if I had a catastrophic tire failure. Maybe yes, Maybe no….But to be on the safe side, I hardened the area with steel and aluminum. There is a steel support directly between the propane piping and the tire. This is where I bolted a diamond plate aluminum box I fabricated.
Stainless Steel marine hardware keeps the door closed


These pictures make it look like it is very close to the tire when in fact it is about 12″ away.
I made it large enough to also store the quick disconnect hose
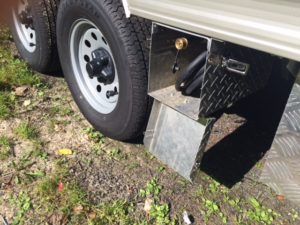
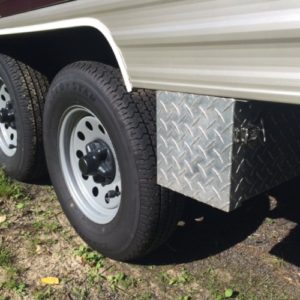
Should serve me well and keep the connection nice and clean
Lots more to see and read about on my main web site http://www.rvbprecision.com
THANKS!
2 comments on “RV Travel Trailer Toy Hauler BBQ Grill Gas Line Addition”