This past year I really got involved in Cowboy Action Shooting and this lead me to any type of rifle or pistol from the period 1850 to 1897. Mostly Black Powder firearms.
Everything I’ve acquired thus far have been reproductions as the “real thing” was too expensive or un-shootable.
This changed yesterday……On the Kittery Trading Post (Maine) used gun list I saw an 1873 Winchester and the pictures showed it to be in excellent condition. The price was extremely reasonable ($795). These rifles in any condition usually command $2000+ . There is a frame and barrel with no internal parts or wood on Gun Broker for $350!
Kittery did say the barrel’s bore was toast. But I figured this could be resolved with a rebore or a reline.
So I drove the 2 hours and 15 minutes to check it out.
Fifteen minutes later I was the new owner of a 128 year old Winchester 1873 lever action rifle!
Caliber is 38-40 and I’m going to reline the barrel with a Redman liner in the same caliber.
I ordered dies, bullet mold, cases and wads yesterday.
I took the whole rifle apart and cleaned over 100 years of lint, dead bugs and other unidentifiable material from the works. There is zero wear inside. In fact, it looks near new! It appears someone shot this rifle very little and put it away without cleaning the bore and ruined it. Which actually preserved the entire rifle in near pristine condition.
I’ll leave the wonderful aged patina as it is. Looks great! I’ve sent a request and my $70 to the Cody Museum in Wyoming (The Keeper of all the Winchester records) for a letter detailing when, where and how it was sold. I do know from the serial number that it was made in 1884.

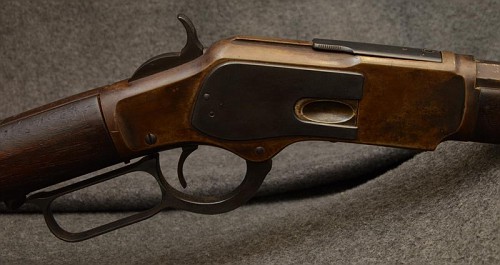
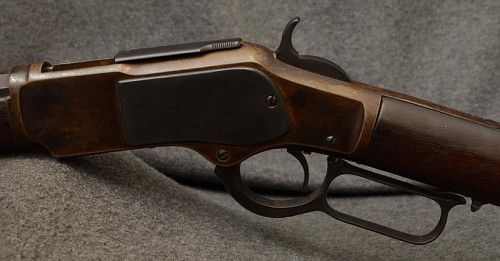


I’ll keep you updated as this project progresses. Should be fun!
( Lots more pictures here:Â Â http://public.fotki.com/Rbertalotto/things-that-go-bang/1873-winchester/Â Â Â Â Â Â Â Â )
UPDATE 4-21-12
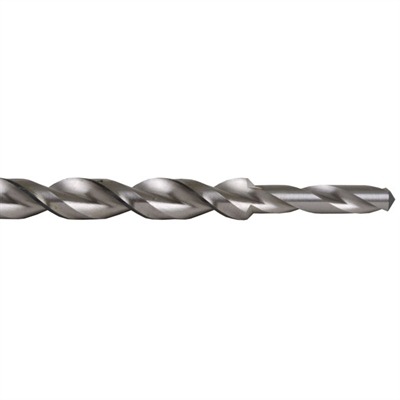
I decided that this rifle will absolutely need the barrel relined. This is a process where a special drill is used to bore out the hole in the barrel to accept a steel liner with rifling and the proper chamber is then reamed. It will make the inside of the barrel like new, while leaving the outside “period correct”.
I sent requests to a few gunsmiths that specialize in this process. They are all charging $375-$400 for this work. But the real issue is the best I could find is a six month wait! Business must be good in gunsmithing.
I can buy all the tools and the barrel liner from Brownells for around $250. and the work will be completed in plenty of time for this summers Cowboy Action Shooting. So I’m ordering the stuff and I’ll do it myself.
Here is a “Barrel Liner Drill” available through Brownells Gunsmith Supplies:
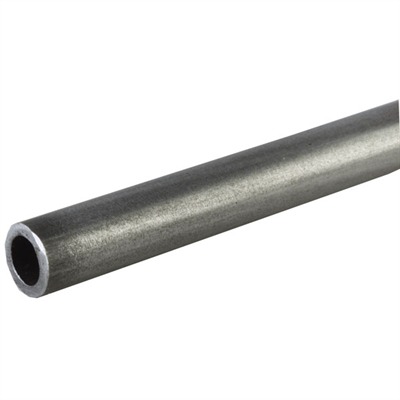
And a picture of a barrel liner:
And the 38-40 reamer needed to cut the chamber
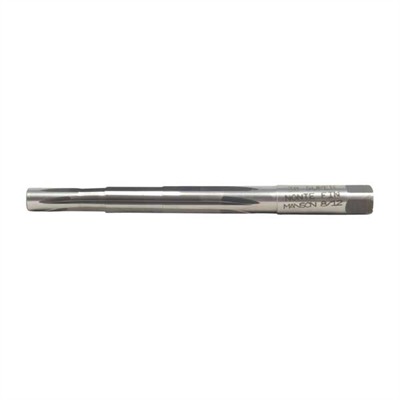
This will leave me with the equipment to “resurrect” other riflesI might find along the way.
How about a nice 1874 Springfield Trap Door in 38-40!
UPDATE 4-22-12
I finally got to put the bore scope camera down the barrel. CAUTION! the following pictures are not for the faint of heart!
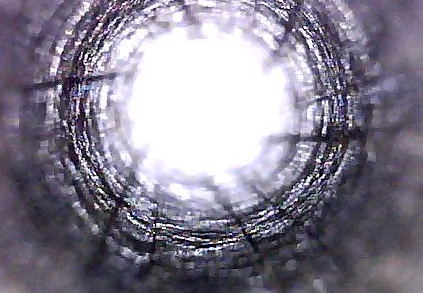
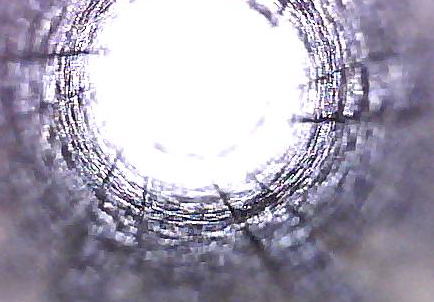
This is the throat…

And this is the chamber:

And just for comparison, this is a barrel from a new Winchester 1886 in 45-70 not cleaned after 50 rounds:


So, it appears someone used this rifle, wiped down the outside regularly and never cleaned the bore! This rifle used Black Powder back in the day and it is extremely corrosive if not dealt with properly.
Note: These bore pictures were taken with a $34 USB bore scope that is available on Ebay and ships from Hong Kong. Not bad for $34!!
TERRIBLE TRIGGER PULL…
The other issue I had is a VERY hard trigger pull. I thought there was something wrong with the sear, as it had huge creep and then a stall, and then the sear would break.
I took the rifle apart again and the sear looked great. With the stock removed the trigger was excellent. I couldn’t figure out where the stock was touching the trigger to cause this situation. It finally dawned on me that the stock bolt that goes through the top and bottom tang was just a bit too long. The wood in the stock had shrunk over the last 128 years and the stock bolt was protruding a bit too much below the bottom tang, keeping the lever open just a bit. With the lever open a bit the trigger was dragging on the “Lever Safety”! A little work with a file to shorten the tang bolt and this rifle has one of the better triggers in my collection. Nice!
UPDATE 4-27-12
My molds arrived a couple days ago so I melted some lead and cast about 100 Lyman #2 lead bullets. The mold I’m using is the LEE TL401-175SWC. I’m tumble lubing with LEE Alox.
My brass and reloading dies arrived today so I quickly whiped up ten rounds to see if the Sewer pipe barrel would shoot anything even approaching accurate,
5.4g of Trail Boss under the 180g LEE bullets.
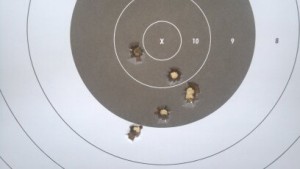
Well….Not so good! Here is a picture of the target shot at 25 yds.
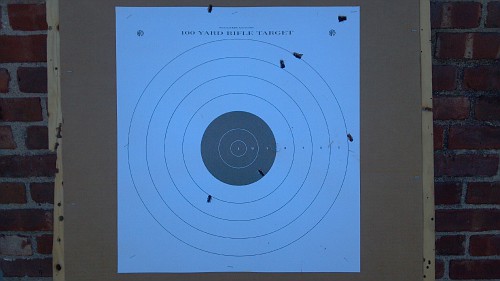
As you can see, the barrel is totally gone!
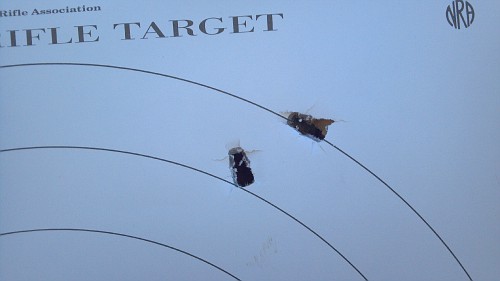
Can you say “Key Holing!”
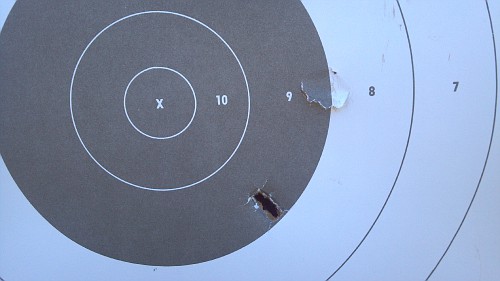
I couldn’t find all ten shots on the target. It appears at least on of the bullets broke up and simply ripped the paper without even penetrating. There were little flecks of lead on the paper around this tear.
So the liner and liner drill are ordered. I’ll be renting a reamer in 38-40 and do the deed.
The good news is the rifle functioned flawlessly. Perfect feeding, extraction. The trigger breaks beautifully. All it needs now is a new bore. And interestingly, the sights were right on target!
Stay tuned for more updates on the barrel relining project.
UPDATE 4-2-12Â CODY FIREARMS MUSEUM LETTER
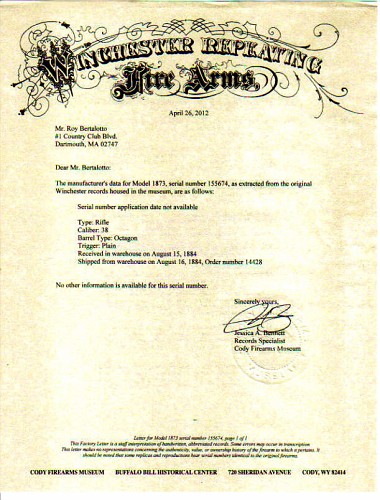
The “Factory Letter” I ordered from the Cody Firearms Museum in Cody Wyoming arrived. This museum is the keeper of all the records from the Winchester Rifle factory. You send them the serial number and $70 and you get a nice letter, hopefully with some great history on the rifle. But my rifle was pretty boring. It never belonged to a bank robber or cattle rustler. No sheriffs hands graced its stock. No grizzly bears or buffalo fell to its blast.
It was built in 1884 and delivered to the warehouse on August 15 of that year.
Everything jives with what the rifle has currently. It was not modified or converted as many old rifles will be.
Just a nice old rifle……But if it could talk, I’d love to hear what it would say!
UPDATE 5-4-12 Start of the BARREL RELINING PHASE
 Today starts the barrel relining phase of this project. First order of business is to remove the barrel in preparation to boring out the bore.
I had great concern about removing a barrel from a 128 year old rifle. I’ve had a few vintage Mausers of the same age drive me totally crazy trying to get the barrels off.
So I totally disassembled the rifle and installed the barreled action into my hydraulic barrel vise. With the “action wrench” installed on the receiver I put some pressure on the handle. POP! With about twenty pounds of force the barrel popped right off! NICE!
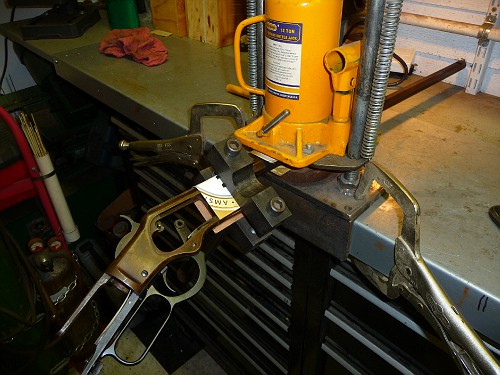
I then needed to indicate the barrel in my lathe. Being an octagon barrel, I would normally use my four jaw chuck in the lathe, as a three jaw or a six jaw simply won’t land on the eight flats of the barrel. But I hate four jaw chucks! I don’t like the way they force you to put unequal pressure on a barrel. So when I work on octagon barrels I use a collar made from PVC pipe.
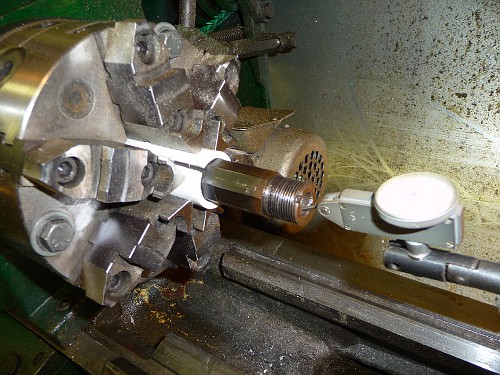
This method works beautifully! Once the chamber was indicated true, I did the same thing with the muzzle in the outboard spider.
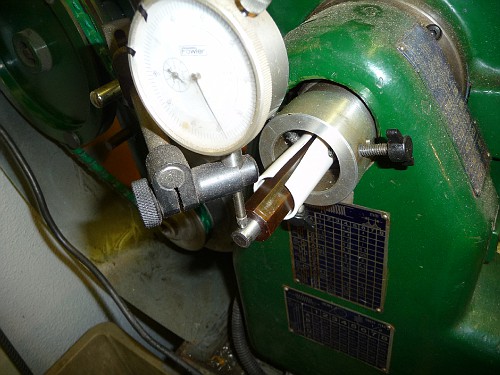
Now it’s time to drill. I might even get fancy and do a video of this process. Since this is the first barrel relining I’ve ever attempted, it might make a good video for “Americas Funniest Home Videos” as the drill bit comes out of the side of the barrel half way down!
Stay tuned…..Much more to follow!
BORING A DEEP HOLE IS EXTREMELY BORING……..(Sorry)
I couldn’t resist.
My deep hole drill and my barrel liner arrived this afternoon. So this evening it was time to bore!
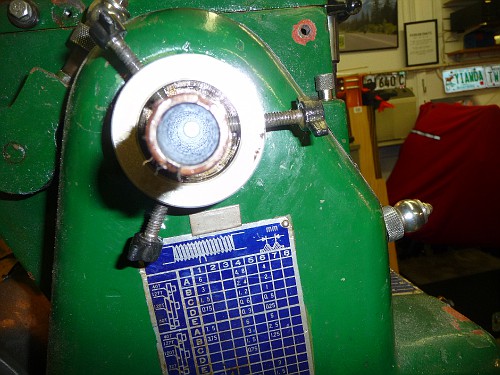
But we have a problem. The drill I bought from Brownells will not fit into my 1/2″ drill chuck on my lathe. So I had to remove the barrel from the lathe and turn down the shank on the deep hole drill.
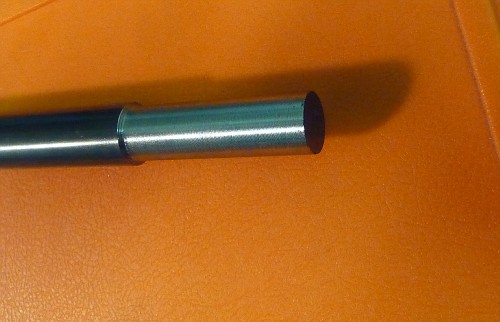
With that done I had to reinstall the 1873 barrel in the lathe and index it all over again.
We are ready to bore. The drill is 13″ long, so I will need to bore from both ends of the 24″ octagon barrel. I started at the chamber end first. But before I insert the piloted bit, I needed to counter bore the chamber so the pilot on the drill could find the bore. This I did with a small boring bar.
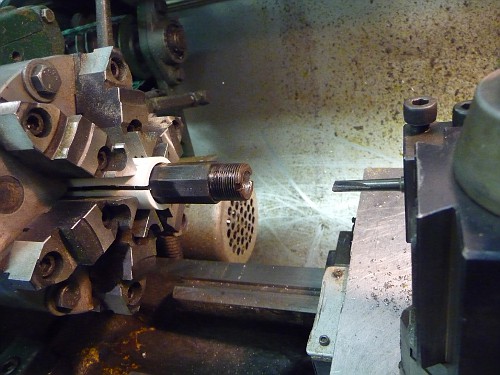
Once that was finished it was time to feed in that big ass drill!
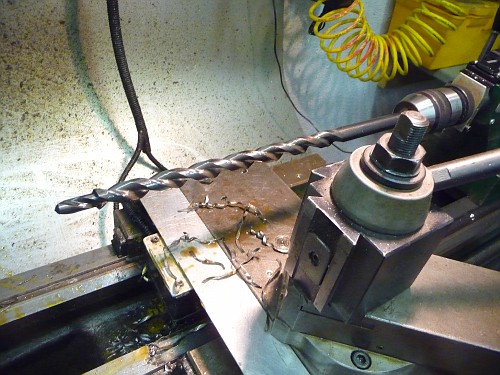
I was extremely concerned about the drill bit “biting” and jamming in the bore. So I used my cross slide and my digital read out to keep things in check. With the drill bits cutting edge just touching the barrel, I locked down the carriage and bumped the tail stock against the rear edge. Using the scale on the tail stock I cut 1/4″ and then backed out the drill. After blowing out the chips from the bore and brushing off the drill bit, Id advance the carriage 1/4″ and move the tail stock into position and bore another 1/4″ after squirting more cutting fluid into the bore with a long neck oil can…….All I need to do now was repeat this 96 times…….CUT – BACK OUT TAIL STOCK – REMOVE CHIPS – ADVANCE CARRIAGE – SQUIRT CUTTING FLUID INTO THE BORE AND ON THE DRILL – CUT .25″ – REPEAT…..  I told you it was boring! This process took me a few hours to complete. No wonder gunsmiths charge $400 for this work. If I was doing this as a business I’d have a high pressure flush system installed on my lathe. Then I could take multiple inch cuts instead of just .25″ cuts.
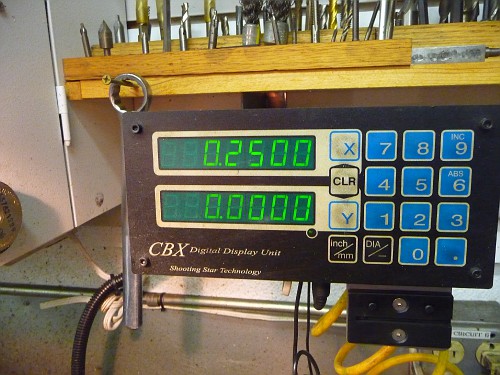
(I love my DRO!)
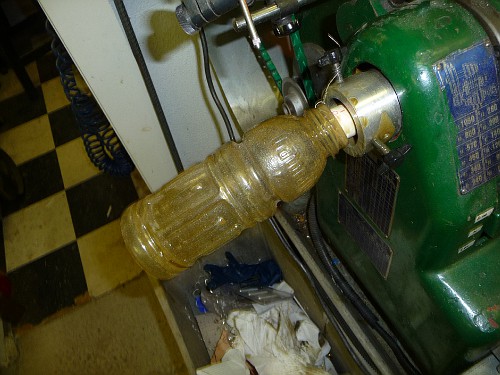
To capture the chips and cutting fluid as I blow the chips through the bore, I attached a plastic bottle to the muzzle end hanging out of the spider. I tied it on with a piece of wire and let it flop around as the barrel rotated. This is SOP when I chamber barrels. Keeps the shop clean.
A few house keeping issues:
Lathe Speed…. 100RPM, Back Gear
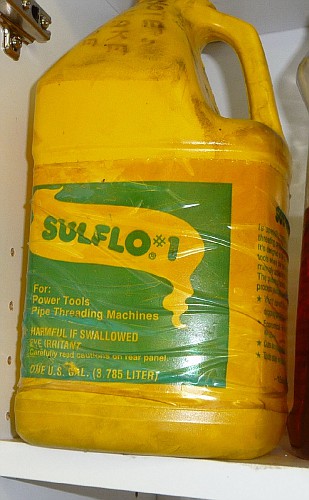
Cutting Fluid……Sulflo #1 (Best cutting fluid on God’s green earth)
Issues while drilling the bore:
The front sight dovetail was actually undermined. The muzzle of this barrel was thin enough where the front dovetail is cut that it actually cut into the bottom of the dovetail slightly. A chip got caught in this hole and jammed the drill. I had to reinstall the front sight to stop this from happening. There is no safety concern. The barrel liner is the same diameter as a few of my ultra light hunting rifles. And this rifle will be shooting Black Powder and Black Powder equivalent loads. I bet there won’t be 1000 pounds of pressure at the muzzle. The other dovetails fared better as the barrel tapers to a larger cross section in these areas.
Other than that, it went very smooth. The drill cut like a hot knife through butter. The instructions that came with the drill bit say you could do this with a 1/2″ hand drill. First of all, the bit won’t fit in a 1/2″ drill. If you didn’t have access to a lathe to turn the shank down you are out of luck. Secondly, I can’t imagine how you would steady the drill and bit and not cause the drill bit to wobble and create an over sized hole at the chamber and muzzle. I would suggest don’t even try it without a lathe. Maybe a 22 rimfire line might be ok with a hand drill. But this big drill bit and the large hole it cuts is asking too much of a hand drill and operator.
OK, so now the barrel has a nice big hole in it. From one end to the other.
Time to try the liner….
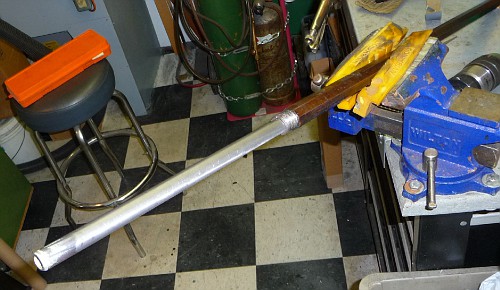
Well, it fits, but it’s too tight. Tomorrow I’ll lap the bore and get it fitting perfect. The liner has a slight bend to it as does the bore on this rifle. If I line the bends up properly, the liner will fit, but it doesn’t leave enough room for the Locktite 620 retaining compound (super glue).
I have to decide if I’m going to cut the chamber first in the liner or install the liner with both ends proud and cut the chamber as you normally would.
I’ll sleep on it and decide in the morning.
Stay tuned, more to follow!
UPDATE 5-4-12Â IT’S DONE !!!!!!!!!!!!!!!!!!!!!!!!!!!!!!!!!!!!!!!!!!!!!
Got up at 4AM to finish this project. I don’t know about you, but when I get into a project, I have to finish it RIGHT NOW!
First order of business was to remove about a thousandth of an inch from the liner. It would go into the barrel, but it was a bit tight and I was concerned about it jamming half way in. So I set up my “Belt Sander Contraption” that I use to smooth barrels and other cylinders. This is nothing more than a $50 belt sander bought at Harbor Freight Tools that I fabricated a bracket to hold it to the carriage on my lathe. Power feed walks it down the entire length of the liner. Removing as little or as much as I like depending on feed and speed.
Here is a video of the device in action:
http://public.fotki.com/Rbertalotto/gunsmithing-reloading/1873-winchester-bar/p1030334.html
Once that was done it was time to decide on how I was going to chamber this thing. One way is to chamber the liner first, slide it into the barrel with an empty cartridge in the chamber and seat they whole kit and kaboodle right up against the bolt. This automatically sets headspace perfectly. But I was very concerned the Locktite would set up before I could get all the ducks in a row.
So I decided to simply install the liner and chamber as you would any other rifle. Checking for headspace with measuring tools.
So I dug out the Locktite and a small brush
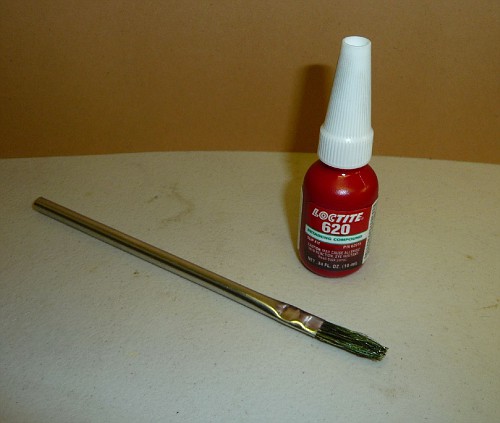
And coated the whole liner with a nice coat of Locktite 620 and slid the liner into the barrel.
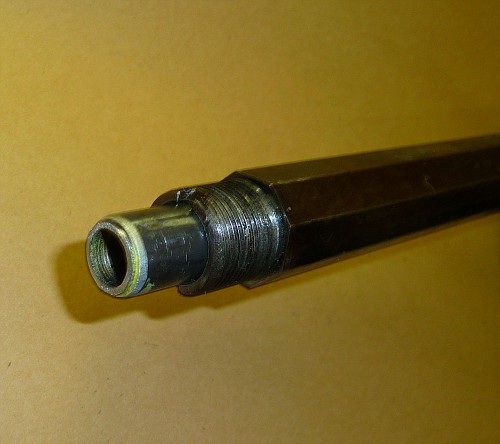
Letting a bit protrude on each end.

Then over to the lathe to face the ends off.
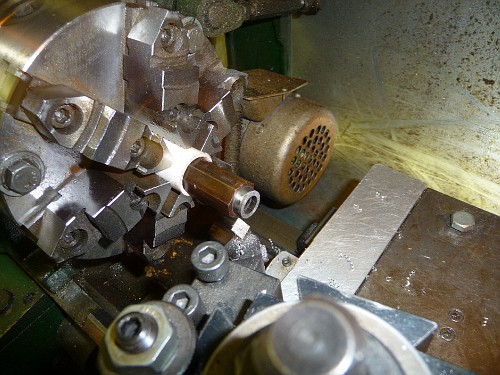
The muzzle end was cleaned up with a file and made to look a bit worn. Crowned with a ball bearing and a piece of 400 grit paper.
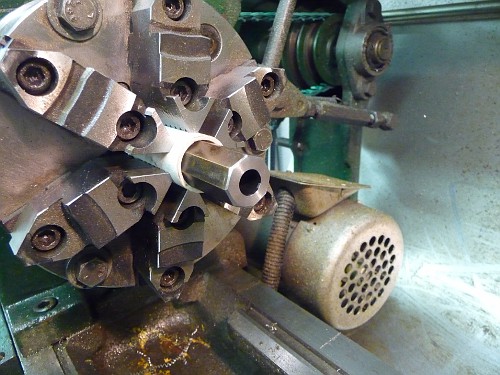
The chamber end needed a bit more “figer’n”. This rifle had a .001 headspace problem. So the liner needed to be exposed .001″.
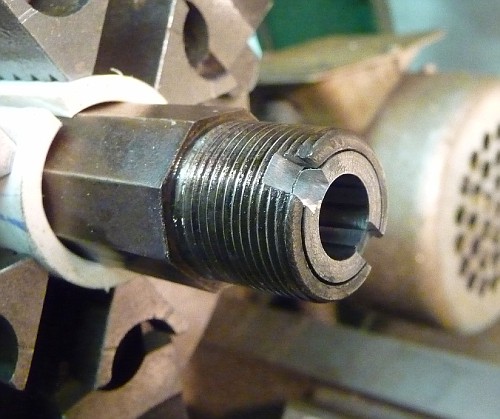
The extractor cuts were done by hand using a Dremel Tool with a small cut off wheel. I needed to cut the reliefs for the extractors before I chambered so I could mount the action and check bolt to barrel fit. Everything checked out perfectly!
Next was reaming the chamber.
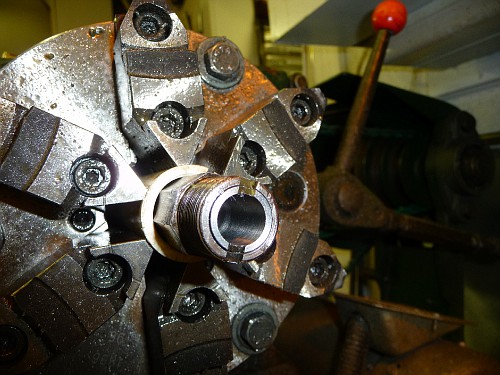
Sorry, no pictures of the actual reaming process. When I’m reaming a barrel I get into a Zen type of state. Doors are locked, radios shut off…..The world is put on hold. This is what makes or breaks a fine rifle. And my chambers are usually beautiful! But this one gave me one scare. I was cutting .015″ at a time. On the third cut the reamer bound up tight and spun the reamer holder in the tail stock. Yikes! This could have been disaster. I shut everything down and tried to back out the reamer. No go!
You NEVER want to turn a reamer backwards. You will destroy the cutting edges. So I inserted a brass rod down the bore and tapped ever so lightly with a little lead hammer to push the reamer out of the bore. I inspected the cutting edges with a magnifying glass and they were fine. Nice thing about rifle chamber reamers is they have a lot of taper. So you only need to move them a few thousandths and they will “unlock”.
It turns out even at .015″ cutting, the reamer’s flutes were filling up with shaving and causing it to lock. I went down to .010″ per cut and had no more problems. The chamber came out beautifully! When I cut chambers on target and hunting rifles, I pre bore the chamber first. This gives the reamer very little material to remove and I can usually move them in sometimes 3/8″ before I need to back out and clean the flutes. But for this rifle I decided to simply chamber the whole thing in one fell swoop. Live and learn!
Time to put everything back together.
And here is the final product:
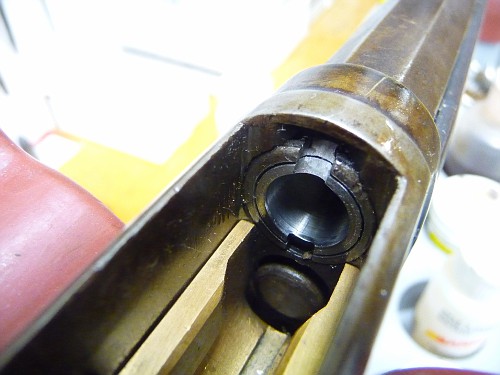
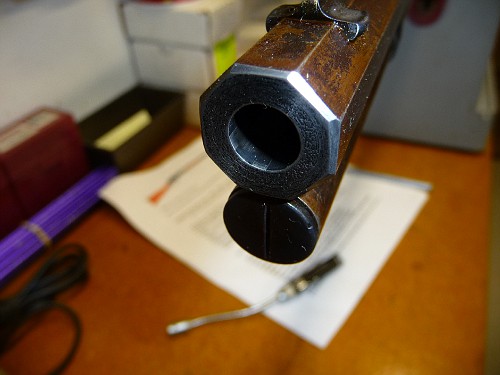
The muzzle actually looked “Too New” so I took a piece of 100 grit sand paper and held it against the front of the muzzle and tapped it with a hammer to give it that “Vintage” – “Period Correct” look.
And now this rifle has gone from this:

TO THIS:

I need to let the Locktite set for 12 hours before I can shoot it.
Stay Tuned for a range report……………
UPDATE 5-5-12 RANGE REPORT
Yea, you got the math right! I couldn’t wait 12 hours. I looked at the spec sheet on the Locktite 620 and it said at the temperature the barrel was and the 6 hours that had passed, the bond was 80%. Heck, 80% of the shear strength of Locktite 620 is about 20 times more than this barrel liner will ever require. It’s off to the Gun Club!
I loaded up 30 rounds and headed to the range.
All loads were comprised of 180g LEE cast of Lyman #2 lead and lubed with Alox tumble lube.
15 rounds were this bullet on top of 5.4g of Trail Boss /800fps
10 rounds were same bullet with 15g of SR4759 powder /1100fps
5 rounds of same bullet with 16g of Accurate 5744 /1200fps
It was raining and all the seats at the shooting benches were filled with water. So all shooting was done standing, with targets at 25 yds.
First few rounds were simply into the bank to see if the gun would blow up or if the barrel liner would shoot out like a harpoon! None of this happened. Everything held together nicely. I can still count to 10!
This is the trail Boss load. A total of 12 rounds were fired aiming at the bullseye. The lower three shot group was after I lowered the elevator to its lowest position. The group is still about 8″ high.
I will need to add a taller front sight. This load was about 800fps. Look closely and you’ll see six bullets touching. Not bad for 60 year old eyes, in the rain, standing and concerned that this thing might blow up and take my head off!
This target is the SR4759 load. Four shots were into the bank to see if the gun came apart with this more powerful load. This target shows 6 shots, standing, offhand at 25 yds. I’m REALLY liking this rifle!
The last load was simply fired into the bank as I didn’t have enough loaded rounds for an accuracy test. But since I have about 20 pounds of SR4759, this most likely will be my go to load for Cowboy Side Matches with the Trail Boss for general match shooting.
I’d like to report that there was zero leading in the bore after 30 rounds. But I did have a problem with my crimps. a couple of cartridges when loaded into the magazine had their bullets pushed into the case. I did not fire these rounds. If I crimp under the crimp groove on the LEE bullet, the OAL is to great and they don’t feed. I’ll need to trim my brass a bit if I decide to use these bullets. I also bought a Lyman mold for traditional grease groove bullets that I’ll experiment with.
UPDATE 5-11-12 MORE RANGE TIME
I finally got all my reloading and bullet casting supplies and cast a bunch of bullets and loaded thirty cartridges. This was no way as easy as it sounds! I’m going to do a full report on what I had to do to make loaded rounds for this rifle. Stay tuned!
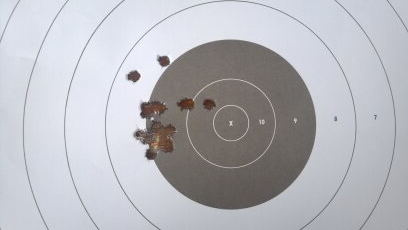
Using a sand bag for a front rest and no rear rest, and trying to beat the coming rain, I fired these groups at 25 yds:
This target is 15 rounds…..iron sights…..no rear rest!
And this target is same distance, 5 rounds, same set up:
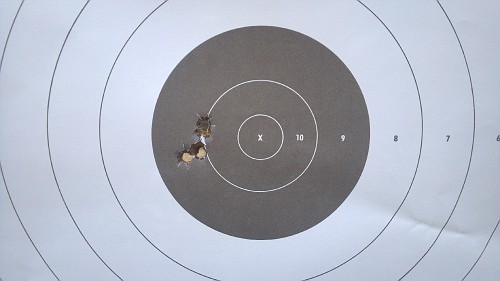
Id say she’s a keeper!
I didn’t have a drift and a hammer to move the POI over a bit, but the elevation was perfect after adding a taller front sight. I just fished a sight out of my parts drawer and without adjusting the rear site, this is where it landed. I should buy a lottery ticket today!
This load is a LEE tumble lubed TL401-175 SWC over 5g of Trail Boss.
So…That’s the story of bringing an old relic of a rifle back from the dead. I sure hope you enjoyed.
THANKS!


42 comments on “1873 Winchester “Bring It Back From The Dead!””