As you can read in another article on this web site, I recently became involved in late 1800 rifles and the period correct scopes to go with them.
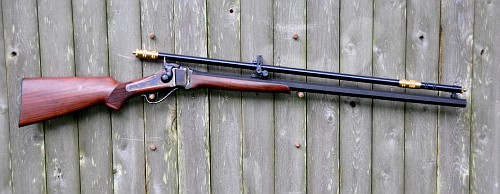
1874 Sharps

1885 Winchester High Wall
I ordered two of the reproduction William Malcolm 3/4″ scopes that are imported through Leatherwood. Both scopes were ordered through SWFA.com
Although the optics on these two scopes are superb, the rear mounts are really pretty poor. Zero repeatability and even simply “sighting-in” is terribly frustrating. The threads on the adjustments are very rough and simply not accurate enough for precision work.
I attempted to buy a set of Unertl mounts but they are difficult to find and very expensive. There are a couple of folk that advertise on the internet that are making a version of the Unertl mounts. But at over $350, it was just to rich for my pocketbook.
So I decided to make my own.
Unertl type mounts are “external adjusting”. The scope itself has no internal adjustments like a modern rifle scope.

There are two threaded adjusters that simply move the scope tube up and down and left to right. There is a spring loaded plunger at the 7 o’clock position that hold the scope firmly up against the two adjusters.
The Malcolm scope has a similar set up for the short tube scopes.
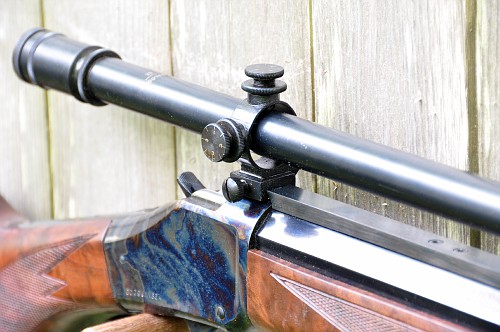
But the Long Tube scope on the Sharps rifle is a completely different affair.
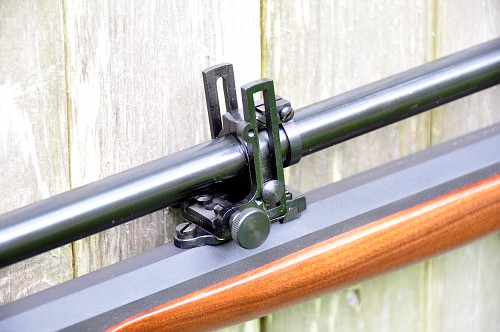
The problem with the rear adjusters for the Shory Tube Malcolm, is the poor quality threads and the tips of the threaded adjusters are not perfectly perpendicular to the threads.
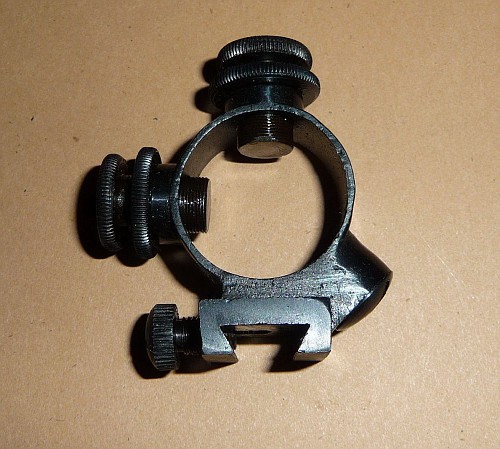
So as you are trying to set elevation, the scope is actually moving up and down as the high and low side of the adjuster is moving the scope. Extremely frustrating!
The first issue was to source very fine, accurate thread to use for the windage and elevation adjustment. The best source for this was a cheap set of calipers. The threaded shaft will be hardened and the threaded boss they are threaded into will also be hardened. This will give great repeatability and long service life.
A quick search showed Amazon had a set for under $10. I ordered two.
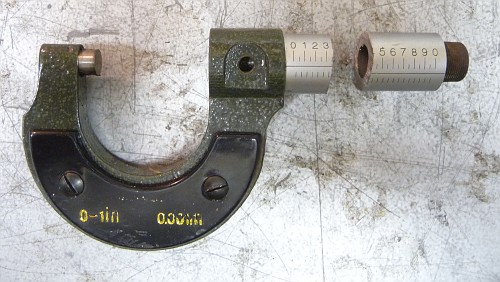
As soon as they arrived I took them completely apart , removed the internals and cut the barrel off as needed.
I took a 1 inch thick block of aluminum and milled out the rough mount, drilled holes for the adjusters and mounted the windage adjuster. The hole was just slightly undersized for the threaded boss. The threaded insert that I removed from the body of the caliper was pressed into the mount.
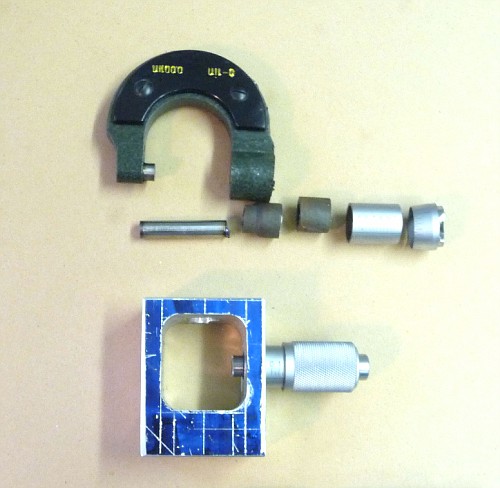
In the above picture, the fourth piece from the right is the threaded boss made reference to above. This piece is quite hard but a new fine tooth hack-saw made quick work of it. It was mounted in the lathe and the ends squared up.
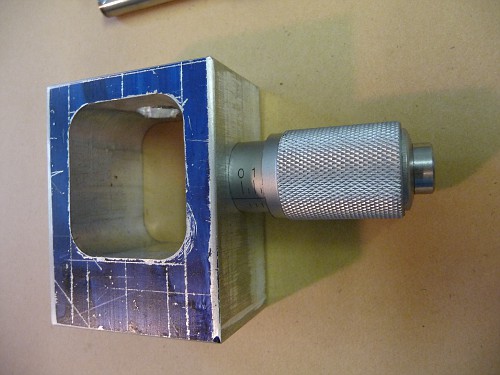
The knobs are supplied are just too long. I cut them down and turned a smooth end. I reused a section of the tube with the markings. This simply was super glued to the part of the threaded boss extending out side of the mount.
These adjusters are EXTREMELY smooth. As the project progresses I’ll be modifying the mount so I can lock the adjustments into place.
This is all I have done so far.
 OK, Part 2
Had a few more minutes I could spend in the shop so I finished up the elevation adjuster, milled the whole mount down a bit as it was too thick.
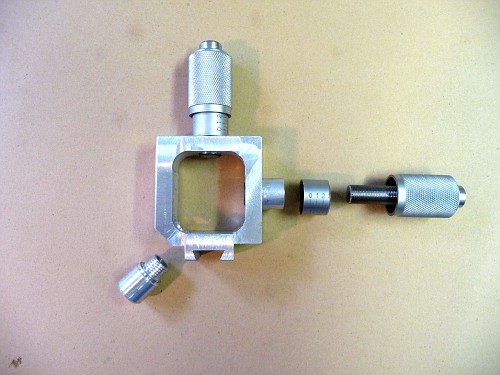
I milled the bottom out and cut the dovetail. And made a little thingy to hold the spring and ram that keeps the scope up against the adjusters.
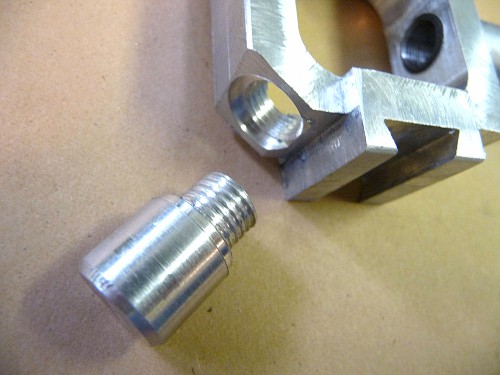
I’m getting close! Still lots of contouring and drilling and taping the dovetail for a set screw. I might split the DT for a more reliable fit to the scope rail. Not sure yet. (Update….Decided to go with the Unertl ‘Standard” mount as that is what the Malcolm scope base had. This type of mount does not use a split base) There is an excellent description of this at Dewayne Greiner’s home page. http://unertl.alexweb.net/new_page_2.htm
This fellow also sells Unertl scopes and mounts and always has a tremendous selection. http://unertl.alexweb.net/
These are “Standard” Unertl scope blocks.
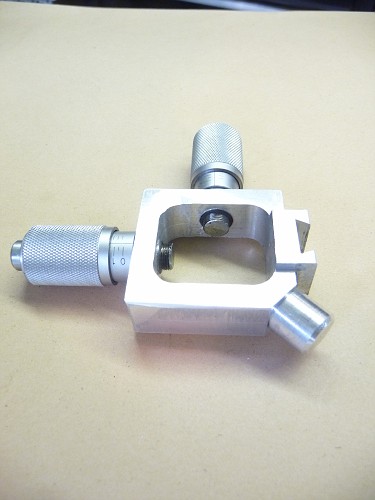
I also need to split the mount from one adjuster to the other and install a small screw to lock everything down once the scope is sighted in.
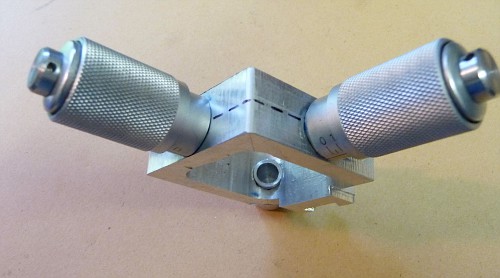
Cut on the dotted line!
(Update: I’m not sure what I’m going to do to lock the adjusters. I think I’d like to lock each one independently. Might just use a small brass tipped set screw against the thread of each adjuster)
TO BE CONTINUED!
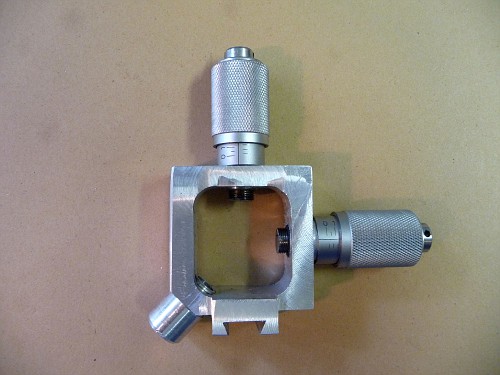
Well, I might as well keep going and get this project finished!
Just about finished.
I got the mount all contoured and bead blasted for a trial fit.
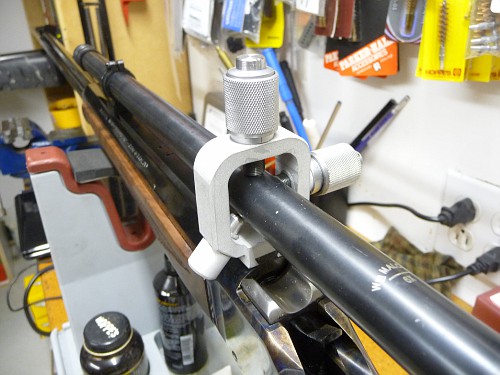
Went together beautifully!

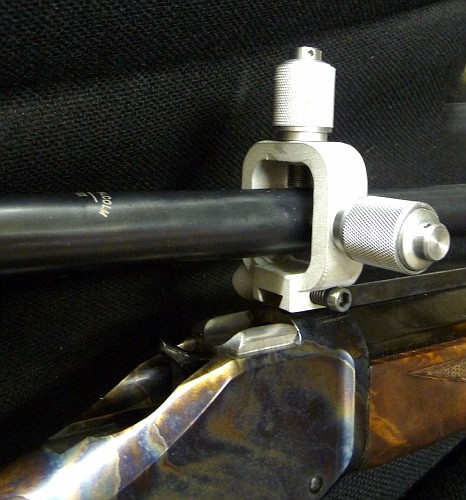
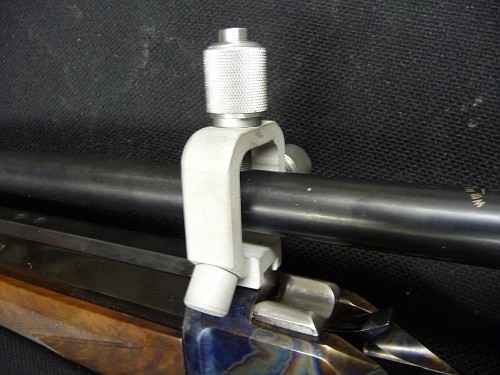
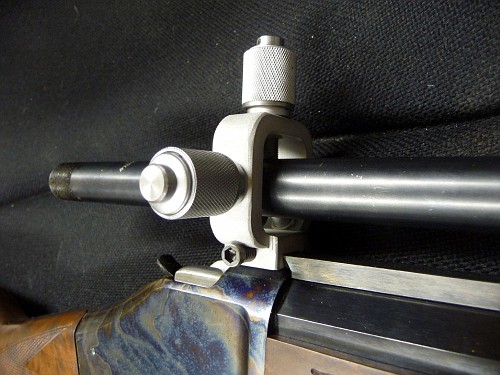
Pieces are now in the oven waiting for the GunKote to cure.
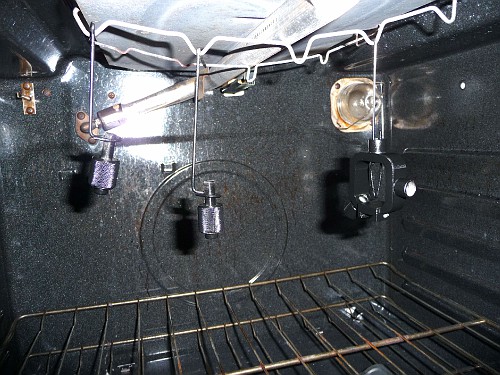
Can’t wait to put it all back together and take it to the range tomorrow.
As soon as I get it all put back together and mounted on the rifle, I’m going to do some “repeatability” tests using a magnetic base and a dial indicator. Should be fun to see how well it returns to zero.
The NRA Black Powder Cartridge Competition does not allow “clicks” in the turrets. So this scope has none. But I bet dollars to donuts that it will be extremely repeatable!
OK, Parts are out of the oven…………
Time to put it all together. When I was milling the surfaces the mount jumped out of the vise and made a couple marks that I didn’t see when the parts were in the white. I’ll need to hit them with the files and sandpaper and refinish. But they are good enough to take to the range tomorrow.
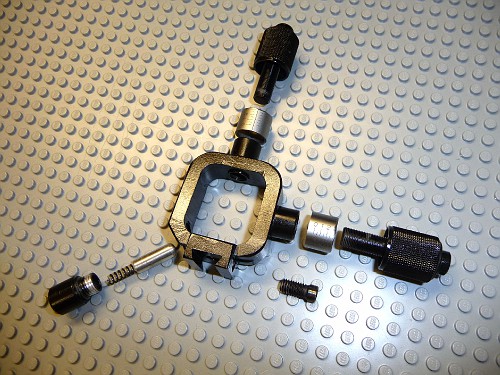
As I stated above, I decided to not split the base and use a Standard Unertl mount.
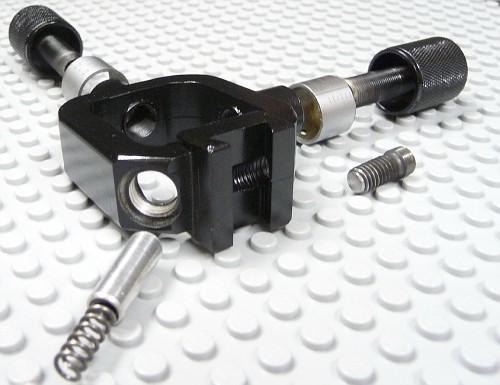
I found this spring in my “junk drawer” to hold the scope tube against the adjusters. Not sure where it is from, but it is one tough bugger.
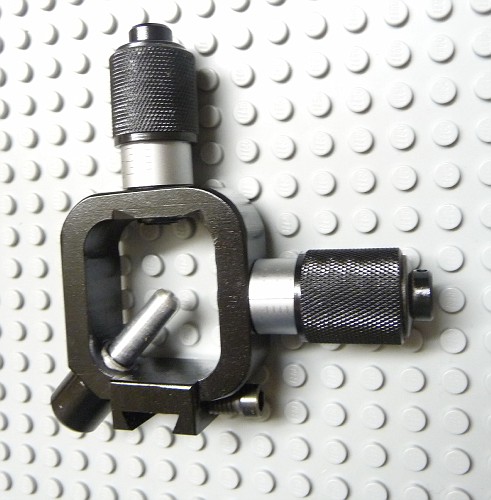
And now on the rifle.
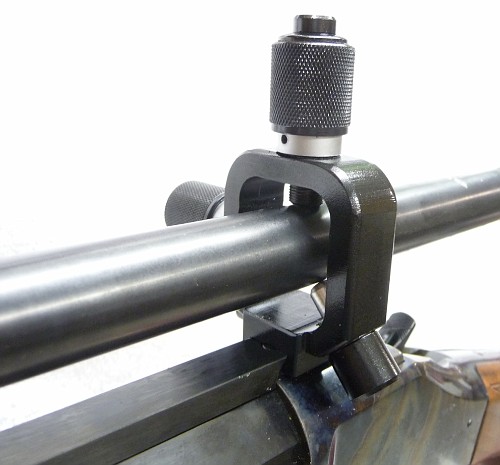
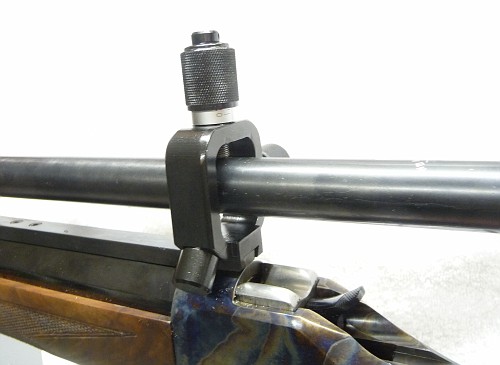
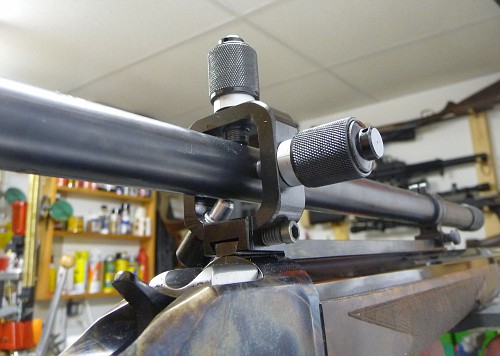
RANGE REPORT
Had a couple hours I could spend on the range. Got on paper at 50 yards and moved the target out to 100 yards. Readjusted the elevation and the windage stayed perfect! Fired two three shot groups and they both hovered around 1.5″. This is FAR better than this gun ever shot. I always suspected the poor scope mount and I believe I was right!
I then pushed the target out to 200 yards and with a pretty strong wind I fired (5) three shot groups. These averaged under 3″. Again. This rifle was a scatter gun at 200 yard. And it was frustrating because my 1874 Sharps, with the identical ammo was shooting under 2″ at 200 yards with its Malcolm 6X scope. So it wasn’t me and it wasn’t the ammo.
One thing I didn’t like. As I was adjusting the scope elevation up and down, I could see that the windage was moving because the scope tube is round and the adjusters have little purchase on the scope tube. This will need to be modified.
Other than that, I’m extremely happy with how this little project is turning out.
FINAL DRIVE TO THE FINISH LINE!
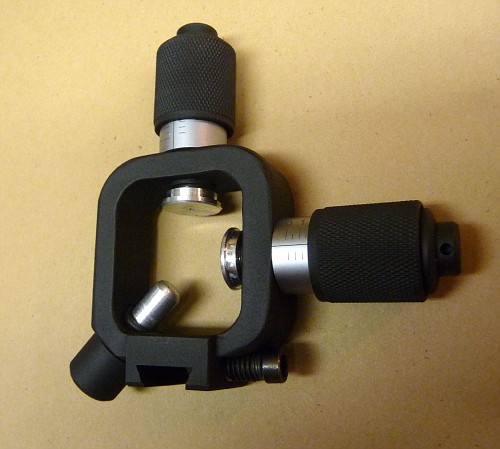
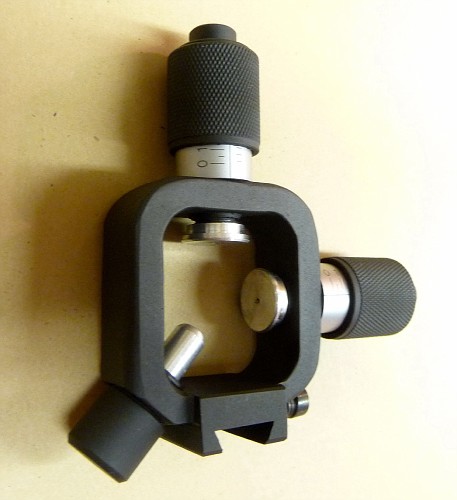
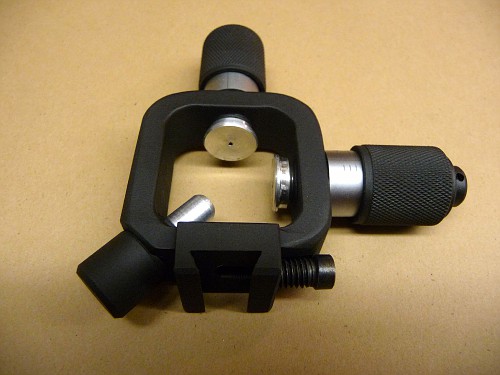
First I need to disassemble everything and sand out those milling marks. I decided to refinish in a Flat Black, rather than the Semi Gloss Black I had used. I think it will look more period correct in a flat finish.
Second I needed to do something about the bearing surface of the adjusters.
I made two little “buttons out of aluminum.
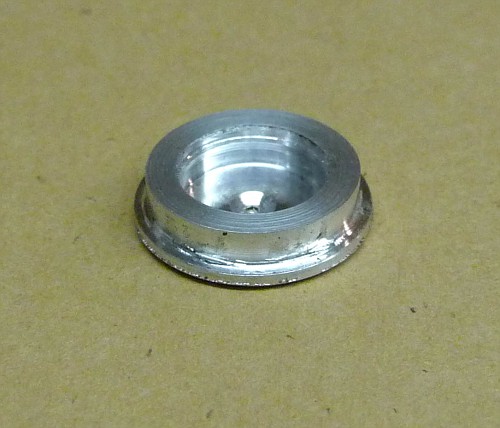 Â Â
  
These will be epoxied on to the ends of the adjusters to give a “longer” bearing surface so the curvature of the scope body has less effect on where the adjuster is bearing……..You follow this?
I needed to figure out a way to get them perfectly perpendicular to the threaded adjuster while the epoxy set. I decided to use a set of parallels to hold it in perfect alinement (As long as my “box” is perfectly square)
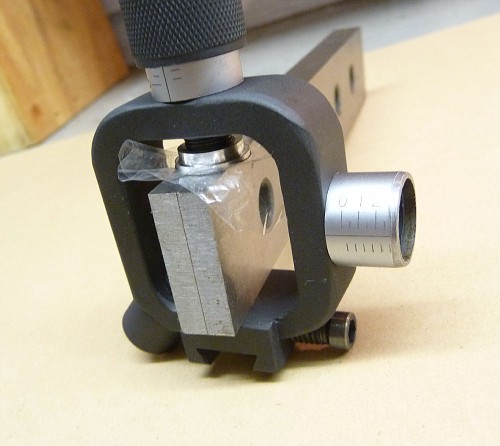
And here is the final result

And here is the mount all finished and pretty like! I think the Flat finish looks much better.
I attempted a test using dial indicators. I bolted the rifle down to my milling machine table and using two dial indicators mounted to magnetic bases I had one indicating the top of the scope and one indicating windage from the side of the scope.
Well, didn’t work out so good. The old curvature of the tube was present. As the scope moved up, the windage dial indicator would show movement because the curve of the scope tube was moving and the dial indicator has a very fine tip and can easily sense this slight shift.
But I did get to use the setup for a repeatability test. I turned each turret a couple revolutions and then back to where I started and the dial indicators showed spot on. Zero change was indicated both elevation and windage. Nice!
So back to the range tomorrow for more testing. But I’m not expecting any surprises. I’ll need to see if the simple friction of the threads will hold the scope as I’ve not decided on how to lock things down, or if I really need to. Range-time will tell.
THANKS!
More pictures here:
http://public.fotki.com/Rbertalotto/gunsmithing-reloading/


Pingback: 1874 Pedersoli Sharps with a Malcolm 6X Scope | RVB Precision