I picked up a stainless steel Rossi 1892 Winchester in 45 long colt. The sole purpose was to convert it to a Take Down. I love riding motorcycles long distances and this fall I’ll be riding to Mo and possibly Montana to do a bit of Whitetail hunting. This rifle will fit nicely in my painers.
Years ago I read an article in the NRA Gunsmith Digest on doing this to a Model 94 and I’ve wanted to try it ever since. So with gun in hand, I had at it today.
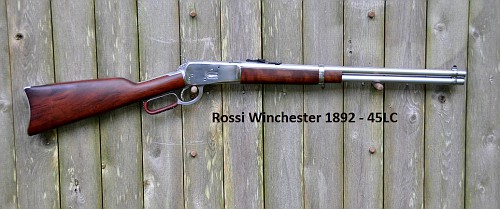
Here’s what I started with:
First order of business was to remove the barrel. This was very easy. They are not on very tight. Once the barrel was removed you need to remove the “ears” on the front of the receiver:
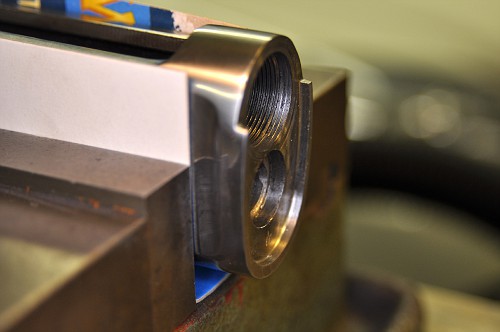
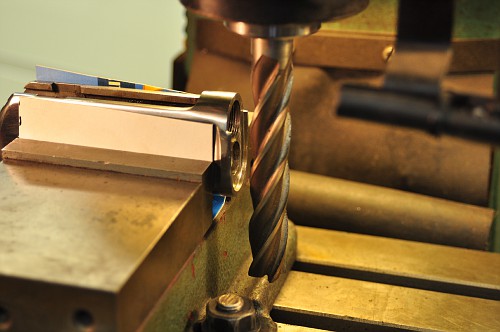
I used the milling machine to remove most of the material:
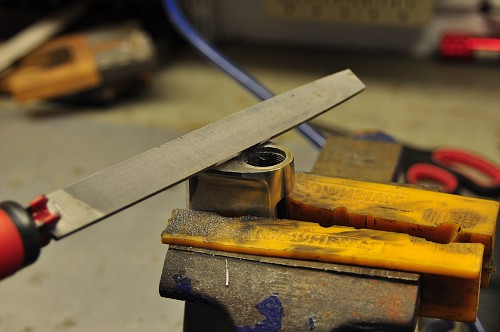
And then a fine file cleaned it up:
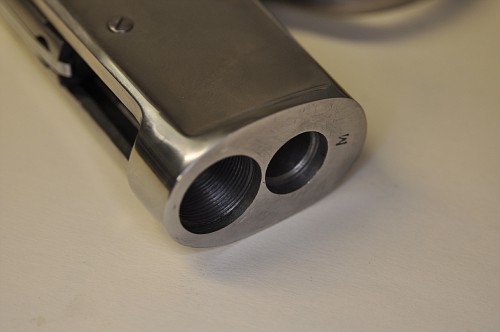
Here’s what the front of the receiver looked like:
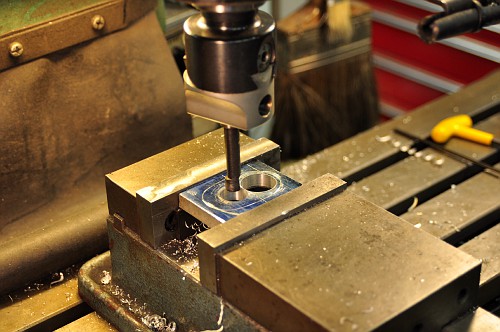
Next I had to layout the plate that will hold the barrel and forend. And bore the holes in the milling machine:
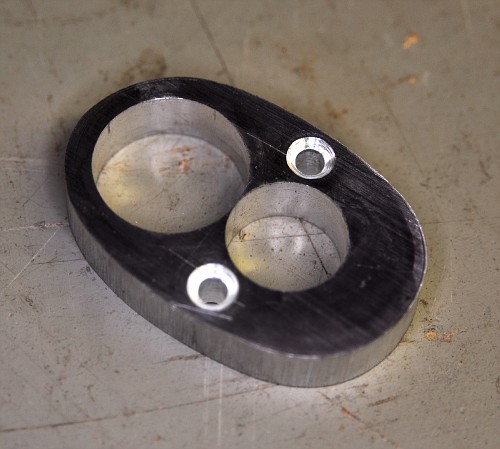
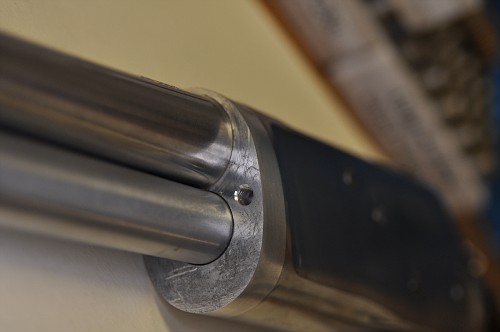
The finished piece ended up looking like this. I used 7075 Aluminum as I wanted to keep the weight down and this piece does nothing but stop the barrel from turning.
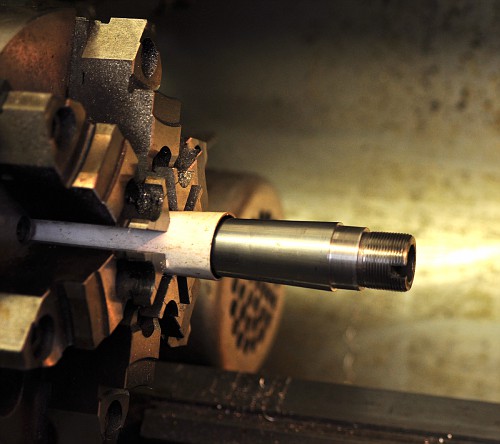
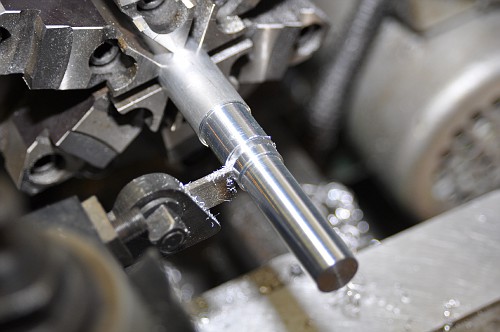
The barrel needed to visit Mr Lathe and have a shoulder cut the thickness of the attachment plate:
A very tight fit was the goal. The attachment plate was heated with a heat gun and using the action and a large washer, the attachment plate was press fit onto the barrel shank:
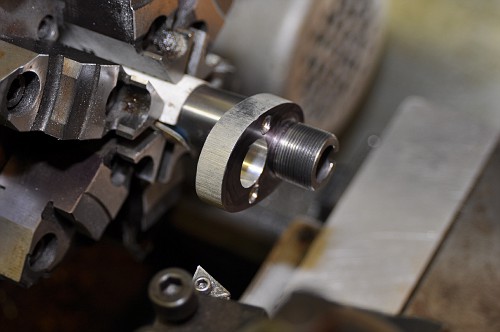
The barrel was then indicated in and the face of the attachment plate was turned true and perfect headspace was achieved:
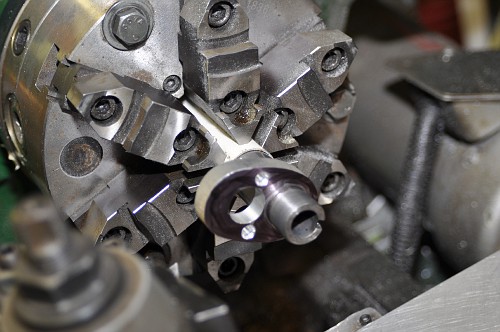
A new “plug” was turned for the end of the magazine. This plug will have a spring loaded button to keep the magazine in place which stops the barrel from unthreading:
Finished assembly with the magazine tube retracted:

And extended:
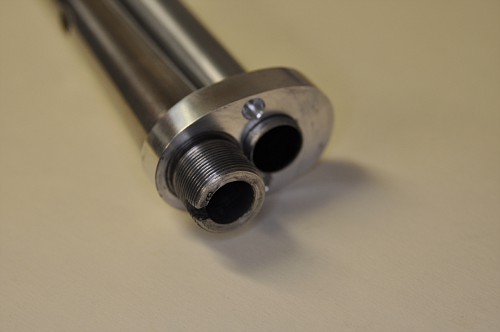
And the retaining button on the other end:
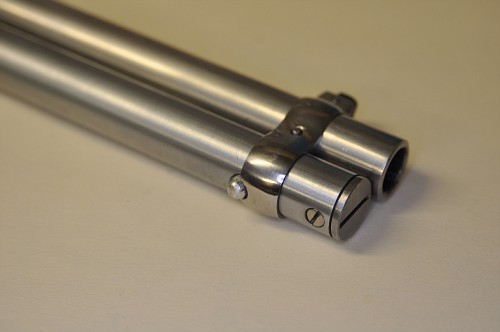
And the button depressed and the tube retracted:
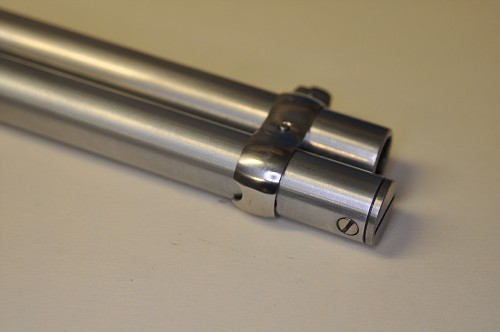
Nine turns and we are on:
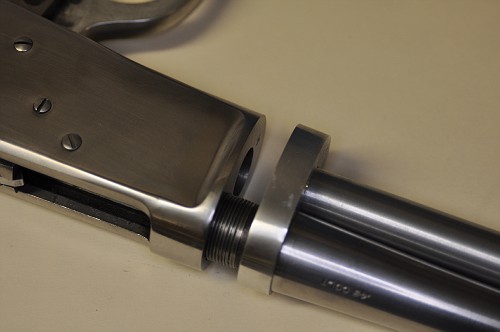
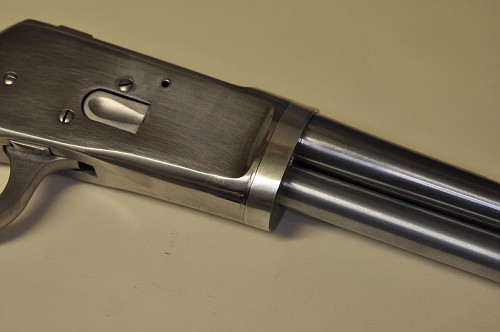
These two holes are to mount the forend.
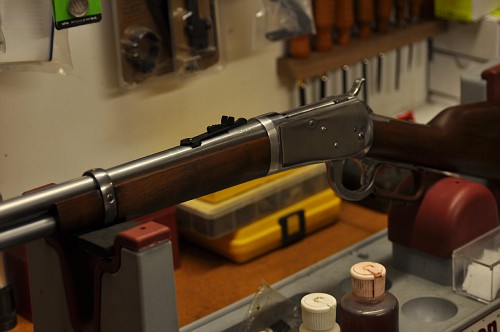
And the finished project:
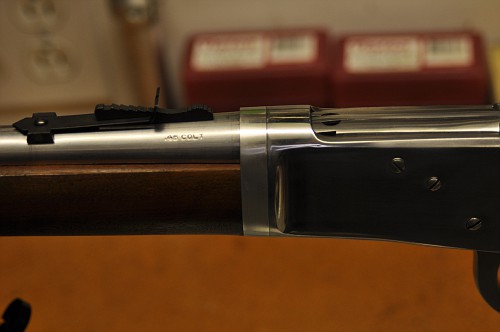
This project was a lot of fun and very quick. 6 Hours from beginning to end!
Hope you enjoyed this little article………….
BTW, folks are asking if I’d be willing to convert their rifle. I’m not a gunsmith. Just an advanced hobbyist! I don’t work on other folks guns. But Lee over at “The Arms Room” does a real nice job with these conversion. Call him up at 719-680-1255 or check out his work at http://www.thearmsroom.com/id3.html
UPDATE!
Well, I resolved the magazine plug issue! I had to figure out a way to retain the magazine plug within the magazine tube, yet let it retract enough to allow the barrel to unthread. Here’s what I came up with:
Using a very dull pipe cutter I turned a canular on the magazine tube. This created a little bump on the inside of the tube which will stop the magazine follower from popping out of the magazine tube.
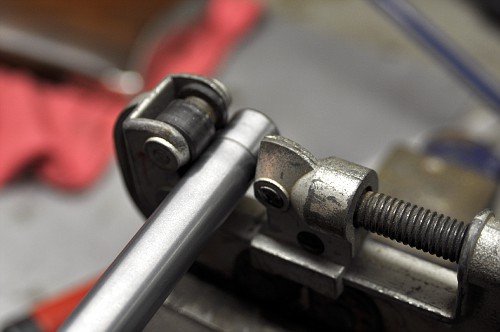
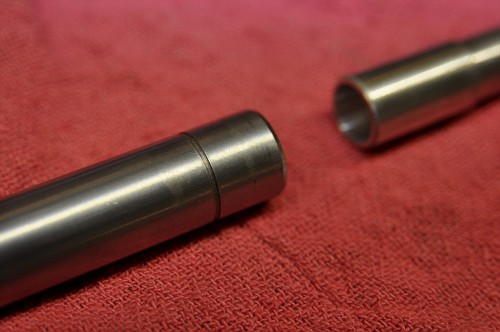
Then I turned a new plug which is longer than the original:
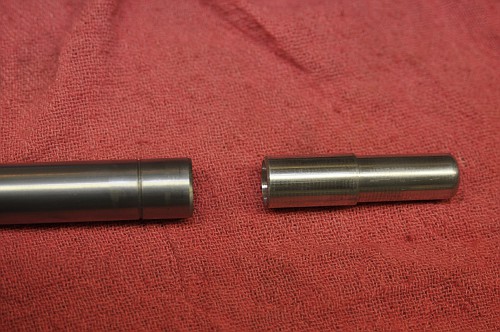
To take down the rifle the magazine tube now extends further forward so the plug will clear the receiver:
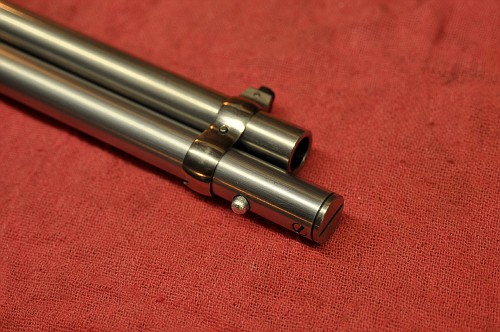
Here is the barrel with the magazine tube in the “locked” position:

It feeds like the democrats at a budget meeting!
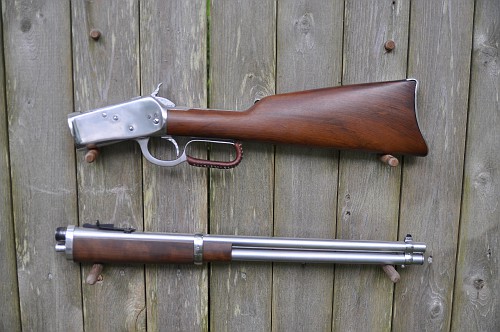
Rossi 1892 Winchester Take Down UPDATE….10-10-11
Soooo…….Things are not to good here in Rossi Winchester Take-Down land.
The rifle operates very well, but accuracy is terrible. Five inch groups at 50 yards with anything I try to load. The fellow I bought this rifle from said he invested over $350 with a “Cowboy Action” gunsmith. He might be a Cowboy, but I question the title Gunsmith.
The first problem is the rear sight needed to be almost 1/8 to the left for the rifle to even be on target at 25 yds. I have no idea why and there were much bigger fish to fry rather than try to figure this out.
It seems either this Cowboy Gunsmith or someone else had no idea how to run a milling machine and how to cut a dovetail.
Check this out:
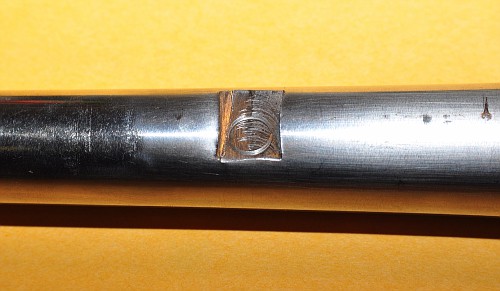
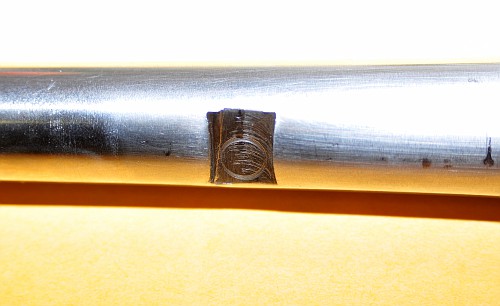
This is the rear sight dovetail. What a mess. But this isn’t the real issue.
If you look down the bore from the breach end, you’ll see that the dovetail actually collapsed the bore of the barrel!!!
There is a huge “bulge” right under the dovetail cut.
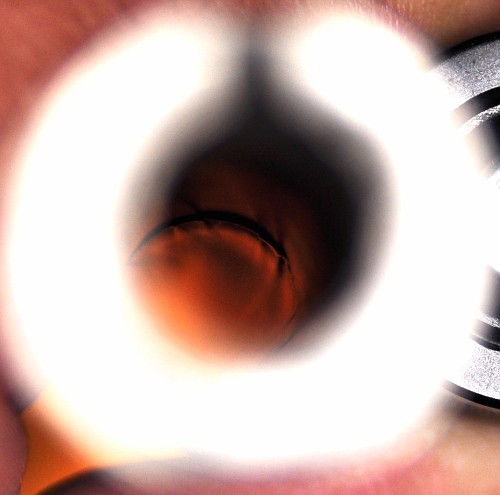
Sorry for the poor photograph. It’s the best I could do. But you can see the issue right here.
The rifling in the muzzle section of the barrel is worn out on one side. Not sure what caused this. Poor cleaning rod technique? But I believe this is the reason the gun was shooting well to the right.
Enough about the barrel issues. It needs to be replaced. Period!
Those that know me, know I’m a nut about Octagon barrels. So a search for a Stainless Steel octagon tube led me to M&M Gunsmithing. They stock parts and do repairs on Rossi firearms. They sold me a brand new Stainless Steel Octagon barrel, chambered and threaded for the Rossi 1892 for $160! An amazing deal in anyone’s book.
M&M Gunsmithing
204 S. Union Street
Alexandria, VA 22314
703-739-2150
http://www.mmgunsmithing.com/
With barrel in hand I needed to pull the round barrel out of the take down plate and insert the octagon.
The takedown plate was a sweat fit affair on the round barrel. A bit of heat and a small gear puller I whipped up had it off without damage in about ten minutes.
Surprisingly, the Octagon barrel was smaller in diameter at the shank. Rather than make a new plate, I allowed the octagon barrel to fit into the round hole.
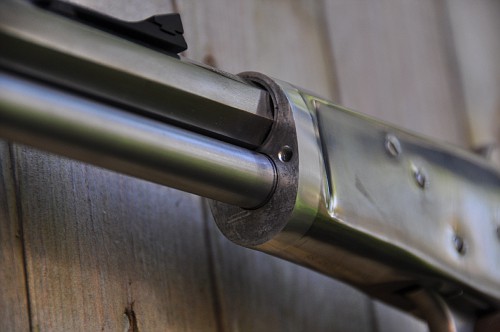
This plate simply hold the forend. It does not set head-space. Head-space is set on the factory shoulder of the barrel. And by the way, I only needed to remove a half a thou from this shoulder to get the barrel to index and headspace properly. Nice!
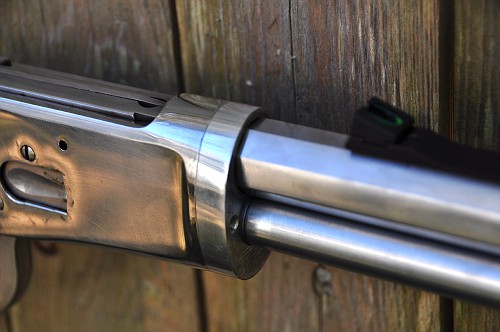
Once I mount the forend, I’ll make a decorative piece to clean up this transition area.
The most difficult area of this octagon conversion was deciding how to carry the forward part of the tube magazine, and still utilize the button as it had when it wore a front barrel band. Normally, these rifles that wear octagon barrels have the front of the magazine tube attached with a screw into a boss that is set into a dovetail on the underside of the barrel.
This is a photo of the Marlin 336 I converted from round barrel to octagon:
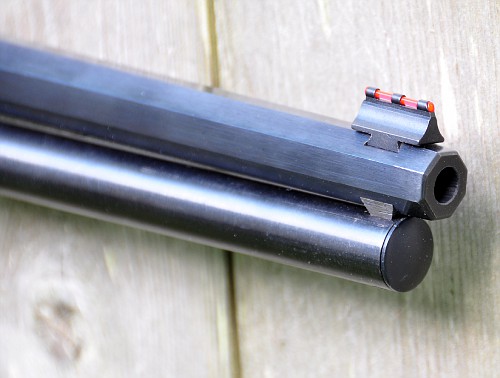
But this method won’t work on a Take-Down rifle. The magazine tube needs to slide forward to be able to thread the barrel off.
I have a “Thinking Stool” in my shop. I sat on this stool and stared at that rifle for near an hour trying to figure out how to accomplish this.
I decided to cut a dovetail under the barrel and make a little steel tenon to carry a modified barrel band.
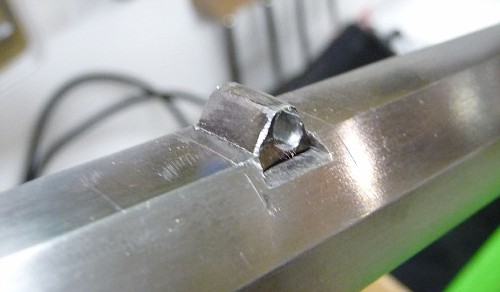
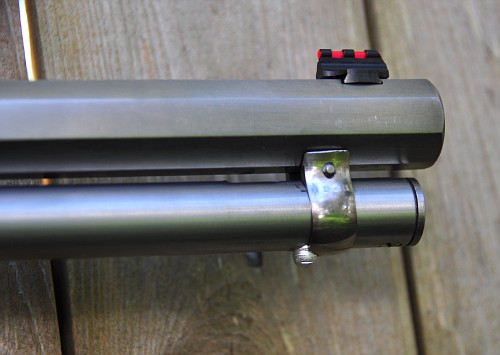
I simply cut the barrel band in two and contoured the inside to fit perfectly against the octagon barrel.
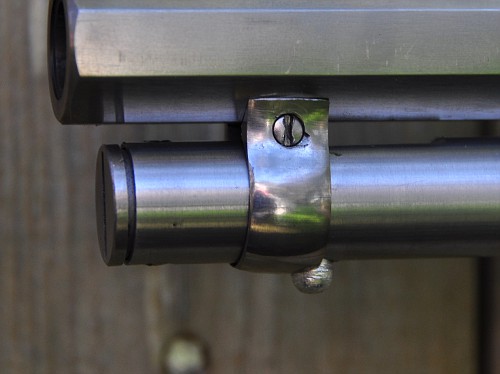
Drilled through the tenon and ran the bolt through. Done!
(note the nice condition of the screw head. Someone practiced “kitchen knife gunsmithing” on this rifle.) I’ll make a new screw and clean this up later.
The barrel from M&M was 24″ long. I wanted this rifle to be shorter so when it is in two pieces it will fit into the saddle bags of my motorcycle. So I cut 4″ off the barrel to bring it down to 20″. Re-cut the front sight dovetail and mounted a set of my favorite Williams Fire Sights.
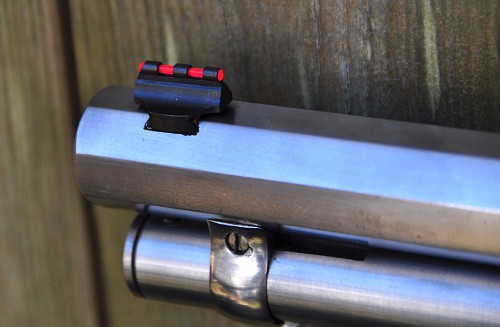
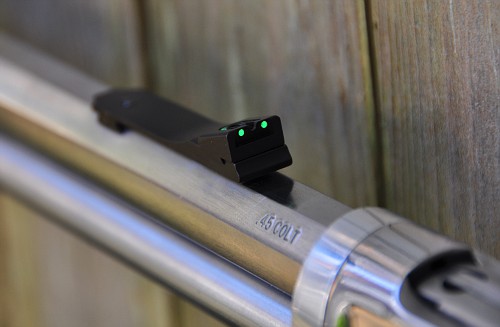
There is simply no better sights for hunting in dark woods!
I ordered a new forend from a Marlin 1894Â from Numrich Gun Parts in West Hurley NY and a Stainless Steel forend cap from Brownells.
But I couldn’t wait to shoot it.
I went to the range with my forend-less (kind of like an 1860 Winchester) rifle and set up a target at 25 yards. The first shot, with zero setting of the sights was a bulls-eye! Talk about luck.
I moved the target board out to 50 yds and using a rest shot ten three shot groups with different powders, but all with Lee 255 grain Lyman #2 cast bullets. ALL the groups hovered around 1.5″ ! To say I was happy is an understatement.
Interesting to note that the gun shot off hand extremely well without a forend. I’ve never shot a Winchester 1860, but other than the heat after shooting for a while, I could live with this rifle without a forend. Extremely light and handy. I was shooting at an 8″ steel plate at 50 yds and hit it 27 out of 30 times. Not bad for 60 year old eyes!
Stay tuned for the final chapter when the forend comes in and I complete this project.
UPDATE 10-14-11
OK, lets finish this thing!
The forend came in from Numrich Gun Parts. Thank God I ordered one from a 1894 Cowboy ! I thought the forend from my 336 or my 1895 would fit fine. While I was waiting for the forend to arrive, I pulled one off of these rifles and tried it. The barrel on the Rossi is much smaller in cross section and this left a huge gap between the wood and the barrel. Looked like hell. “Measure twice, cut once!”
The forend from a 1894 Cowboy fit perfectly! All I needed to do was sand of the tenon at the rear that would normally fit into a recess in the Marlin receiver.
But, there was a problem. The magazine hole in the Rossi forend is much smaller than the hole in the Marlin piece. So when you pulled the magazine tube out to unscrew the barrel, it couldn’t find the hole in the barrel piece to lock things back together.
So on the lathe I turned a piece of thin wall aluminum tubing out of 6061 rod.
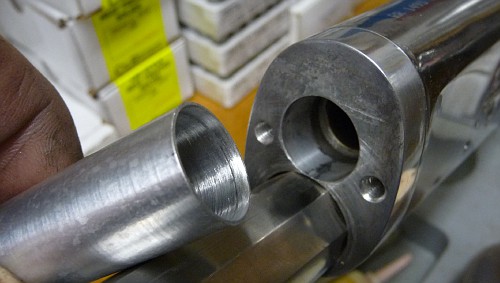
This piece of tubing was JB welded to the adapter plate so the magazine tube can rest inside and remain located when pulled out.
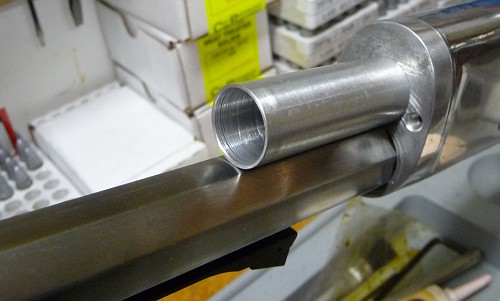
This piece of tubing needed to be extremely thin walled. I bored it out very carefully with a nice sharp boring bar and then turned the outside to near paper thin. It only will locate the magazine tube as it slides back into its hole. It won’t undergo any stress so being very thin won’t matter.
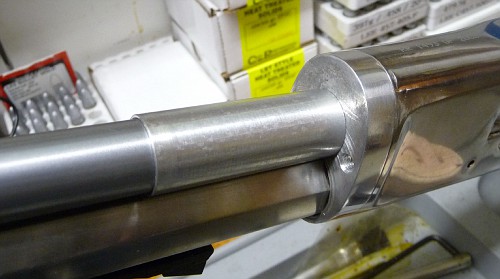
The above picture shows the tube installed and the magazine inserted. I think this proves a picture is worth a 1000 words?
The inside of the Marlin forend would barely clear this tube so a small sanding drum on the Dremel opened it up so it would slide over this tube.
Once this was done, the rest was clean sailing. A dovetail was cut for the forend hanger tenon. And the Forend was installed.
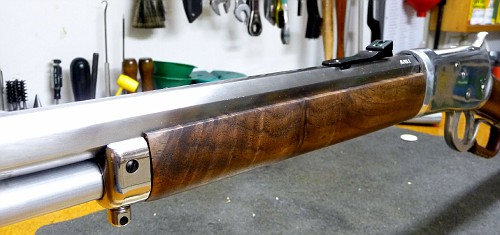
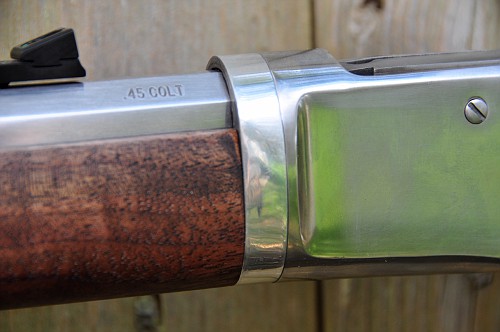
The forend tip from Brownells said it was Stainless. It’s not. It’s nickle plated. And it needed to be polished to come close to looking like SS. It also had to be fitted as it was for a round Marlin barrel, not an octagon. As far as I know, Marlin never made Octagon barreled rifles in Stainless Steel. True?
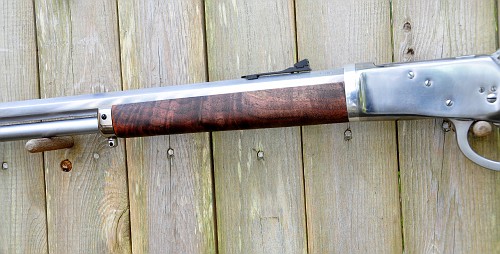
As you can see above, I sanded off the checkering on the forend as the butt stock was uncheckered and there was a beautiful piece of walnut hiding behind the Marlin spray on finish and the checkering.
Five coats of Tung Oil and we’re ready for shootn’

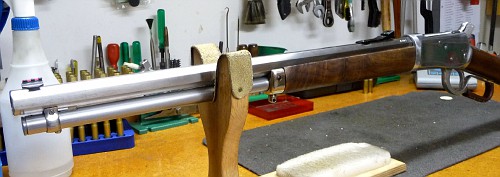
(Sorry for the crappy picture. It’s pouring outside so I can’t get out there and use the better camera. I’ll update these tomorrow)
I promised you better photographs…


Lots more pictures here:
http://public.fotki.com/Rbertalotto/things-that-go-bang/
Hope you liked this little project……..I know I had a ball with it!
Thanks!

Pingback: Rossi 1892 Stainless converted to Take Down.......Done! - LongRangeHunting Online Magazine
Pingback: Take-down conversion