
On another post I outlined the entire renovation of a 50 year old Maine Camper truck cap and then taking it on a 10,000 mile cross country , two month long trip.
Along the way various “Parking Lot” modifications were made to tweak the usability of the camper.
But there was one major modification that had to wait until I returned home.
For refrigeration I was using a very good chest type refrigerator from ICECO. This thing is fantastic and I used it for a few years when I was experimenting with Roof Top Tents.

This worked out great when mounted on the truck bed and was at waist height. But in this Maine Camper I mounted it on the floor, on slide rails.
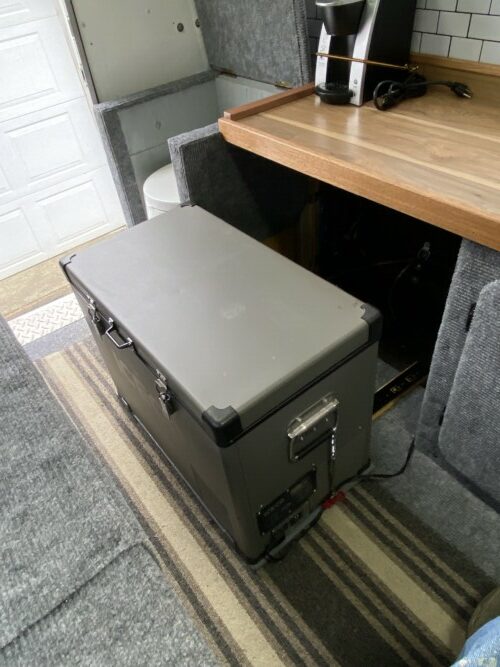
It was a total PITA to use. I had to be sure it was always secured for travel. Every time I wanted to access it, I had to slide it out, where it contacted the bed platform, making unlatching the cover very tight. ( I made the first 12″ of the bed platform hinged to give me some space. But this just complicated accessing the cooler more involved)
And then everything was on top of each other and what I wanted was always on the bottom! Salads and fruits got crushed. Liquids spilled. And at about 1.5 cu ft (45L) it required frequent grocery store visits. Yes, it kept my food from spoiling and it sips DC voltage. But I hated it!
I wasn’t home but a couple hours when the entire left side of the camper was disassembled. I had built the entire interior with no glue and only screws so I could perform this type of modification if needed.
And a trip to Lowes to buy a 3.3 cu ft, 120v residential mini frig.
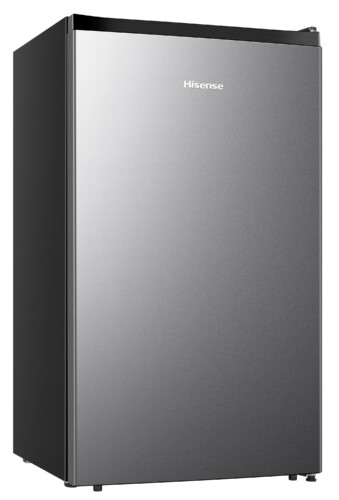
I did this modification in my travel trailer last year with fantastic results. Replacing the Propane refrigerator with a 120v residential refrigerator is a game changer!
This 3.3 CU FT Hisense refrigerator cost under $200 at the time of this post (3/24). Easily runs on a 1000 watt pure sine wave inverter. And use about 2aH to operate once cold. And it takes about 15 minutes to get cold. Unlike a propane refrigerator that can take hours. It does not need to be level like a propane refrigerator which is great when boondocking or parked in a rest stop. And no outside ventilation is needed. All plusses. And should it fail on the road, a quick trip to Lowes or Home Depot and you are back in business for a couple hundred dollars!

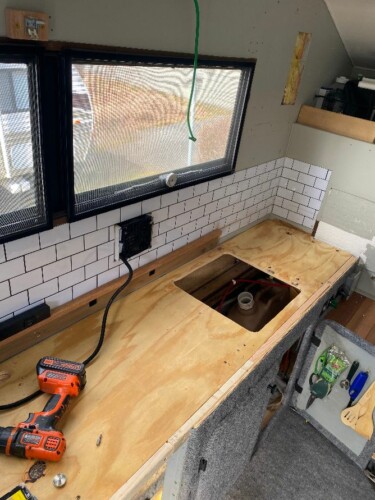
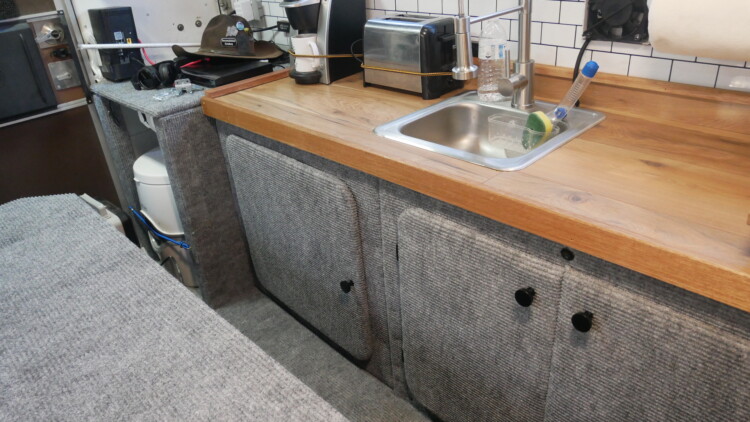
So, the sink was relocated to the center of the counter top and the refrigerator was located up toward the cab to keep the weight centered on the truck

Brackets were fabricated and attached to existing threaded holes under the refrigerator. Same on the rear

The space where the cooler was located was reconfigured with a door.
The Grey Water tank was relocated to accommodate the sink and MUCH more accessible to empty.

While I was at it, the folding portion of the bed was removed and the two sections bonded together. Much easier to gain access to storage below

BEFORE

AFTER
And lastly, the front window of the camper was useless. I had installed a mini blind over this window.

The blind kept getting destroyed when I propped pillows up against it to watch TV or to read. And the little shelf impeded opening the refrigerator door fully.
I removed the blind and shelf and insulated the window behind and covered with 5mm plywood panel. Some kind of graphic or art work with adorn this space…..See more below

Various racks and shelves were 3M VHB (Very High Bond) double sided tape attached to the side of the refrigerator. (FAIL! It appears these little refrigerators remove the heat by sending it to these side panels. This heat undid the VHB tape and the little shelf nearly fell off. I removed it and placed it under the paper towel holder.)

And lastly, lastly….The medicine cabinet was cut down from 16″ wide to 13″ wide to fit on the opposite wall.

So that’s that! Well not quite.
A couple modifications to the rear aluminum storage area. I ordered a second “under truck box” . The existing box will be moved over and a second installed next to it. Storage space is still a bit of a challenge. (See this finished modification below)

I might add a roof mount storage container between the solar panels on top and install a roof access ladder.

Gotta keep busy….Otherwise the old man will get in!
Thanks!
One More Mod! (for now!)
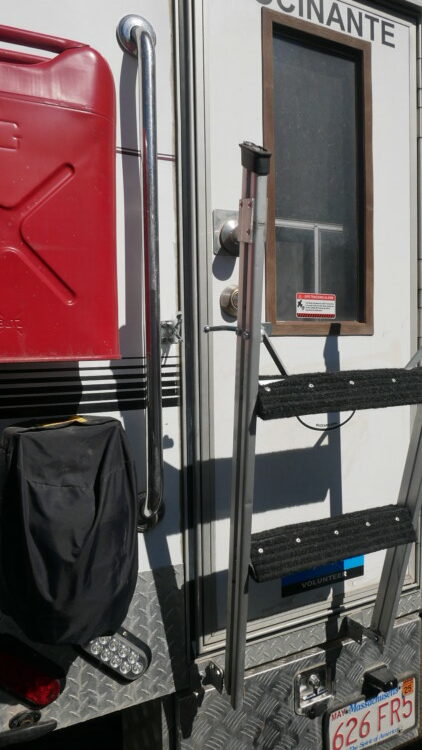
The swing up ladder was held in the up position by a bungee cord….looked hack…so a gate lock was installed. and now using a padlock I can lock it. And when it is down, and the padlock installed, someone can’t put it up and lock me in the camper

Yet More Modifications 4-5-24:
Created a small shelf under the TV for a Sony Blue Ray DVD player…Tied it down with a long wire ties. Now it has a home!


NEXT…added a third 100aH Lithium battery. I just couldn’t resist the sale of a Dr Prepare 100aH Lithium battery with freeze charge protection and (useless) LED voltage read out for $199! The first two I bought were $229 and I thought that was a Smok’n Deal! Now with 300aH of juice, I should be able to go about 5-6 days without sun.

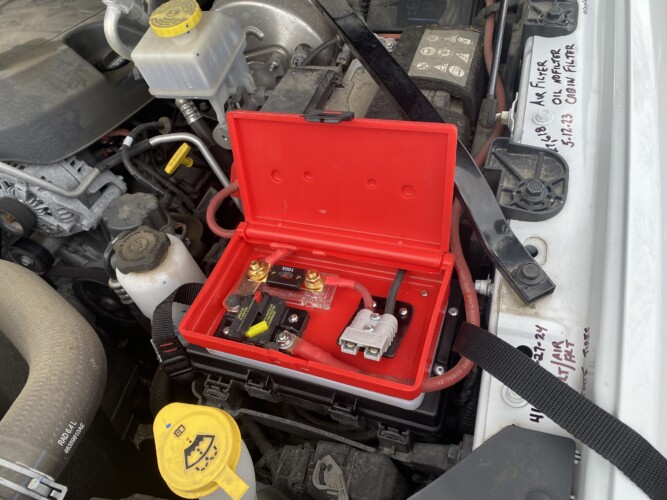
Built a new battery box with a cover

Small waterproof case for extra fuses

And reinstalled my DIY battery heating system to allow charging when temperature is under 32F/0C.
You can read all about this here: https://rvbprecision.com/rv-projects/lithium-battery-heating-project.html

Also added a temperature probe with LED readout to monitor the heat of the inverter. A small on/off switch shuts it down for sleep time. Interesting that I used the 1000watt inverter to run the TV, DVD player, charge my phone and the laptop, run a couple LED lights and power the residential mini refrigerator all at the same time and the inverter was 5 degrees above ambient. (75 degrees F)


A NEW INVERTER. I found a great deal on a better, 1500w inverter to replace the off brand 1000w. I decided to mount it outside of the storage box to give it better ventilation and to keep an eye on it.


Removed the remote panel from the 1000w inverter and installed the new panel for the 1500w inverter.

Much more inverter comparison information available below
ANOTHER TRUCK BOX:
The BIG modification was the reinstall of the rear mounted truck boxes.
Originally I had installed just one box. But that precluded the use of the receiver hitch to tow a motorcycle trailer or a boat.

To rectify this I ordered a second Truck Box and mounted them to either side of the receiver.
Since this camper is made for an 8′ bed and my truck has a 6’6″ bed, the floor of the camper overhangs the rear about 18″
I had simply mounted the boxes directly to the floor of this little topper camper. The floor is a simple 2×2 wood frame with 3/8″ plywood as the deck. I was concerned about the weight of two boxes hanging on such a minimal system.
O went to Harbor Freight and bought an 18″ raw receiver tube. I welded a piece of 2″ square tubing I had in the scrap pile inside it and welded on two angle iron supports for the truck boxes.
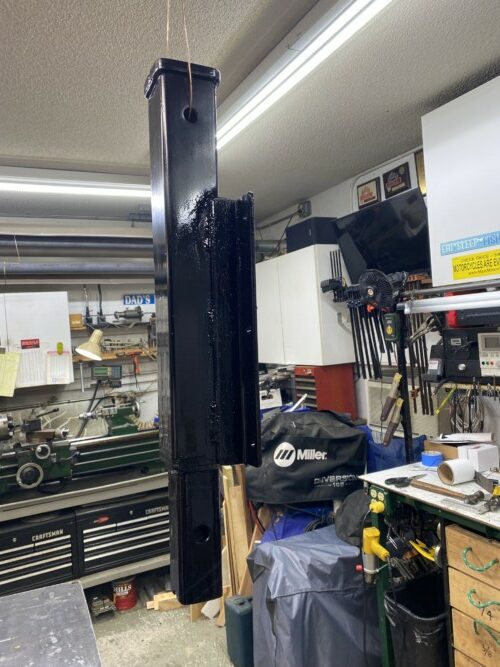
This was installed into the trucks receiver and the boxes bolted to it

The boxes are then tied together at the top, creating a homogeneous structure that is now easily removed by simply removing the receiver pin and sliding the whole thing out.
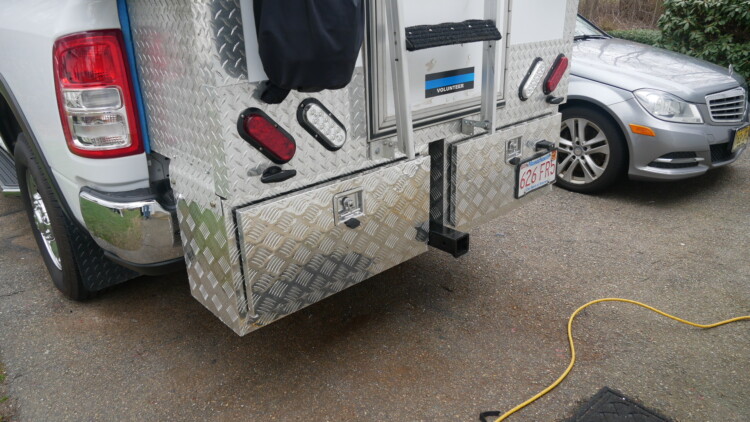

To keep it from rocking and rolling as all hitch mounted devices do, I fabricated a couple end plates and bolted them to the sides. These are not supporting much weight and the removal of four bolts facilitates removing the whole system easily

So now I can tow my 16′ fishing boat or my motorcycle trailer as needed.

WATER HEATER / SHOWER
The only thing really lacking on my cross country trip was the ability to shower. Although I was always able to find showers at truck stops, camp grounds, friends houses…having one as needed would be nice.
Having totally run out of room on the inside of the camper, it would have to go outside.
A large Pelican case was used.

Bolted to the back of the camper
Inside is a propane fired water heater, hoses to connect to the under sink pump inside the camper and the hose to connect to a propane tank

A piece of scrap diamond plate was added. It will be used to mount a “Tire Table”

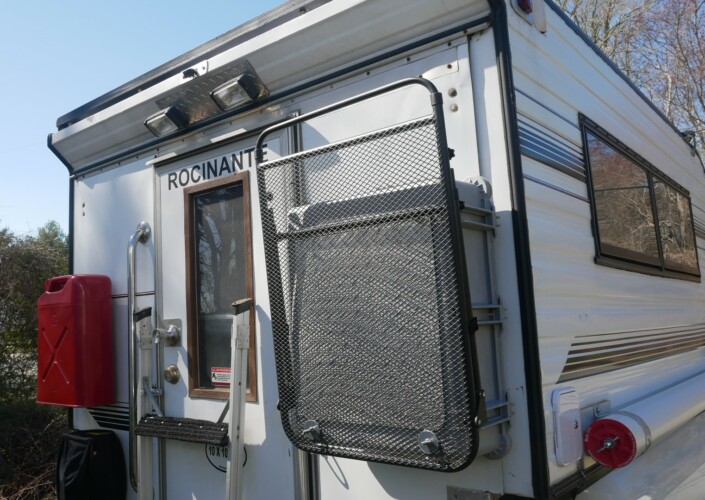
A simple Pop-Up type shower tent will be used for privacy

I use a TIRE MOUNTED table for my propane cooking grill

I needed a place to store and transport it. I attached it to the outdoor shower box with a couple fabricated hooks and wing nuts
I need a place to store a tarp, large umbrella and a flag pole/antenna tower. A piece of PVC pipe and a couple inspection plugs did the trick

AIR CONDITIONING.
Added a portable AC unit. Cut a hole in the side of the camper for the hot exhaust. Got a chance to use it in 90+ temperature and it cooled the camper down to 62 degrees in 30 minutes. Runs off a Honda 2000i generator. It will run off the new inverter but even with 300aH of battery, only for a few hours. Easily removed when not needed.


AIR CONDITIONING UPDATE!
Well, that didn’t work too well. These portable AC units add a tremendous amount of heat into the living space, that needs to be cooled, and adds more heat. Kinda crazy! The units with two exhaust tubes work much better I’m told.
I decided to replace it with a 5000 BTU window unit that I bought at Lowes for $150 (6/24 pricing)


A hole was cut into the rear wall, brackets fabricated and AC unit installed
An aluminum Truck Bed tool box was cut down and installed outside to protect the unit while traveling

The door remains open while in operation

Extra storage above the AC unit
Vents were installed on the bottom and sides as needed

This unit works fantastic in the small camper. Can bring the temperature down to the 60s in 90 degree weather. And sips batteries. With 300aH of Lithium, I can run it for 6-8 hours with batteries ending at 30%. One of the better modifications!
MORE!
Reinstalled the circuit breaker for the DC to DC charger under the truck’s hood and added a 50a Anderson plug for aux service

Gotta have a bit of art!


These are decals that simply would not stay attached to the painted surfaces. Especially in the heat. So I used them as stencils with some black spray paint. Snazzy!
Well, I think that about wraps it up! Can’t think of any more needed modifications at the moment…But we shall see!
Thanks!
The FULL LONG review of this camper build is here. (Click on the picture below)
THE FINAL WALK-AROUND VIDEO…….
INVERTER UPGRADE 4-16-24
Before I left on my three month, 11,000 mile cross country trip, I saw that inverters.com had refurbished inverters on a very deep sale. My camper had a “Power Tech-On” 1000w inverter that I have been using for over 5 years. Works great and zero issues being used in Roof Top Tent installations, to mounted on a tractor for 120v AC in the field to currently in my refurbished truck camper. But Inverters.com had refurbished Krieger 1500w inverters on sale for 139 dollars. Couldn’t pass up the deal so I ordered one. It arrived a couple weeks before I left on my trip. But there was something loose inside and it made a bad humming noise. Inverters.com was great in replacing it, but the replacement did not show up in time for my departure. (BTW, the replacement looks unused. Not a mark on the mounting slots or and marks on the power cables supplied. The remote monitor panel and cable were unopened) So I did the trip with the 1000w inverter. Upon my return home I replaced the 1000w with the Krieger. When using my 750 watt Keurig machine, the 1000w inverter drew 55 amps as shown on the shunt based monitor. Interestingly, the Krieger only draws 35amps in the same application. The Power Tech-On draws 1.5a when idling and the Krieger draws .5a on idle! The 1000w would not allow the coffee machine AND the 750w toaster to operate at the same time. The Krieger does and doesn’t even get warm. For 139 dollars, seems like a fantastic deal.


YET ANOTHER INVERTER!
The Krieger inverter worked great, but being right in the tiny living area, the fan was quite loud whenever I was using more than a few watts from it. I sold it to a friend that was mounting it into a storage space and moved to a different unit.
GIANDEL Pure Sine Wave Power Inverter 1500 Watt

MUCH quieter and excellent performance.
I had to fabricate a trim plate for the remote panel

So far, So Good!
5 comments on “Truck Cap Camper…Modifications are needed!”