
My Pickup Truck has a Roofnest Falcon Roof Top Tent installed above the truck cap. Even though I might be camping far off the beat’n path, I still need access to electricity for charging devices, powering a portable refrigerator/freezer, running a diesel heater, and more.
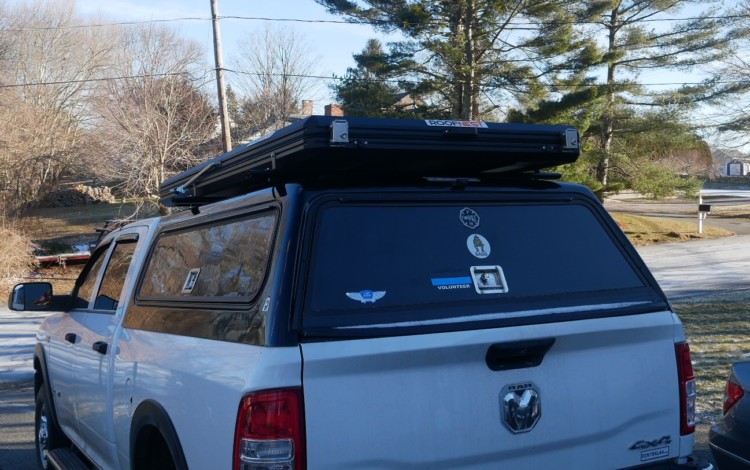
To accomplish this, I added a solar panel to the top of the RTT (Roof Top Tent) and a charge controller to a 100amp hour battery.
Originally this battery was a very heavy (65 pounds!) AGM type battery. Since I sometimes tent camp away from the truck, or use the battery in my fishing boat for the trolling motor, this battery needs to be portable. Hauling a 65# battery through the woods or down the dock is no joke!
Recently I changed the battery to a Lithium with its many inherent advantages:
It weighs under 25 pounds
It charges up much faster once the sun comes out
The voltage stays constant throughout the discharge cycle
Nearly twice as many amp hours as the same size AGM battery
But there is one big disadvantage:
You can’t charge a lithium battery if the battery is at or below freezing…..
I camp a lot in the high desert of New Mexico and Arizona in the winter. During the night it can get down into the 20s and sometimes it can stay below freezing for days at a time. If the battery is frozen, I can discharge it until depleted, but then I can’t recharge it unless I warm it up somehow.
The battery I bought was quite inexpensive

At the time of this writing (11/22) it is around $350.(2024 prices are now well under $200!) This is a huge price drop from a few years ago when a 100ah lithium battery was $1000 or more!
To deal with this freezing issue, lithium battery manufactures are now offering batteries with self heaters built in. But they are near twice what I paid for my Lithium battery. (2024 the price for a heated battery is now only a few dollars more than unheated!)
So how am I going to keep my battery from freezing.
First thing is some type of insulation to store whatever heat the battery might have or is putting out while being used.
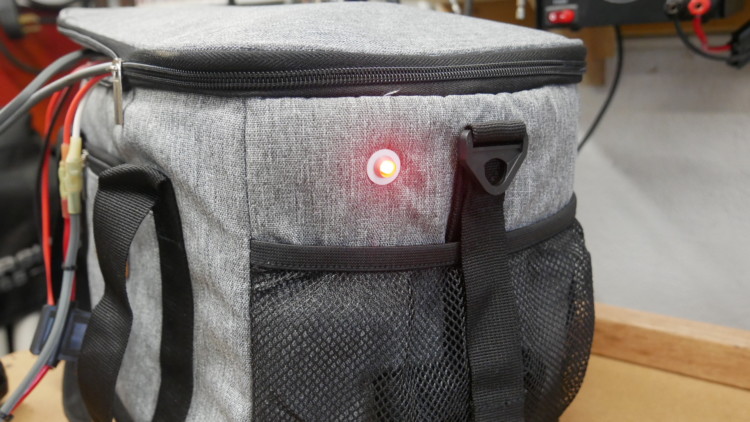
I decided to simply put it in a “cooler” like you’d put food or drinks in. A quick search on Amazon and I found a soft cooler that fits this Group 31 size battery perfectly! And the straps and shoulder strap the cooler is supplied with make transporting the battery a snap!
A MOYAQI Large Soft Side Picnic Cooler

As a heating element I decided to use a RV water tank heating pad. These pads are adhered to the bottom of RV water tanks to keep the water from freezing in cold weather.
The one I chose is made by Falcon (no relation to the RTT)…. #CW-ST725, 7.25″ X 25″… Runs off 12V and draws 78 watts

I didn’t want to adhere it to the battery, so the first thing I did was remove the paper backing

And layed down a layer of aluminum foil to the adhesive

These tank warming pad have a built in thermostat that turns the heater on at 45 degrees F and shut it off once it reaches 68 degrees F…..This delta is much too large for heating a smaller battery to above freezing.
The built in thermostat needed to be found and removed.
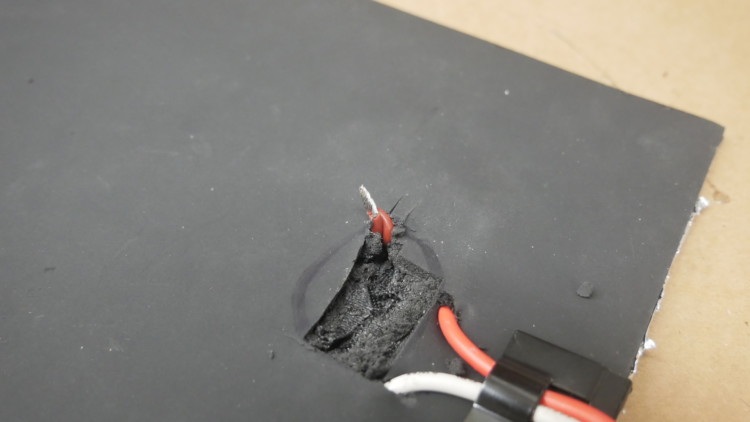
Feeling around on the back side of the pad, where the power wires enter, you will feel a small metal device, about 3/4″ X 1/2″ X 1/4″…..You need to be careful and cut it out with an exacto knife….
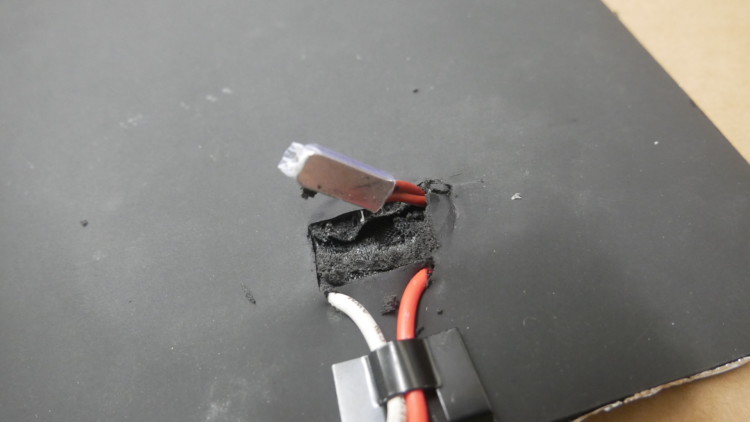
Once you have it exposed, cut the two wires feeding it, solder them together and insulate with some heat shrink tubing and a piece of duct tape.


Now that the pad is modified you can simply place it around the battery that is in the cooler
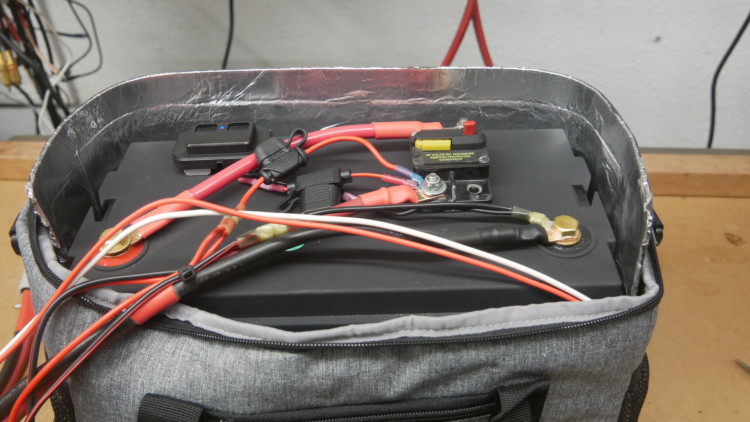
I decided not to put it under the battery. My concern was the battery bouncing around on top of the pad might not be health for the pad in the long run. The 25″ pad I bought covers nearly three sides of the battery. Should supply plenty of heat.
I added an LED light on the side of the cooler to tell at a glance if the heater was on or off
Now because I want the battery to be portable, it get a little bit more complicated.
ANDERSON PowerPole quick disconnect plugs were employed to allow quickly removing the battery from the truck.

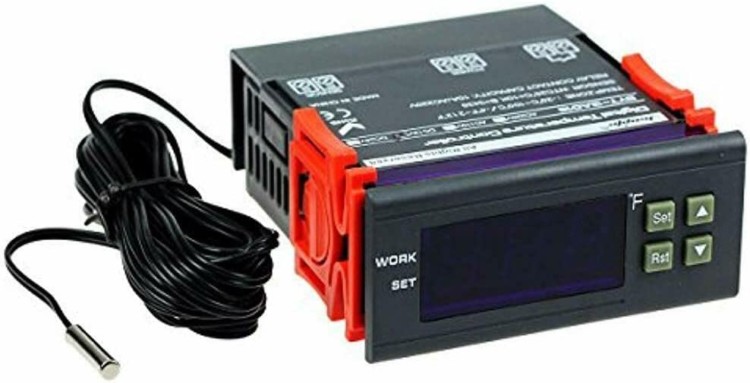
I actually experimented with three Temperature Control Units before I settled on the one I used. The other two were VERY difficult to program and only read in Celsius……Too confusing!
I finally found a very well made, easily programmed and “F” readout
BAYITE DC 12V Fahrenheit Digital Temperature Controller ($18 in todays date 11/22)
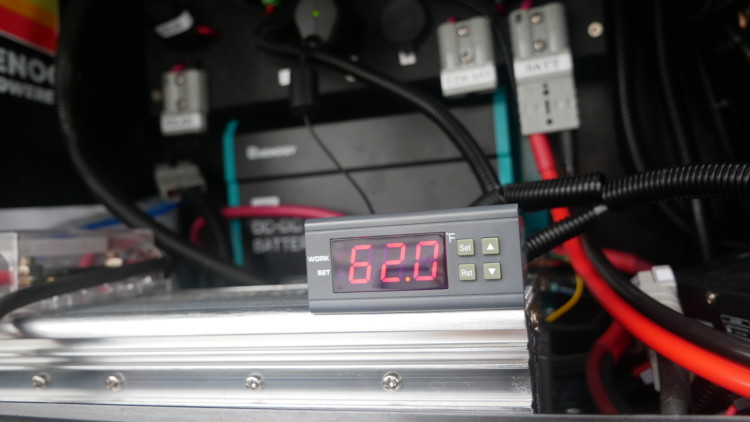
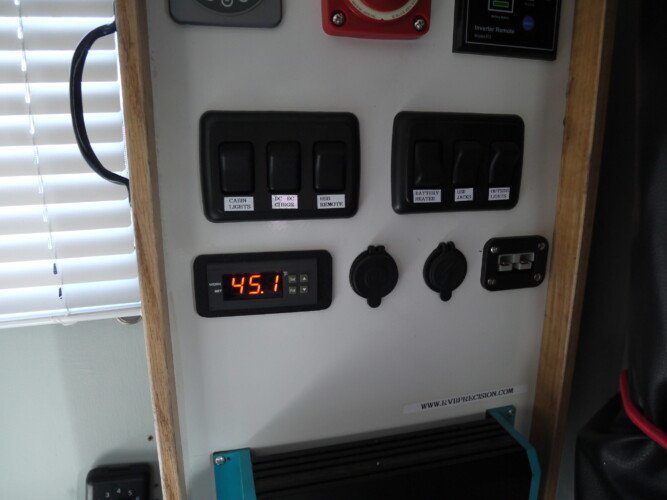
This unit was located in the sidebox of the truck cap where all the other solar and power electronics live.
I set the parameters for the pad to heat up at 35F degrees and to shut off once the battery is at 40F degrees.
This video might explain some of this better than my words can:
Once the controller was installed, and it was just stuck down to the inverter with 3M VHB double sided tape (Very High Bond tape is amazing stuff BTW!), the wires for the temperature sender and the power for the heater pad were snaked down to the battery,

The battery “Cooler” was secured to the bed of the truck with a strap.
Power for the controller simply plugged into one of the jacks in the power panel in the truck cap.

To clarify, on the top of the battery is a small panel with USB connectors to charge devices when away from the truck
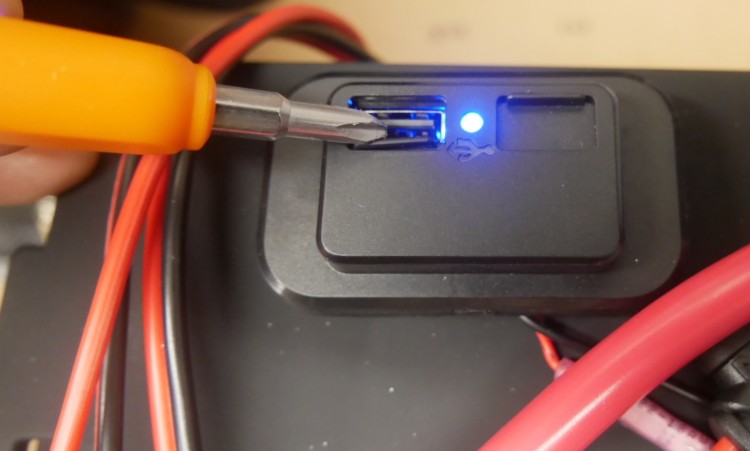
Also a cigarette lighter socket
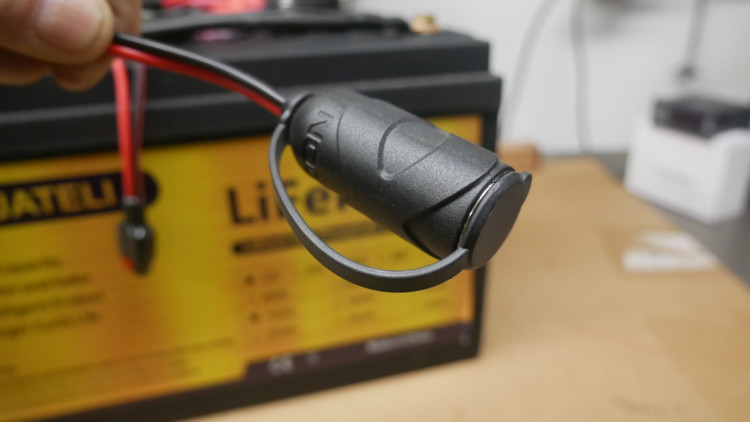
And another Anderson PowerPole plug to attach other devices that use this type of connection

All are fused and there is a 50a circuit breaker to protect the battery and wires of the large Anderson Plug

And we’re done!
Now we just need to wait for it to get cold enough to test …(Actually, I tested it with the temperature sender in a glass of ice water and it worked great!)
Thanks for reading! Be sure to visit the full website to see many more articles on Solar, Camping, RTT, Travel Trailers and way more!
Wiring of BAYITE DC 12V Fahrenheit Digital Temperature Controller

UPDATE!!!…Took advantage of a Black Friday Sale and bought a second matching100w solar panel for the Roof Top Tent……Now 200w of solar to recharge battery faster….
Here are the videos on the battery heater install of both the RTT and the Travel Trailer
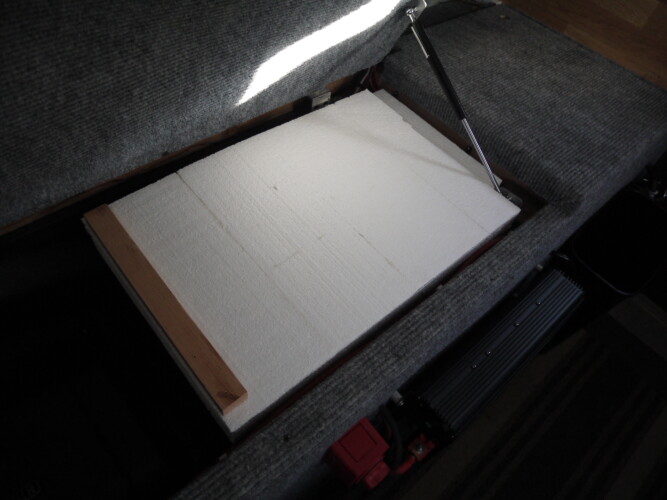
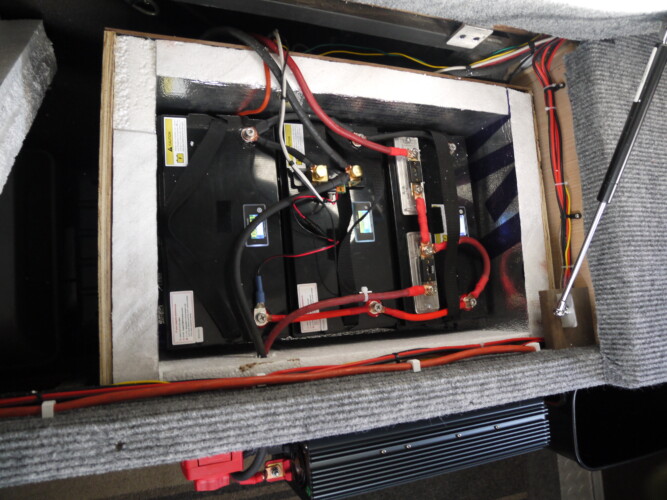
I liked how this system worked so much that I built one for my 20′ Toy Hauler camping trailer.
Two 100aH Lithium batteries in a custom , insulated, aluminum box, outside on the trailer tongue. Batteries have been in there over three winters with no issues. 12 below zero, F and the batteries stayed well above freezing.
And this past year, 2024, I built a truck camper for solo camping excursions. Three Lithium batteries with the same battery heating system

Thanks!
NOTE!
Battery Heater or Low Temperature Protection…Absolutely need low temp protection in an RV installation, or battery heaters. Sun comes up, solar panels start charging, batteries are at below freezing…damaged battery. This scenario happened just about every night in the high desert of New Mexico this past winter. Down in the single digits or teens overnight, in the 50-60s during the day. Water hose froze solid every night. If batteries are mounted outside, and you are not drawing them down sufficiently to cause internal heating, there could be an issue. I built a battery heater system to thwart this issue. Worked great. I’d rather heat the batteries so I can start charging immediately when the sun rises rather than waiting for batteries with low temp protection to heat up so they can then accept a charge. My new Dr Prepare batteries have low temp protection as a failsafe should the heating system fail.
NOTE #2
Some are relying on the internal temperature control of a Solar Charge Controller…..But if the controller is in a heated space, it might be above freezing but the batteries could still be below 32F/0C. Be careful!
22 comments on “LITHIUM BATTERY HEATING PROJECT”