I recently decided to add solar power to my Palomino Bronco truck camper. After a few weeks of research, I decided to go with a pre-packaged system from www.solarblvd.com.
The system consists of a 120wall panel, a controller and a digital readout display.

The total cost at the time of this writing (7-21-13)Â is $288 with free shipping.
The Palomino Bronco is a “pop-up” type pickup truck camper

So this required me to figure out a way to get the power into the electrical cabinet as the roof goes up and down. I went to Lowes and found a couple pieces of PVC pipe that slid inside each other.
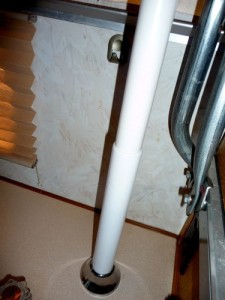
The area directly behind the sink is over the electrical closet.
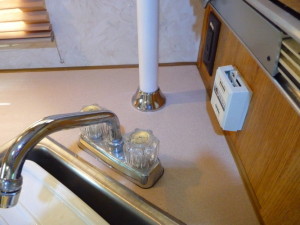
The sliding pipe will extend from the ceiling to this area behind the sink.
I also found a couple of nice chrome fitting to make everything look nice when finished.

The first thing to do was bore a hole in the counter top for the stationary piece of pipe.
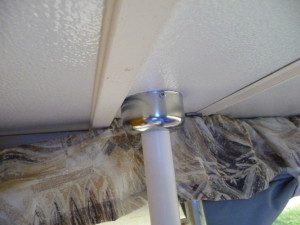
This pipe and the trim ring were glued in place.
For the piece of pipe that will slide into this stationary piece I needed to fabricate something to hold the pipe to the ceiling.
A PVC “pipe cap”, a round piece of plywood and another trim ring and I was in business.
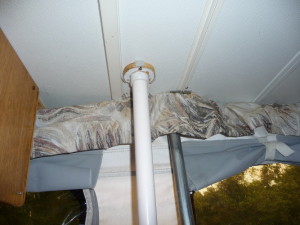
The PVC cap was epoxied into the plywood ring and the whole thing screwed to the ceiling in alignment with the pipe below.
A Â 1/2″ hole was bored through the PVC cap right through the roof. Always gives me the willies to drill a hole in the roof of a camper!
Once the hole was drilled, the trim ring was installed with a couple tiny screws.

With the roof closed, this is what it looks like
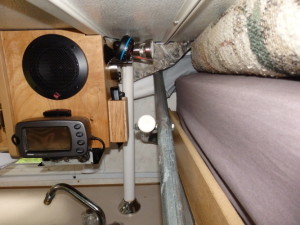
The interior work done it was now time to deal with the panel itself.
The two 10g wires were threaded through the hole in the roof and down into the electric cabinet.
Where the wires entered the roof, I wrapped them with a piece of bicycle inner tube.

I then fabricated a piece of aluminum as a weather cap.
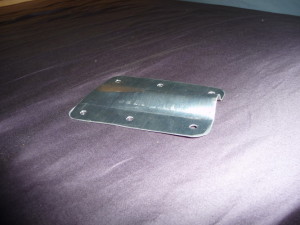
Gooped it all up with 3M 5200 Marine Sealant.
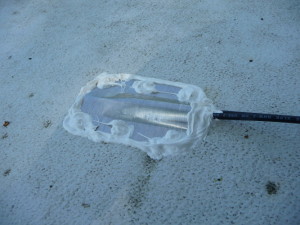
I don’t think THAT will leak!
Now it was time to mount that panel.
I used a couple pieces of 2 X 2 Aluminum angle that I picked up at Lowes. A couple holes drilled into the frame and four bolts with Nylok nuts and we were ready to mount the panel.
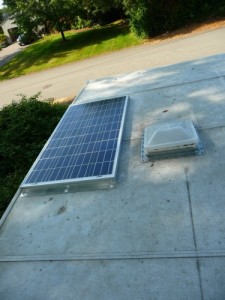
I wanted to leave plenty of air space under the panel to aid in cooling, but I didn’t want the wind to get under the panel from the front so I used a solid piece of angle rather than just a couple of mounting tabs that the kit came with.
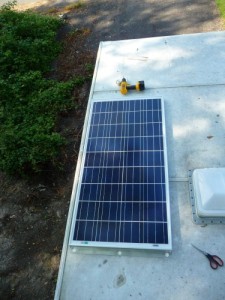
Screw heads all “gooped” up and the three screws sitting in a pad of sealant.
The outside portion of the project is finished!
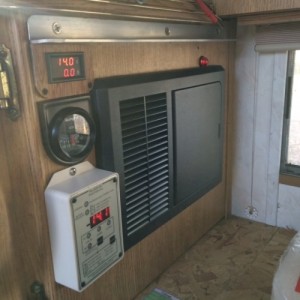
Back inside to mount the controller and the digital display.
I had previously mounted an aux fuse panel to the door under the sink. This left just enough real estate for the controller below.
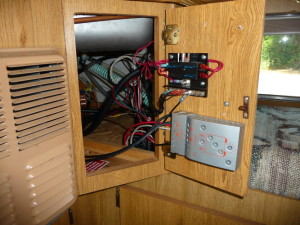
And the digital read out panel found a home next to the battery charger and my volt meter and cigarette lighter socket.
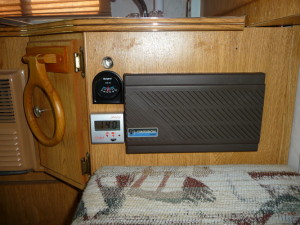
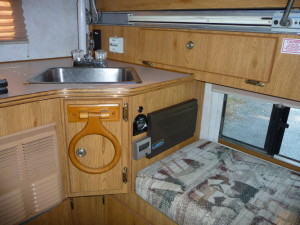
The single Group 31 battery resides under this seat. A very short run for the charge controller to the battery.
So now to try it in real world conditions next week in New Hampshire……
Hope you enjoyed this little article….Questions or comments… rvb100@comcast.net
THANKS!
UPDATE Â MAY 15,2014
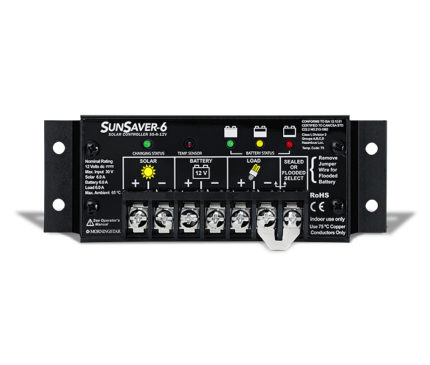
The solar controller I was using showed quite a bit of loss from the panel. I bit the bullet and spent the money on a Morningstar Sunsaver 20L controller.
This unit gets rave reviews from most folks in the solar community.
http://www.morningstarcorp.com/products/sunsaver-gen-3/
I added a TRIMETRIC TM2025-RV / TM2025-A BATTERY MONITOR. This thing is quite amazing. It analysis your current battery state and the current flowing into the batter and out. Real fun to play with if you like this type of thing. If you don’t know how to use the timer on your microwave, you might want to avoid this device. It can be a little complicated with all the functions it has.
http://www.aasolar.co.nz/Bogart%20Battery%20Monitors.html
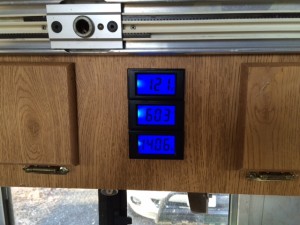
And I added three LED gauges to read AC Voltage, AC Frequency and DC Voltage.
Now all I need to do is get the camper out from under the trees to see if all this stuff works!
UPDATE !!! Â 6-1-15 Â Â My SOLAR EXPERIENCE SO FAR….
Three day weekend camping trip first week of June 2015…….Southern New Hampshire
1998 Palomino Bronco Truck Camper
All interior lights replaced with LED
120w Solar Panel..Paid $149 last summer (Sorry, can’t remember brand)
Morningstar SS-20L-12V SunSaver 20 Amp Charge Controller
12V /size 27 deep cycle wet battery bought at Walmart early last summer
Three day weekend camping trip …….Southern New Hampshire….on the edge of field , in shadows at 5pm…..First day sunny, second day overcast all day, third day sunny….DaytimeTemp 70,80,70….Evenings 38, 45, 43
Electricity Use:
One LED reading light every night for two hours
One LED overhead light for an hour in AM
Refrigerator on Propane at all times with two 4″ box fans running constantly
LapTop running off 1000w inverter to play a movie first and second night (3hrs each viewing) and then to charge laptop….left plugged in all night
CO2 / Gas detectors
Set Up:
10g wire, 10 feet from solar panel to controller
10g wire, 3′ from controller to battery
Bogart Trimetric battery monitor
As I left my house, Trimetric was showing battery at 100% charge with 13.8V
first night the heater ran every 15 minutes to keep camper at 65 degrees. Watched movie, read a bit……in morning, Trimetric showed battery at 72%
Left camper at 8am, returned at noon and battery was at 100%
Second night, repeat of first night…..In morning battery showed 78%……..Left at 8am and returned at noon to see battery at 97%…..returned at 4pm and battery was at 100% (Cloudy Day)
Third night, no movie…..read for 20 minutes….early to bed…Heater every 20- minutes or so.
In morning, Trimetric reported battery at 80%……By noon it was back to 100%
Never started the generator all weekend! Eveyone else at the event was running generators 3 hours in AM and 2-3 hours at night.
THREE DAY WEEKEND IN NORTHERN VERMONT Â 3rd week of May 2015
Nearly exact same results as in New Hampshire, but much colder at night. Furnace running every ten minutes one night that got down to 28 degrees for a few hours. Partly cloudy during the day but the batteries were 100% by early afternoon. Â Never started the generator again….. Love it!
I can’t tell you how pleased I am with my system….I never expected a single battery and a single 120w panel to work this well……….I’m a solar believer!
UPDATE..8-1-15….I Sold this truck camper and moved on to a Forest River Cherokee 19RR Toy Hauler trailer. Lots more room, a REAL shower and more roof space for a larger solar system. Be sure to read all about that installation here on this web site.

15 comments on “SOLAR PANEL INSTALLATION ON A PALAMINO BRONCO TRUCK CAMPER”