
I simply can’t stop loving me some old rifles! I always wanted a Civil War era Sharps Carbine in 50-70. But the price for a good example was always out of reach.

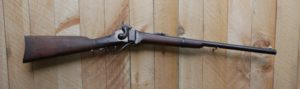
A few weeks ago a fellow on one of the forums I frequent was looking to sell a 1859 Sharps Carbine and was looking for advise on pricing it. I suggested that a rifle in the condition his pictures showed might sell for over $2000. I was planning on buying a reproduction and made an offer that I could afford. Hoping I didn’t insult the seller. As it turned out, he wanted the rifle in a good home and accepted my offer! I added another $50 to the check so he could insure the heck out of it when he shipped it.
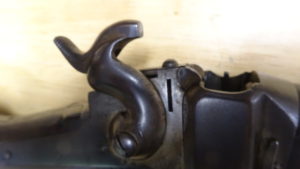
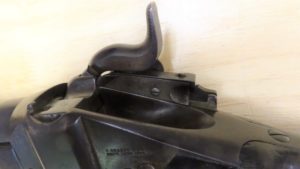
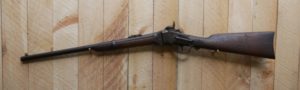
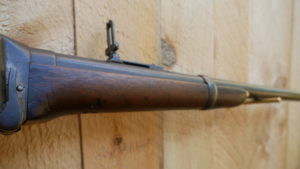
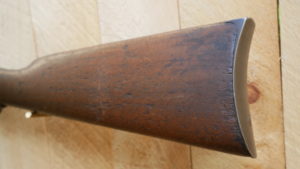
When it arrived is was ten times better than I expected. A VERY nice example of a Sharps paper cartridge rifle that had been converted to metallic cartridge. Everything but the bore was in fantastic condition.
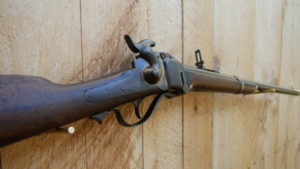
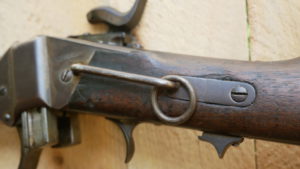
This rifle also had the Lawrence Pellet Primer system installed. A very interesting device to allow a stack of primers to automatically load onto the nipple. Increasing rate of fire dramatically. Do a Google search to learn more about this amazing system
Here is a GREAT video on the Lawrence Priming System by our friend over on YouTube “Cap and Ball”…
https://www.youtube.com/watch?v=Fe6PWIMoHD8
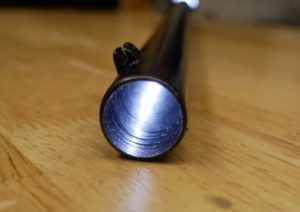
The bore was totally “smooth bore”. Not a trace of rifling. And the chamber and rim diameter was larger than a 50-70 cartridge. Strang…. Upon further measurments, it was fount that this rife, somewhere in its 160 years, had been converted to a 28g shotgun!! A 28G shotgun shell fit perfectly. A 50-70 bullet of .515 diameter would fall straight through the bore which measured somewhere around .550″ which is the 28G standard bore diameter.
A few folks on various “Old Gun” forums suggested that I might have a very valuable “Fowler”. These were given to certain regiments out west after the Civil War to hunt for birds to feed the troops. But since the 28g shotgun round was introduced by Parker in 1903, that puts this rifle clearly out of the running of being a Fowler.
So….Time to get it back in 50-70 shooting form!
The 50-70, sometimes referred to as “The Big Fifty” is a great old BIG cartridge.
Here it is next to a 22RF for comparison
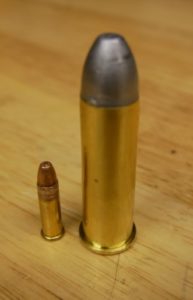
I will be shooting black powder loads of 70 grains black powder under a 425 grain lead bullet. Here it is next to a 50g / 223 bullet for comparison

I’ve not owned a 50-70 but I’ve had the pleasure of shooting other rifles in this caliber. Rainbow trajectory and a whole lot of fun to ring steel at 200 and 300 yds!
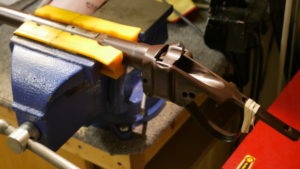
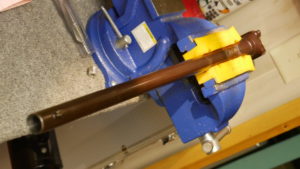
Barrel removal was the first order of business. And to accomplish this the entire rifle needed to be disassembled. The Sharps rifle is easily one of the most convenient firearms to disassemble.
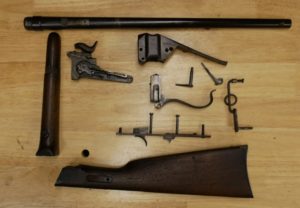
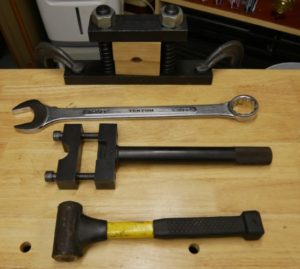
Barrel vise, BFW, Action Wrench and BFH will get it done!
This always scares me with these old guns. What if the barrel is really on tight and I crack or bend the action trying to remove it.
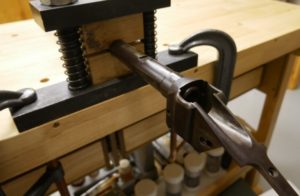
As it turned out, a simple tug on the action wrench and the action unscrewed without drama.
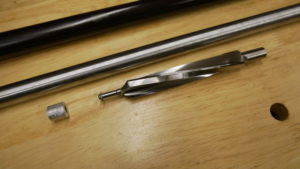
I had ordered a piloted drill from PTG (Pacific Tool and Grinding)Â to ream out the existing bore to accommodate the TJ barrel iner that I received from Track Of The Wolf. I was informed by PTG that the piloted drill might e 6-8 weeks out. Five days later I got an email that it was on its way! Fantastic!
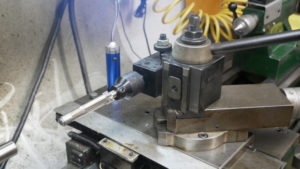
I had to turn a special pilot to fit this shotgun bore.
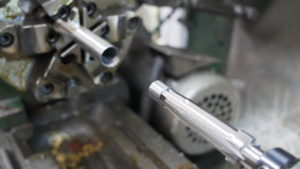
Out to the shop and fire up the lathe. Back gear, 70RPM, 1/8″ cut at a time…..This means 176 times I needed to oil the cutter, insert into barrel, cut 1/8″, remove drill, clean of chips, blow out chips in barrel, repeat…..176 TIMES! (At times I’d give my left leg for a high pressure cutting lube system on this lathe!)
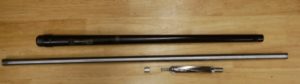
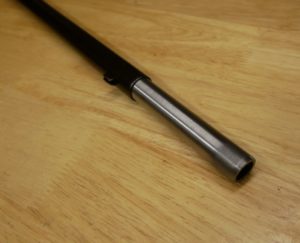
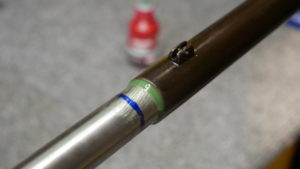
But the rebore came out great!
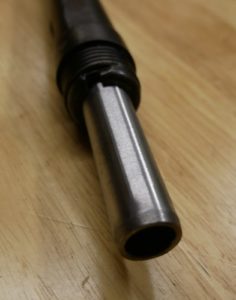
The liner fits perfectly
Next step is to chamber the liner and glue it in with Loctite 620. A chamber reamer has been sourced through ReamerRentals and should be here in a couple days.
Some info on LocTite 620
LOCTITE 620

Retaining Compound – high strength. High temperature resistance.
LOCTITE® 620 is designed for the bonding of cylindrical fitting parts. The product cures when confined in the absence of air between close-fitting metal surfaces and prevents loosening and leakage due to shock and vibration. Typical applications include locating pins in radiator assemblies, sleeves in pump housings and bearings in auto transmissions. Particularly suitable for applications where temperature resistance up to 200°C is required.
Your Benefits
- High temperature resistance
- Ideal for retaining pins in radiator assemblies, sleeves in pump housings and bearings in auto transmissions
- DVGW approval (EN 751-1): NG-5146AR0622
Stay tuned for more………
Be sure to check out other Old Gun restorations on my web site…..  http://www.rvbprecision.com
CONTINUED! 6-4-18
While I was away playing Cowboy, shooting at the three day SASS match, “HellFire At Barristers Junction” in Harvard MA, my 50-70 Reamer from Reamer Rentals and my 620 Loctite from Amazon came in. (BTW…Came in second in my class for the match, Made the top 16 shooters to get myself into the team shootoffs and won the long range lever rifle side match with 5 shots on target in 17 seconds using my Winchester 94 in 38-55! I had a pretty good three day weekend!)
Anyways, back to the subject at hand.
I like to chamber the liner before I bond it to the rifles barrel. In this way, I can simple insert a cartridge into the liner (using PAM cooking spray as a release agent) and slide the liner into the barrel until it hits the breech block….PERFECT headspace!
Liner set up in the lather and reaner at the ready!
As you can see, I’m using my cross slide to chamber this liner rather than the usual method of using the tailstock. Just after I had finished boring out the old barrel liner, the threads in the tailstock totally stripped out. Having the patience of a 5 year old, I couldn’t wait to get this rifle back together. And I need to get the rented reamer back to Reamer Rentals in three days. So cross slide reaming it is! Fortunately I have a tool holder with a Morse taper so I can use the floating reamer holder. Lining everything up too a little bit of work as the reaner holder needs to be perfectly lined up with the liner otherwise you’d be cutting a very oversized chamber.
That done, chambering went very smoothly.
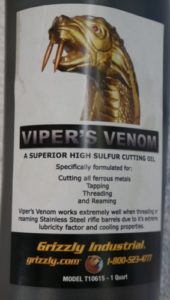
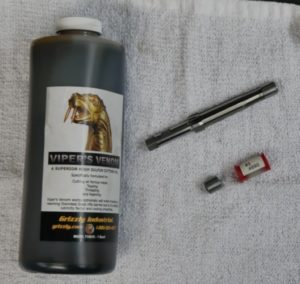
I use “Viper’s Venom” cutting oil from Grizzly Industrial. Fantastic stuff! I used to use a SHELL High Sulphur cutting oil, but I’ve not been able to buy it in 20 years. Some EPA issue has made it Unobtainium. But this Viper’s Venom is just as good in my experience. And I’ve tried dozens of substitutes! (And I like the name…Viper’s Venom!)
The reamer came with two pilots…. .499″ and .500″…The .500″ pilot was the best fit in this liner. As usual, the reamer was perfect! I’ve used Reamer Rentals many times and have NEVER been disappointed……Great folks to work with.
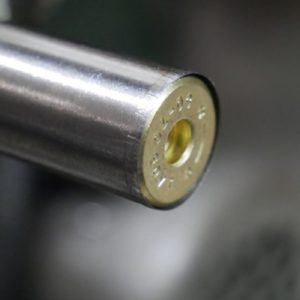
The rim or the 50-70 brass is nearly the same diameter as the liner. Once the liner was chambered there remained a paper thin edge on the chamber end. I decided to remove it completely as I was afraid it would be bent upon chambering a round at some future date. In fact, just touching it with my fingernail caused it to bend.
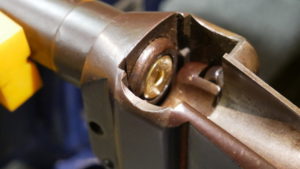
With all that done, THE MOMENT OF TRUTH! Inserting the liner in the barrel.
Action reattached to the barrel…..CHECK!
Breech-block installed to set headspace….. CHECK!
Receiver and barrel in vise…..CHECK!
Liner and barrel degreased with Acetone….. CHECK!
LocTite 620 lightly coated on barrel with plumbers brush…..CHECK!
(Sorry, no picture…Have to work relatively fast with this stuff……)

Insert 50-70 case into chamber after coating with “release agent”. Quickly slide liner into bore from muzzle end using a twisting motion. Keep pushing and turning until the case head hits breech block……
(As you can see, very little LocTite came oozing out of the barrel. This means the slip fit was good and I will have very good adhesion.)
Check headspace….
PERFECTO!!!!!
Next, after the LocTite dries, I need to cut the remainder of the liner off, clean up the muzzle. Do a little welding on the extractor so it reaches the rim of the 50-70 case.
Put the rifle back together and go fire it!
(I’ll be chambering a piece of the liner that I cut off to be used as a “cartridge check gauge” during reloading.)
Stay tuned for a Range Report!
RANGE REPORT!
Loaded up a few rounds and went to the range…..
70g Shockey Black Gold FFG powder / .060″ Vegetable Fiber wad
CCI Large Rifle Magnum primer
LEE mold DC515 – 450FÂ Â https://leeprecision.com/mold-dc-515-450f.html
Using 1-20 Alloy, my bullets dropped at 425g and .515″……Not sure why the large disparity in weight….
I sized them using a LEE sizing die to .510″Â Â https://leeprecision.com/new-lube-size-kit-.510.html
Pan lubed using SPG lube https://www.buffaloarms.com/reloading-supplies-accessories/cast-bullet-lubes/spg-1-2-pound-block-spg12
The TJ liner has the following specs:
BORE = .500″Â Â Â GROOVE=.510″Â Â Â 1-20 TWISTÂ Â Â 6 Lands
I thought I’d have to open up the LEE sizing die or order a custom made one as I usually like the lead bullet to be a few thousands over groove diameter.
But the proof is in the pudding!
50 yards, bench rested, 5 shot group:
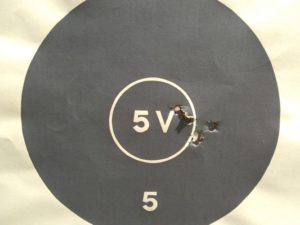
50 yards, off hand, 5 shot group:

I thing we got us a shooter here!
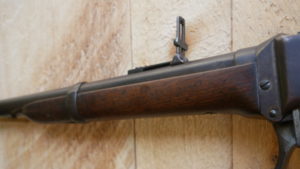
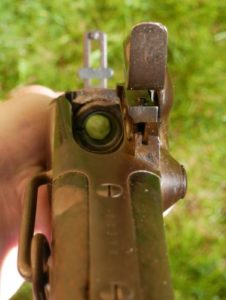
I hadn’t noticed that there was a witness mark on the barrel behind the rear sight. I drifted the sight to align with this mark and the windage was spot on for the final shots after these two groups were fired.
Next we will take it out to 100, 200 and 300 yds……
Here are a few more pictures for your viewing pleasure!
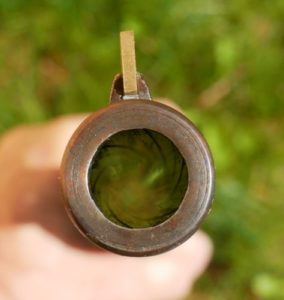
Bore BEFORE…..
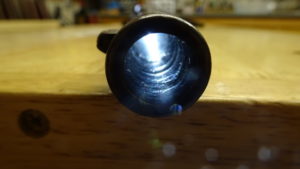
And AFTER…
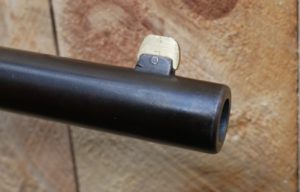
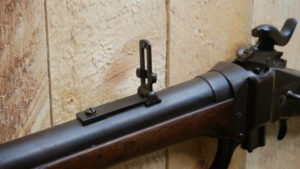
Front sight made from a brass key…
5 comments on “Oops! I Did It Again! (1859 Sharps barrel liner)”