I’m into this whole Cowboy Action Shooting sport in a big way. The first rifle I bought for the rifle stage was a Uberti 1873 Winchester in 45LC.

If you don’t know what CAS (Cowbot Action Shooting) is, you need to check it out. Where else do you get to dress up like a cowboy and say things like “ain’t” and “gonna” and shoot guns……and not have to sing “YMCA” with the Village People!
The object of the game is to “go fast”. At some point in your performance you might want to SHORT STROKE your lever action rifle. This will shorten the stroke of the lever by about 2″ there by allowing you to cycle the action faster. This article will show you in pictures how to add the parts and fit them to Short Stroke your Winchester/ Uberti 1866 rifle.
As you get REALLY involved in the sport, “Leveritis” sets in. It is a terrible disease where you start buying lever-action rifles like crazy! When I started I didn’t own a lever-action rifle. Now I’m embarrassed to admit how many I have.
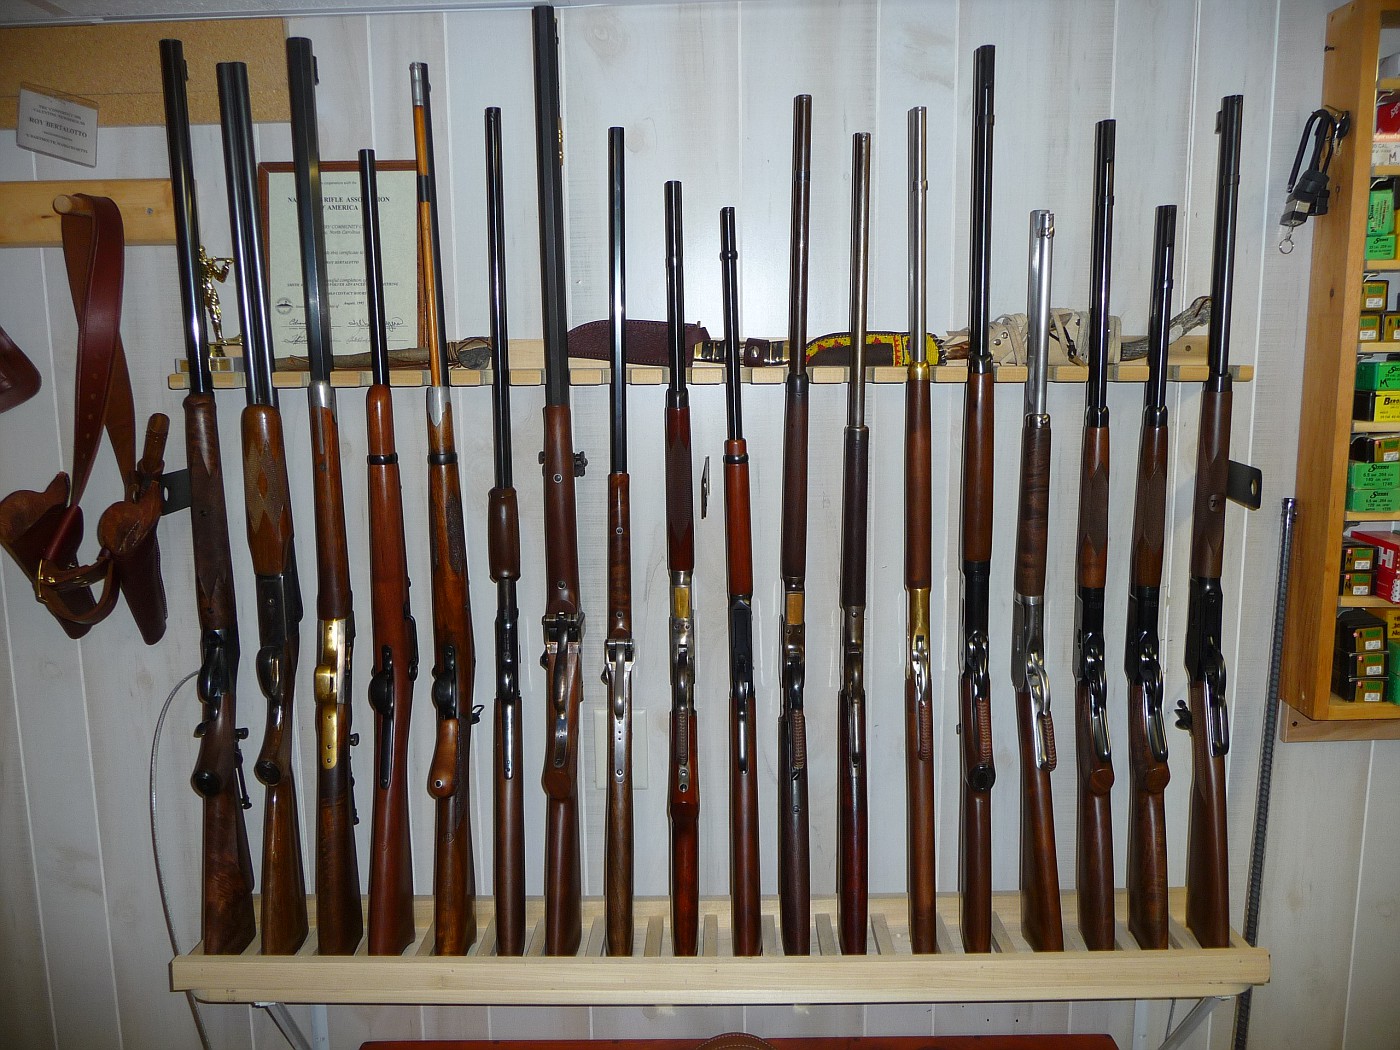
One of the more fun aspects of this sport is moving into “Black Powder Cartridge” firearms. The “BOOM” and the smoke is addictive. But the 45LC is not a very good cartridge for black powder shooting. The brass cases are hard and thick. They don’t expand properly at CAS (Cowboy Action Shooting) pressures to seal the chamber and thereby allow an awful lot of nasty blow-by to get into your actions.
The 38-40 and 44-40 are perfect for this BPC (Black Powder Cartridge) game. The brass is very thin and being a bottle neck cartridge, they tend to seal the bore much better. And they were both BPC back in the day.
So the search was on for a rifle in either 38-40 or 44-40. I happened to stumble upon a beautiful vintage Winchester 1873 made in 1884. It was in 38-40 so that settled the decision as to what cartridge I’d be moving into for BPC.

The bore was toast on this rifle so I taught myself how to bore out the barrel and reline, staying with 38-40. You can read all about it on this web site.
1873 Winchester “Bring It Back From The Dead!â€
http://rvbprecision.com/shooting/1873-winchester.html
And I also added a fantastic Marlin 1889 to the stable a few weeks ago……..in 38-40 (Leveritis!!!!)

These “Vintage” rifles are better than Money In The Bank. If you buy them right you will always see a substantial return when you sell them.
So now I’m a 38-40 fan……Big mistake! Finding modern, serviceable firearms in 38-40 is extremely difficult. I actually had to convert a set of 45LC revolvers to 38-40 as they are just about impossible to find in that cartridge up here in The Peoples Republic of Massachusetts unless you are talking $3000 Colt originals! If I had to do it over again, I’d go with 44-40 as firearms, brass, loading info is very easy to find. The 44-40 is the “GoTo” BPC for CAS.
But, I’m committed to the 38-40 so the search starts for a Uberti 1866 in 38-40. The Uberti reproductions in 1860, 1866 and 1873 models are simply the best “Go Fast” rifles for CAS. Extremely well built. Excellent workmanship.
Sure, folks win with Marlins, Henry Rifle Co, Cimmeron etc. But for someone starting out or a seasoned pro, the Uberti will give you a slight edge. And they will last a whole bunch of seasons.
I wanted an 1866 “Golden Boy” in 38-40……….Good luck finding one either new or used. But being patient, one showed up on one of the CAS forums and I was lucky enough to see it and grab it only 11 minutes after the classified ad was posted! And the asking price was very reasonable. Score!
I received it in short order and it is beautiful!

But now I needed it to “Go Fast”.
An order was placed with Pioneer Gun Works   http://shop.pioneergunworks.com   for a “Super” Short Stroke Kit and that snazzy leather butt cover you see in the picture above. I have no idea what the “Super” kit offers over the standard kit, but being “Super” it MUST be better!
The parts arrived in just a few days. Great service from “Will Shootem” over there at Pioneer. These are the same parts I used to short stroke my Uberti 1873 a few months ago.
So, with parts in hand, away we go……..But first, lets talk about gunsmithing tools.
If this is what you use to work on your firearms……
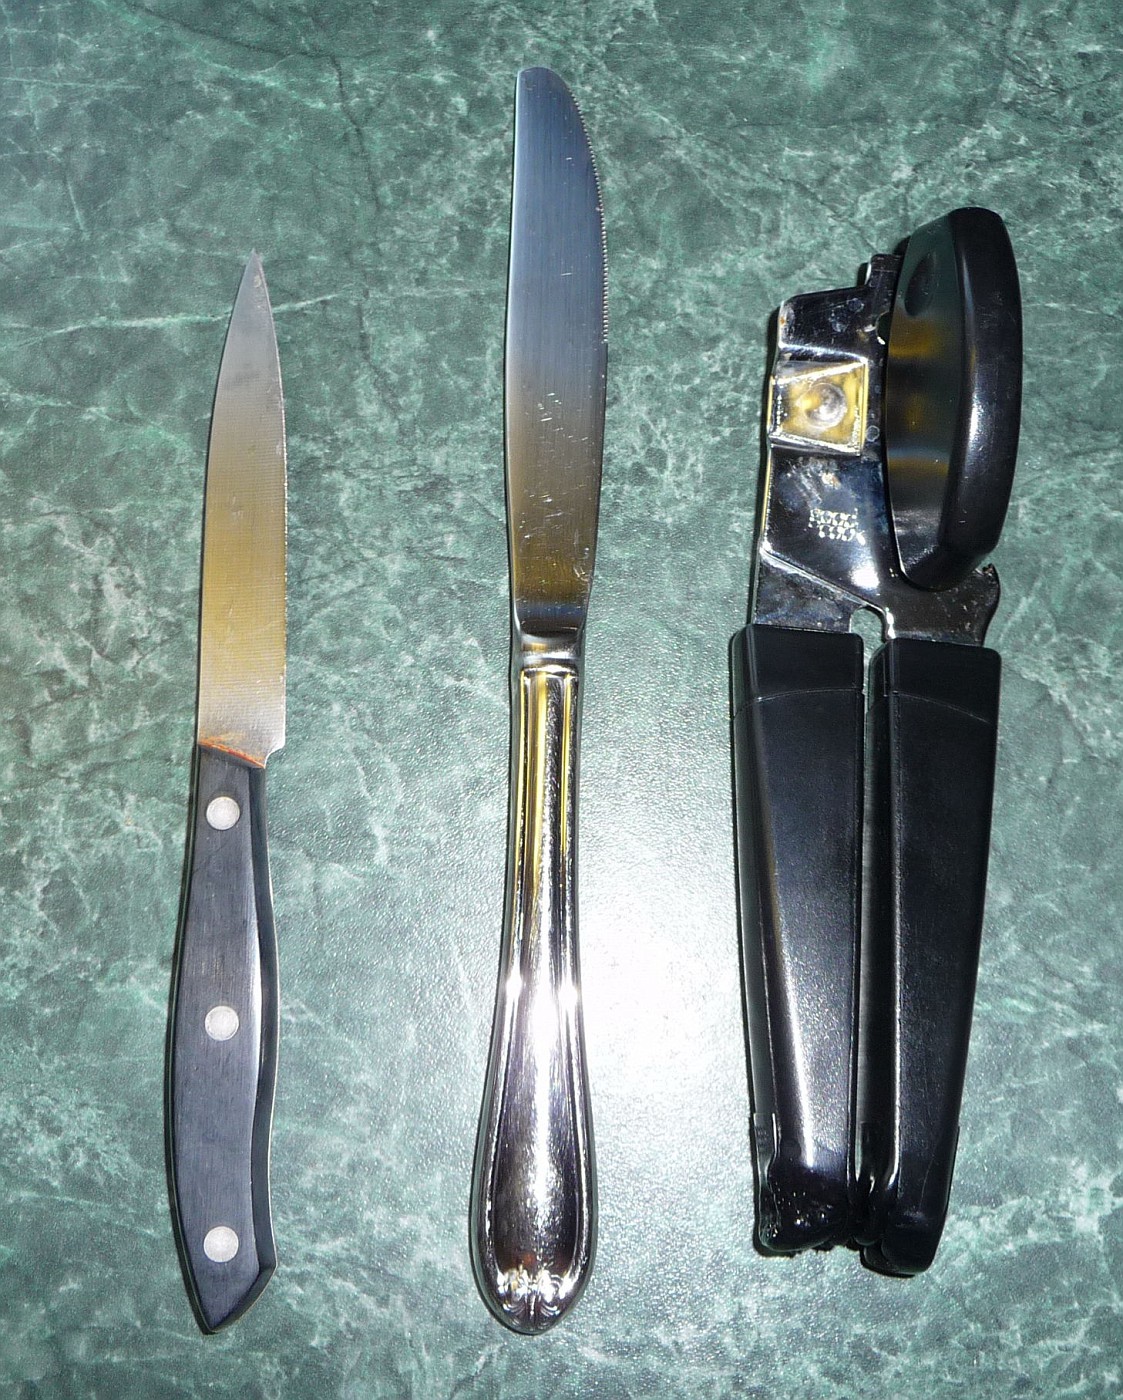
STEP AWAY FROM THE BENCH….KEEP YOUR HANDS WHERE I CAN SEE THEM!……You are NOT a gunsmith!
A bit of a rant here….I’m really sick and tired of buying used firearms that “Kitchen Gunsmiths” have worked on using K-Mart screw drivers or worse! Please, won’t you help me save poor defenseless screw heads all over America!
Here is what you need to do this job:
A good set of “CENTER GROUND” screw drivers (do a search!) THAT FIT THE SCREWS ON YOUR FIREARM!!!. A nice sharp file and some lube. (BTW, I’m a big fan of RIG grease and this new Frog Lube stuff)
OK, so now that we got that out of the way………lets move on!
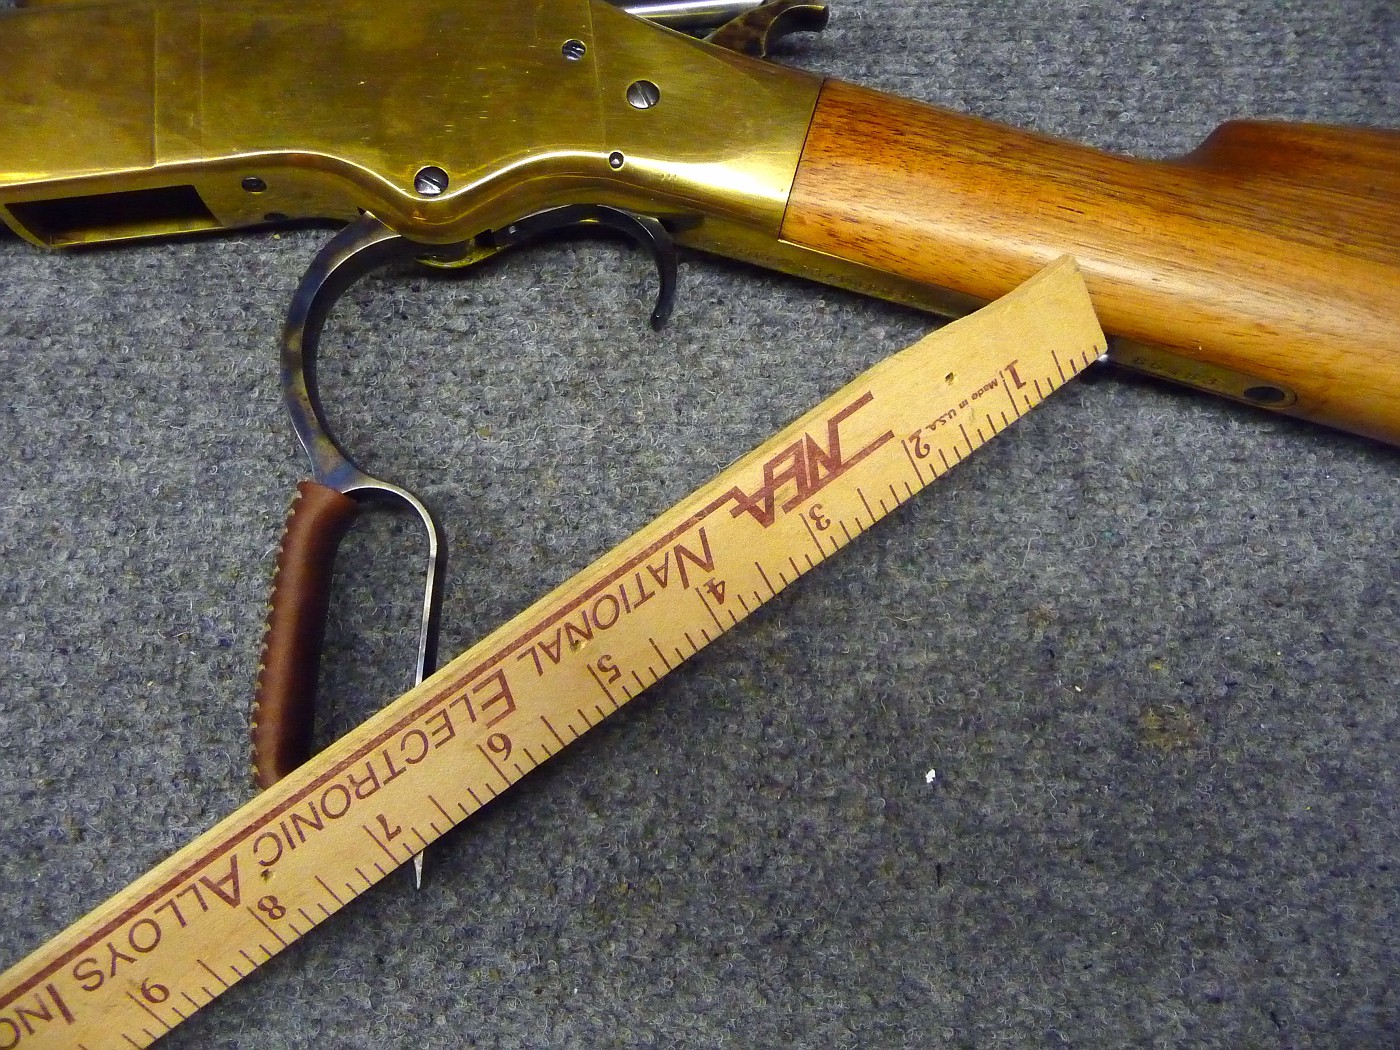
Here’s where we are starting. Lever stroke of 7″ measured from the lever lock to the end of the lever.
First I’m going to remove the stock. You don’t need to do this to install the kit, but I just want it out of harms way.
Remove the wood screw from the bottom of the tang extension:
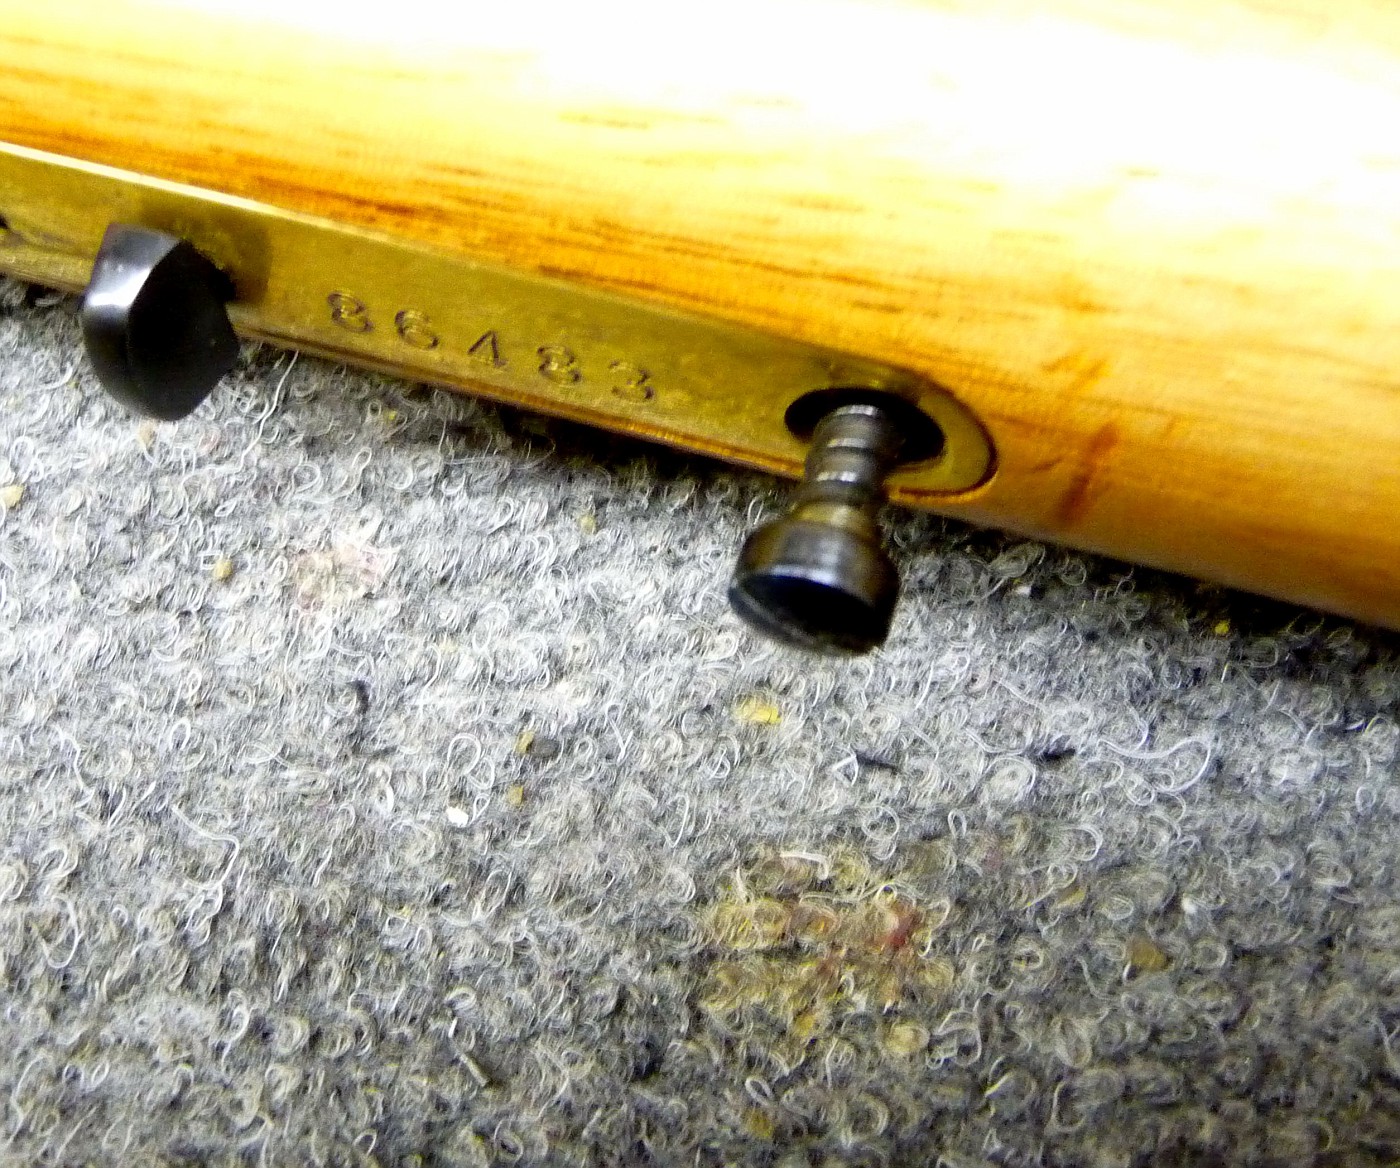
And the through bolt from the top tang:

Pull the stock to the rear and separate it from the receiver:
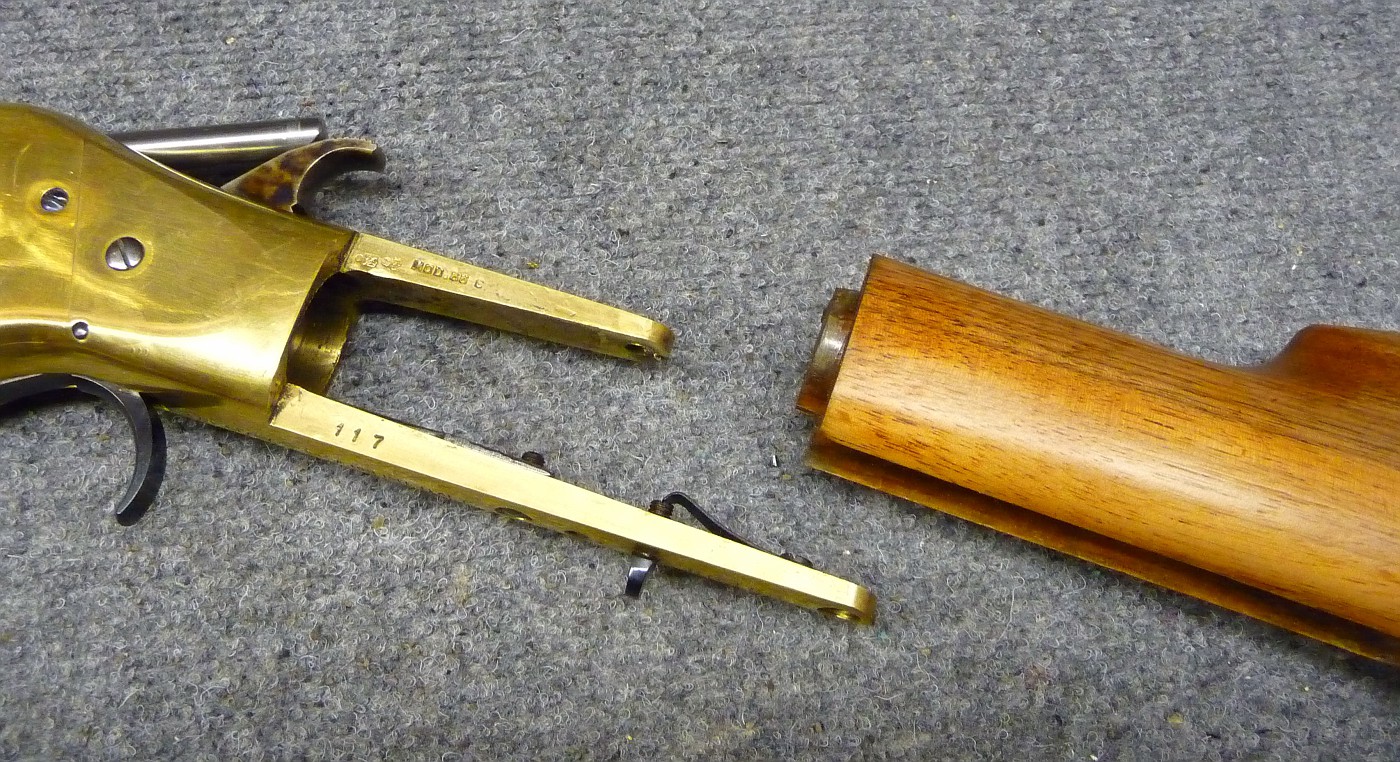
As you can see, this 1866 still has the “Lever Lock” in place. I’m going to remove it. I don’t think this rifle will be finding its way into a scabbard on a horse any time soon where you would need to lock the lever down.
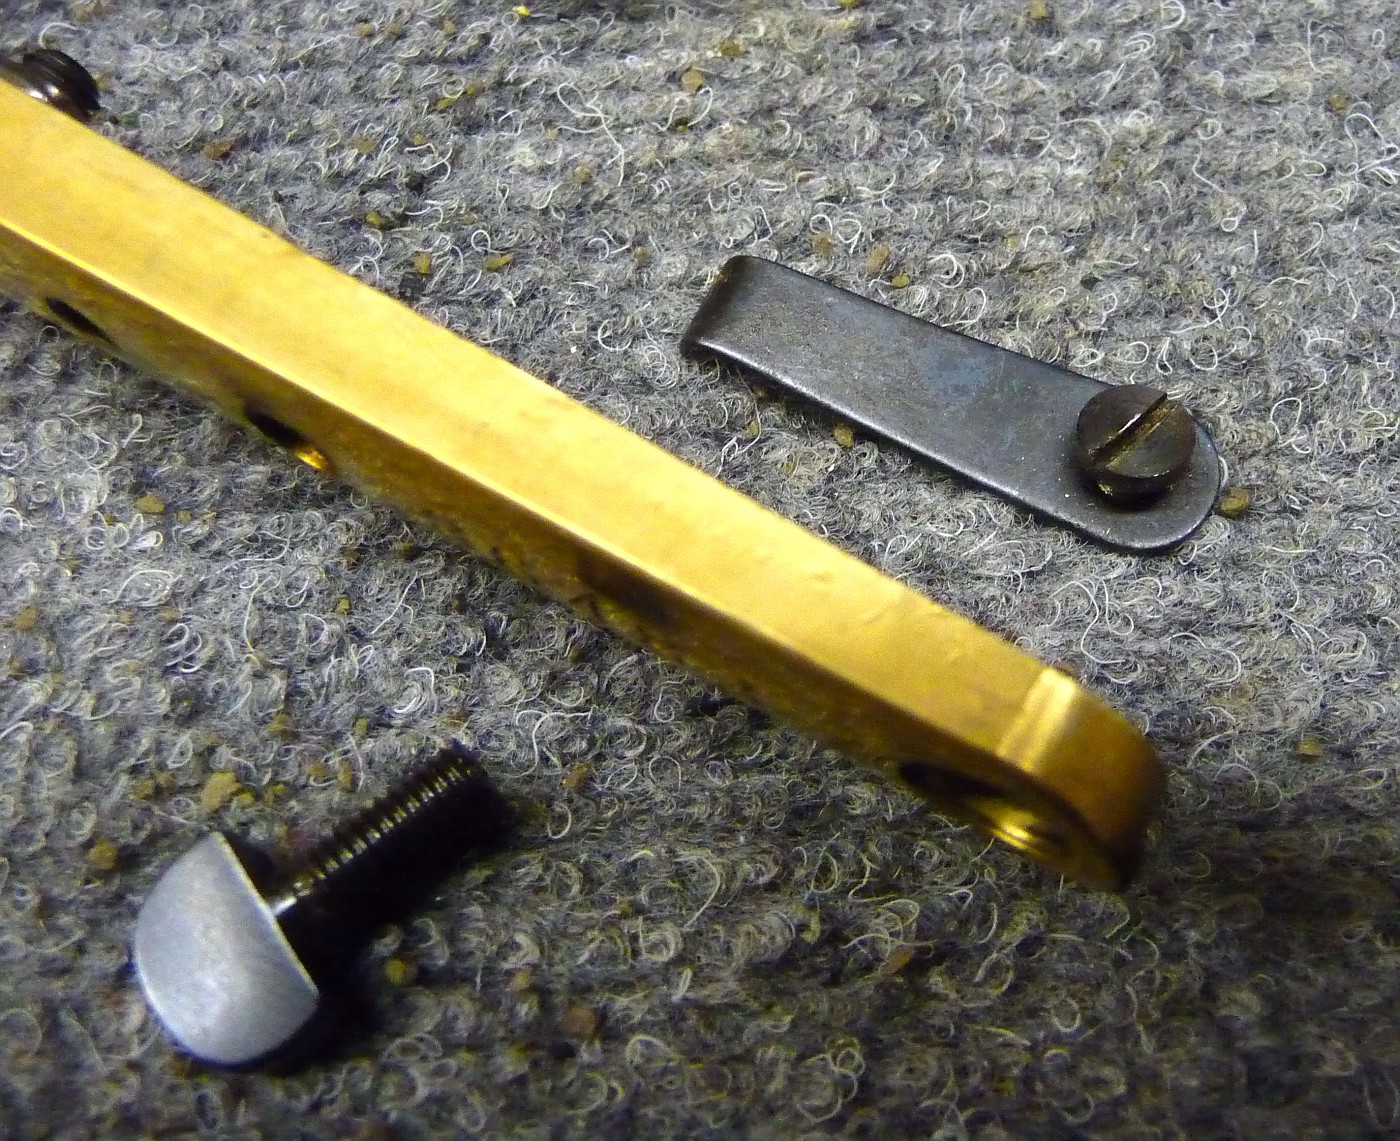
Save these parts for when it is time to resell it and you move into IDPA……. 🙂
These two screws need to be removed to remove the left and right sideplates:
(Hint: There are two small screws just in front of the lever opening. Loosen these two screws to make it easier to remove the large lever screw)
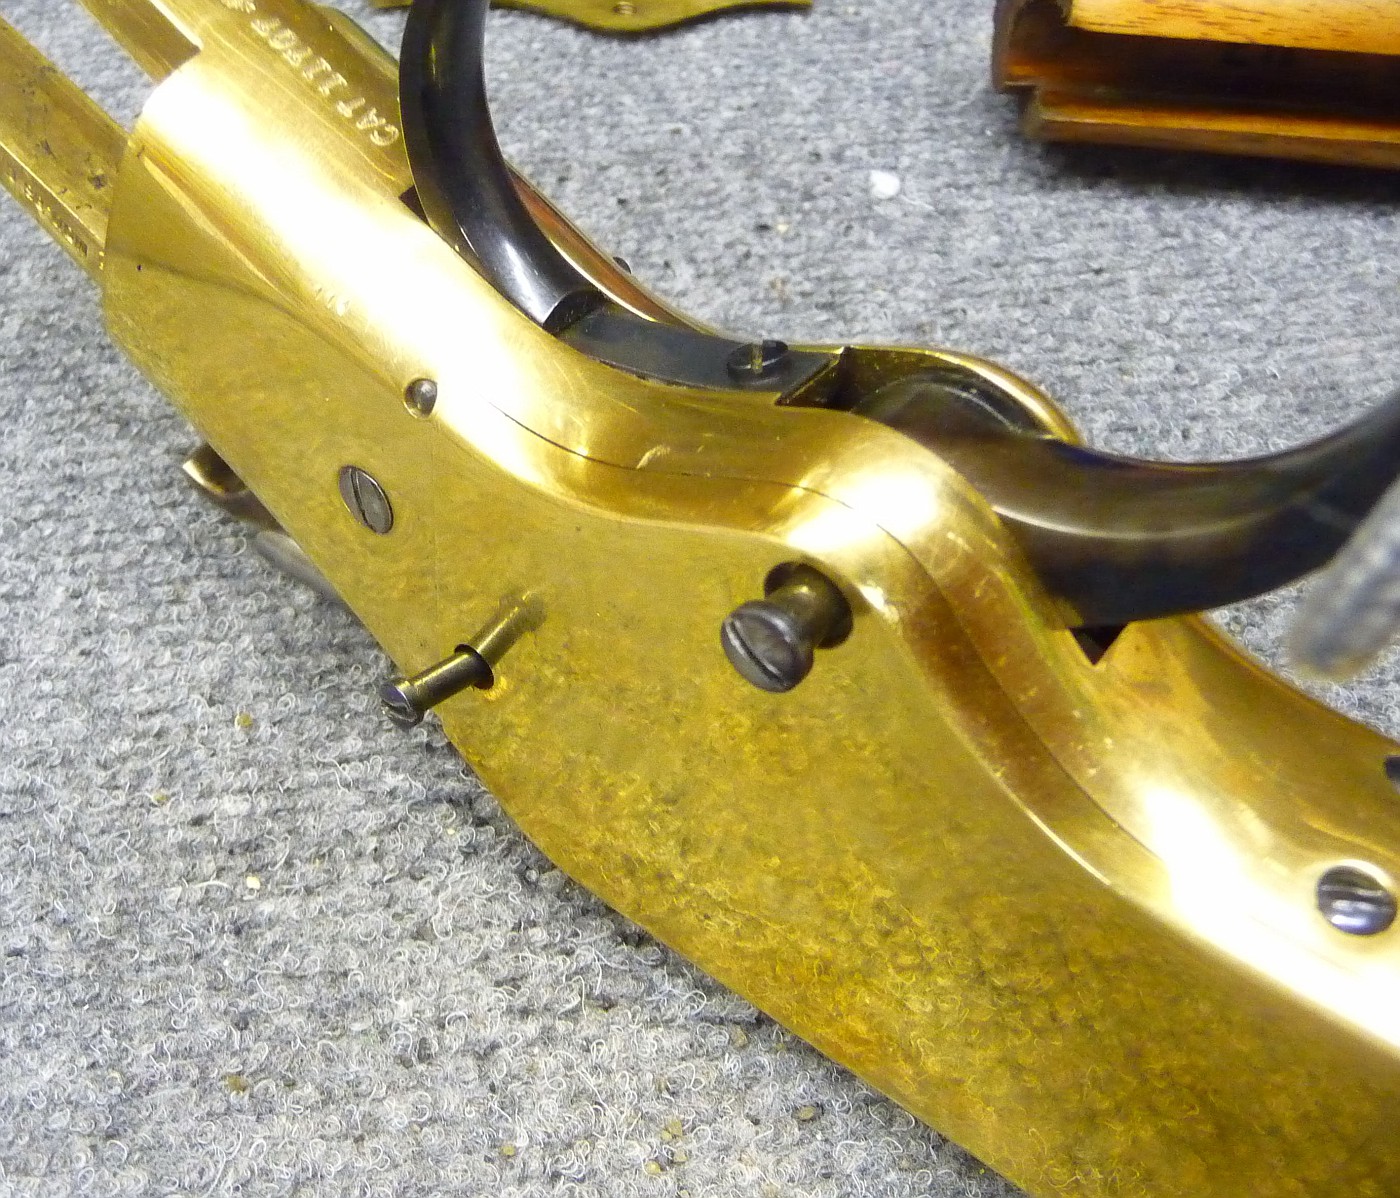
The right sideplate will come off first:
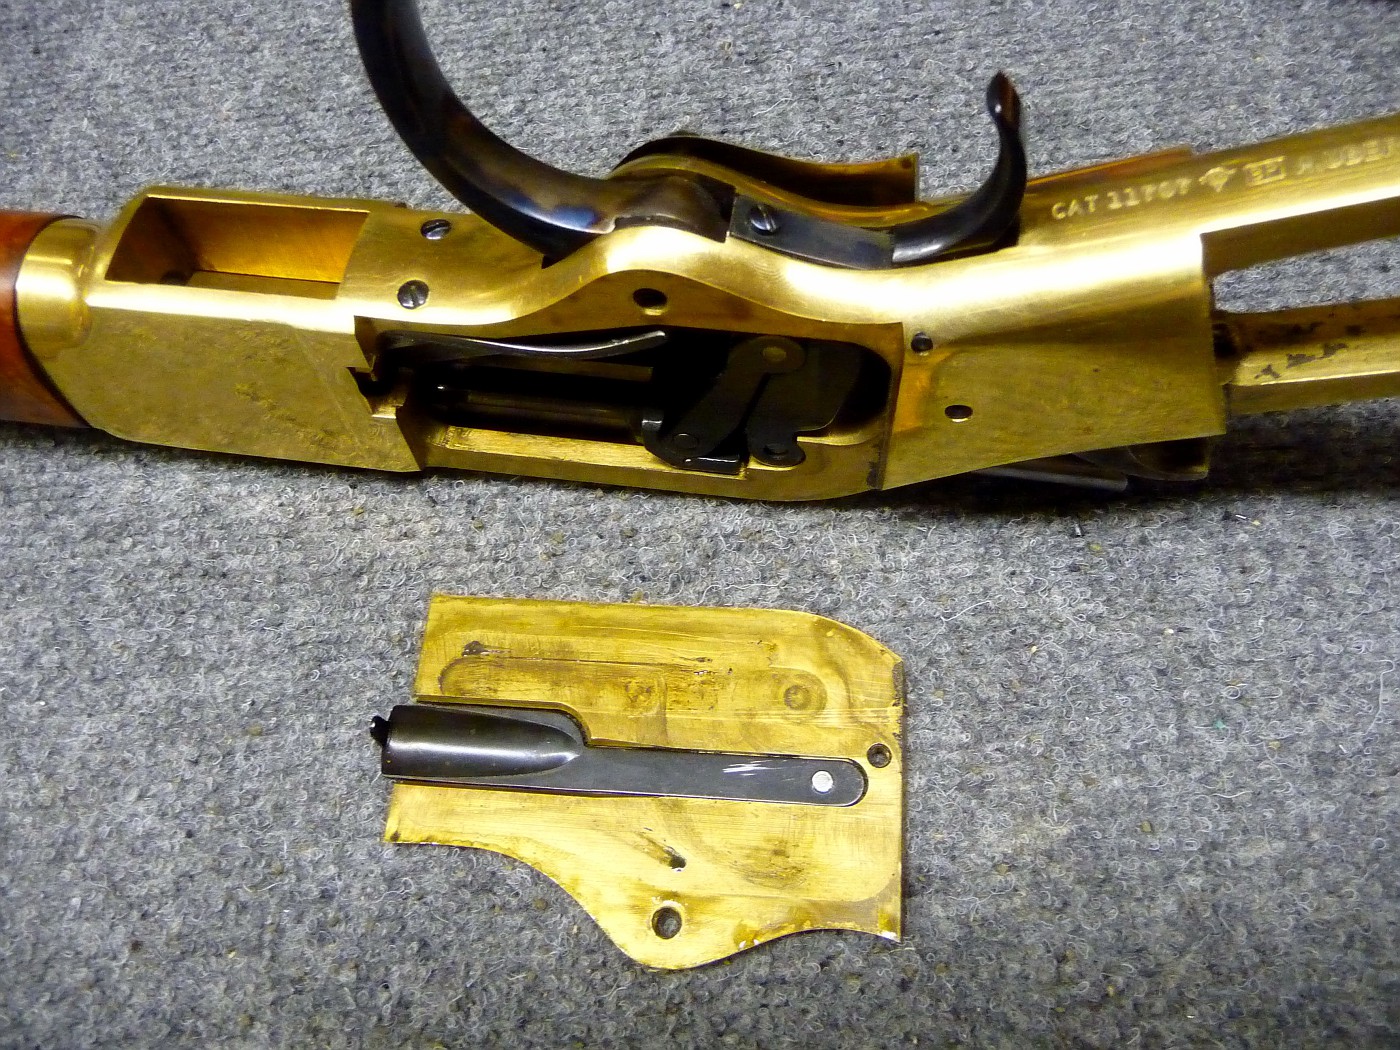
And then the left:

This will expose the inner mysteries of Mr Nelson King’s design (Oliver Winchester had nothing to do with it) :
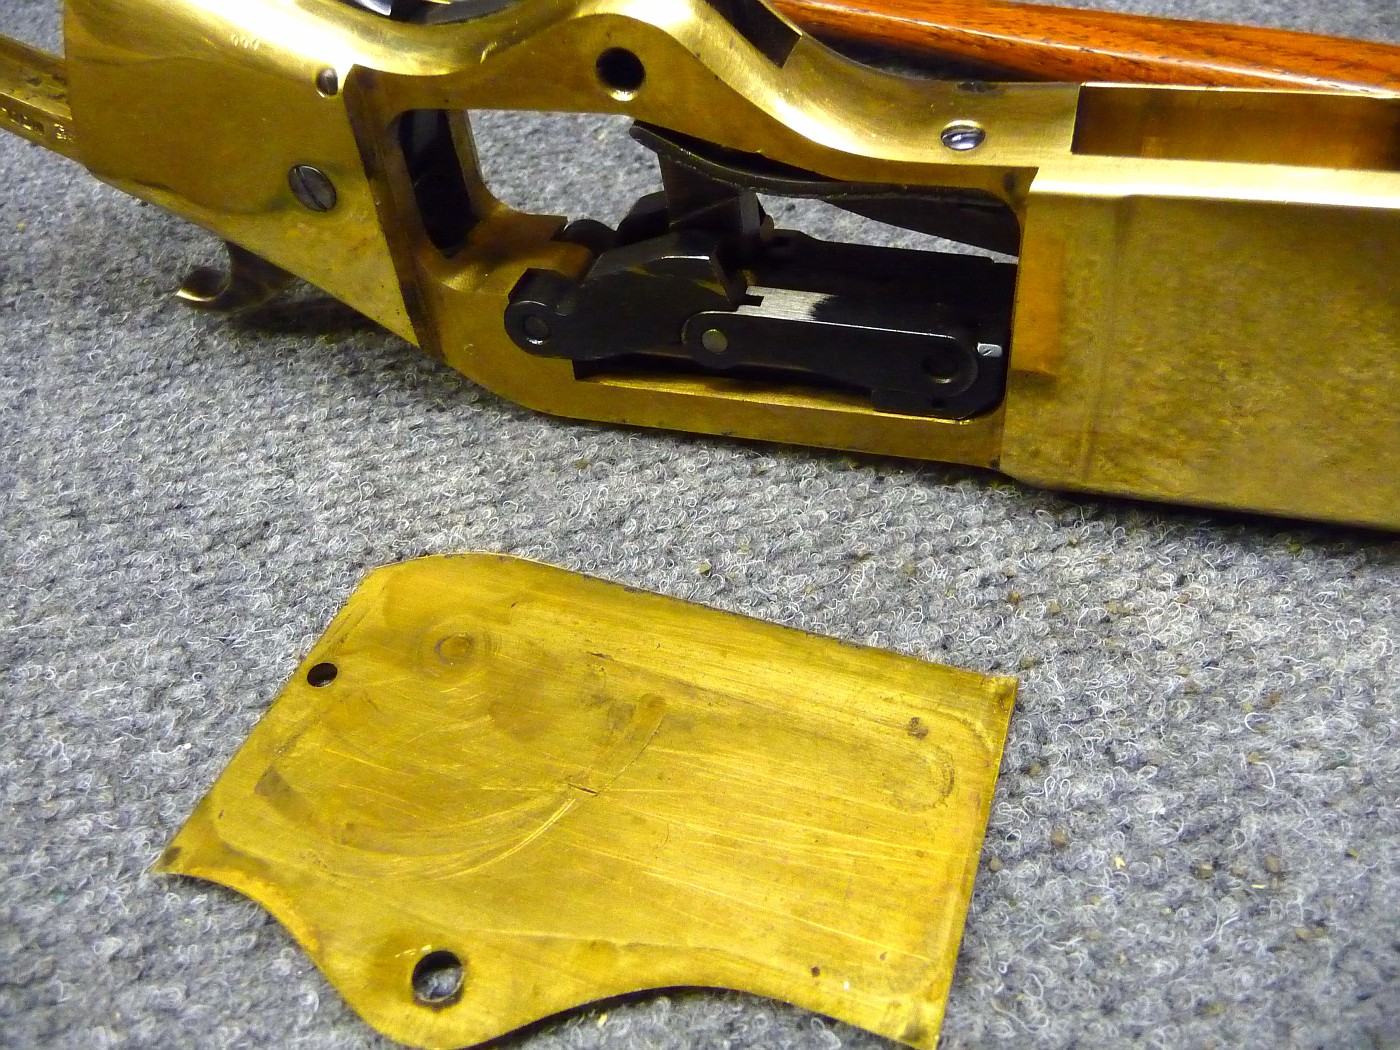
This is one of two factory “toggle Links” you will be removing and replacing with the Pioneer Gun Works parts:
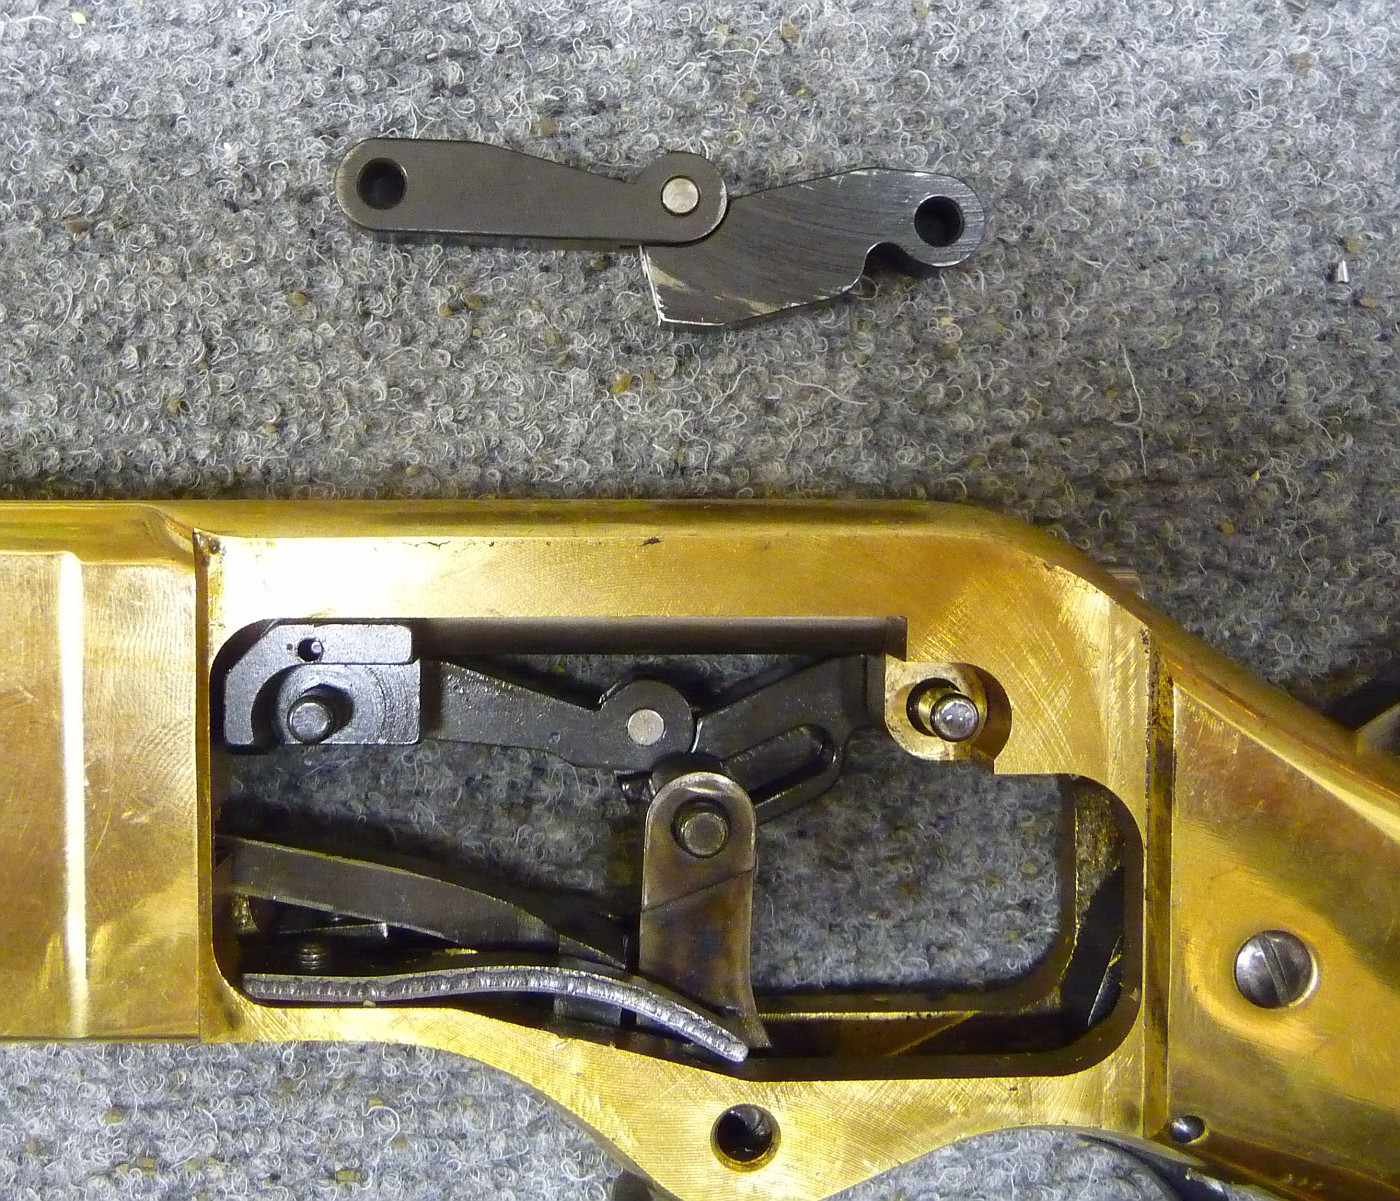
Right and left toggle links removed. They simply slip right off and usually fall to the ground and you kick them under a cabinet to a place you can’t reach…..No big deal, they can stay there as you are not going to be reusing them. You’ll find them when you sell the house.
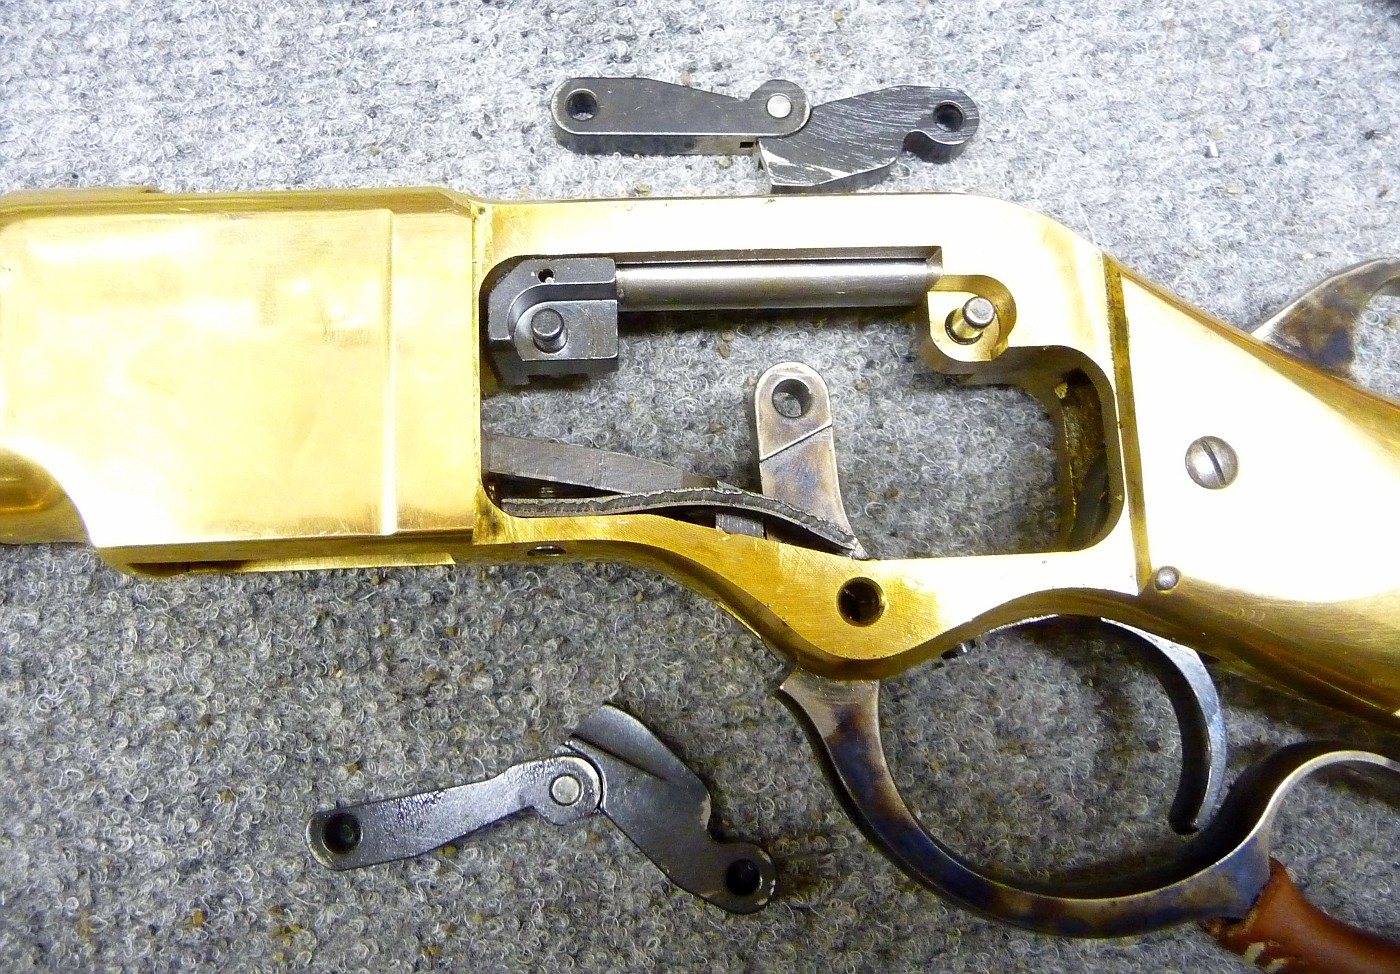
Loosen these two screws just in front of the lever opening in the receiver and slide the “carrier arm spring” and the “lever spring” to the side.You do not need to remove these springs. Just move them slightly to the side.
Slide the lever down and out. Be careful to not lose this hardened pin that attaches the two links to the lever. (It will usually end up under the bench next to the toggles you dropped)

Now you can remove the “Carrier Lifter Arm” down and out.
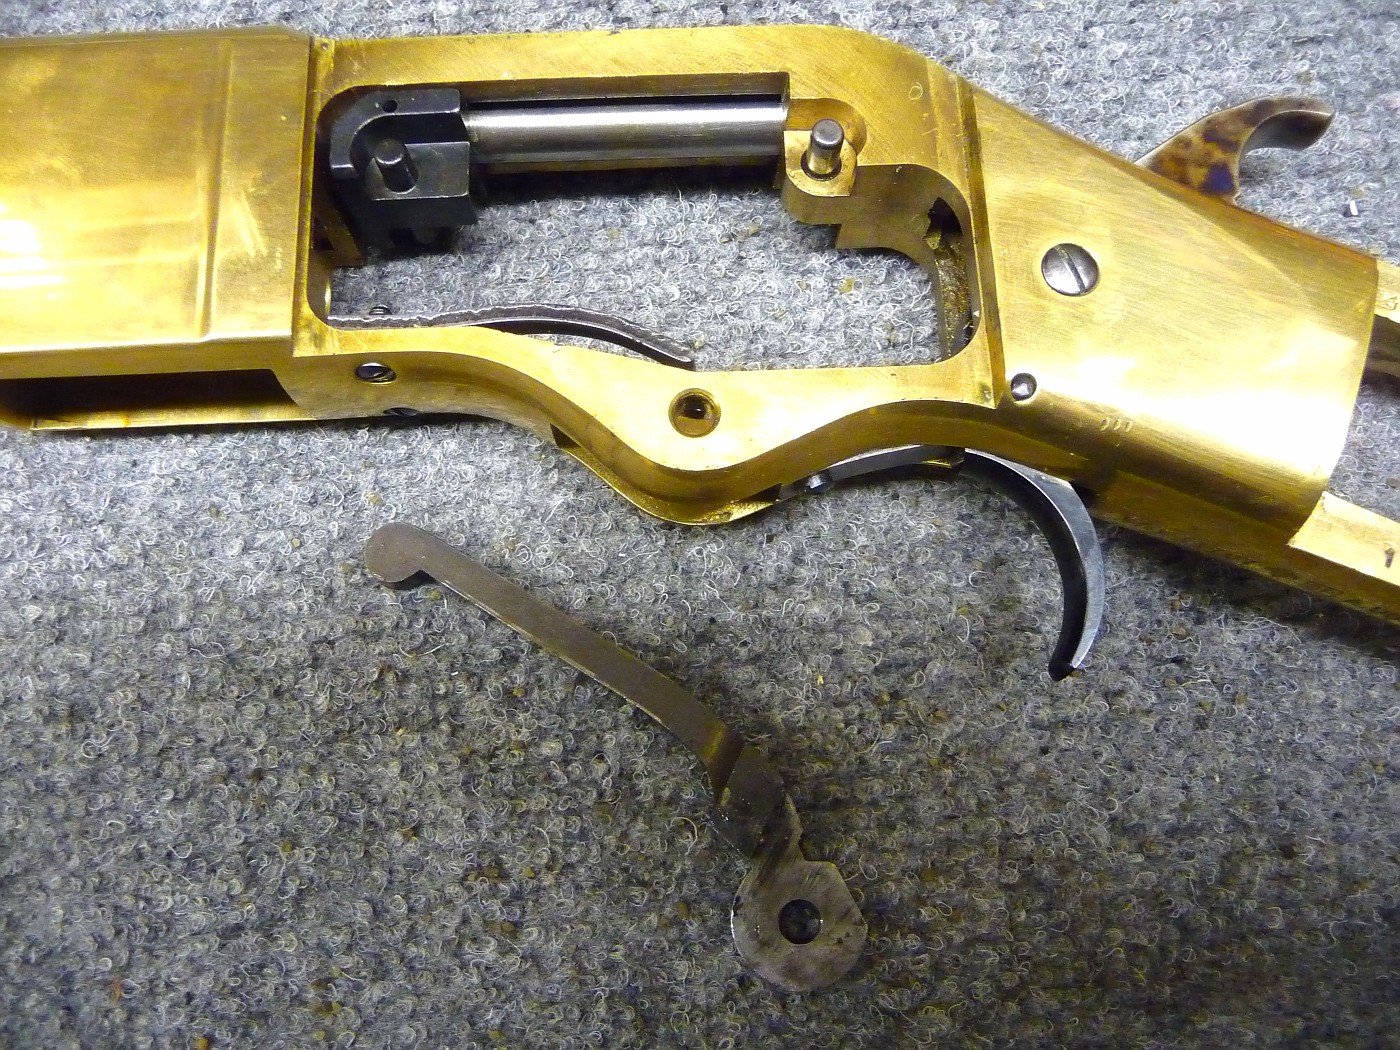
You can now slide the cartridge carrier block out the bottom of the receiver. This is a great time to “de-horn” all the sharp edges with a fine file and some 400 grit sandpaper. Put the paper on a flat surface and polish the sides etc.
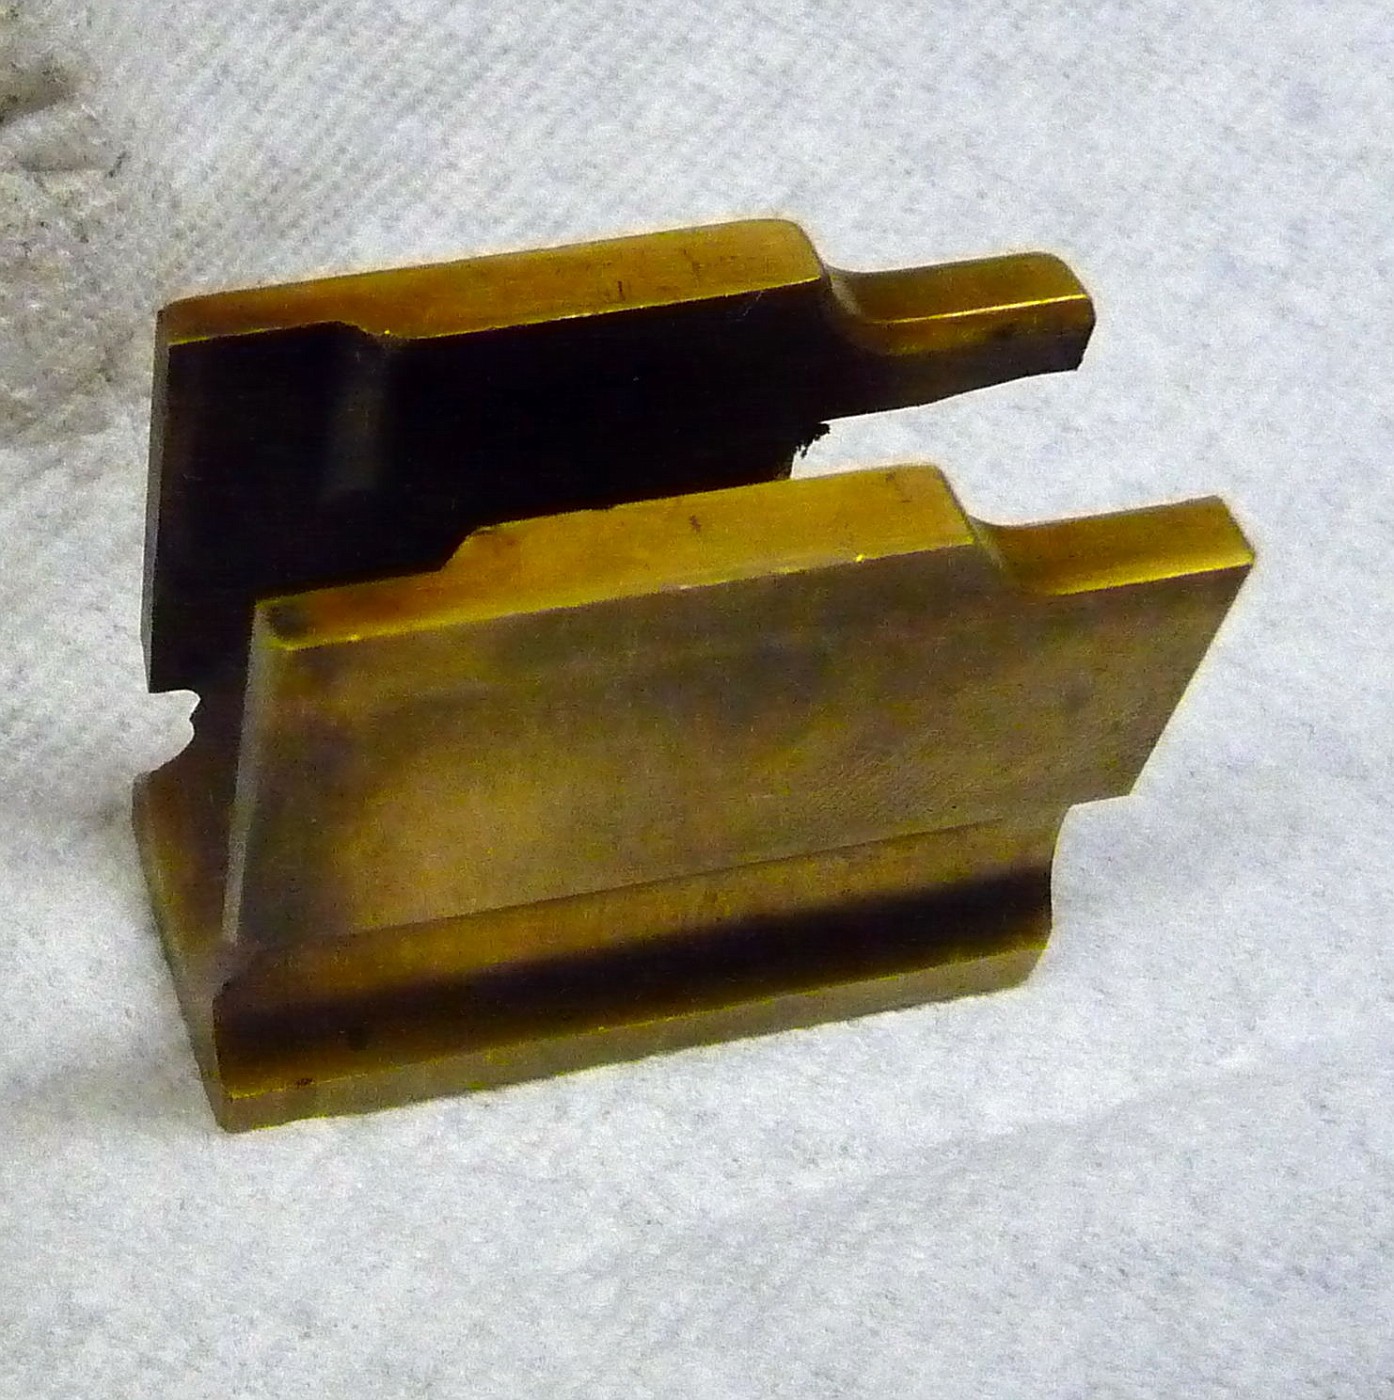
You will not be using the factory lifter arm or the two toggles. New parts are supplied from Pioneer. Put these in a safe place to go with the gun when you resell it.
These are the nice new parts from Pioneer:
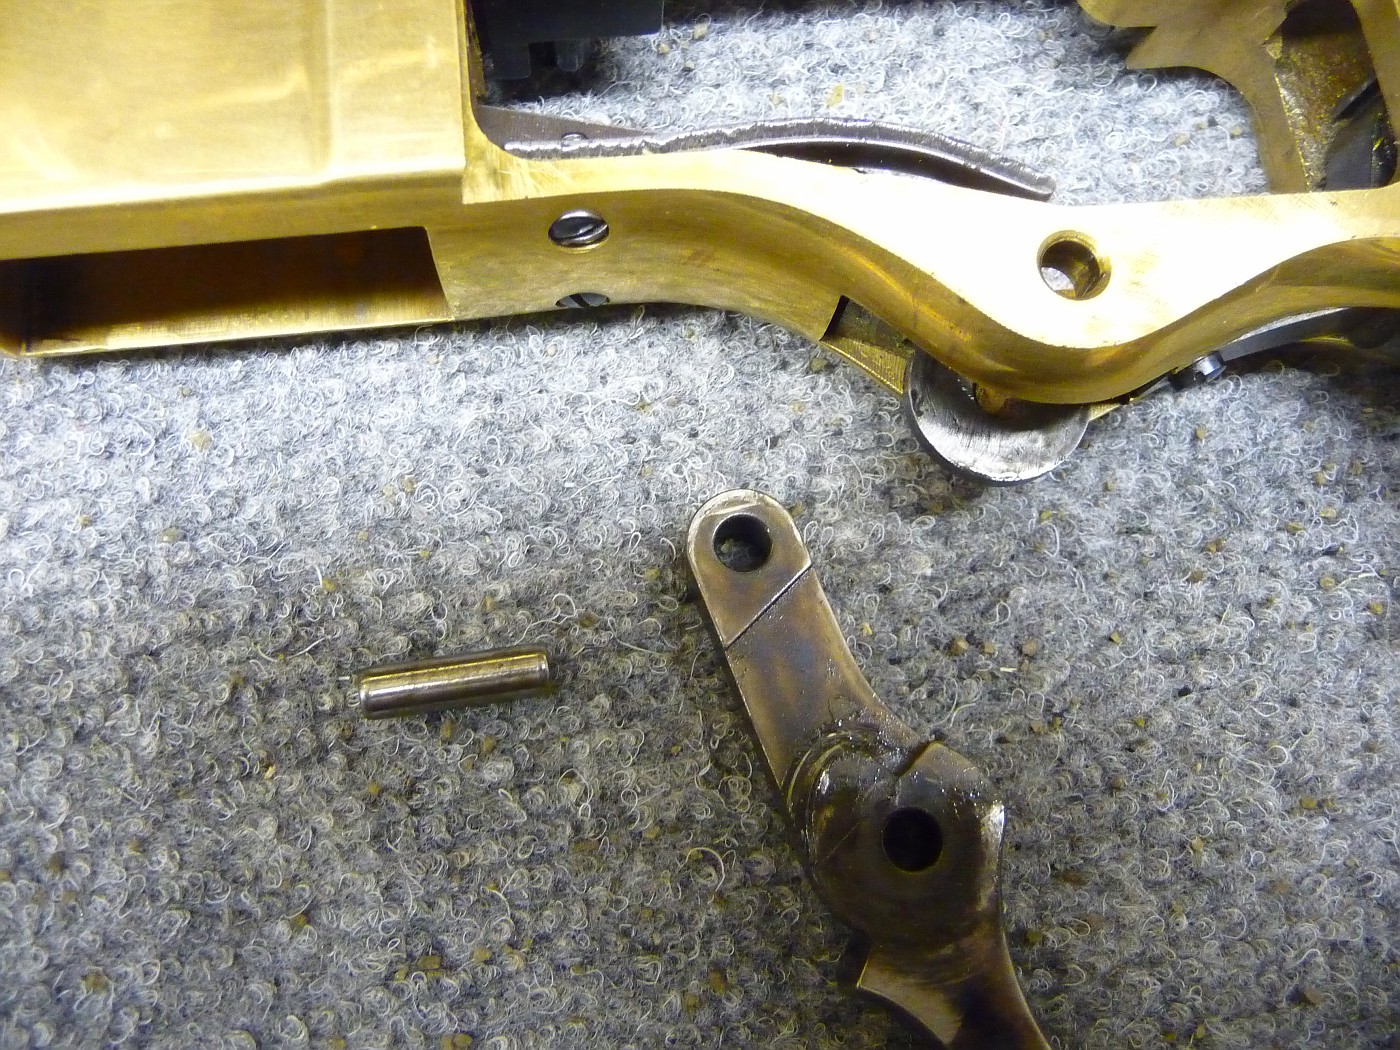
Now the fun part begins. I sure hope you liked taking the working parts out of your rifle because you will be doing it about a dozen times as you “fit” the lifter arm to “time” the action.
Here’s the deal….The cartridge carrier block must be timed to raise at exactly the moment the rifle’s bolt is retracted into the receiver. And then it must fall again. precisely when the new cartridge is moved into the chamber and ready to fire. If this isn’t done properly, you could break off the little nub that is on the bottom of the bolt or the rifle simply won’t function.
This is a ..”remove” – “file” – “try” – repeat” procedure. No other way to do it.Take your time. Be one with your file. It’s a beautiful experience!
So….Put the rifle back together using the new parts:
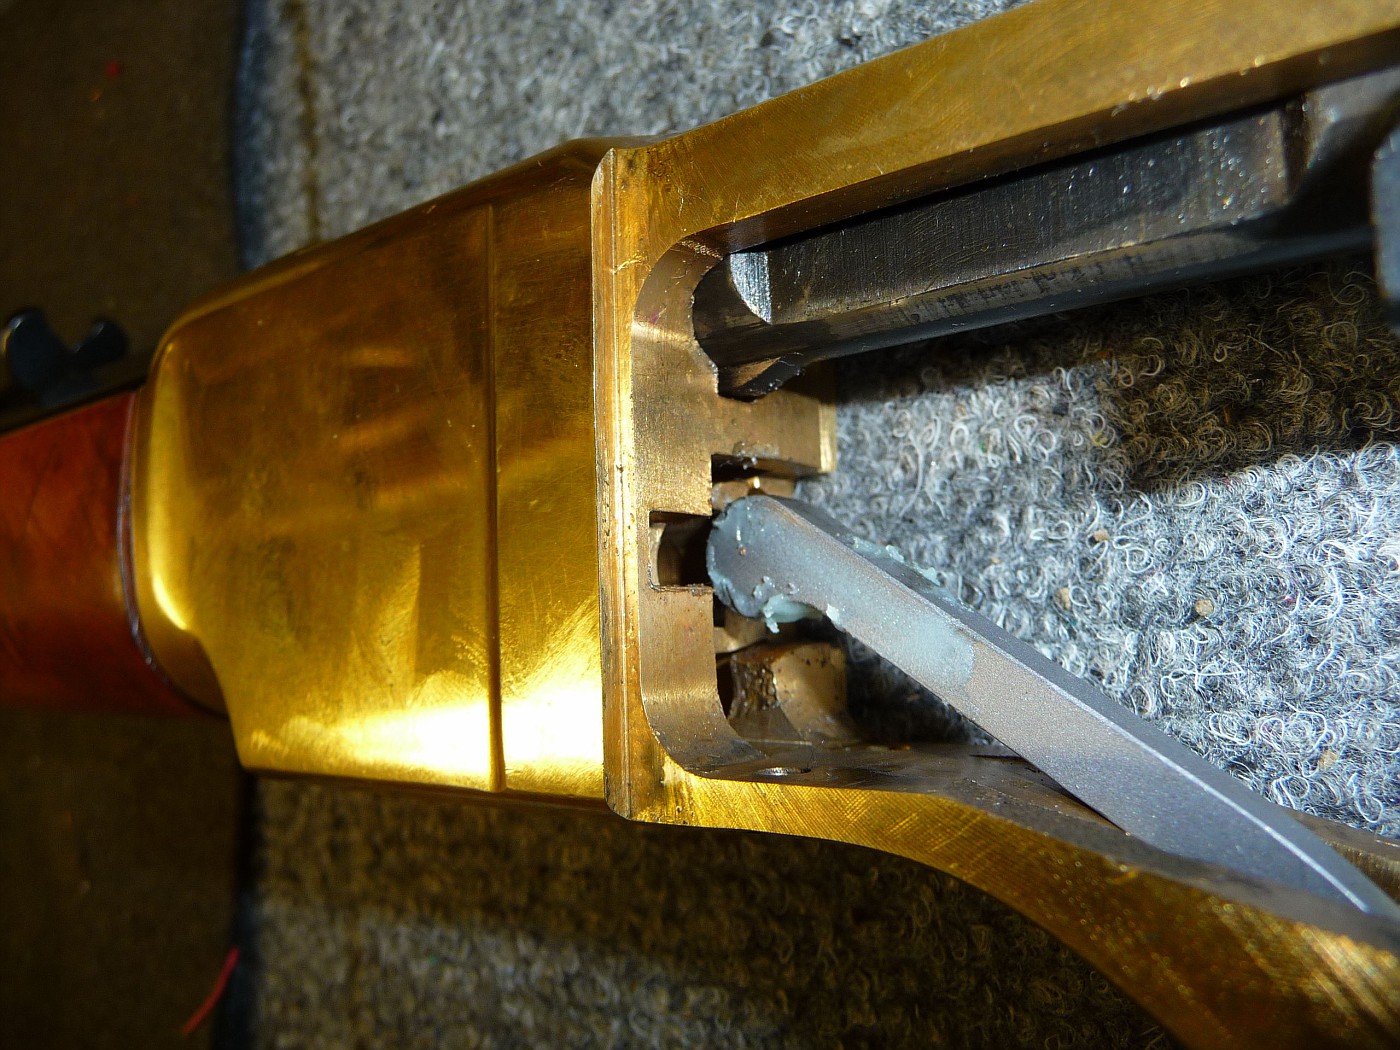
Be sure to use a bit of lube on the lifter arm.
You DO NOT need to reinstall the side plates. Install the lifter, lever, left and right link and the lever spring and the lifter arm spring.
Try the action………….It ain’t gonna cycle! The bolt isn’t going to come back far enough to let the carrier block rise. DON’T FORCE ANYTHING!
Take everything apart again.
Remove the lifter arm.
On the lifter arm, identify the area I colored with a marker:
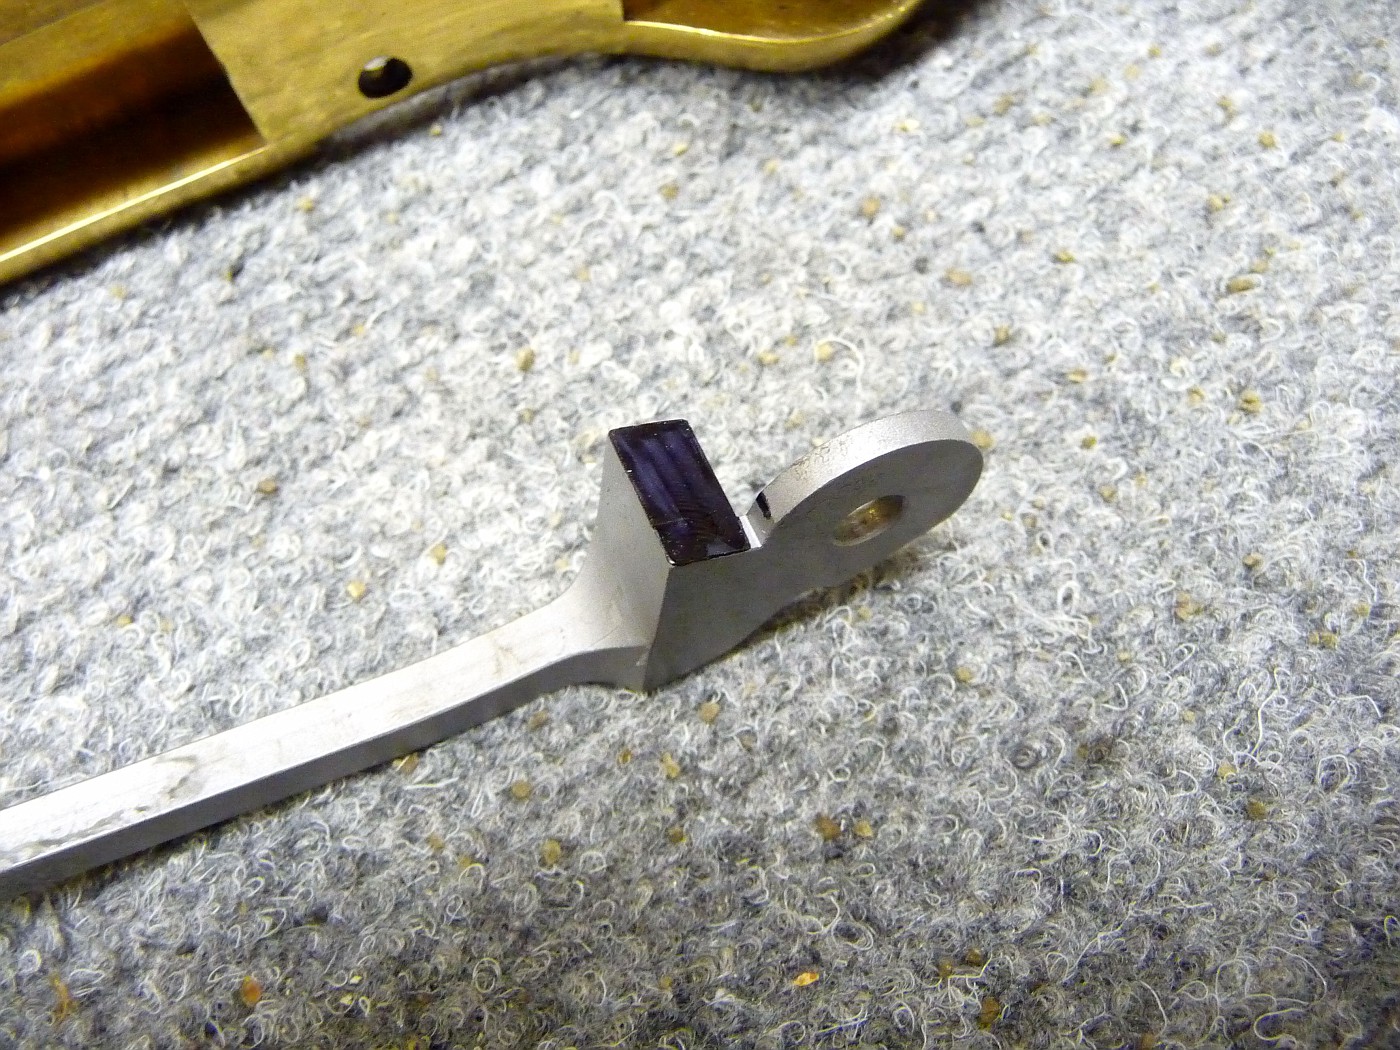
You are going to use a good file and remove a couple thousandths of an inch off of this area until your rifle “times” beautifully. It took me 8 “filing sessions” to get this rifle just right. On my 1873 it only took seven. It could take you a dozen or more.
I mark the area with a Magic Marker before I file. This shows me that my file is straight when I take the first cut. I then take ten passes with the file. Re-install and check for “time”.
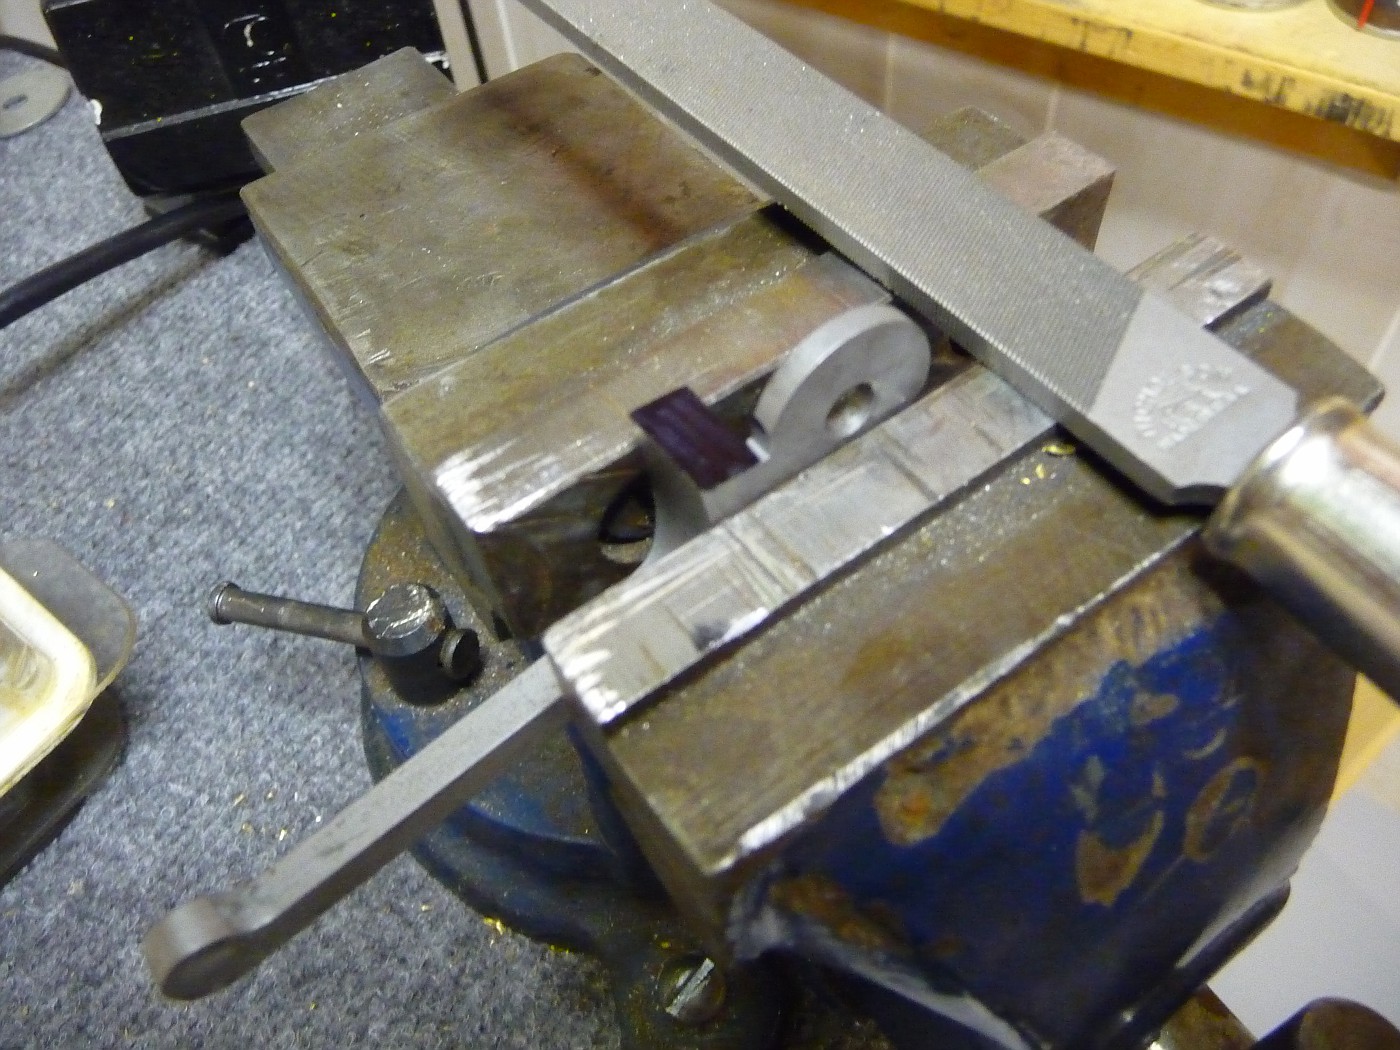
You’ll know when it is in proper time as the bolt will be fully back as the cartridge carrier block rises and then the bolt is fully forward when the block falls. With nothing being forced. If you force the action when you THINK you are done, you will break off the cartridge retaining tab on the bolt. This will really hurt your wallet! (VTI Gunparts in Lakeville CT will be your friend if this happens……order a new bolt!)
You must have the lever spring and the carrier arm springs engaged when you are testing. If not, you will get false reading and the whole thing will be screwed up. (But actually, the only thing you can really ruin is the lifter arm. If you mess it up you can order another one and start over. You are not modifying the rifle in any way. Just the internal parts. Nice!
Do not try to file off big globs of material and rush this part of the project. Take your time and enjoy working on a fine firearm. Nothing like it in the world!
When it is “In Time”, reassemble the entire rifle with sideplates and all. Make up three “dummy” cartridges with no powder and no primers. Test the rifle for feed and function.
You should have about 2″ less lever travel which will make the rifle a joy to “go fast”…
BEFORE…

AFTER…
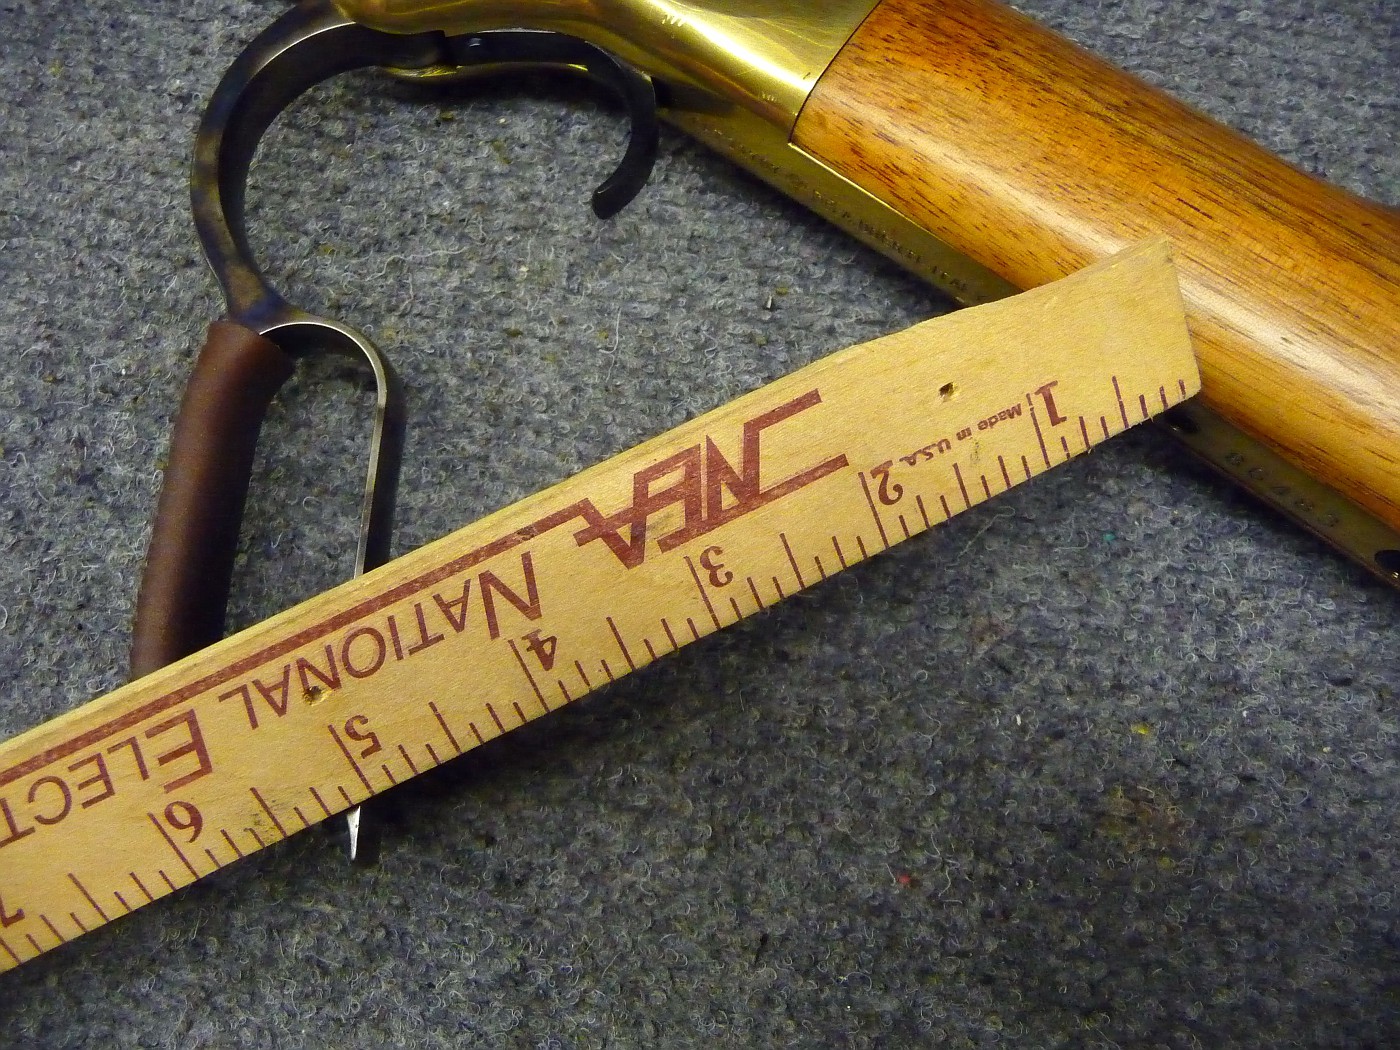
DONE!….Now go out and blow the doors off the competition at the next CAS!
A few hints:
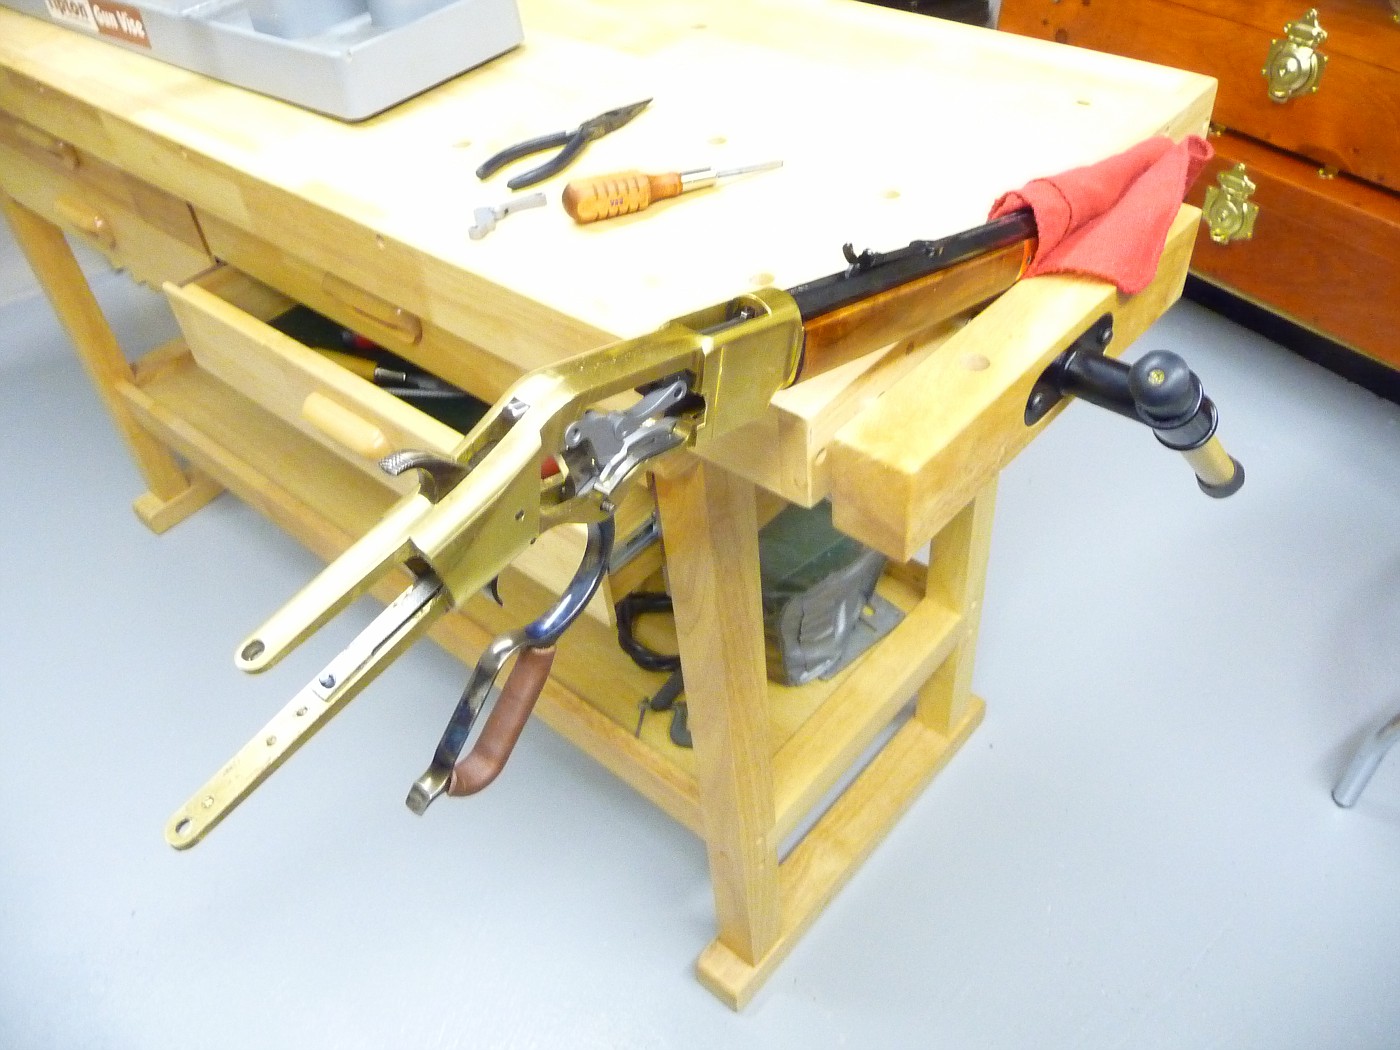
I bought a woodworkers bench at Harbor Freight Tools and for under $150 it is the best thing I ever added to my shop!
I never thought I’d use the vise portion but I use it all the time. Nothing like having another set of hands!
Be sure to check out other articles on my web site. Let me know what you think. Comments here or by email are always appreciated!
THANKS!
A friend of mine just sent me this experience he had and thought it might help others:
Hello Rancho Roy,
I just installed a short stroke kit on my Uberti 1873 and I had the same problem as the commenters above. I have a
solution…….but first a little background:
About 2 years ago, at your suggestion, I started monitoring the Kittery Trading Post site for lever guns. A few months later
an Uberti Win 73 showed up in 45LC. Just what I was looking for. It sat there for a few months so I decided it was waiting
for me. I bought it. It was almost new. No work had been done to it. The action was stiff as a board. From The Smith Shop
in Warwick RI I bought a set of springs and from PGW I bought the Super Short Stroke Kit. And like a wise man once said
“If it’s super it must be better.” Now a year later I got around to installing the short stroke kit. I went through about 10
iterations of disassembly, file, reassembly, evaluate. Now when I pull the lever down the carrier block waits long enough
for the bolt to move out of the way before moving up. But when I pull the lever back up the action jams. What is happening is
the carrier block is being pushed down before the bolt is extended far enough for the carrier block to slide by. The solution
is to file down another side of the lifter arm. This is the side of the lifter arm that the lever pushes against when trying to
push the carrier block down. Filing this surface delays the lever pushing on the lifter arm long enough for the bolt to
extend forward far enough so the carrier block will slide down without binding on the bolt. I went through about 6 iterations
of disassembly, file, reassembly, evaluate. I hope this explains it well enough.
Knob Creek McGee
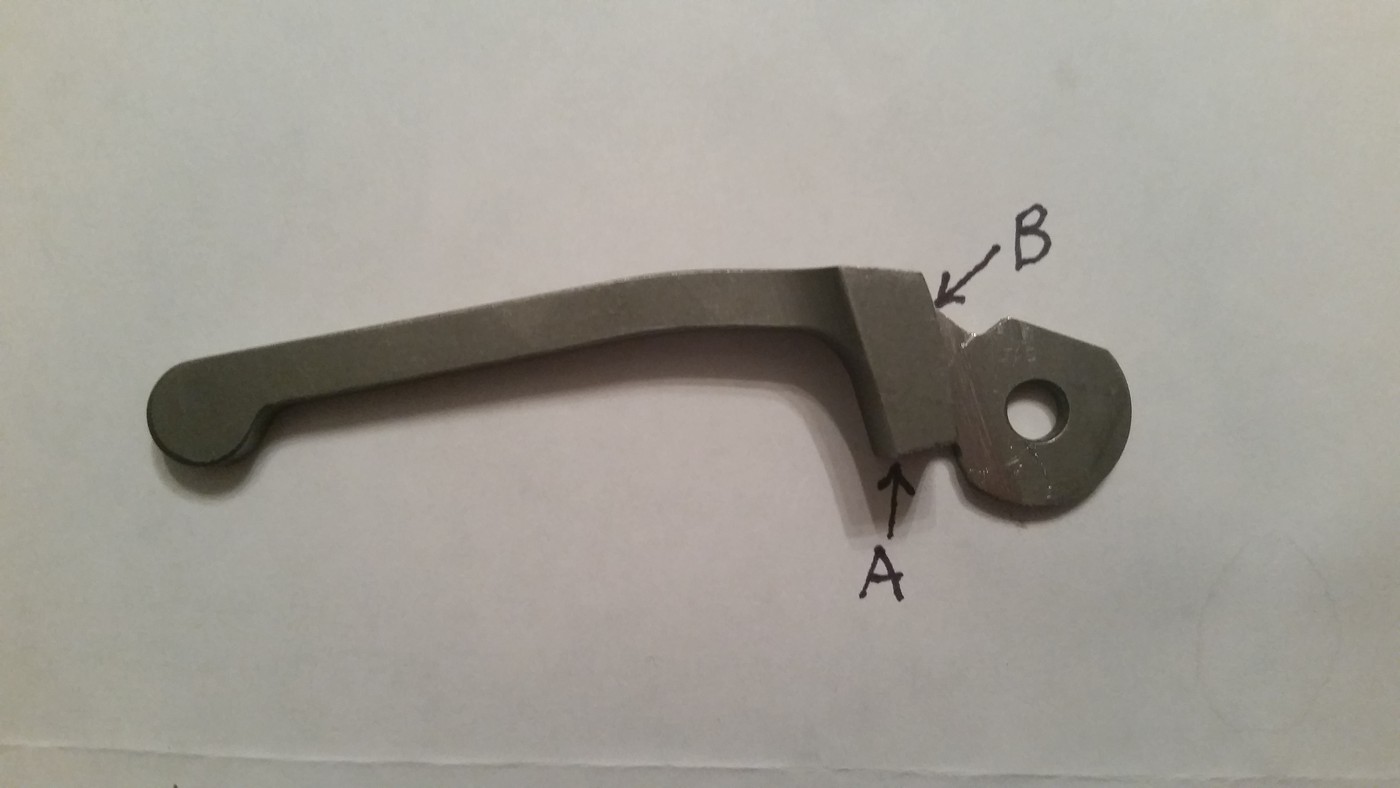

Surface “A” is filed down to delay the rising of the block until the bolt is out of the way.
Surface “B” is filed down to delay the falling of the block until the bolt is far enough forward.
Thanks for this addition Knob Creek…..Very helpful!

13 comments on “Uberti 1866 Winchester – Short Stroke Install”