The Savage rimfire rifles are tack drivers right out of the box. There is simply no denying that Savage is leading the charge with accurate rifles in both centerfire and rimfire. But if you are like me, good can always be better!
I recently bought a new Savage 93R17 TR. This is the Tactical version of the venerable 93 series rifle. Kind of a “One Shot-One Kill” for close range varmints of rabbit and prairie dog size. 

The first thing I did after a quick range session to verify that the rifle goes “bang” was to tear it apart. The trigger needed adjusting and the magazine wasn’t seating properly, therefore not feeding consistently. But these two subjects will make future articles. Once the barreled action was removed from the stock, it was clear there was zero bedding and absolutely no recoil stop. Now we all know a rimfire rifle has nearly no recoil, but there is some and controlling it can only improve accuracy. I also observed that the stock this rifle cones with is a laminated wood painted black. The wood used in the laminate appears to be a very soft birch. The bottom metal that the front action bolt is secured through is nothing more than a piece of thin tin. If you try to torque down the action into the stock, you will deform this metal plate and compress the soft wood measurably. Not good for accuracy. My plan is to pillar bed the rifle with total metal against metal and letting the entire action and barrel float within the wooden stock. The only thing in contact with the rifle will be two aluminum pillars that are epoxied into the stock. Heat and humidity will have zero effect on the bedding in this fashion. If the stock was an inert fiberglass I might be convinced to glass bed it, but because it is very soft wood, pillars are the way to go. With the action removed from the stock, you will see the two “bosses” that screw into the bottom of the action and into which the action bolts are screwed into. Instead of the action bolts going directly into the action, they are screwed into these threaded bosses. 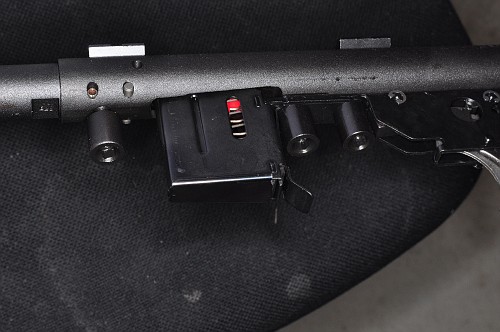 The two outboard bosses are the only two that are used to secure the action into the stock. the middle one simply secures the magazine guide. This boss was removed and a simple socket head bolt was used. Savage uses standard 1/4-28 threads into the action. Same as Remington and Winchester. Nice!
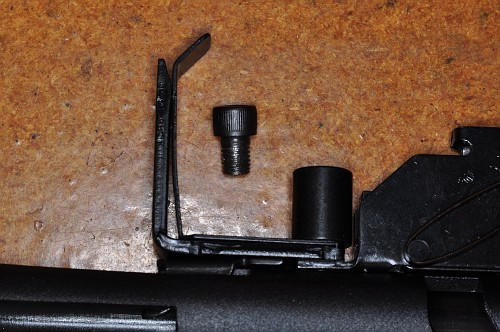
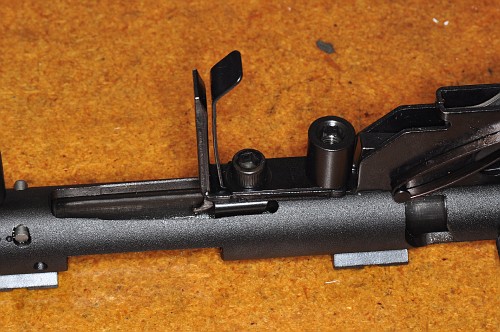 Next we had to deal with the front action boss. The plan is to remove it and use a conventional action screw directly into the action.
 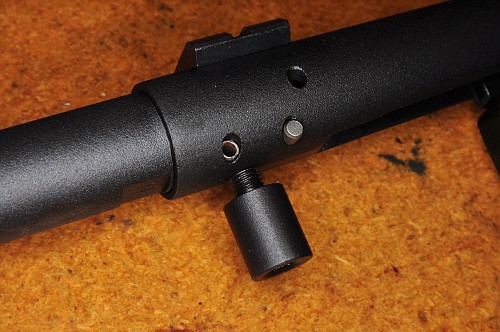 It appears that this front boss is not screwed all the way into the action. But it is. In fact it screws right up tight and touches the barrel tenon. It seems Savage screws this bolt into the action, and then bores right through it to secure that front roll pin.
 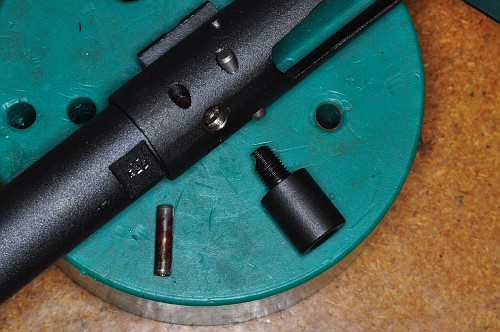 This front “boss” was abandoned and the front roll pin needed to be cut into two to clear the way for a conventional action screw.
 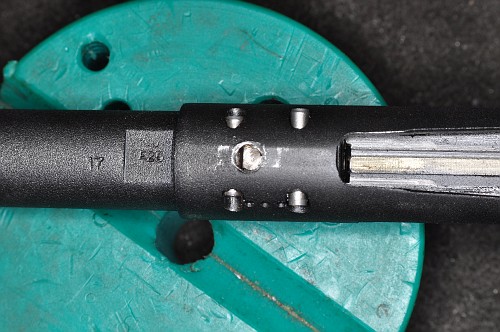 With the action squared away, it was time to start on the pillars. A quick look at the front area of the stock showed that the front action bolt wasn’t even contained by the stock. The bolt fit into a slot and simple friction kept everything in check.
 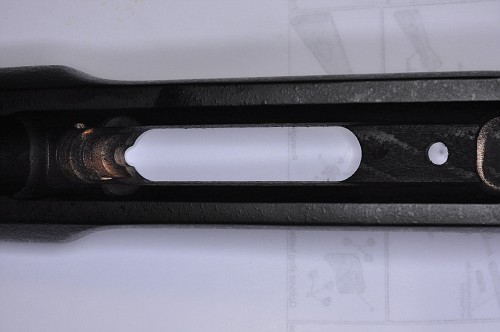 The rear action bolt did go through the trigger guard and the stock stock, but this area was approximately 3/8″ thick and not dense enough to hold up its end of the bargain.
 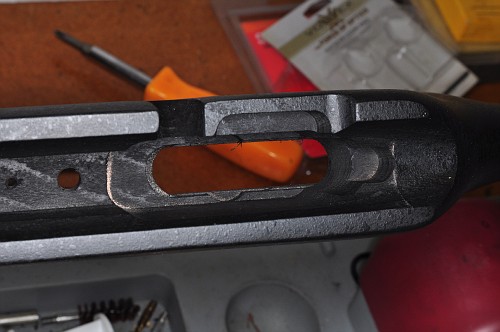 The first thing I needed to do was build up that front action area with Brownell’s Steel Bed and install a pillar. A pillar was turned on the lathe out of 6061 Aluminum.
 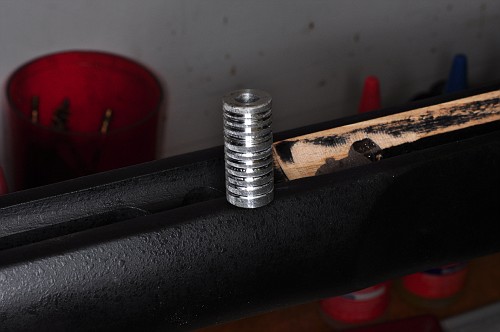 And the same was done for the rear
 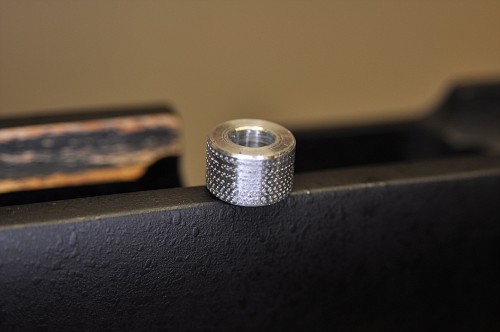 I needed a way to guide the drill bit when I bored out the front action bolt area. Here’s what I came up with. I turned another pillar without the grooves for epoxy that you see on the pillar above. Using a simple nut and a bolt, I secured this smooth pillar in the area where the new pillar would go, using the thin bottom metal to locate it.
 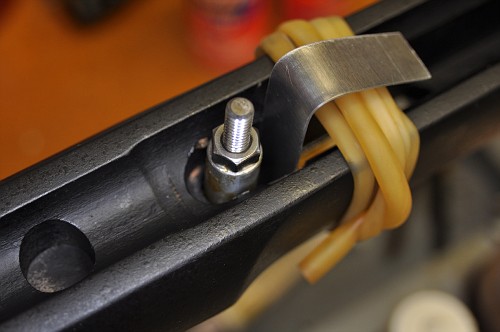 Using a thin strip of metal, I built a “dam” to contain the epoxy and a piece of surgical tubing was wrapped around the bottom metal to keep it tight against the bottom of the rifle. CAUTION!!! be sure to put a good release agent on the temporary pillar and the metal dam. These need to be removed once the epoxy hardens. I used simple RIG grease, but any release agent will do. Nest is mix up a batch of steel bed and using small wooden Popsicle sticks, fill the area around the temporary pillar.
 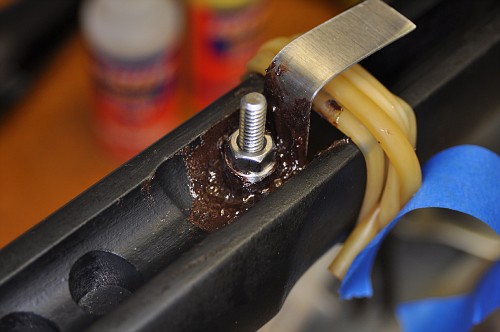 You need to let this Steel Bed to cure for at least 24 hours. Got to bed. Goodnight! Good morning! Once the Steel Bed is cured you can remove the dam and the temporary pillar.
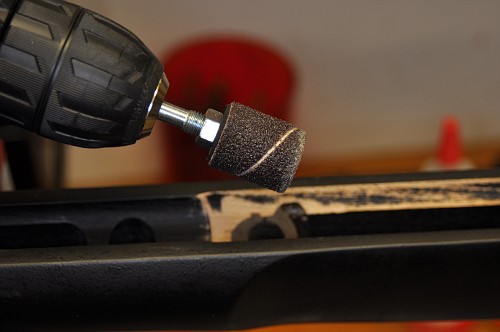
 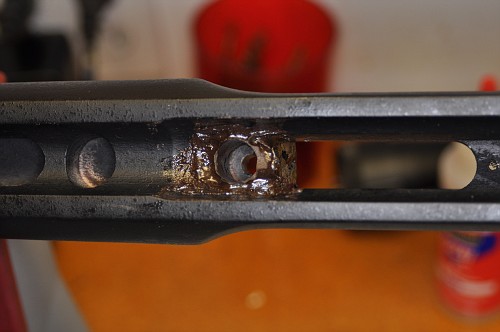 I used a small rubber sanding drum to clean everything up and get the level of the hardened epoxy down below where the action will sit. Remember we don;’t want any of this bedding material to touch the action when we are finished.
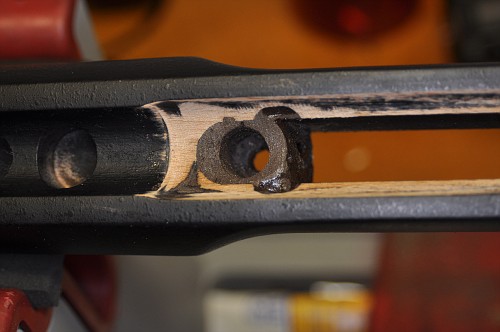 Now we need to drill out that pillar hole down through the stock. The pillars I made are exactly 1/2″ in diameter, so a 1/2″ Forsner bit was used.
 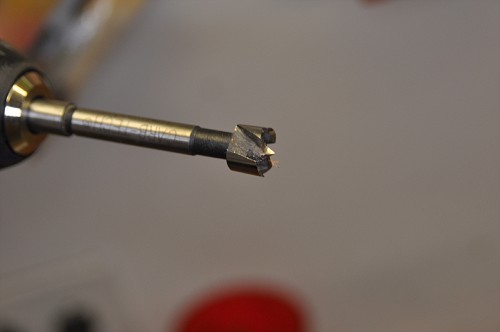 I used a simple electric hand drill to bore this hole, using the epoxy channel as a guide. Here is what you end up with.
 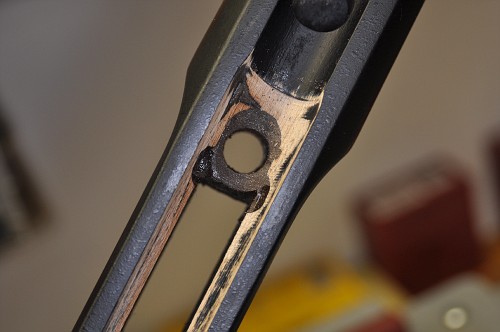 The pillar with the grooves is now epoxied in place. It was first cut to length to be perfectly flush with the bottom metal and a bit proud to keep the action from touching the wood stock.
 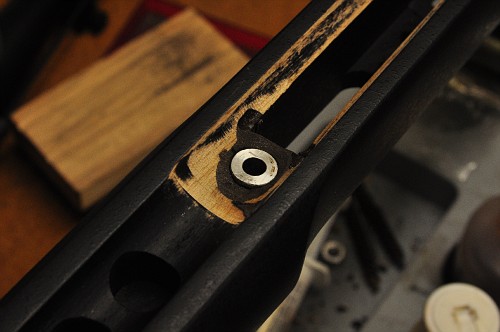 This is the view from the bottom.
 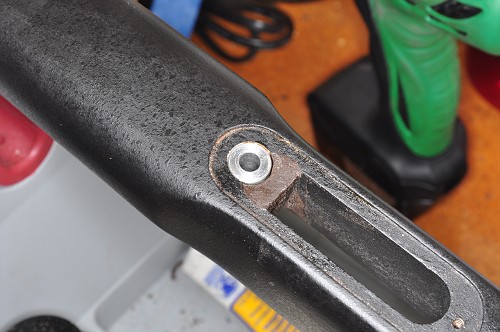 NOTE: The front pillar is flat across the top where it sits against the action. The action has a small flat section that allows this. No need to make the top of the pillar concave as you would do on a Remington 700 round action. With the front pillar done, it’s time to focus on the rear pillar. Because there was no real way to guide the drill bit, this process was done on a simple drill press.
 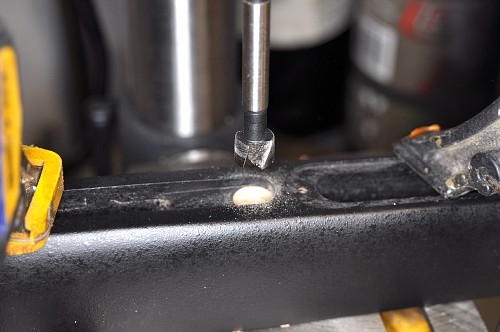 This hole and it’s associated pillar need to go right up against the routed trigger guard area.
 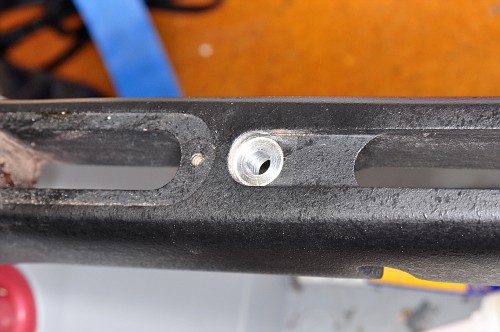 Like the front pillar, the rear pillar is epoxied in place, flush on the bottom and a bit proud on the top. Surgical tubing is employed once again to hold the trigger guard in place while the epoxy cures.
 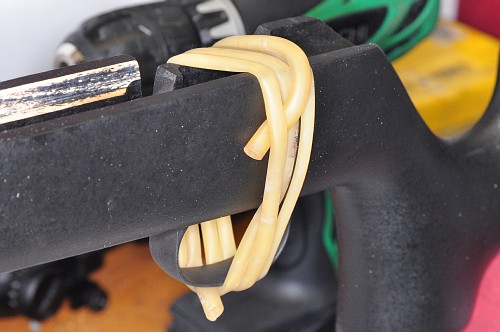 Both pillars installed, glued in place.
 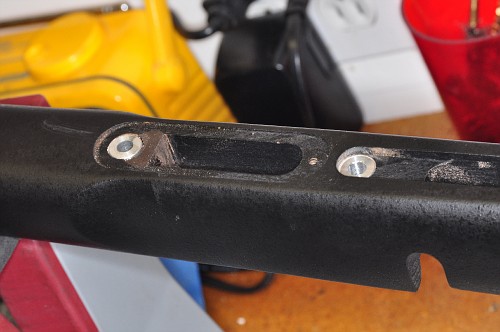 Because these pins stick out a bit on the side of the action.
  I used a small countersink bit to create a create reliefs
 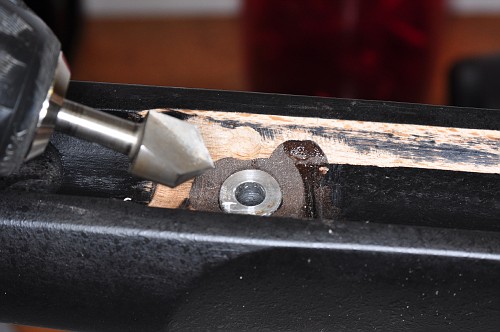 A standard 1/4-28 Remington action bolt was cut to the proper length
 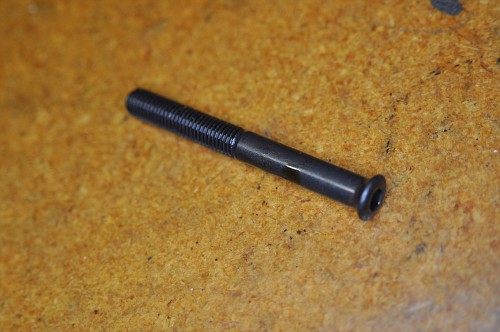 And installed along with the Savage factory rear action bolt
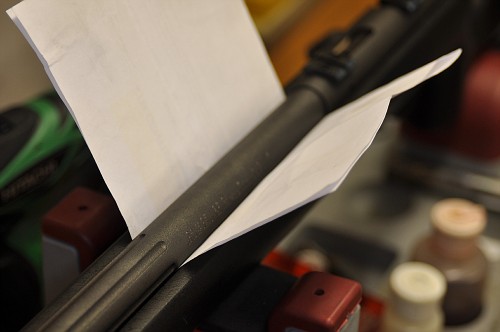
 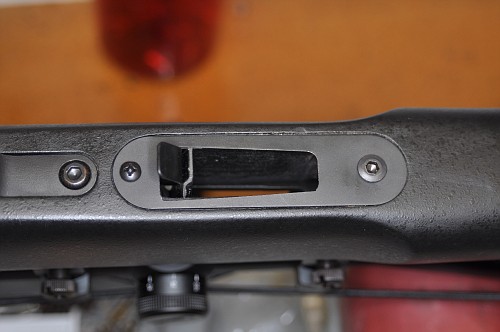 As you can see, the barrel and action are completely free of the stock.
  FINISHED! Now lets go shooting!
 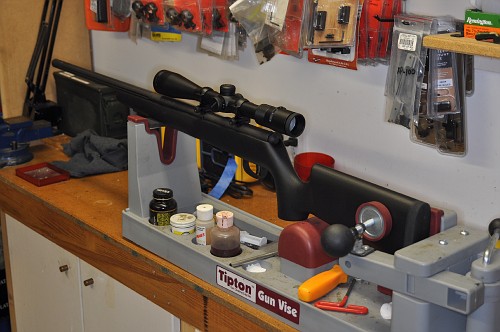 RIFLE: Savage 93R17 TR CALIBER: 17HMR SCOPE: Vortex Viper 4-12X40 V-Plex RINGS: Vortex Tactical
 The two outboard bosses are the only two that are used to secure the action into the stock. the middle one simply secures the magazine guide. This boss was removed and a simple socket head bolt was used. Savage uses standard 1/4-28 threads into the action. Same as Remington and Winchester. Nice!
 Next we had to deal with the front action boss. The plan is to remove it and use a conventional action screw directly into the action.
  It appears that this front boss is not screwed all the way into the action. But it is. In fact it screws right up tight and touches the barrel tenon. It seems Savage screws this bolt into the action, and then bores right through it to secure that front roll pin.
  This front “boss” was abandoned and the front roll pin needed to be cut into two to clear the way for a conventional action screw.
  With the action squared away, it was time to start on the pillars. A quick look at the front area of the stock showed that the front action bolt wasn’t even contained by the stock. The bolt fit into a slot and simple friction kept everything in check.
  The rear action bolt did go through the trigger guard and the stock stock, but this area was approximately 3/8″ thick and not dense enough to hold up its end of the bargain.
  The first thing I needed to do was build up that front action area with Brownell’s Steel Bed and install a pillar. A pillar was turned on the lathe out of 6061 Aluminum.
  And the same was done for the rear
  I needed a way to guide the drill bit when I bored out the front action bolt area. Here’s what I came up with. I turned another pillar without the grooves for epoxy that you see on the pillar above. Using a simple nut and a bolt, I secured this smooth pillar in the area where the new pillar would go, using the thin bottom metal to locate it.
  Using a thin strip of metal, I built a “dam” to contain the epoxy and a piece of surgical tubing was wrapped around the bottom metal to keep it tight against the bottom of the rifle. CAUTION!!! be sure to put a good release agent on the temporary pillar and the metal dam. These need to be removed once the epoxy hardens. I used simple RIG grease, but any release agent will do. Nest is mix up a batch of steel bed and using small wooden Popsicle sticks, fill the area around the temporary pillar.
  You need to let this Steel Bed to cure for at least 24 hours. Got to bed. Goodnight! Good morning! Once the Steel Bed is cured you can remove the dam and the temporary pillar.
  I used a small rubber sanding drum to clean everything up and get the level of the hardened epoxy down below where the action will sit. Remember we don;’t want any of this bedding material to touch the action when we are finished.
 Now we need to drill out that pillar hole down through the stock. The pillars I made are exactly 1/2″ in diameter, so a 1/2″ Forsner bit was used.
  I used a simple electric hand drill to bore this hole, using the epoxy channel as a guide. Here is what you end up with.
  The pillar with the grooves is now epoxied in place. It was first cut to length to be perfectly flush with the bottom metal and a bit proud to keep the action from touching the wood stock.
  This is the view from the bottom.
  NOTE: The front pillar is flat across the top where it sits against the action. The action has a small flat section that allows this. No need to make the top of the pillar concave as you would do on a Remington 700 round action. With the front pillar done, it’s time to focus on the rear pillar. Because there was no real way to guide the drill bit, this process was done on a simple drill press.
  This hole and it’s associated pillar need to go right up against the routed trigger guard area.
  Like the front pillar, the rear pillar is epoxied in place, flush on the bottom and a bit proud on the top. Surgical tubing is employed once again to hold the trigger guard in place while the epoxy cures.
  Both pillars installed, glued in place.
  Because these pins stick out a bit on the side of the action.
  I used a small countersink bit to create a create reliefs
  A standard 1/4-28 Remington action bolt was cut to the proper length
  And installed along with the Savage factory rear action bolt
  As you can see, the barrel and action are completely free of the stock.
  FINISHED! Now lets go shooting!
  RIFLE: Savage 93R17 TR CALIBER: 17HMR SCOPE: Vortex Viper 4-12X40 V-Plex RINGS: Vortex Tactical
UPDATE 1-2-10
I finally got out to do a bit of shooting with the Savage 93R17 TR. Things went extremely well at 100 yards. Five shots could be covered with a dime! But after the sixth 5 shot group, the accuracy went to heck. Groups opened up to 1-1.5″. I thought the barrel needed cleaning so I pulled the bolt to insert my bore guide. As I removed the bolt I felt movement in the action / stock juncture. It seemed the rear action acrew had losened up. But when I tried to tighten it, it was rock solid, but the whole front of the trigger guard was moving! Something was wrong. I took the rifle home and pulled the trigger guard and here is what I found. 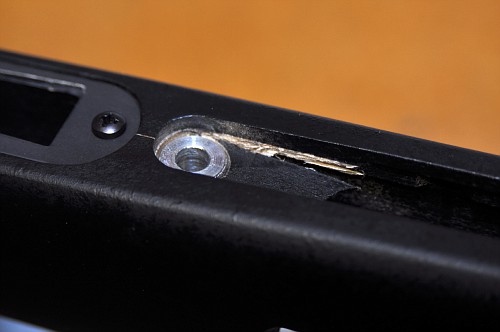 It seems the wood around the rear action screw had completely failed. You can’t see it in the photo but the stock actually cracked between the magazine opening and the trigger opening. If you look at this area closely, you’ll see that there is VERY little material here. And it is that extremely soft Vermont birch. It needs attention. First thing I did was remove the broken piece.
 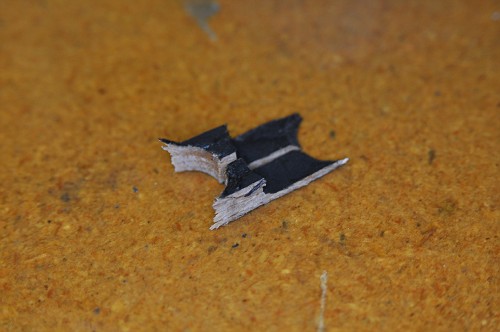 Not wanting to remove the whole trigger assembly, I covered it with a piece of tape. A hole was drilled for an 1/8″ steel cross bolt that will be epoxied in.
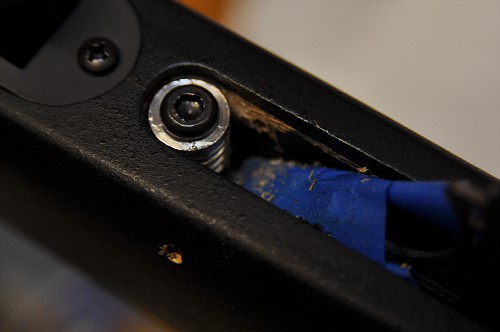
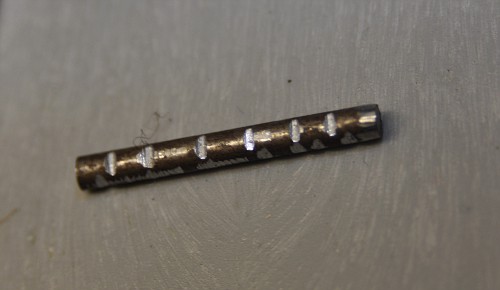
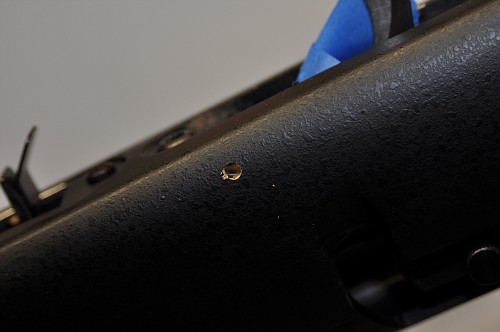 A piece of 1/8″ steel rod was cut to size and using a small file, grooves were cut to lock it into the epoxy.
  This “cross bolt” was epoxied through the stock as a clamp held everything tight.
 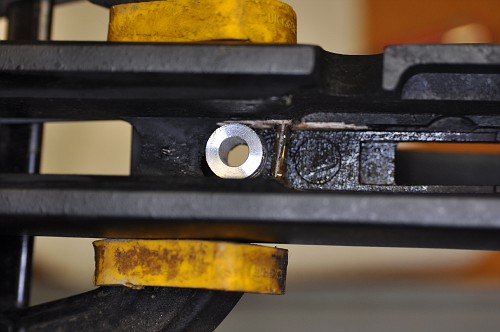 You can also see the trigger guard is covered with release agent, ready for a build up of bedding compound. A dam was made with a piece of thin aluminum and using JB Weld rather than Brownell’s Steel Bed, everything was epoxied in place. I used JB Weld in this situation because it can be “poured” into all the little nooks and crevices.
 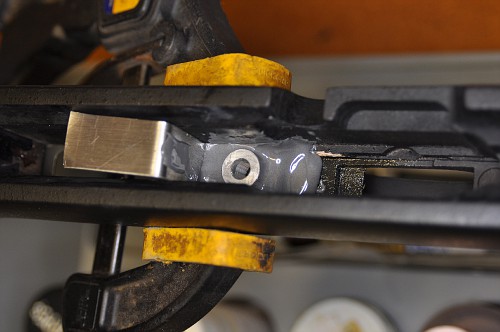 Once it is dry I’ll clean it all up with a file and reassemble the rifle for further shooting. If I was to do another Savage TR or any other rifle that uses very weak wood with very little material in this area, I would simply install a cross bolt from the get go. I believe a free floating barrel, with the barrel weight pulling down and stress being placed on this area caused the damage. If you did not simply pillar bed the action like I did, but full contact bedded the action to the stock, you run the risk of tightening down the action screws and splitting the stock ever worse than you see here. This stock should have reinforcement in this area from the factory, or use some other type of wood that would afford the resistance to splitting deemed necessary.
 It seems the wood around the rear action screw had completely failed. You can’t see it in the photo but the stock actually cracked between the magazine opening and the trigger opening. If you look at this area closely, you’ll see that there is VERY little material here. And it is that extremely soft Vermont birch. It needs attention. First thing I did was remove the broken piece.
  Not wanting to remove the whole trigger assembly, I covered it with a piece of tape. A hole was drilled for an 1/8″ steel cross bolt that will be epoxied in.
 A piece of 1/8″ steel rod was cut to size and using a small file, grooves were cut to lock it into the epoxy.
  This “cross bolt” was epoxied through the stock as a clamp held everything tight.
  You can also see the trigger guard is covered with release agent, ready for a build up of bedding compound. A dam was made with a piece of thin aluminum and using JB Weld rather than Brownell’s Steel Bed, everything was epoxied in place. I used JB Weld in this situation because it can be “poured” into all the little nooks and crevices.
  Once it is dry I’ll clean it all up with a file and reassemble the rifle for further shooting. If I was to do another Savage TR or any other rifle that uses very weak wood with very little material in this area, I would simply install a cross bolt from the get go. I believe a free floating barrel, with the barrel weight pulling down and stress being placed on this area caused the damage. If you did not simply pillar bed the action like I did, but full contact bedded the action to the stock, you run the risk of tightening down the action screws and splitting the stock ever worse than you see here. This stock should have reinforcement in this area from the factory, or use some other type of wood that would afford the resistance to splitting deemed necessary.
I sure hope you enjoyed this article. If you did and you want to contribute to this web site you can drop a couple bucks into my PayPal account. Not necessary, but much appreciated PayPal account rvb100@comcast.net

Pingback: Help with pillar bedding Savage Mark II FV-SR