Forest River Grey Wolf 19RR Toy Hauler Ramp Extension

My Grey Wolf 19RR sits quite high. The loading ramp has a very sharp angle that makes loading and unloading a motorcycle a bit more exciting than I bargained for.  Usually I unhook from the truck and raise the front of the camper as high as the jack will take it. But now I’m loading a motorcycle on a floor that is on an angle. Not to easy to do alone.

Pictures are deceiving. It is actually quite steep. Some, low slung cruiser type motorcycles can’t make it over the transition hump!

The solution is to extend the ramp.

I decided to extend my ramp 48″.  A trip to Lowes or Home Depot found:

(1) 4′ X 4′ 3/4 sheet plywood

(2) 10′ 3/4″ aluminum C-Channel

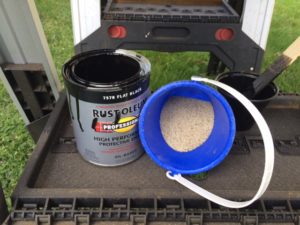
(1) Can Flat Black Paint

(1) 4′ Piano Hinge

(2) Screen Door handles

(2) Small barrel bolts

(30) Self tapping, 1 1/2″ X 10 Self Taping Flat Head Screws

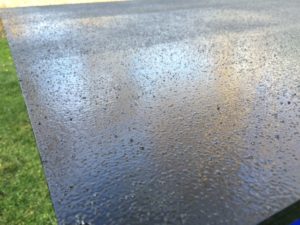
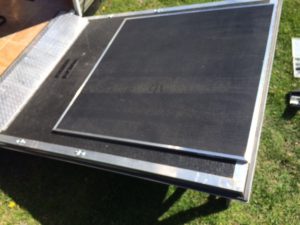
To start, the 4 X 4 sheet of plywood was painted with flat black paint. a cup of fine sand was gently tossed on the wet paint.

IMG_1317


Once this dried, two more coats of Flat Black paint were applied. This creates a nice, no slip, surface

IMG_1319


IMG_1318


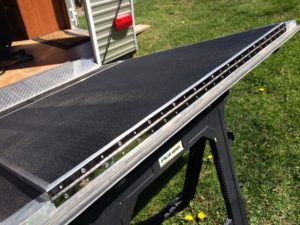
Next the aluminum “c” channel is installed around the edge using 45 degree cuts on the corners

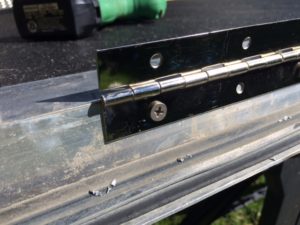
The piano hinge is installed on the trailers ramp edge using self taping screws into the existing ramps aluminum edge

IMG_1321


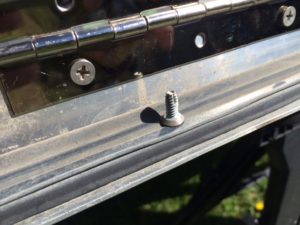
This is the type of screw I used  into pre drilled holes.

IMG_1322


They tightened up beautifully in the aluminum edge of the existing ramp.


Next the ramp extension was placed on the existing ramp and attached using more self taping screws

IMG_1323


The existing ramp is 58″ wide. I simply didn’t want or need the extra weight of going the full width. This size added 28 pounds to the existing ramp

IMG_1325


A few photos of how the ramp extension was actually attached to the main ramp. I used longer screws on the extension piece than you would normally use on a piano hinge. I went with 1″ which have some “grab” to the wood under the aluminum edging. (This photo was taken before all the screws were installed)
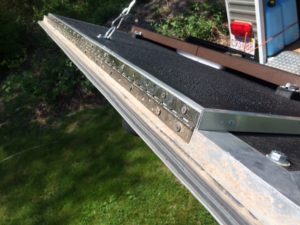
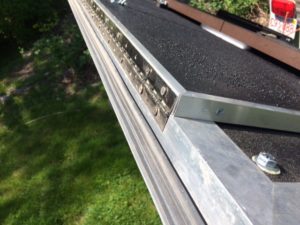
 

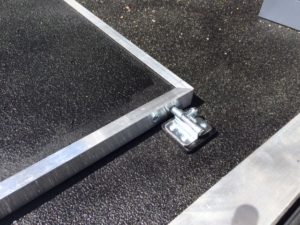
A couple of small barrel bolts were added to keep it in place while traveling

IMG_1337


And a pair of Screen Door Handles were installed on the edge to ease handling

IMG_1339


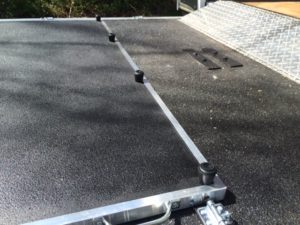
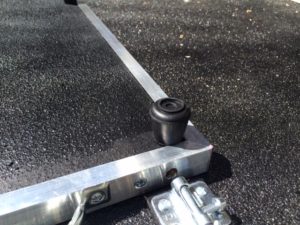
And a few rubber feet completes the deal

IMG_1340


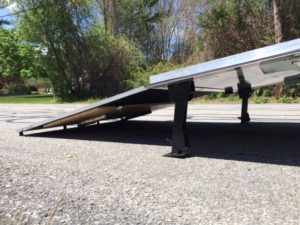
I ordered a set of “Swing Down” leveling legs online. These were attached to the end of the existing ramp with a couple 3/8″ bolts and nuts.

IMG_1447


IMG_1446


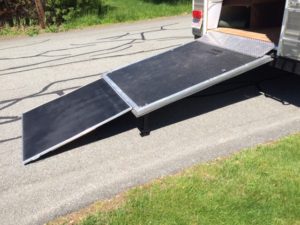
As you can see, the loading will now be much easier and not as scary!

IMG_1328


IMG_1327


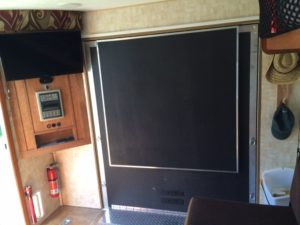
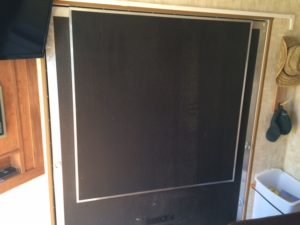
The finished product from the inside, closed up. (Would make a great Dart Board backstop!)

UPDATE!    I added a work table / desk to this side of the ramp. Read about it here:

Work Table / Desk addition to Loading Ramp


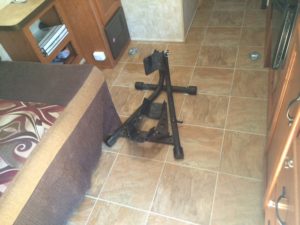
FRONT WHEEL CHOCK HOLD DOWN

IMG_1329


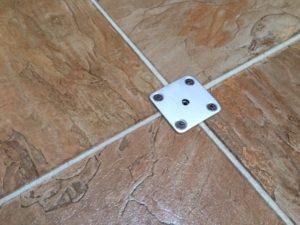
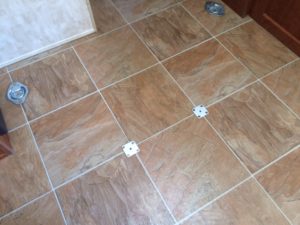
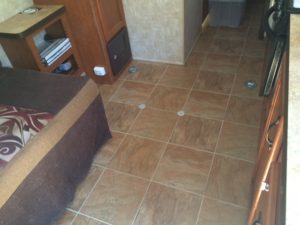
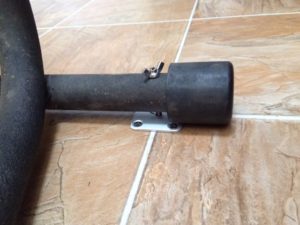
I also welded a couple of 1/4 X 20 nuts to the back of a couple pieces of steel and inset them into the floor to hold the wheel chock from sliding around.

Flush with the floor so no tripping hazard.

IMG_1330


IMG_1331


IMG_1332


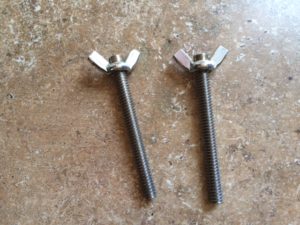
I made up a couple of long thumb bolts to screw into these nuts

IMG_1335


IMG_1333


This hold the wheel chock in place and very secure.


I’ve tested the new ramp extension and wheel chock hold down and it works great. This type of wheel chock holds the bike totally steady while you tie it down. Makes loading and unloading your motorcycle an easy one person job.


Hope you like this little modification. Lots more on the full web site

www.rvbprecision.com

And lots more pictures here:

http://public.fotki.com/Rbertalotto/toy-hauler-and-truc/forest-river-cherok/


Thanks!


Share this Article:

52 comments on “Forest River Grey Wolf 19RR Toy Hauler Ramp Extension”

  1. Jim Reply

    This looks awesome. I have a very similar camper and can’t wait to try to build this. Thanks for sharing.

  2. Jim and Cathy Coleman Reply

    Could you please provide a picture of the ramp door closed so that we can see how the legs look on the outside of the trailer, and could you please provide a link as to were to purchase the legs.

  3. Linda Notaro Reply

    Making this ramp for my toyhauler, wondering how the c channel was secured to the plywood thanks

    • Roy Bertalotto

      I used 3M 5200 caulk/adhesive. Expensive but amazing marine grade adhesive. And a few counter sunk stainless steel screw just to hold it while glue set.

    • Linda Notaro

      Thanks so much for fast reply.also you say 11/2 in self taping screw the picture you show appears to be smaller thanks again

  4. Joe Reply

    VERY NICE—I also have a 2015 19RR—same ramp issue—–loading my R1150RS BMW is ok but I also take my 1975 Norton Commando at times and it hangs up….used blocks, spacers, and raised the front —all a bit too bothersome—wood to deal with etc—-this looks like it will work great…had that in mind myself only not drawn out on paper yet….Would be nice to find a less weighty platform than the 3/4 plywood…maybe some type of aluminum…like aircraft flooring…thanks for the write up and details.
    Also, replaced the osb platform under the bed and used 1/2 in sanded plywood—-hinged with piano hinge so now easy to lift up and get to the storage area.

  5. Pam Reply

    This is exactly our problem! I have a lowered bike and we could NOT get it in the back of our new toy hauler. My husband had this same thing in mind when he was trying to figure out a solution! Thanks for posting this..now we don’t have to figure out what to buy…you have it all listed for us! GREAT IDEA!!!

  6. John Reply

    This looks like a great idea, I plan to purchase material today to start the build, I ordered the leveling legs and was wondering how you mounted them, did you just drill all the way through the door and nut and bolt? Are there any support’s in the door I should be looking for ? Also your build list says 10′ of C channel,,, how did this cover 4 sides each 4′ in length ? Also when mounting the legs, was there specific placement for ramp angle ? Sorry for all the questions, just anxious to start my build and hope it comes out nice as yours, GREAT job

    • Roy Bertalotto

      Yes, bolted right through the aluminum edging on my ramp. That spec for 10′ should read 20′. I’ll have to fix that. You can adjust the angle as needed with the attached supports. Hope this helps.

  7. John Reply

    My bad, your material list does show 2 pieces,, I did my mod today and thank you so much for the idea, it’s amazing plan, still waiting on the legs, should be here tomorrow, you are a genius,, any way you could send me the plan on the portable storage tank mount

  8. Roy B Reply

    Sorry, I don’t have s plan for the waste cart. I just designed it as I went. I figured plans might not help as the chassis on all travel trailers will be different.
    Thanks for the kind words!

  9. John Reply

    I have the extension mounted and looks great. The legs came in but before I mounted them thought to reinforce the strength of the door I will add 2 pieces of 6″ aluminum flat bar (1/8) across the door, one inside and one outside and then secure the legs to the flat bar, do you think I am over thinking it? Just hate to bust my door

  10. Roy B Reply

    I don’t think that is overkill at all. Depending on the weight of you bike and the construction of the tailgate , it might we necessary.

  11. Jack Warren Reply

    I see at the end of the ramp project pics you show one that has a piece of diamond plate at the top to cover the gap. Is this some thing extra you added to your trailer?

  12. Jack Reply

    Thanks Roy. I have not been able to find any piano hinge that is suitable. The ones at Lowes and Home Depot are bendable and have a hinge pin that is like a piese of safety wire. Did you find a sturdier one somewhere?

    • Roy Bertalotto

      I bought my piano hinge from Lowes. Has been working great. Piano hinges are very strong as they spread the force over a very large area.

      And you don’t need to use a piano hinge if you want something stronger. You could use a series of heavy duty door hinges

  13. Antonette Reply

    Awesome – thank you so much for posting these wonderful pictures and supplies list! We have the identical trailer except bigger (26RR) and had the same concern with that stinking ramp!! Went shopping today for all the supplies, and starting our ramp extension tomorrow! THANK you Roy for blazing the trail for us!! Can’t wait to put the bikes up in the TH!!!

  14. Michael Buesing Reply

    Hello. Great design. Can you send pics of the legs attached? I assume you just bolted them on? Also, I did this on my old TH and used rivets to attach the small (2*3) ramp extension.

  15. diane Reply

    how do you stabilize your bike in this trailer? we are looking at the 21 rr and hoping to put two bikes in but am unsure as to how to safely immobilize them…

  16. Bruce Stevens Reply

    Do you think two small car jack stands would work ok in place of the self leveling legs? Also, did you seal any bolts that you ran thru the ramp to keep moisture out?

    • Roy Bertalotto

      Yes, two car type Jack’s would work. But just something else to store. And not as rigid as the Jack’s I used.
      I did seal the bolts with 3M 5200.

    • Bruce Stevens

      Thanks for the info! So will the hinge and plywood handle a 800+ lb bike and rider? Seems like a lot of weight on that piano hinge. Do i need a heavier hinge for this type of bike?

  17. RoyB Reply

    My bike weighs about 600 pounds and I’m 185 pounds. I’ve been up and down it a number of times with zero issues. But if you feel it should be able to handle more weight, I’d suggest a series of strap hinges spread along the width. And a couple pieces of angle iron or c-channel iron could reinforce the extension ramp. Hope this helps.

  18. Tony Reply

    Did you use 3M 5200 caulk/adhesive on the leveling legs when you attached them to the door?

  19. Bruce Stevens Reply

    Can you tell me the website you ordered the swing down legs from?

    • RoyB

      Hi Bruce, I don’t remember where I bought them. Most likely trailer.com or Amazon. They are simply trailer stabilizer jacks.

  20. Tony Reply

    So you used 1/2″ X 10 Self Taping Flat Head Screws to attach c channel and hinge?

Leave A Reply

Your email address will not be published. Required fields are marked *

This site uses Akismet to reduce spam. Learn how your comment data is processed.